Table of Contents
Advertisement
Advertisement
Table of Contents

Subscribe to Our Youtube Channel
Related Manuals for Topcon Compu-Vision CV-5000


Summary of Contents for Topcon Compu-Vision CV-5000
- Page 1 CV-5000 INSTRUCTION MANUAL COMPU-VISION CV-5000...
-
Page 3: Introduction
• The target can be controlled by the controller for the main unit. • The PD and the anterior eye alignment can be checked even in a dark optometry room. This instruction manual outlines the Compu-Vision CV-5000, including the basic operation, trouble shooting, maintenance and cleaning. -
Page 4: Environmental Conditions For Use
(4) Do not store the instrument where chemicals are stored or gas is generated. 3. Usage period 8 years from delivery providing regular maintenance is performed (according to the self-cer- tification [Topcon data]) ENVIRONMENTAL CONDITIONS FOR PACKAGING IN STORAGE Temperature : -20°C - 50°C... -
Page 5: Display For Safe Use
DISPLAY FOR SAFE USE To encourage safe and proper use and to prevent danger to the operator and others or potential damage to property, important cautionary messages are placed on the instrument body and inserted in the instruction manual. We suggest that everyone using the instrument understands the meaning of the following dis- plays, icons and text before reading the "SAFETY CAUTIONS"... -
Page 6: Safety Cautions
SAFETY CAUTIONS WARNING Icon Prevention item Page To avoid electric shock, do not attempt disassembling, rebuilding and/or repairs on your own. Ask your dealer for repairs. To avoid fire and electric shock, install the instrument in a place ---- free of water and other liquids. To avoid fire and electric shock, do not put cups or vessels con- ---- taining liquids near the instrument. - Page 7 CAUTION Icon Prevention item Page To prevent the instrument from tipping over or falling and to avoid ---- injury, do not install the instrument on an uneven or unsteady sur- face, including a slope. To avoid electric shock, do not handle the plugs with wet fingers. ---- To avoid the damaged instrument or an injury caused by electric ----...
-
Page 8: Usage And Maintenance
MOUNTING SECTION" on page 46 for details. ESCAPE CLAUSE • TOPCON shall not take any responsibility for damage due to fire, earthquakes, actions by third persons and other accidents, or damage due to negligence and misuse by the user and any use under unusual conditions. -
Page 9: Warning Displays And Positions
To ensure safety, the machine provides warning displays. Use the instrument correctly by observing the display instructions. If any of the following display labels are missing, contact your TOPCON dealer or your local Topcon office listed on the back cover of this manual. -
Page 10: Table Of Contents
CONTENTS INTRODUCTION ........................1 CAUTIONS FOR USE ......................1 ENVIRONMENTAL CONDITIONS FOR USE............... 2 STORING PLACE, USAGE PERIOD AND OTHERS ............2 ENVIRONMENTAL CONDITIONS FOR PACKAGING IN STORAGE ........2 ENVIRONMENTAL CONDITIONS FOR PACKAGING IN TRANSPORTATION....2 CHECKPOINTS FOR MAINTENANCE ................2 DISPLAY FOR SAFE USE.................... - Page 11 OPERATION PRINCIPLE ....................34 ELECTRIC RATING ......................34 ELECTROMAGNETIC COMPATIBILITY ................35 SYSTEM CLASSIFICATION ....................39 REFERENCE MATERIAL ..................... 40 SHAPE OF PLUG ....................... 40 SYMBOL ..........................40 CORNEAL ALIGNING DEVICE ..................41 MAINTENANCE ........................43 DAILY CHECKUPS ......................43 ORDERING CONSUMABLES ....................
-
Page 12: Component Names And Functions
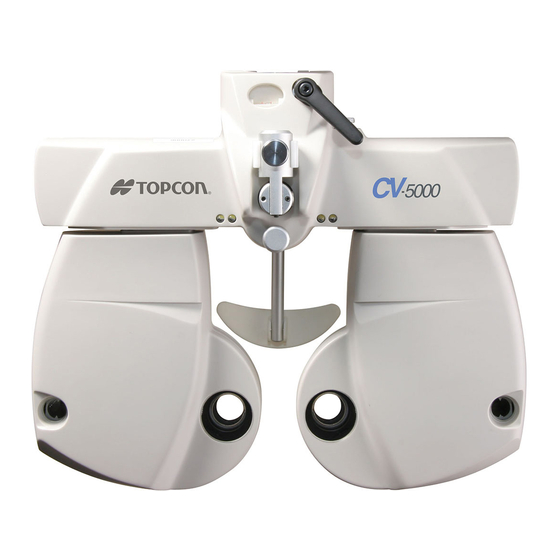
COMPONENT NAMES AND FUNCTIONS MAIN UNIT (1) Examination window ....The patient's eyes are observed through this window, and the display lenses are set here. (2) Corneal aligning window ..The position of the patient's cornea can be observed through this window. (3) Forehead rest knob.... -
Page 13: Cv Power Supply Unit
CV POWER SUPPLY UNIT (18) Connector for connecting KB .. Used to connect the CV 1 Dial Controller. (19) Cover switch ......Opens the printer cover. (20) Printer cover (21) Power switch MC(SERIAL) ACP/MC (22) Connector for connecting KB .. Used to connect the CV 1 Dial Controller. (23) USB connector...... -
Page 14: Standard Accessories
STANDARD ACCESSORIES Upon unpacking, make sure that all the following standard accessories are included. Figures in ( ) are the quantities. Instruction manual (1) Dust cover (1) Near-point rod (1) Forehead rest (2) Face shield (2) Near-point card and card holder (1 each) Silicone cloth (1) CV power supply unit (1) COMPONENT NAMES AND FUNCTIONS... - Page 15 The standard accessories for the CV power supply unit are shown below. Fuse (2) Power cord (1) Fixing metal fixture (1) Printer paper (2) CV connection cable (1) Screw (4) Printer shaft (1) COMPONENT NAMES AND FUNCTIONS...
-
Page 16: Optional Accessories
OPTIONAL ACCESSORIES • CV 1 Dial Controller KB-10 Controls the operation of the Compu-Vision CV-5000 when combined with it. • CV 1 Dial Controller KB-50 Only in CV-5000 Controls the operation of the Compu-Vision CV-5000 when combined with it. KB-10 is not available in some regions. -
Page 17: Preparations
PREPARATIONS ASSEMBLY/INSTALLATION OF NEAR-POINT ROD AND NEAR-POINT CARD Insert the near-point card into the end of the near-point rod. The near-point card is designed to slide on the near-point rod. Insert the near-point rod into its holder and tighten the clamp screw securely. When the near- point rod is not in use, set it upright. -
Page 18: Level Adjustment
LEVEL ADJUSTMENT Before using the instrument, check if it is horizontal, using the level. If there are not bubbles between two red lines, turn the leveling knob to make the instrument horizontal. Level Leveling knob FIXING THE TILTED HEAD By tilting the head in the near-point test, the instrument can be set in the proper position for the real near-point test. - Page 19 Do not rotate the instrument while the tilt fixing lever is loosened. The NOTICE tilt fixing lever may hit the mounting arm to damage the instrument. Do not put your hand between the arm and the instrument. Your hand CAUTION may be pinched to cause injury.
-
Page 20: Near-Point Card
NEAR-POINT CARD When the patient wears the multi-focal lenses, measure the eyeglass refractive power at near distance. For installing the near-point rod and near-point card, refer to "ASSEMBLY/INSTAL- LATION OF NEAR-POINT ROD AND NEAR-POINT CARD". Incline the near-point rod until it stops. If the near-point rod is almost horizontal, the position is the measuring position. -
Page 21: Operating The Instrument
OPERATING THE INSTRUMENT Press the main switch on the CV power supply. The instrument is reset. Perform the objective measurement by an auto refractometer and set the measurement data in the instrument. In this case, optometry by fogging method and others can be omit- ted. -
Page 22: Measurement Screen (Example: Kb-50)
MEASUREMENT SCREEN (Example: KB-50) (1) Displays the type of the displayed main data, the test name, the time, the lapse of test time, etc. (2) Displays the data set in the CV-5000 instrument, displays the set visual acuity, etc. Only the astigmatic axis is displayed by steps in ( ). -
Page 23: Output Of Printer
OUTPUT OF PRINTER Press [PRINT] in KB-50 and [PRT] in KB-10, and the data are printed. (only in CV-5000) * The unmeasured data are not printed. ID number Column for name Date and time of measurement Test time Distance between cornea vertexes Uncorrected visual acuity Uncorrected visual acuity for far point Uncorrected visual acuity for near point... - Page 24 Data input from database Visual acuity measured last, which was input from database Addition refractive power data, which was input from database Near-point visual acuity, which was input from database Far-point phoria data, which was input from database Near-point phoria data, which was input from database Final correction data Visual acuity in final correction data...
- Page 25 Prescription data Near-point addition refractive power data in prescription data Near-point visual acuity in prescription data Far-point phoria data in prescription data Near-point phoria data in prescription data Result of binocular function test Result of stereoscopic vision test Result of Worth 4 dots test Far-point interpupillary distance Near-point interpupillary distance PREPARATIONS...
-
Page 26: Optometry
Mr. A, an adult aged 25 wearing eyeglasses comes to the store. He complains about his insuf- ficient visual acuity. After we have checked the refractive power of his glasses with the TOPCON lens meter, the following results are obtained. -
Page 27: Optometry By Fogging Method
OPTOMETRY BY FOGGING METHOD For the right eye, add +3.00D to the expected spherical power. Since the current eyeglass refractive power is -1.00D, the right spherical power is +2.00D. His eyesight fails to almost 0.1. (Adding +3.00D to the spherical power enables to drop his visual acuity to almost 0.1. -
Page 28: Accurate Measurement Of The Astigmatic Axis And Astigmatic Power (When Using The Cross Cylinder)
ACCURATE MEASUREMENT OF THE ASTIGMATIC AXIS AND ASTIGMATIC POWER (WHEN USING THE CROSS CYLINDER) Set the dot chart as the target. The cross cylinder status "1" is set for the right eye (dial mode A) and the accurate measurement mode of the astigmatic axis is accessed. Press "1"... -
Page 29: Accurate Measurement Of The Spherical Power (Red-Green Test)
ACCURATE MEASUREMENT OF THE SPHERICAL POWER (RED-GREEN TEST) Next, make an accurate measurement of spherical power. Set the red-green chart, and the spherical movable mode is automatically set. Ask the patient which side is seen better, red or green. He answers the green side is seen a little better. Since this means that myopia is a little strong (or hyperopia is a little weak), increase the spherical power by +0.25D. -
Page 30: Binocular Balance Test
BINOCULAR BALANCE TEST Measurement by using the polarizing filter Set the binocular balance target. Apply the polarizing filters to both eyes and access the binocular spherical movable mode. Mr. A sees the upper line with the right eye and the lower line with the left eye. If he can read up to the same place on both lines, the binocular balance is obtained. -
Page 31: Measuring Phoria (Far-Point)
MEASURING PHORIA (FAR-POINT) Measurement by using the polarizing filter Only in CV-5000 Set the cross target. Apply the polarizing filters to both eyes and access the binocular prism movable mode-horizontal (H). If no phoria is found in the patient, four lines are seen as a cross. If the patient has phoria, the four lines are seen differently. - Page 32 Measurement by using Maddox rod and rotary prism Only in CV-5000 Measure horizontal phoria first. Access the binocular mode. Apply the red horizontal Maddox rod to the right eye with the right auxiliary lens selector switch, and make the left eye uncovered. Turn on the fixation target (small dot of light) at the target position.
-
Page 33: Summing Up Measurement Results
SUMMING UP MEASUREMENT RESULTS The visual acuity test of Mr. A is finished. If much phoria is found in phoria measurement, the visual acuity needs to be corrected with eyeglasses. For the visual acuity of Mr. A, correction is not necessary. Therefore, his eyeglasses will be prepared according to the following data: : 64mm Right eye : S-1.25D... -
Page 34: Other Measurements
POWER CONVERSION Setting the measurement method by using the convex astigmatic lens Since TOPCON designs instruments applied to the visual acuity measurement based on the fogging method, this instrument contains the concave astigmatic lenses. If convex astigmatic lenses are necessary, press [TRANSPOSE] of the controller. You can perform optometry by using a convex astigmatic lens. -
Page 35: Trouble Shooting
If the problem is not resolved after following the instructions below, or if there is no relevant check item in the list, contact Topcon authorized dealer or TOPCON offices at the address stated on the back cover. CHECK LIST... -
Page 36: Specifications And Performance
SPECIFICATIONS AND PERFORMANCE Measuring range +27.00 ~ -27.00D Spherical power Measuring step 0.25D/3.00D Measuring range +8.00 ~ -8.00D Astigmatic power Measuring step 0.25D/1.00D Measuring range 0 ~ 180° Cylinder axis Measuring step 1°/5°/15° Δ Measuring range 0 ~ 20 (all direction) Prism Δ... -
Page 37: Electromagnetic Compatibility
ELECTROMAGNETIC COMPATIBILITY This product conforms to the EMC standard (IEC60601-1-2 Ed.3.0: 2007). a) MEDICAL ELECTRICAL EQUIPMENT needs special precautions regarding EMC and needs to be installed and put into service according to the EMC information provided in the ACCOM- PANYING DOCUMENTS. b) Portable and mobile RF communications equipment can affect MEDICAL ELECTRICAL EQUIPMENT. - Page 38 Guidance and manufacturer's declaration - electromagnetic immunity The CV-5000 is intended for use in the electromagnetic environment specified below. The customer or the user of the CV-5000 should assure that it is used in such an environment. IEC 60601 Compliance Electromagnetic environment Immunity test test level...
- Page 39 Guidance and manufacturer's declaration - electromagnetic immunity The CV-5000 is intended for use in the electromagnetic environment specified below. The customer or the user of the CV-5000 should assure that it is used in such an environment. Immunity test IEC 60601 Compliance Electromagnetic environment - test level...
- Page 40 Recommended separation distance between portable and mobile RF communications equipment and the CV-5000 The CV-5000 is intended for use in an electromagnetic environment in which radiated RF distur- bances are controlled. The customer or the user of the CV-5000 can help prevent electromag- netic interference by maintaining a minimum distance between portable and mobile RF communications equipment (transmitters) and the CV-5000 as recommended below, according to the maximum output power of the communications equipment.
-
Page 41: System Classification
SYSTEM CLASSIFICATION Types of protection against electric shocks: This instrument is classified as Class I equip- ment. Class I equipment does not depend only on basic insulation for protection against electric shocks, but also provides a means of connection to a protective earth system of facilities so that metal parts that come into contact do not become conductive while the basic insulation is in failure. -
Page 42: Reference Material
REFERENCE MATERIAL SHAPE OF PLUG Country Voltage/frequency Shape of plug Mexico 110V/50Hz Type C&E Argentina 220V/60Hz Type A Peru 220V/60Hz Type A Venezuela 110V/50Hz Type C&E Bolivia & Paraguay Type A (Most common) 220V/60Hz Type H (Infrequently) Chile 220V/60Hz Type A Colombia 110V/50Hz Type C... -
Page 43: Corneal Aligning Device
CORNEAL ALIGNING DEVICE The forehead rest moves back and forth by turn- Scale ing the forehead rest knob. Patient’s eyes With the patient's forehead set on the forehead rest, look through the corneal aligning window from the position about 25cm apart from its front. Look at the patient's eye (cornea surface) so that Approx. - Page 44 Correction value (When the measured refractive power is in plus region) <Table 1> L mm D dptr +1.00 0.001 0.002 0.000 0.004 0.005 0.006 0.007 0.008 0.009 0.01 +2.00 0.004 0.008 0.01 0.02 0.02 0.02 0.03 0.03 0.04 0.04 +3.00 0.01 0.02 0.03...
-
Page 45: Maintenance
• When not in use, turn off the power. ORDERING CONSUMABLES • When ordering consumables, contact your dealer or TOPCON office (listed on the back cover) and tell them the article name, article code and quantity. Article name Article code... -
Page 46: Replacing The Fuse
REPLACING THE FUSE To avoid electric shock, be sure to remove the power cable from the instrument body before removing the fuse cover for replacement. WARNING Also, do not connect the power cable to the instrument body with the fuse cover left unfixed. To avoid fire in the event of an instrument malfunction, use a properly WARNING rated fuse. -
Page 47: Cleaning
CLEANING Do not wipe the forehead rest, face shield and other resin parts with NOTICE volatile solvent. To prevent the resin parts from discoloring or deterio- rating, do not use benzine, thinner, ether or gasoline. Cleaning the parts which contact the patient If the forehead rest or face shield is stained, prepare a tepid solution of the neutral detergent for kitchenware. -
Page 48: Inspecting The Optometry Unit Mounting Section
Raise the CV-5000 instrument as shown below. If an abnormal noise is heard or any part is unsteady between the arm and the arm mounting shaft, immediately contact the TOPCON offices listed on the back cover and ask them to repair your instrument. -
Page 49: Setting The Printer Paper
SETTING THE PRINTER PAPER The paper has its front and rear. If the paper is reversely set, printing NOTICE is impossible. Insert the paper to the innermost of the printer. NOTICE If not, the paper may not be fed. Use the printer paper of width 58mm. Push the printer release lever to open the cover. - Page 51 Please provide us with as much detail as possible on the problem. COMPU-VISION CV-5000 INSTRUCTION MANUAL 2010 version (2010.04-100TH Date of issue: April 15, 2010 Published by TOPCON CORPORATION 75-1 Hasunuma-cho, Itabashi-ku, Tokyo, 174-8580 Japan. ©2010 TOPCON CORPORATION ALL RIGHTS RESERVED...
- Page 52 COMPU-VISION CV-5000 43221 90266 Printed in Japan 1004-200TH...
Need help?
Do you have a question about the Compu-Vision CV-5000 and is the answer not in the manual?
Questions and answers