
Related Manuals for Topcon Chronos


Summary of Contents for Topcon Chronos
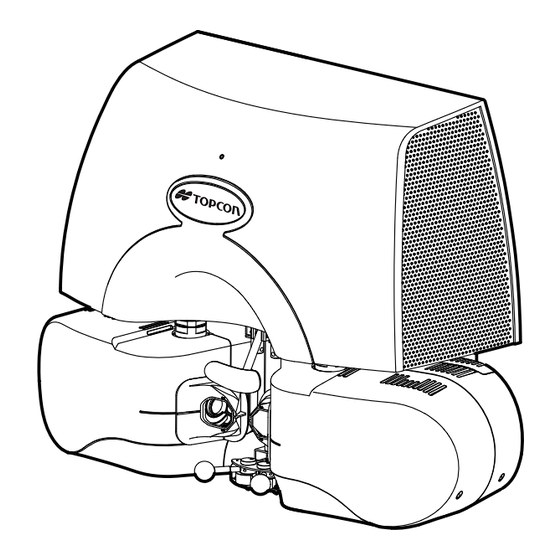
- Page 1 Installation Manual Refraction system Chronos TOPCON CORPORATION Confidential, duplication and reproduction prohibited O-CHR-8-2207-08...
- Page 2 Confidential, duplication and reproduction prohibited O-CHR-8-2207-08...
-
Page 3: Revision History
Revision history Details of revision Author Date of revision Ver. (Reasons for Revision, Contents of Changes, and Effective Date Approver Relevant Documents Affecting the Revision) Sugahara 1.00 2020/10/16 Preparation of first edition Hiyoshi Sugahara 2.00 2020/10/30 ・Added Check sheet for 3 chapter. Hiyoshi ・Type miss and added illustration for all chapter. - Page 4 ・Added chapter 5.4 How to connect CV-5000 to Hiyoshi Chronos ・Added chapter 5.5 How to connect SOLOS to Chronos ・Added chapter 5.6 How to connect IMAGEnet6 to Chronos (1) Unauthorized reproduction of this document, in part or in whole, is prohibited.
-
Page 5: Table Of Contents
2.20 Network connection procedure .................. 2-113 Configuration ........................2-113 2.20.1 How to connect Chronos to local area network ..........2-114 2.20.2 Shared folder settings *No IP specified, shared folder in Control BOX ....2-118 2.20.3 Shared folder settings *IP specified(When installing multiple Chronos or when importing or exporting from other Chronos)... - Page 6 Purpose ........................5-33 5.5.2 Required tools ......................5-33 5.5.3 Connecting SOLOS to Chronos ................5-33 5.5.4 Check the SMBs setup in Chronos Control Box ............5-34 5.5.5 Standard GUI settings ....................5-35 5.5.6 SightPilot settings ..................... 5-37 5.5.7 SOLOS data-output settings ..................5-38 5.5.8...
- Page 7 5.6.8 Creating a Shared Folder ..................5-53 5.6.9 MDR settings ......................5-54 5.6.10 Standard GUI settings ..................5-61 5.6.11 SightPilot settings ....................5-63 5.6.12 Standard GUI operating procedures ..............5-64 5.6.13 Operating procedures for SightPilot ..............5-65 5.6.14 IMAGEnet6 Operating steps ................5-66 Confidential, duplication and reproduction prohibited O-CHR-8-2207-08...
- Page 8 Confidential, duplication and reproduction prohibited O-CHR-8-2207-08...
-
Page 9: Overview
Refraction System– Chronos – Installation Manual 1. Overview Introduction This Procedure describes the procedures for Installation at the customer, and Incoming inspection. Confidential, duplication and reproduction prohibited O-CHR-8-2207-08... - Page 10 Refraction System– Chronos – Installation Manual Confidential, duplication and reproduction prohibited O-CHR-8-2207-08...
-
Page 11: Installation Procedure
• Please install and assemble according to TOPCON instruction. Please be sure to use the tools specified by TOPCON and the tools calibrated. Otherwise, the • failure in the measurement, unexpected error, or product damage may occur when installing and assembling. -
Page 12: Assembly The Table, And Installing Of Control_Box
Refraction System– Chronos – Installation Manual screwdriver Hex wrench Assembly the TABLE, and Installing of CONTROL_BOX When unpacking, be careful not to drop or fall the board. • There must be at least two people when taking out the TABLE. - Page 13 Refraction System– Chronos – Installation Manual Remove the bundle wire of Ⓐ. Then install it on any place. Ⓐ Put Ⓑ on the table of Ⓐ and connect cables. Ⓑ Ⓐ Connect power cable and turn on the power. Then move to the top with the up and down lever.
- Page 14 Refraction System– Chronos – Installation Manual Turn off the power then remove the power cable. Attach Ⓐ and Ⓑ with 10 hexagon screws. DIN 7991 M5×25(×10) Connect power cable and turn on the power. Then move to the bottom with the up and down lever.
- Page 15 Refraction System– Chronos – Installation Manual Turn off the power then remove the power cable. *When attaching CONTROL_BOX to TABLE, the printer position can be attached in either direction. →If the printer position is on the right side, go to step (9). If it’s on the left side, go to step(15)...
-
Page 16: In Case That The Printer Is On The Right Side
Refraction System– Chronos – Installation Manual *In case that the printer is on the right side. Remove the 4 screws on the bottom of CONTROL_BOX. Fix the accessory plate (D) to the CONTROL_BOX with 4 screws. DIN 125 M4(×4) DIN 7985 M4×10(×4) Set the CONTROL_BOX to the back of the TABLE and adjust the height. - Page 17 Refraction System– Chronos – Installation Manual Set the CONTROL_BOX on the back side of TABLE. Then fix it with 2 screws and 2 nuts. DIN 7985 M3×16(×2) DIN 125 M3(×2) DIN 934 M3(×2) Connect the power cable to the CONTROL_BOX.
-
Page 18: In Case That The Printer Is On The Left Side
Refraction System– Chronos – Installation Manual *In case that the printer is on the left side Set the CONTROL_BOX on the back side of TABLE. Fasten 2 hexagon screws to fix the side covers (C3/C1 Parts No.9018128) of TABLE C3/C1 DIN 7380 M5×16(×4) - Page 19 Refraction System– Chronos – Installation Manual Fix the accessory plate (E) of TABLE to the position shown below with 4 screws. DIN 965 M3×8(×4) Fasten 4 screws to attach the accessory plate (E) and CONTROL_BOX. DIN 125 M4(×4) DIN 7985 M4×10(×4)
-
Page 20: Installing Gadai_Base And Opt_Head On The Table
2-10 Refraction System– Chronos – Installation Manual Installing GADAI_BASE and OPT_HEAD on the TABLE Set the level on the hook at top of the TABLE and check if it is within the standard level. If tilted, adjust the tilt with the adjuster of hexagonal wrench. - Page 21 2-11 Refraction System– Chronos – Installation Manual Fasten 6 screws to fix the GADAI_BASE from the back side of TABLE. • If fasten the hexagnal screws in upper middle first, can fix the rest easiely. Attach the OPT_HEAD(L/R)while rotating it as follows. Then push it all the way to the end.
- Page 22 2-12 Refraction System– Chronos – Installation Manual Fasten the nut in order ①upper low, ②lower low. Make sure to fasten the nut tightly. If not fastened enough, it will affect its accuracy • and lose the reproducibility at factory shipment.
- Page 23 2-13 Refraction System– Chronos – Installation Manual Attach the cable cover of OPT_HEAD(L/R). • Make sure to attach the cover so as not to put a load to the connecting part as the cable is no length to spare and the hole for cable is narrow.
-
Page 24: Connecting Network Devices And Cables
Bundle the cables with cable clamps attached to the back of TABLE. Connecting network devices and cables Chronos can be connected with two networks, Network 1 (for operation) and Network 2 (for data linkage). Network 1 (for operation) is explained in this chapter. -
Page 25: For Wired Lan Connection
2-15 Refraction System– Chronos – Installation Manual For wired LAN connection Connect the USB-LAN converter to the CONTROL_BOX and connect it to the PC with a LAN cable. Stretch the cable to connect it to PC from TABLE the bottom of the... -
Page 26: Attaching Cover Parts
2-16 Refraction System– Chronos – Installation Manual Attaching cover parts Fasten 2 hexagon screws to fix the side covers (C3/C1 Parts No.9018127 or C4/C2 Parts No.9018129) of TABLE C3/C1 DIN 7380 M5×16(×4) C4/C2 Attach the back cover of the TABLE using 8 hex screws. - Page 27 2-17 Refraction System– Chronos – Installation Manual Connect the power cable to the back side of TABLE. Turing on the CONTROL_BOX. Confidential, duplication and reproduction prohibited O-CHR-8-2207-08...
-
Page 28: Connecting Tool Pc/Operation Pc To Chronos' Network
2-18 Refraction System– Chronos – Installation Manual Connecting Tool PC/Operation PC to Chronos’ network This section describes how to connect the tool PC and operation PC to the network prepared in Chapter 2.3 Connecting network device and cables. For wired LAN connection Connect the LAN cable from CONTROL_BOX to operation PC. - Page 29 2-19 Refraction System– Chronos – Installation Manual Select [Internet Protocol version 4]. Then click [Property]. Make sure to uncheck “Internet Protocol version 6”. • Select [Use the following IP address]. Then enter the IP address and Subnet mask as shown below.
-
Page 30: For Wireless Lan (Wi-Fi) Connection
2-20 Refraction System– Chronos – Installation Manual For wireless LAN (Wi-Fi) connection Turn on the power of CONTROL_BOX. Enable Wi-Fi on operation PC, select the SSID of wireless LAN router from the Wi-Fi list, and click "Connect". Enter the network security key and click "Next". - Page 31 2-21 Refraction System– Chronos – Installation Manual Set up the wireless LAN router. *The explanation below is for when [tp-link TL-WR802N] is used. If you use another wireless LAN router, refer to the instruction manual.) Start up your browser and connect to "http://tplinkwifi.net".
- Page 32 2-22 Refraction System– Chronos – Installation Manual Click "Next" without checking "Login password". Quick setup-mode of operation:Select [Bridge mode] and click [Next]. Quick setup-wireless 2.4GHz:Keep the default settings and click [Next]. Confidential, duplication and reproduction prohibited O-CHR-8-2207-08...
- Page 33 2-23 Refraction System– Chronos – Installation Manual Quick Setup-Network Settings: LAN type:static IP IP address:10.1.2.4 sub-net mask:255.0.0.0 DHCP serverー:To enable After setting as above, click "Next". Quick Setup-Review Settings: Click “Finish” to complete. When using a tablet PC such as iPad, select the SSID of the wireless LAN router to be used from the Wi-Fi list and enter the network security key.
-
Page 34: Google Chrome Bookmark Setting
Refraction System– Chronos – Installation Manual Google Chrome Bookmark Setting • Bookmark the URL which is needed when installing Chronos or using as a user. Do not import the data to the customer's PC, as it contains a URL where the correction •... - Page 35 2-25 Refraction System– Chronos – Installation Manual Open “Management” in the upper right and click [Import Bookmark] Select[Chronos_Link_20200413_E_html]and click [Open]. Confirm all items as shown below are added in Bookmark. Confidential, duplication and reproduction prohibited O-CHR-8-2207-08...
-
Page 36: Installing Tool Software
2-26 Refraction System– Chronos – Installation Manual Installing Tool Software • Install tool software to use for checking and adjusting αβθ axis of OPT_HEAD. Do not import the data to the customer's PC. • Installing Microsoft Visual C++ 2010 x64 Redistributable Right-click “setup.exe”... - Page 37 2-27 Refraction System– Chronos – Installation Manual If “Microsoft Visual C++ 2010 x64 Redistributable” has not been installed, check [Agree] then click[Install]as the shown screen below. If “Microsoft Visual C++ 2010 x64 Redistributable” has been already installed, the screen as below will be shown.
- Page 38 2-28 Refraction System– Chronos – Installation Manual Installing Calibration tool Click [Next] Select a folder for installation then click [Next]. Click [Next] Confidential, duplication and reproduction prohibited O-CHR-8-2207-08...
- Page 39 2-29 Refraction System– Chronos – Installation Manual Once the installation is completed, click [Close]. Make sure the shortcut icon is appeared on the desktop. Confidential, duplication and reproduction prohibited O-CHR-8-2207-08...
-
Page 40: Preparation Before Confirmation
2-30 Refraction System– Chronos – Installation Manual αβθ axis confirmation of the OPT_HEAD. Preparation before confirmation Boot up the “Tool software link” by URL below. Use Google Chrome when booting up. • • Please note that URLs have "uppercase" and "lowercase" letters. - Page 41 2-31 Refraction System– Chronos – Installation Manual Select [alpha, beta, theta, X, Y, Z adjustment] on “Tool software link” menu. Select [Alfa, Theta]on the chart and change the display chart to the crosshair. Make sure that the cross chart is displayed when looking through the measurement window.
- Page 42 2-32 Refraction System– Chronos – Installation Manual Loosen the screw of the _BASE. Then insert the Test Eye all the way to attach it to the GADAI_BASE. Please insert it to all the way to the end and fasten the screw tightly. Otherwise, the error •...
- Page 43 2-33 Refraction System– Chronos – Installation Manual Un-check [Display line] and [Automatic detection] on “Select mode”. Check [For theta detection] on “Select mode” Select [Parameters] on “Set”. Confidential, duplication and reproduction prohibited O-CHR-8-2207-08...
- Page 44 2-34 Refraction System– Chronos – Installation Manual Select Device number assigned to αβθ diopter telescope camera and click [OK]. The Device number differs depending on PC specification. • Click [Live] Make sure the camera image is displayed. Confidential, duplication and reproduction prohibited...
-
Page 45: Θ Axis Confirmation
2-35 Refraction System– Chronos – Installation Manual θ axis confirmation Attach the αβθ diopter telescope to model eye holder then fix it with screws. Make sure not to misplace the pin position as it causes inacculate measurements. • A pin of diopter telescope is αβθ... - Page 46 2-36 Refraction System– Chronos – Installation Manual Adjust the scale of αβθ diopter telescope and adjust the diopter focus on the chart. • Make sure to focus acculately as it causes inacculate measurements. Fasten the αβθ diopter telescope camera with 2 screws.
- Page 47 2-37 Refraction System– Chronos – Installation Manual Check [Display line] and [Automatic detection] on “Select mode” Make sure the camera tilt is ±1°and 13 detection lines (blue lines) are all displayed. • Text box will be highlighted in green when it comes within ± 1°.
- Page 48 2-38 Refraction System– Chronos – Installation Manual Diopter may rotate when ratating camera, but there is no problem if it rotates a little . • Bad example Confirm that the value is displayed in “theta detection value” Text box will be highlighted in green when it comes within ±30’.
- Page 49 2-39 Refraction System– Chronos – Installation Manual Enter the correction value of αβθ diopter telescope into[Correction Value]. • This is a value attached on the side of αβθ diopter telescope(center value on the scale) Click [SET]button of “theta deviation” on OPT HEAD (L/R) with αβθ diopter telescope set. Deviation amount considering the correction value will be displayed and it judges “OK”...
- Page 50 2-40 Refraction System– Chronos – Installation Manual αβθ diopter telescope center line αβθ diopter telescope 1 Scale = 10’ θ axis reference line Example as above: Deviation amount is -13’which is within the standard as the θ axis reference line of the chart is at the position of -5’...
-
Page 51: Β Axis Confirmation
2-41 Refraction System– Chronos – Installation Manual β axis confirmation As shown below, rotate the αβθ diopter telescope for 90 degrees. Make sure the scale is set vertically. When rotating the αβθ diopter telescope, rotate the attachment part so as not to put a load •... - Page 52 2-42 Refraction System– Chronos – Installation Manual Make sure the camera tilt is ±1°and 13 detection lines (blue lines) are all displayed. Text box will be highlighted in green when it comes within ± 1°. • • Make sure 13 detection lines are all displayed between -1°and 1°on the scale, otherwise cannot be measured accurately.
- Page 53 2-43 Refraction System– Chronos – Installation Manual Confirm that the value is displayed in “beta detection value” Text box will be highlighted in green when it comes within ±30’. • Click [SET]button of “bata deviation” on OPT HEAD (L/R) with αβθ diopter telescope set. Deviation amount considering the correction value will be displayed and it judges “OK”...
- Page 54 2-44 Refraction System– Chronos – Installation Manual • It detects how much the β reference line is tilted against the scale of αβθ diopter telescope. αβθ diopter telescope center line αβθ diopter telescope 1 Scale = 10’ β axis reference line Confirm the value is within the standard below.
-
Page 55: Α Axis Confirmation
2-45 Refraction System– Chronos – Installation Manual α axis confirmation As shown below, fix the αβθ diopter telescope so as the scale is vertical. When rotating the αβθ diopter telescope, rorate the attachment part so as not to put a load •... - Page 56 2-46 Refraction System– Chronos – Installation Manual Make sure the camera tilt is ±1°and 13 detection lines (blue lines) are all displayed. Text box will be highlighted in green when it comes within ± 1°. • • Make sure 13 detection lines are all displayed between -1°and 1°on the scale, otherwise cannot be measured accurately.
- Page 57 2-47 Refraction System– Chronos – Installation Manual Confirm that the value is displayed in “alpha detection value”. Text box will be highlighted in green when it comes within ±30’. • Enter the correction value of αβθ diopter telescope in [Correction Value].
- Page 58 2-48 Refraction System– Chronos – Installation Manual Click [SET]button of “alpha deviation” on OPT HEAD (L/R) with αβθ diopter telescope set. Deviation amount considering the correction value will be displayed and it judges “OK” or “NG”. αβθ diopter telescope center line αβθ...
- Page 59 2-49 Refraction System– Chronos – Installation Manual Do the same for the opposite OPT_HEAD. Then confirm the gap between L/R Head. *Export the measured value. Click [Save] Select any preferred place to save. then click [Save] Confidential, duplication and reproduction prohibited...
-
Page 60: Preparing Before
2-50 Refraction System– Chronos – Installation Manual αβθ adjustment of the OPT_HEAD Preparing before Remove the Test eye holder. Please make sure that the test eye was removed when setting to the packing mode. • Otherwise, it may cause the damage in the mirror. - Page 61 2-51 Refraction System– Chronos – Installation Manual Open the setting screen. Select [Maintenance] tab, click the[Execute] in [Packing mode]. *Please make sure that the OPT_HEAD was moved to the both edges. Be sure to set the OPT_HEAD to the packing mode before removing it. Otherwise, it •...
- Page 62 2-52 Refraction System– Chronos – Installation Manual Remove the OPT_HEAD (L/R). ② ① Remove 6 screws of Light (L) and Right (R) OPT_HEAD for each. Then remove HEAD covers. Attach the OPT_HEAD (L/R) to the GADAI_BASE. ① ② Confidential, duplication and reproduction prohibited...
- Page 63 2-53 Refraction System– Chronos – Installation Manual Fasten the nut in order ①lower low, ②upper low. • Make sure to fasten the nut tightly. If not fastened enough, it will affect its accuracy and lose the reproducibility at factory shipment.
- Page 64 2-54 Refraction System– Chronos – Installation Manual Turn on the CONTROL_BOX. Boot up the “Tool software link” by URL below. Use Google Chrome when booting up. • Please note that URLs have "uppercase" and "lowercase" letters. • Adjust OPT_HEAD URL...
- Page 65 2-55 Refraction System– Chronos – Installation Manual Select [alpha, beta, theta, X, Y, Z adjustment] on “Tool software link” menu. Select “Alfa, Theta” of “Chart” to change the display to a cross hair chart. Confirm that a cross chart is displayed when looking through the measurement window.
- Page 66 2-56 Refraction System– Chronos – Installation Manual Loosen the screw of the _BASE. Then insert the Test Eye all the way to attach it to the GADAI_BASE. Please insert it to all the way to the end and fasten the screw tightly. Otherwise, the error •...
- Page 67 2-57 Refraction System– Chronos – Installation Manual Uncheck [Display line] and [Automatic detection] of Select mode. Check [For theta detection] on “Select mode” Select [Parameters] in [Set] tab. Confidential, duplication and reproduction prohibited O-CHR-8-2207-08...
- Page 68 2-58 Refraction System– Chronos – Installation Manual Select the Device number that is assigned to αβθ diopter telescope camera. Then, click [OK]. • Device number differs depending on the PC specification. Click [Live]. Confirm that the movie captured by camera is displayed.
-
Page 69: Θ Axis Roughly Adjustment
2-59 Refraction System– Chronos – Installation Manual θ axis roughly adjustment Attach αβθ diopter telescope to Test eye holder. Then, fasten screws to fix. If a pin is on the incorrect position, it may fail to measure accurately. • A pin of diopter telescope is αβθ... - Page 70 2-60 Refraction System– Chronos – Installation Manual Adjust the diopter until the scale of αβθ diopter telescope and chart are focused. If the scale and chart are out of focus, it cannot accurately measure. • Attach αβθ diopter telescope camera and fix it by two screws.
- Page 71 2-61 Refraction System– Chronos – Installation Manual Check [Display line] and [Automatic detection ] of Select mode.” Confirm that Camera tilt(deg) is ±1°and all 13 detect lines are displayed. Text box will be highlighted in green when Camera tilt is within ±1°.
- Page 72 2-62 Refraction System– Chronos – Installation Manual Diopter may rotate when ratating camera, but there is no problem if it rotates a little . • Bad example Confirm that the value is displayed in “theta detection value”. • Text box will be highlighted in green when it comes within ±30’.
- Page 73 2-63 Refraction System– Chronos – Installation Manual Enter the correction value of αβθ diopter telescope of “Correction Value”. It means the numetic value mentionend on sticker placed on the side of αβθ diopter telescope. • (Center of scale) Click [Set] of [theta deviation] on OPT HEAD (L/R) with αβθ diopter telescope set. Deviation amount considering the correction value will be displayed and it judges “OK”...
- Page 74 2-64 Refraction System– Chronos – Installation Manual αβθ diopter telescope center line αβθ diopter telescope 1 Scale = 10’ θ axis reference line Example as above: Deviation amount is -13’ which is within the standard as the θ axis reference line of the chart is -5’...
- Page 75 2-65 Refraction System– Chronos – Installation Manual Adjust θ axis reference line within the standard. Then , click [Set] of “theta deviation” . Please make sure that the Deviation amount is within the standard and “OK” is displayed. Please do the same for the opposite OPT_HEAD. Confirm the gap between L/R Head.
-
Page 76: Β Axis Adjustment
2-66 Refraction System– Chronos – Installation Manual β axis adjustment As shown below, rotate the αβθ diopter telescope for 90 degrees. Make sure the scale is set vertically. When rotating the αβθ diopter telescope, rotate the attachment part so as not to put a load •... - Page 77 2-67 Refraction System– Chronos – Installation Manual Confirm that Camera tilt(deg) is ±1°and all 13 detect lines are displayed. Text box will be highlighted in green when Camera tilt is within ±1°. • • Please be sure that all 13 detect lines are displayed between -1 and 1°on the scale. Otherwise, it cannot accurately measure.
- Page 78 2-68 Refraction System– Chronos – Installation Manual Confirm that the value is displayed in the box of “beta detection value”. Text box will be highlighted in green when it comes within ±30’. • Click [Set] on “beta deviation” on OPT HEAD (L/R) with αβθ diopter telescope set. Deviation amount considering the correction value will be displayed and it judges “OK”...
- Page 79 2-69 Refraction System– Chronos – Installation Manual • It detects an inclining degree of β axis reference line against the scale of αβθ diopter telescope. αβθ diopter telescope center line αβθ diopter telescope 1 Scale = 10’ β axis reference line Confirm that the value is within the standard.
- Page 80 2-70 Refraction System– Chronos – Installation Manual Adjust it within the standard. Then, click [Set] of “beta deviation”. Confirm that the deviation amount is within the standard and “OK” is displayed. Please do the same for the opposite OPT_HEAD. Confirm the gap between L/R Head.
-
Page 81: Α Axis Adjustment
2-71 Refraction System– Chronos – Installation Manual α axis adjustment As shown below, rotate the αβθ diopter telescope until the scale is set vertically. When rotating the αβθ diopter telescope, rotate the attachment part so as not to put a load •... - Page 82 2-72 Refraction System– Chronos – Installation Manual Confirm that Camera tilt(deg) is ±1°and all 13 detect lines are displayed. Text box will be highlighted in green when Camera tilt is within ±1°. • • Please be sure that all 13 detect lines are displayed between -1 and 1°on the scale. Otherwise, it cannot accurately measure.
- Page 83 2-73 Refraction System– Chronos – Installation Manual Confirm that the value is displayed in the box of “alpha detection value”. Text box will be highlighted in green when it comes within ±30’. • Enter the correction value of αβθ diopter telescope in “Correction Value”.
- Page 84 2-74 Refraction System– Chronos – Installation Manual Click [Set] of “alpha deviation” on OPT HEAD (L/R) with αβθ diopter telescope set. Deviation amount considering the correction value will be displayed and it judges “OK” or “NG”. αβθ diopter telescope center line αβθ...
- Page 85 2-75 Refraction System– Chronos – Installation Manual In case it judged “NG”, adjust it as shown below. Loosen 4 screws as shown below image, chart will move up and down by turning the eccentric • pin left and right. Move the chart within the standard. Then, click [Set] of “alpha deviation”. Confirm the deviation amount is within the standard and “OK”...
- Page 86 2-76 Refraction System– Chronos – Installation Manual Please do the same for the opposite OPT HEAD. Confirm the gap between L/R head. Confidential, duplication and reproduction prohibited O-CHR-8-2207-08...
-
Page 87: Θ Axis Adjustment
2-77 Refraction System– Chronos – Installation Manual θ axis adjustment As shown below, rotate the αβθ diopter telescope for 90 degrees to set the scale vertically (“0°” is shown on top). Then, fix it by screws. αβθ diopter telescope 1 Scale = 10’... - Page 88 2-78 Refraction System– Chronos – Installation Manual Check [For theta detection] of “Select mode”. Check [Display line] and [Automatic detection] of “Select mode”. Confidential, duplication and reproduction prohibited O-CHR-8-2207-08...
- Page 89 2-79 Refraction System– Chronos – Installation Manual Confirm that Camera tilt(deg) is ±1°and all 13 detect lines are displayed. Text box will be highlighted in green when Camera tilt is within ±1°. • • Please be sure that all 13 detect lines are displayed between -1 and 1°on the scale. Otherwise, it cannot accurately measure.
- Page 90 2-80 Refraction System– Chronos – Installation Manual Confirm that the value is displayed in the box of “theta detection value”. Text box will be highlighted in green when it comes within ±30’ • Enter the correction value of αβθ diopter telescope in “Correction Value”.
- Page 91 2-81 Refraction System– Chronos – Installation Manual Click [Set] of “theta deviation” on OPT HEAD (L/R) with αβθ diopter telescope set. Deviation amount considering the correction value will be displayed and it judges “OK” or “NG”. αβθ diopter telescope center line αβθ...
- Page 92 2-82 Refraction System– Chronos – Installation Manual In case that it judged “NG”, enter the movement quantity into [deg] and [minute] of [・Input△θ] on “θ adjustment”. Then, click [calc] →[Save] in order. • Please enter a mark in [deg]. Mark always needs to be entered even though only [minute] was entered.
- Page 93 2-83 Refraction System– Chronos – Installation Manual Please do the same for the opposite OPT_HEAD. Confirm the gap between L/R Head. *Export the measured values. Click [Save]. Select any preferred place to save. Then click [Save]. Confidential, duplication and reproduction prohibited...
-
Page 94: Xyz Adjustment
2-84 Refraction System– Chronos – Installation Manual 2.10 XYZ Adjustment Attach Test Eye with pupil (-5D) to the Test Eye holder. Then fix it with screw. Click [load] to display the current correction value. Confirm the correction values of X, Y and Z. When it is not 0, enter 0. Then click [save]. - Page 95 2-85 Refraction System– Chronos – Installation Manual Click [OK]. Click [load] to confirm if 0 is saved. Click [calc] to measure the cornea alignment. Click [save] to save the measured correction value to EEPROM. 0.0137342 0.0171619 0.0981154 Confidential, duplication and reproduction prohibited...
- Page 96 2-86 Refraction System– Chronos – Installation Manual Check whether the following standards are met. If “NG” is displayed or the value becomes 0.1 or more, please try the procedure again from (6) • until the result meets the standard. 0.0137342 0.0171619...
-
Page 97: Confirming Xyz Adjustment
2-87 Refraction System– Chronos – Installation Manual 2.11 Confirming XYZ adjustment Attach Test Eye with pupil (-5D) to the Test Eye holder for both eyes. Then fix it with screw. Boot up the System Evaluation Screen by URL below. Use Google Chrome when booting up. - Page 98 2-88 Refraction System– Chronos – Installation Manual Click [Reset position]. Click [BINO]. Click [Alignment mode]. Then select [Cornea]. Confidential, duplication and reproduction prohibited O-CHR-8-2207-08...
- Page 99 2-89 Refraction System– Chronos – Installation Manual Click the [X=0.1 Y=0.1 Z=0.1]. Lightly push the forehead rest part of GADAI_BASE. Alignment is activated by pushing in the forehead rest. • Click [Alignment] to visually check that the XY spot does not move.
-
Page 100: Attach The Opt_Head Cover
2-90 Refraction System– Chronos – Installation Manual 2.12 Attach the OPT_HEAD cover Turn the power off. ・ When installing the OPT_HEAD cover (L/R), make sure that the OPT_HEAD is attached to the GADAI_BASE. If removing it from the main body, it needs to be readjusted αβθ and XYZ. - Page 101 2-91 Refraction System– Chronos – Installation Manual Attach the mirror cover. Attach the OPT_HEAD cover (L/R) with 6 screw. Connect the cables. Confidential, duplication and reproduction prohibited O-CHR-8-2207-08...
- Page 102 2-92 Refraction System– Chronos – Installation Manual Attach the connecter cover with a screw. Do the same for the opposite side of OPT_HEAD. Confidential, duplication and reproduction prohibited O-CHR-8-2207-08...
-
Page 103: Confirmation Of Forehead Detection
2-93 Refraction System– Chronos – Installation Manual 2.13 Confirmation of forehead detection Start the Standard GUI screen from the following URL. • Use Google Chrome for activation. Content Remarks Standard GUI http://10.1.2.3/topcon/sub/patient.php ― Enter http://10.1.2.3/topcon/sub/patient.php Enter the Username and Password. - Page 104 2-94 Refraction System– Chronos – Installation Manual On the Objective Measurement screen, start auto-alignment measurement while pushing the forehead pad in by hand. Ensure that error messages are displayed when the hand is removed from the forehead during measurement. Confidential, duplication and reproduction prohibited...
-
Page 105: Refractive Power Measurement Accuracy
2-95 Refraction System– Chronos – Installation Manual 2.14 Refractive Power Measurement Accuracy Start the Measurement mode changeover tool from the following URL. • Use Google Chrome when booting up. Please note that URLs have "uppercase" and "lowercase" letters. • Adjusting Head... - Page 106 2-96 Refraction System– Chronos – Installation Manual Select to[Cornea]for “Objective alignment mode”. Select to[xySpotPositionAlignment]for “Model eye alignment mode”. Click [Save]. Confidential, duplication and reproduction prohibited O-CHR-8-2207-08...
- Page 107 2-97 Refraction System– Chronos – Installation Manual Start the Standard GUI from the following URL. Use Google Chrome when booting up. • Content Remarks Standard GUI http://10.1.2.3/topcon/sub/patient.php ― Enter http://10.1.2.3/topcon/sub/patient.php Enter the Username and Password. Username *********** Password *********** Place the model eye with the pupil (-5D) in the model eye owners.
- Page 108 2-98 Refraction System– Chronos – Installation Manual Click the [Auto Alignment] and [Start] to measure the model eye (-5D) with pupil. Push the forehead in with your hand during measurement. • Click [All] to check the measurement results. [REF] Click the tab to verify that the standard values are met.
-
Page 109: Pd Accuracy Of Measurement
2-99 Refraction System– Chronos – Installation Manual 2.15 PD accuracy of measurement Start the Standard GUI from the following URL. • Use Google Chrome when booting up. Content Remarks Standard GUI http://10.1.2.3/topcon/sub/patient.php ― Enter http://10.1.2.3/topcon/sub/patient.php Enter the Username and Password. - Page 110 2-100 Refraction System– Chronos – Installation Manual Click the [Auto Alignment] and [Start] to measure the model eye (-5D) with pupil. Push the forehead in with your hand during measurement. • Check that the PD measurement value meets the following standards.
-
Page 111: Corneal Curvature Measurement Accuracy
2-101 Refraction System– Chronos – Installation Manual 2.16 Corneal curvature measurement accuracy Start the Standard GUI from the following URL. • Use Google Chrome when booting up. Content Remarks Standard GUI http://10.1.2.3/topcon/sub/patient.php ― Enter http://10.1.2.3/topcon/sub/patient.php Enter the Username and Password. - Page 112 2-102 Refraction System– Chronos – Installation Manual Click the [Auto Alignment] and [Start] to measure the model eye (-5D) with pupil. Push the forehead in with your hand during measurement. • Click [All] to check the measurement results. [KRT] Click the tab to verify that the standard values are met.
- Page 113 2-103 Refraction System– Chronos – Installation Manual Start the Measurement mode changeover tool from the following URL. Use Google Chrome when booting up. • • Please note that URLs have "uppercase" and "lowercase" letters. Adjusting Head Remark Measurement mode changeover tool http://10.1.2.3/topcon/sub/factoryConfig.php...
- Page 114 2-104 Refraction System– Chronos – Installation Manual Select to[Corneal]for “Objective alignment mode”. Select to[off]for “Model eye alignment mode”. Click [Save]. Confidential, duplication and reproduction prohibited O-CHR-8-2207-08...
-
Page 115: Confirmation Of Visual Acuity Chart Switch
2-105 Refraction System– Chronos – Installation Manual 2.17 Confirmation of visual acuity chart switch Start the Standard GUI from the following URL. • Use Google Chrome for activation. Content Remarks Standard GUI http://10.1.2.3/topcon/sub/patient.php ― Enter http://10.1.2.3/topcon/sub/patient.php Enter the Username and Password. - Page 116 2-106 Refraction System– Chronos – Installation Manual Select “General settings” of “Subjective” tab. Then, switch “Alignment when chart is selected” to [OFF]. Click [Save]. Look thorough the measurement window at Subjective screen to ensure that the visual acuity chart is switched when clicking a chart switching button.
-
Page 117: Checking Subjective 0D
2-107 Refraction System– Chronos – Installation Manual 2.18 Checking subjective 0D Start the Standard GUI screen from the following URL. Use Google Chrome for activation. • Content Remarks Standard GUI http://10.1.2.3/topcon/sub/patient.php ― Enter http://10.1.2.3/topcon/sub/patient.php Enter the Username and Password. Username... - Page 118 2-108 Refraction System– Chronos – Installation Manual Click the Settings button. Select [General Settings] in the “Subjective tab” and Set the inspection distance (for far) to "4m". Click [Save]. Confidential, duplication and reproduction prohibited O-CHR-8-2207-08...
- Page 119 2-109 Refraction System– Chronos – Installation Manual Return to the subjective screen and display the chart of any visual acuity. The S value in both eyes is set to [+0.25]. Look through the measurement window to ensure that the scale pins on the αβθ diopter telescope and the visual acuity table pins together.
- Page 120 2-110 Refraction System– Chronos – Installation Manual Click[Setting]mark. Select [General Settings]in the “Subjective tab” . Then, Click "Result to default" to reset the inspection distance to the default value. Change the "Alignment when chart is selected" to the customer's setting.
-
Page 121: Cleaning Method
2-111 Refraction System– Chronos – Installation Manual 2.19 Cleaning method This is the work to be performed when the measurement mirror and exterior cover becomes dirty. Used tools Tool name Tool No. Image Blower Cotton Seagull (or Microstar) finger cot incandescent bulbs light(Tungsten etc.)... - Page 122 2-112 Refraction System– Chronos – Installation Manual Cleaning method of the measured lens ・When adhering dust or dirt on the measuring lens・・・ Use a blower to blow off dust and dirt. ・When getting on fingerprints or oil on the measuring lens・・・ Use a blower to blow off dust and dirt, and clean the lens.
-
Page 123: Network Connection Procedure
Network 2 (For data linkage) Network 1 (For operation) Chronos can be connected to two networks, Network 1 (for operation) and Network 2 (for data linkage). Network 2 (for data linkage) is described in this chapter. Connection method for Chronos-Terminal... -
Page 124: How To Connect Chronos To Local Area Network
2-114 Refraction System– Chronos – Installation Manual How to connect Chronos to local area network Connect the second USB-LAN converter for network 2 to the CONTROL_BOX and connect the LAN cable connected to local area network. Make sure the communication is active and POWER is supplied. - Page 125 2-115 Refraction System– Chronos – Installation Manual Click [Setting]mark. Click [Retrieve network Information]in the "Network" tab. Set "Auto IP assignment" to [OFF] in Network2. Confidential, duplication and reproduction prohibited O-CHR-8-2207-08...
- Page 126 2-116 Refraction System– Chronos – Installation Manual Enter "IPv4 Address" and "Subnet Mask". Do not use "192.168.1.3" and "192.168.2.4", which are used for communication between • CONTROL_BOX and OPT_HEAD. • Do not use IP addresses that are reserved or already in use in the existing network in the local.
- Page 127 2-117 Refraction System– Chronos – Installation Manual Open the "Network" tab of the "Setting" mark and confirm that the "IPv4 Address" and "Subnet Mask" you entered are saved. Confidential, duplication and reproduction prohibited O-CHR-8-2207-08...
-
Page 128: Shared Folder Settings *No Ip Specified, Shared Folder In Control Box
2-118 Refraction System– Chronos – Installation Manual Shared folder settings *No IP specified, shared folder in Control BOX Set [Print / Data] on the [General settings] tab of the setting screen to [Data export]. Set [Use pre-installed shared folder] to [ON] in [Data import Folder configuration] on the [Data Entry &... - Page 129 2-119 Refraction System– Chronos – Installation Manual Set [Use pre-installed shared folder] in [Data Export Folder Configuration] on the [Data Entry & Export] tab of the setting screen to [ON]. Click the [Verify path] button with the [IP address for data export] blank.
- Page 130 2-120 Refraction System– Chronos – Installation Manual *Place it directly under Import data D: / SharedFolder / CL *Place it directly under Export data: D:/SharedFolder/DB Confidential, duplication and reproduction prohibited O-CHR-8-2207-08...
-
Page 131: Shared Folder Settings *Ip Specified(When Installing Multiple Chronos Or When Importing Or Exporting From Other Chronos
& Export] tab of the setting screen. Enter anIP address of the import source Chronos (e.g.: 192.168.10.4) in [IP address of CL / EZ data acquisition terminal] on the [Data import and export] tab of the setting screen. Click the [Verify path]. - Page 132 Export] tab of the setting screen to [ON]. Enter an IP address of the export destination Chronos (e.g.: 192.168.10.5) in [IP address for data export] on the [Data Entry & Export] tab of the setting screen and click the [Verify path].
-
Page 133: Shared Folder Settings *Use An External Shared Folder
2-123 Refraction System– Chronos – Installation Manual Shared folder settings *Use an external shared folder Set [Print / Data] on the [General settings] tab of the setting screen to [Data export]. Set [Use pre-installed shared folder] to [OFF] in [Data import Folder configuration] on the [Data Entry &... - Page 134 Export] tab of the setting screen to [OFF]. Enter the information below in [Data Import Folder Configuration]. Then, click [Verify path]. ・Path to the shared folder: ¥¥IPaddress¥ shared folder name (e.g.: ¥¥192.168.10.50¥Chronos) ・User name: Username with access to the shared folder (e.g.: Administrator) ・Password: Password for the above username (e.g.: Topcon1932)
-
Page 135: Check Sheet
Refraction System– Chronos – Installation Manual 3. Check sheet Installation Check sheet for Chronos Date of Installation (yyyy/mm/dd) : Company name : Serial Number(S/ N) : Person in charge Signature : *Use Installation manual and Instruction manual in combination. Referenc... - Page 136 Refraction System– Chronos – Installation Manual ↓ Accuracy check of Measure (R8) after auto alignment (L/R) Chapter corneal coverture Standard:(R indicated value) ±0.05mm 2.13 Push the changing button of visual acuity chart. ― ☐ ☐ Check the change of Chapter...
-
Page 137: Used Tool List
Refraction System– Chronos – Installation Manual 4. List of Used Tools Used Tool List Name of the tool Tool No. Appearance Test eye holder (PD65) CHR-01 αβθ diopter telescope CHR-032 *Components: Diopter Telescope (CHR-02), Stereo Camera Screw, Misalignment-preventive metal fitting, Power cable NTSC-USB Converter cable... - Page 138 Refraction System– Chronos – Installation Manual finger cot incandescent bulbs light(Tungsten etc.) For forehead rest and exterior cover Neutral detergent for tableware For measuring lenses SH-11、ethanol For measuring mirror Fluorine solvent Confidential, duplication and reproduction prohibited O-CHR-8-2207-08...
-
Page 139: Tool Software List
Refraction System– Chronos – Installation Manual Tool Software List Tool software name Intended use Image Google Chrome web application tool software ipsetting_L_Control_Box.bat Connecting to PC network Chronos_Link_20200413_J_html Google Chrome Bookmark Setting Calibration tool αβθ axis confirmation and adjustment of the OPT_HEAD. - Page 140 Refraction System– Chronos – Installation Manual Confidential, duplication and reproduction prohibited O-CHR-8-2207-08...
-
Page 141: Appendix
A diopter telescope can create any diopter from the +4D to -4. 5D. Used primarily for telescope dioptric measurement, variable telescope dioptric displacement measurement, binocular left-right dioptric measurement, and angle measurement of real visibility, and in Chronos, it is used to adjust the position of the LCOS chart. -
Page 142: What Is The Eccentricity Error
There is an individual difference in the eccentricity, and there is no diopter telescope with the same eccentricity. In Chronos, the position of LCOS charts is adjusted using the scale, so the eccentricity error must be taken into consideration. - Page 143 Refraction System– Chronos – Installation Manual To measure the amount of eccentricity in the “Positive” direction, Since the amount of eccentricity = direction of “positive” – direction of “opposite” /2, it is 20’= (10’) - (-30’)/2 in other words, the diopter telescope scale is 20’shifted (eccentric), and the 20’ position of the scale is the axis of lotation.
-
Page 144: Αβθ Diopter Telescope】 Assembly Procedure
Refraction System– Chronos – Installation Manual 【CHR-32 αβθ diopter telescope】 Assembly Procedure Purpose CHR-32 is an improved version of CHR-02 which problems of CHR-02 have been solved. This procedure is for those who purchased only CHR-02 and explains how to install Stereo Camera and Metal Fitting for preventing the misalignment. -
Page 145: Assembling The Metal Fitting For Preventing The Misalignment
Refraction System– Chronos – Installation Manual Assembling the Metal Fitting for preventing the misalignment. Attach the Metal Fitting to αβθ diopter telescope. Fix it by three Hex screws. Please be sure that the Metal Fitting is flush with attachment part when fixing. -
Page 146: Assembling Stereo Camera
Refraction System– Chronos – Installation Manual Assembling Stereo Camera Remove a part of αβθ diopter telescope pointed by red arrow in the below picture. Set the attachment of Stereo Camera to αβθ diopter telescope. Peel the protector film on the lens of Stereo Camera and fix it on the attachment by two screws. -
Page 147: How To Connect Cl-300 Pdl To Chronos
Refraction System– Chronos – Installation Manual How to connect CL-300 PDL to Chronos Purpose The connection and operation procedures for importing measurement data from CL-300 PDL to Chronos are described. Required Tools Tool name Tool No. Image Laptop (LAN cable also needed for wired network) ―... -
Page 148: Enabling Smb1.0 Supporting In Chronos Control Box
Refraction System– Chronos – Installation Manual Enabling SMB1.0 Supporting in Chronos Control Box Turn on Chronos control box. After the system starts up, access to it with using the remote desktop and open folder D:¥ uwf_filter. Refer to Chapter 2.3 and 2.5 for how to connect to the control box with the laptop. - Page 149 Refraction System– Chronos – Installation Manual When "Turn Windows features on or off" dialog is displayed, select the checkbox in which "SMB1.0/CIFS File Sharing support" and press [OK] button to close the dialog. A dialog box prompting you to restart the system is displayed. Press [Restart now] to restart the system.
-
Page 150: Standard Gui Settings
5-10 Refraction System– Chronos – Installation Manual Standard GUI settings Connect http://10.1.2.3/topcon/sub/login.php with the laptop. Enter user name and password and log in. *The default is below. Username Password admin Topcon@123 Click Settings button. Confidential, duplication and reproduction prohibited O-CHR-8-2207-08... - Page 151 192.168.10.3 255.255.0.0 0.0.0.0 Open [Data Entry & Export] tab, set "Import data format" to "TOPCON", and select "Use pre-installed shared folder" in "Data Import Folder Configuration". Path of preinstalled shared folder: D:¥ SharedFolder¥cl Click "Verify path" button and confirm that "Connected." is displayed, then click [Save] at the top.
-
Page 152: Sightpilot Settings
5-12 Refraction System– Chronos – Installation Manual SightPilot settings Connect to http://10.1.2.3/sgui with the laptop and press Settings. Type D:¥ SharedFolder¥cl¥ in [Import path (LM)] and click [Save]. Confidential, duplication and reproduction prohibited O-CHR-8-2207-08... -
Page 153: Cl-300 Pdl Connect Settings
5-13 Refraction System– Chronos – Installation Manual CL-300 PDL Connect Settings Press [Set-up]. Press [LAN]. Confidential, duplication and reproduction prohibited O-CHR-8-2207-08... - Page 154 5-14 Refraction System– Chronos – Installation Manual Enter the following in "IP address", and then press [OK]. IP address Subnet Mask Gateway 192.168.10.5 255.255.0.0 0.0.0.0 Enter the followings in "Setting 1" and press [OK]. IP address Link Folder 192.168.1035 Blank...
- Page 155 5-15 Refraction System– Chronos – Installation Manual Enter the followings in "Setting 2" and press [OK]. Shared Folder User Name Pass Word Topcon Topcon1932 Select "TOPCON" for "XML". Confidential, duplication and reproduction prohibited O-CHR-8-2207-08...
-
Page 156: Operating Procedures For Cl-300 Pdl
Operating procedures for CL-300 PDL Measure the left and right lenses with CL-300 PDL and press print button. Chronos does not receive any uniocular eye data, so must transmit binocular data. • Access ¥¥10.1.2.3¥cl on the laptop and confirm that the XML file was created. -
Page 157: Standard Gui Operating Procedures
5-17 Refraction System– Chronos – Installation Manual Standard GUI operating procedures Click [Data Entry] button on the subjective screen. After selecting the relevant data, click [OK] button in the lower right corner of the screen. If uniocular data is received, the following error is displayed. Ensure that binocular data are •... - Page 158 5-18 Refraction System– Chronos – Installation Manual The data is reflected. Confidential, duplication and reproduction prohibited O-CHR-8-2207-08...
-
Page 159: Operating Procedures For Sightpilot
5-19 Refraction System– Chronos – Installation Manual Operating procedures for SightPilot After patient registration, select “Yes, import data from lensmeter”. The outcome measured by CL-300 PDL is displayed. Only the most recent data in the specified folder is automatically loaded. -
Page 160: How To Connect Cv-5000 To Chronos
USB-LAN converter, LAN-cable ― Connecting CV-5000 to Chronos • Chronos control box does not have any additional LAN ports. Insert USB-LAN converter into USB3.0 port. • USB-LAN converter connected in Chapter 2.3 is for Network1. In this case, connect additional USB-LAN converter for Network2. -
Page 161: Enabling Smb1.0 Supporting In Chronos Control Box
5-21 Refraction System– Chronos – Installation Manual Enabling SMB1.0 Supporting in Chronos Control Box Turn on Chronos control box. After the system starts up, access to it with using the remote desktop and open folder D:¥ uwf_filter. Refer to Chapter 2.3 and 2.5 for how to connect to the control box with the laptop. - Page 162 5-22 Refraction System– Chronos – Installation Manual When "Turn Windows features on or off" dialog is displayed, select the checkbox in which "SMB1.0/CIFS File Sharing support" and press [OK] button to close the dialog. A dialog box prompting you to restart the system is displayed. Press [Restart now] to restart the system.
-
Page 163: Standard Gui Settings
5-23 Refraction System– Chronos – Installation Manual Standard GUI settings Connect http://10.1.2.3/topcon/sub/login.php with the laptop. Enter user name and password and log in. *The default is below. Username Password admin Topcon@123 Click the Settings button. Confidential, duplication and reproduction prohibited... - Page 164 5-24 Refraction System– Chronos – Installation Manual Open [Network] tab, enter it in [Network 2]. IP address Subnet Mask Default Gateway 192.168.10.3 255.255.0.0 0.0.0.0 Open [Data Entry & Export] tab and set the following. "Data Export Folder Configuration" - Select "Use pre-installed shared folder".
-
Page 165: Sightpilot Settings
5-25 Refraction System– Chronos – Installation Manual SightPilot settings Connect to http://10.1.2.3/sgui with the laptop and click Settings. Enter D: ¥ SharedFolder ¥ db ¥ in [Export results path] and click [Save]. Confidential, duplication and reproduction prohibited O-CHR-8-2207-08... -
Page 166: Cv-5000 Connection Settings
5-26 Refraction System– Chronos – Installation Manual CV-5000 connection settings The following is an example of a mouse type. Click "Set-up" button. Click [Data I/O settings]. Confidential, duplication and reproduction prohibited O-CHR-8-2207-08... - Page 167 5-27 Refraction System– Chronos – Installation Manual Click [System configurations]. In LAN configuration tab, enter the followings: ☑ for " Enable network connection" IP properties IP address Subnet Mask Default Gateway 192.168.10.6 255.255.0.0 0.0.0.0 Confidential, duplication and reproduction prohibited O-CHR-8-2207-08...
- Page 168 5-28 Refraction System– Chronos – Installation Manual In Data Folder tab, enter the followings. Setting AR data folder configuration ☑ for "Use shared folder in CV system" "IP address of AR data stations": 192.168.10.6 Set Rx data folder configuration in the same way.
- Page 169 5-29 Refraction System– Chronos – Installation Manual Click [Exit] in the lower-right corner and click [OK]. Confidential, duplication and reproduction prohibited O-CHR-8-2207-08...
-
Page 170: Standard Gui Operating Procedures
5-30 Refraction System– Chronos – Installation Manual Standard GUI operating procedures After examination with Standard GUI, click [Print/Data Export] to export data. If the export is successful, the following message will be displayed. Click [OK]. Confidential, duplication and reproduction prohibited... -
Page 171: Operating Procedures For Sightpilot
5-31 Refraction System– Chronos – Installation Manual Operating procedures for SightPilot After examination with SightPilot, click [Export]. Confidential, duplication and reproduction prohibited O-CHR-8-2207-08... -
Page 172: Operating Procedures For Cv-5000
5-32 Refraction System– Chronos – Installation Manual Operating procedures for CV-5000 Click File Import button in the upper left corner. Shows the results measured in the standard GUI or SightPilot. Confidential, duplication and reproduction prohibited O-CHR-8-2207-08... -
Page 173: How To Connect Solos To Chronos
5-33 Refraction System– Chronos – Installation Manual How to connect SOLOS to Chronos Purpose The connection and operation procedure for importing measurement data from SOLOS to Chronos are described. Required tools Tool name Tool No. Image Laptop (LAN cable also needed for wired network) ―... -
Page 174: Check The Smbs Setup In Chronos Control Box
5-34 Refraction System– Chronos – Installation Manual Check the SMBs setup in Chronos Control Box Turn on Chronos control box. After the system starts up, access it from the laptop with the remote desktop, enter "Turn windows" in the search box on the taskbar, and select "Turn Windows features on or off" as the search option. -
Page 175: Standard Gui Settings
5-35 Refraction System– Chronos – Installation Manual Standard GUI settings Connect http://10.1.2.3/topcon/sub/login.php with the laptop. Enter user name and password and log in. *The default is below. Username Password admin Topcon@123 Click Settings button. Confidential, duplication and reproduction prohibited O-CHR-8-2207-08... - Page 176 192.168.10.3 255.255.0.0 0.0.0.0 Open [Data Entry & Export] tab, set "Import data format" to "TOPCON", and select "Use pre-installed shared folder" in "Data Import Folder Configuration". Path of pre-installed shared folder: D:¥ SharedFolder¥cl Click "Verify path" button and confirm that "Connected." is displayed, then click Save at the top.
-
Page 177: Sightpilot Settings
5-37 Refraction System– Chronos – Installation Manual SightPilot settings Connect to http://10.1.2.3/sgui with the laptop and click Settings. Type D:¥ SharedFolder¥cl¥ in [Import path (LM)] and click [Save]. Confidential, duplication and reproduction prohibited O-CHR-8-2207-08... -
Page 178: Solos Data-Output Settings
5-38 Refraction System– Chronos – Installation Manual SOLOS data-output settings Click [Menu] button > [Settings]. Confidential, duplication and reproduction prohibited O-CHR-8-2207-08... - Page 179 5-39 Refraction System– Chronos – Installation Manual Select General tab and change Data output button Settings to [Print + Export] or [Export]. Click [Configure] button under Data export to open Export configuration. Confidential, duplication and reproduction prohibited O-CHR-8-2207-08...
- Page 180 Content Exportation Network Device CV-5000 Smb Version SMBv1 or SMBv2.x/v3/x (Select according to the version of SMBs in Chronos control box identified in "5.5.4(3)).) IP address 192.168.10.3 Credentials Workgroup Blank (Smb Version is not displayed by SMBv1) User Name Topcon...
-
Page 181: Solos Connection Settings
5-41 Refraction System– Chronos – Installation Manual SOLOS connection settings Select Maintenance tab and click [Network Configuration] button. Select Lan tab, make the following settings, and click Apply All button. DHCP: Disabled IP address Subnet Mask Gateway 192.168.10.7 255.255.0.0 0.0.0.0... - Page 182 5-42 Refraction System– Chronos – Installation Manual Click "X" button. Return to the Measurement screen. SOLOS settings are now complete. Confidential, duplication and reproduction prohibited O-CHR-8-2207-08...
-
Page 183: Operating Procedures For Solos
Refraction System– Chronos – Installation Manual Operating procedures for SOLOS After measuring with SOLOS, press data-output button to export data. Chronos does not receive any uniocular eye data, so must transmit binocular data. • If the following error is displayed, review the settings. - Page 184 5-44 Refraction System– Chronos – Installation Manual After selecting the relevant data, click [OK] button in the lower right corner of the screen. If uniocular data is received, the following error is displayed. Ensure that binocular data are • sent.
-
Page 185: Operating Procedures For Sightpilot
5-45 Refraction System– Chronos – Installation Manual Operating procedures for SightPilot After patient registration, select “Yes, import data from lensmeter”. The outcome measured by SOLOS is displayed. Only the most recent data in the specified folder is automatically loaded. •... -
Page 186: How To Connect Imagenet6 And Chronos
5-46 Refraction System– Chronos – Installation Manual How to Connect IMAGEnet6 and Chronos Purpose The connection and operation procedure for importing measurement data from Chronos to IMAGEnet6 are described. Required tools Tool name Tool No. Image Laptop (LAN cable also needed for wired network) ―... -
Page 187: Check The Smbs Setup In Chronos Control Box
5-47 Refraction System– Chronos – Installation Manual Check the SMBs setup in Chronos Control Box Turn on Chronos control box. After the system starts up, access it from the laptop with using remote desktop, enter "Turn windows" in the search box on the taskbar, and select "Turn Windows features on or off" as the search option. -
Page 188: Installing Mdr
5-48 Refraction System– Chronos – Installation Manual Installing MDR Execute "setup.exe" of MDR on the PC on which IMAGEnet6 is installed. “setup.exe” for MDR is located on IMAGEnet6 install disc at the following location: Install disc ¥MDR¥ setup.exe Note: If IMAGEnetR4 is installed, install MDR for IMAGEnetR4. If you install MDR for IMAGEnet6, IMAGEnetR4 and MDRs will not work properly. - Page 189 5-49 Refraction System– Chronos – Installation Manual Click [Next]. Click [Install]. Confidential, duplication and reproduction prohibited O-CHR-8-2207-08...
-
Page 190: Smb Setting Of Pc
Confirm if the check of "SMB1.0/CIFS file sharing support" in "Turn Windows features on or off" is the same as the setting in "5.6.4 Check SMB settings of Chronos control box". and click the [OK] button to close the dialog. -
Page 191: Network Settings
5-51 Refraction System– Chronos – Installation Manual Network settings Open Control Panel on PC and click [Network & Internet]. Click [Network and Sharing Center]. Click [Change adapter settings]. Right-click the Ethernet connected to CONTROL_BOX and select Properties. Confidential, duplication and reproduction prohibited... - Page 192 5-52 Refraction System– Chronos – Installation Manual Select Internet Protocol Version 4 and click [Properties]. • Clear the check box for Internet Protocol Version 6. Select “Use the following IP address” and enter the following values for the IP address and subnet mask.
-
Page 193: Creating A Shared Folder
5-53 Refraction System– Chronos – Installation Manual Creating a Shared Folder Create a folder to receive Chronos test data on the PC. e.g. C:¥Temp¥MDR¥ Chronos Right-click the folder and click Properties. Under Properties, select “Sharing” tab, and then click [Advanced Sharing]. -
Page 194: Mdr Settings
5-54 Refraction System– Chronos – Installation Manual Under Permissions, select “Everyone”, check “Full Control”, and then click [OK]. Under Advanced Sharing, click [OK]. Click [Close] button in the properties. MDR settings Execute "MdrSetup.exe" on the computer. MdrSetup.exe resides in the following paths: C:¥Program Files (x86)¥TOPCON¥MDR¥MdrSetup.exe... - Page 195 Refraction System– Chronos – Installation Manual Select "Import data file Plugin" in "Communication plug-in" and click [Setting]. Set as follows and click [OK] button. Path to the folder where the examination data files will be received, e.g. C:¥ Temp¥MDR¥ Chronos Extension Name...
- Page 196 5-56 Refraction System– Chronos – Installation Manual Select "ExamData Plugin" in "Data Output Plug-in” and click [Setting]. Confidential, duplication and reproduction prohibited O-CHR-8-2207-08...
- Page 197 5-57 Refraction System– Chronos – Installation Manual Set the following settings on General tab. Items Content Backup Folder Specify a folder of your choice if you have. (If there is no specific folder, you can leave this as blank.) Server Enter the server name of IMAGEnet6.
- Page 198 5-58 Refraction System– Chronos – Installation Manual On “Out PlugIn” tab, make the following settings: Items Content Auto registor Check this box if you would like automatic register if receiving data from the test instrument when the patient ID is being searched.
- Page 199 Refraction System– Chronos – Installation Manual Set “Procedure Map” tab as desired and click [Regist] button. Chronos's examination data are "Ref", "Kerato", "Lens meter," and "Subjective". You can change the procedure name registered in IMAGEnet6 by changing the "Exam Name" and "Group Name".
- Page 200 5-60 Refraction System– Chronos – Installation Manual Click the [Close] button. Setting is completed once MDR has been activated as follows. When "Show register window" is ON, the following window is also displayed. Confidential, duplication and reproduction prohibited O-CHR-8-2207-08...
-
Page 201: Standard Gui Settings
5-61 Refraction System– Chronos – Installation Manual Standard GUI settings Connect http://10.1.2.3/topcon/sub/login.php with the laptop. Enter your username and password and log in.*The default is below. Username Password admin Topcon@123 Click Settings button. Confidential, duplication and reproduction prohibited O-CHR-8-2207-08... - Page 202 5-62 Refraction System– Chronos – Installation Manual Open [Network] tab, enter it in [Network 2]. IP address Subnet Mask Gateway 192.168.10.3 255.255.0.0 0.0.0.0 Open [Data Entry & Export] tab and set the following. "Data Export Folder Configuration" - OFF using pre-placed shared folders...
-
Page 203: Sightpilot Settings
5-63 Refraction System– Chronos – Installation Manual SightPilot settings Connect to http://10.1.2.3/sgui with the laptop and click [Settings]. Enter the following in [Import/Export] and click [Save]. Export results path Username Password \192.168.10.8\chronos\ user name of MDR PC The password of the above user... -
Page 204: Standard Gui Operating Procedures
5-64 Refraction System– Chronos – Installation Manual Standard GUI operating procedures After examination with Standard GUI, click [Print/Data Export] to export data. If the export is successful, the following message is displayed. Click [OK]. Confidential, duplication and reproduction prohibited O-CHR-8-2207-08... -
Page 205: Operating Procedures For Sightpilot
5-65 Refraction System– Chronos – Installation Manual Operating procedures for SightPilot After examination with SightPilot, press [Export]. Confidential, duplication and reproduction prohibited O-CHR-8-2207-08... -
Page 206: Imagenet6 Operating Steps
5-66 Refraction System– Chronos – Installation Manual IMAGEnet6 Operating steps Examination results import with MDR. Confidential, duplication and reproduction prohibited O-CHR-8-2207-08... - Page 207 5-67 Refraction System– Chronos – Installation Manual Confirm that the data is registered in IMAGEnet6. Confidential, duplication and reproduction prohibited O-CHR-8-2207-08...
- Page 208 5-68 Refraction System– Chronos – Installation Manual Confidential, duplication and reproduction prohibited O-CHR-8-2207-08...
- Page 209 Confidential, duplication and reproduction prohibited O-CHR-8-2207-08...
- Page 210 Confidential, duplication and reproduction prohibited O-CHR-8-2207-08...
Need help?
Do you have a question about the Chronos and is the answer not in the manual?
Questions and answers