Telguard TG-4 Quick Installation Manual
Hide thumbs
Also See for TG-4:
- Quick install manual (8 pages) ,
- Installation and operating instructions manual (28 pages) ,
- Installation and operation instructions manual (31 pages)
Advertisement
Quick Links
Alarm Panel
Acceptable RSSI Range
1
2
System Status
3
LEDs
4
5
Not Used
6
Not Used
7
Power LED
8
LED Mode
Toggle Button
SIM
TELGUARD
Digital TG-4
R
T
1 2
1 2 3
4
5 6
1
2
3
1 2
BATTERY
INCOMING
TELCO
AC
(12V 800MA)
STC2
STC1
(N.C)
(N.O.)
GND DC
GND IN
4
5
3
6
R
T
6
2
7
1
8
1
2
1
2
3
4
5
8
RJ31X
System Status LEDs (RSSI Mode)
OFF
BLINKING
ON
RSSI (bars)
NONE
1
1½
2
2½
3
3½
NO
Signal (dBm)
< -110
> -110
> -100
> -90
> -80
> -70
SVC
System Status LEDs (Normal Mode)
OFF
NOT ACTIVATED
ACTIVATION
ON
ACTIVATED
FLASHING
ACTIVATION DENIED (DISABLED)
OFF
NO TROUBLE
FLASHING
TROUBLE:
1 FLASH = ACFC LOW/MISSING AC
LPF LOW DC INPUT
SYSTEM
2 FLASH = LBC LOW BATTERY
TROUBLE
3 FLASH = LFC LINE FAULT
4 FLASH = NSC NO SERVICE
5 FLASH = RFC RADIO FAILURE
6 FLASH = DTF DIAL TONE FAIL
7 FLASH = PPF PNL PRES FAIL
OFF
PANEL ON-HOOK (PRIMARY)
PANEL COMM
ON
PANEL ON-HOOK (BACKUP)
Battery
Connector
FLASHING
PANEL OFF-HOOK
OFF
IDLE
Battery wire
should be at
WAITING FOR RESPONSE FROM
TMC COMM
ON
TCC
least ¼ inch
apart from
FLASHING
ACTIVATION DENIED
AC wires
OFF
IDLE
RADIO STATUS
ON
RADIO INITIALIZING
EARTH
GROUND
FLASHING
RADIO COMMUNICATING
FLASHING STANDARD LINE SECURITY ENABLED
(2 FLASHES EVERY 5 SECONDS)
NOT USED
OFF
NOT USED
NOT USED
OFF
NOT USED
OFF
AC NOT CONNECTED
POWER LED
UNIT MAY BE RECEIVING
POWER FROM DC/BATTERY
ON
AC CONNECTED TO UNIT
OPTIONAL
TRIP
BATTERY
-
+
AC
6
1
2
3
1
2
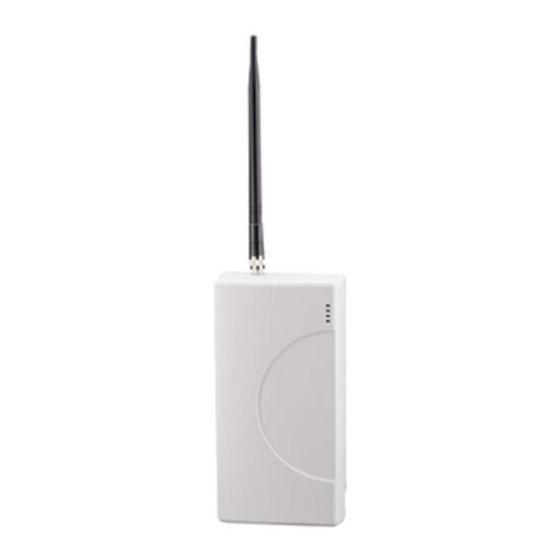
Telguard Model TG-4
QUICK INSTALLATION GUIDE
Installation Summary
4
There are seven steps in installing Telguard properly. IF YOU DO NOT
> -60
PROCEED IN THE ORDER AND MANNER PRESCRIBED, YOU MAY
NOT COMPLETE THE INSTALLATION IN THE TIME ALLOCATED.
S
1: R
TEP
EGISTER FOR
Register the unit online through www.telguardonline.com, by
completing the Online Registration Form at www.Telguard.com. Telular
requires this information to activate the unit.
S
2: L
TEP
OCATE
First, you will be confirming that Telguard has adequate cellular signal strength. Press the LED
Mode Toggle button, LEDs will now indicate signal strength. Minimum recommended is 2 ½
(2 on solid and the third flashing). ). The LED Mode will reset to normal automatically after 10
minutes or after pressing the LED Mode Toggle button again.
S
3: T
TEP
RANSMIT
Next, you will verify that the alarm panel is programmed properly. This step is important to
verify that the alarm panel is programmed with valid account code and central station
information before transmitting signals through the cellular network.
S
4: P
TEP
ROGRAM
C
R
THE
ELLULAR
Next, you will be connecting the alarm panel's digital dialer output to Telguard and verifying that
alarm signals can be reliably sent through Telguard over cellular to the central station digital
receiver. The incoming Telco line is not connected to Telguard during this step. A minimum of
two alarm signals must be transmitted. Activation is confirmed when LED 1 is illuminated.
(NOTE:
THE FIRST ALARM WILL ACTIVATE THE UNIT AT THE
C
,
ENTER
IT WILL NOT GO TO THE
C
SENT TO THE
ENTRAL
S
5: C
TEP
ONNECT
Next, you will wire Telguard's supervisory trip outputs to the alarm panel and then test.
S
6: C
TEP
ONNECT
Optionally, you can wire an external relay input to the trip input lead and ground, and test.
S
7: C
TEP
OMPLETE THE
Your last step will be to attach earth ground, and permanently mount the unit.
C
S
ELLULAR
ERVICE
U
M
S
S
NIT AND
EASURE
IGNAL
TRENGTH
P
A
T
ANEL
LARMS OVER THE
ELCO
, A
& T
P
CTIVATE
RANSMIT
ANEL
N
ADIO
ETWORK
T
ELULAR
C
,
ENTRAL STATION
ALL SIGNALS AFTER THE FIRST ARE
S
)
TATION
S
T
O
UPERVISORY
RIP
UTPUTS
T
I
(
)
RIP
NPUT
OPTIONAL
I
NSTALLATION
(RSSI)
C
ONNECTION
A
LARMS OVER
C
OMMUNICATION
56044002
Advertisement

Related Manuals for Telguard TG-4


Summary of Contents for Telguard TG-4
- Page 1 ADIO ETWORK NOT USED NOT USED Next, you will be connecting the alarm panel's digital dialer output to Telguard and verifying that BATTERY alarm signals can be reliably sent through Telguard over cellular to the central station digital NOT USED NOT USED receiver.
- Page 2 (note: registration form must be sent to Telular). The STC LED # 2 will flash to indicate any failure conditions. The Mode LED # 3 will be on and the STC 1 and STC 2 relays will be tripped. If changes are required to the default settings, the Telguard can be programmed using a line-mans butt-set connected to T &...
Need help?
Do you have a question about the TG-4 and is the answer not in the manual?
Questions and answers