
Related Manuals for GPRINTER GP-2120T


Summary of Contents for GPRINTER GP-2120T
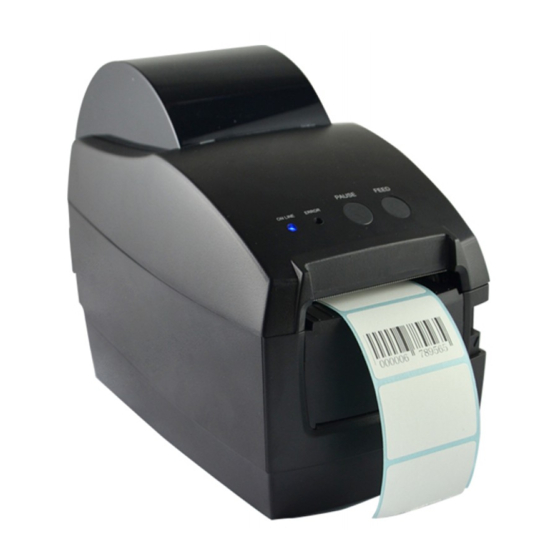
- Page 1 User’s Manual Thermal Barcode Printer GP-2120T Proficient in Commercial POS Receipt Printers...
-
Page 2: Table Of Contents
1. Introduction....................2 1.1 Safety Warning ......................2 1.2 Note ...........................2 2. General Information ................3 2.1 Introduction ........................3 2.2 Main Features ......................3 3. Printer Parts ...................3 4. Paper Roll Installation ................5 5. Specification ...................8 6. Quick Start .....................10 6.1 Unpacking ........................10 6.2 Power Cable Connection ..................10 6.3 Data Cable Connection ....................10 6.4 Media Installation .....................10 7. -
Page 3: Introduction
Thanks for choosing our new thermal label printer GP-2120T. This product provides reliable performance and high printing quality at economic price. With powerful functions and easy operation design, GP-2120T is your best choice of thermal label printer. CAUTION, NOTE CAUTION: MUST COMPLY, OTHERWISE HUMAN GET HARM AND DEVICES DAMAGE. -
Page 4: General Information
2 、General Information 2.1 Introduction GP-2120T is designed for real-time and batch label printing, which is applicable in the field of transportation, logistics, post, retail sale, and etc. The printer can be connected with other equipment with various interface cards, such as Serial, USB ,It supports different paper media, including thermal paper roll, thermal label paper and sticker paper. - Page 5 ( 2) 10- Power Switch 11- Power Port 12- Cashdrawer Port 13- USB Port 14-Serial Port ( ( 3) 4) 15- Print Head 16- Paper Roll Limiting Block 18- Paper Presence Sensor 19- Peel-off Roller Lever 20- Light Transmission Sensor Light Source 21- Paper Roll Spindle 22- Peel-off Spindle 23- Peel-off Roller...
-
Page 6: Paper Roll Installation
4. Paper Roll Installation (1) Insert the paper roll spindle into paper roll, and put it into printer hollow, then fix it correctly into the spindle slot inside the printer. ( 5) ① Press the button to open the top cover. Paper roll spindle slot (... - Page 7 ③ Fix the paper roll into slot and pay attention that label paper should be facing up as picture showing. ( 8) ( 9) (2) Label Paper Peel-off Mode Setting ① Pull the leading edge of label paper and thread through the limiting block, then adjust it according to paper width to make sure label paper is in proper and fixed printing positon.
- Page 8 ③ After peel-off roller unlocked, seperate the label paper from release paper manually, insert the release paper into peel-off device in front of the peel-off roller. ( 13) ④ Pull up the peel-off level and the roller will press on the release paper, then close the top cover.
-
Page 9: Specification
Note: If the peel-off function fails, please check: 1.The printing media is installed correctly. 2.The r elease paper must be in front of the peel-off spindle. 3.The peel-off roller needs to press on the release paper. 4.The peel-off roller lever must be stand. Please refer the pictures below: Label Printing Side Label Exit... -
Page 10: Specifications
SPECIFICATIONS Parameter Printing method Direct Thermal Resolution 203DPI Print width 2inch Print speed Max. 127mm/s; Min. 101mm/s Memory Print DRAM: 2M FLASH: 2M Print head Thermal Sensitive Resistance temperature sensor Print head Microswitch position sensor Paper Presence Photoelectricity sensor sensor (RS-232) Interface Serial... -
Page 11: Quick Start
6 . Quick Start 6.1 Unpacking Open the printer package and check the printer parts according to packing list. If any parts are missing or damaged, please contact the local distributor. 6.2 Power Cable Connection 12V DC ( 19) 1) Make sure the printer power switch is OFF; 2)The printer power jack is a 3-pin socket and for 12V DC power input. -
Page 12: Gap Sensor Calibration
Self-test Page Sample: SELFTEST...........Self-test Mode ( 20) MODEL:GP2120T...........Model name VERSION:V1.0..........Firmware version INTERFACE:USB...........Interface type SPEED:5............Print speed DENSITY:7.............Print darkness SIZE: 48 mm ,180 mm ........Paper width GAP: 0 mm ,0 mm ........Gap distance CODE PAGE:437 .........Code page MILAGE(m):0..........Printed mileage (meter) REFERENCE:0 mm ,0 mm......Reference offset DIRECTION:... -
Page 13: Hexadecimal Dumping
This function is to reset the label gap sensor sensitivity when the printer power is turned on. User needs to start the calibration of the gap sensor sensitivity after loading a different type of label roll or the printer is initialized. Please follow the steps below to calibrate the gap sensor: 1. -
Page 14: Printer Initialization
7.5 Printer Initialization Printer initialization is used to clear DRAM and restore printer settings to defaults. Please do the gap sensor sensitivity calibration after the printer initialization. Please follow the steps below to initialize the printer: 1. Turn off the printer power. 2. -
Page 15: Maintenance
Gap sensor calibration 1. Turn off the printer power. 2. Make sure the label roll is installed correctly and the printer top cover is closed. 3. Press and hold on the PAUSE button, then turn on the printer power. The printer will automatically calibrate the gap sensor sensitivity and save the gap length into DRAM.
Need help?
Do you have a question about the GP-2120T and is the answer not in the manual?
Questions and answers