
Related Manuals for EcoQuest Breeze 2


Summary of Contents for EcoQuest Breeze 2
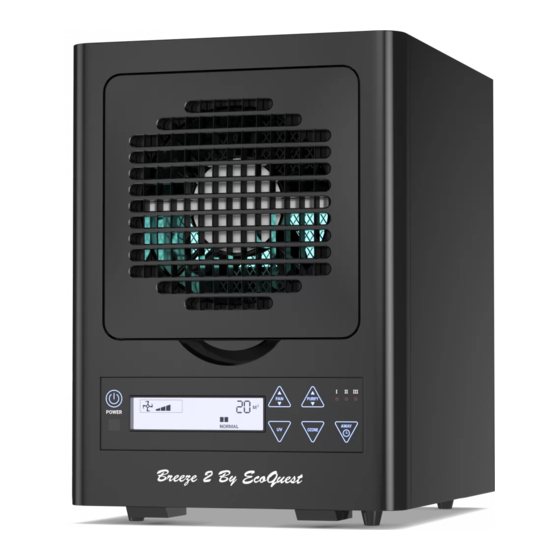
- Page 1 Breeze 2 by Ecoguest 6 Stages Air Purifier INSTRUCTION MANUAL CAUTION: Read manual carefully for proper operation.
-
Page 2: Table Of Contents
CONTENTS Specifications..................... 3 Features......................3 Introduction......................4 Applications......................5 Installation......................5 Back Cover & Filter Removal................5 Placing the Unit....................6 Settings and Adjustments..................8 Maintenance....................11 Replacing the Fuse..................12 Troubleshooting....................13 Warranty Information..................15... -
Page 3: Specifications
SPECIFICATIONS Model: Breeze 2 Rated Voltage: USA-AC 110-120V/60Hz or Europe 220-240V/50Hz Power Consumption: Fan Speed (non-grade): 1500-3000 RPM Air Volume: Max 106 CFM(3 m /min) Ion Output ≥5 x 10 cm3 (or≥2.5 x 10 /cm3) UV Spectrum: 500μw/cm2 ( at 10cm- distance) -
Page 4: Features
CAUTION! – Turn off power when performing maintenance. If the fuse is blown and needs to be replaced, the current of fuse 110 volt models: ≤1.0 Amp; 230 volt models: ≤0.5 Amp 3. INTRODUCTION Breeze 2 air purifier reproduces natural environment same as outdoors. It is designed... -
Page 5: Applications
No Duct Work Required No Chemicals Low Maintenance Low Electrical Usage Complete User Control No Residual Contamination 4. APPLICATIONS Home, Office, Restaurant, Hotel Smoking Areas Production Areas Basements Casinos & Large Meeting Halls ... -
Page 6: Placing The Unit
Step 2: Push two latches down on back cover. Step 3: Remove HEPA filter and all other filters by pulling out the white ribbon on the top. Step 4: Insert 2 Ozone plates found in the small brown box. Step 5: Reinstall all filters in the same order they were removed and reattach back cover. - Page 7 Suggested locations, listed in order of preference: Nearest to the source of the worst pollutant. Near cold-air return in an air circulation system. In the area most frequently used to achieve maximum benefit. Notes: For maximum control, the unit should be placed where easy access to the ...
-
Page 8: Settings And Adjustments
8. SETTINGS AND ADJUSTMENTS Buttons function and Operation Descprition Name Function and operation instruction Power Turns Air purifier on and off. LCD screen Shows all settings. 5 speed fan to adjust fan speed, note: the coverage area changes 200 sq. ft each time you press the fan button. 5 different settings to adjust ozone output, “1-2-3-4-5-0”, PURIFY note: the coverage area changes 200 sq. -
Page 9: Lcd Display
LCD Display Name LCD display Fan speed Press FAN button to increase or decrease fan speed. status LCD display warns you when coverage area is more than Warnings 2400 sq.ft. Dispays current coverage setting 1000- 3000 sq. ft. Coverage area Coverage area changes 200 sq. - Page 10 Remote control function and description Name Function and operation instruction Power Turns Air purifier on and off. Press once for 1200 sq.ft. SLEEP mode. Sleep mode Press 2 time for 1000 sq.ft. SLEEP mode. Fan speed Press this button for higher fan speed. increase Fan speed Press this button for lower fan speed.
-
Page 11: Maintenance
9. MAINTENANCE Periodic maintenance is required to ensure proper operation of your air purifier. A severely polluted environment can foul ozone plates in as little as four weeks. Shown here are basic maintenance procedures that should be carried out to keep your unit running at top performance. -
Page 12: Replacing The Fuse
10. REPLACING THE FUSE A fuse holder is located on the back of the unit next to the power cord. To replace or check the fuse: Remove the fuse holder by pressing on the clip and pulling it straight out. ... -
Page 13: Troubleshooting Guide
11. TROUBLESHOOTING GUIDE 1. I have plugged in the unit, turned the power switch to "On" and nothing is happening. What's wrong? Make sure the electrical outlet is capable of providing power to the unit. Check the back cover located at the back of the unit to make sure it ... -
Page 14: Warranty Information
12. Warranty Information: If your unit fails to operate properly after performing trouble-shooting, contact your authorized dealer you purchased the unit from for further assistance. The air purifier comes with a 3-year Factory Warranty that covers the entire unit (except for filters and ozone plates which may need replacing as they get dirty). For warranty assistance contact the company you bought the air purifier from for authorized warranty service.
Need help?
Do you have a question about the Breeze 2 and is the answer not in the manual?
Questions and answers
My remote does not work. I replaced the battery with a CR 2032 as it says on the back of the remote. The Battery in the unit (original) is a CR 2025. Which battery should I use? How do I get this remote to work? The only thing the remote does is turn the unit on and off with both batteries. Please advise.
@Gary DeMaria