Table of Contents
Advertisement
Quick Links
FOR AGES:
3 - 7
WEIGHT LIMIT:
150
Lbs
68 Kgs
ADULT(S) NEEDED:
TOOLS NEEDED:
WARNING/ADVERTENCIA
• Please read all the instructions before using
this product.
• Consult a physician before beginning any
exercise program or strenuous activity.
• Do not allow more than one person on this
product at any time.
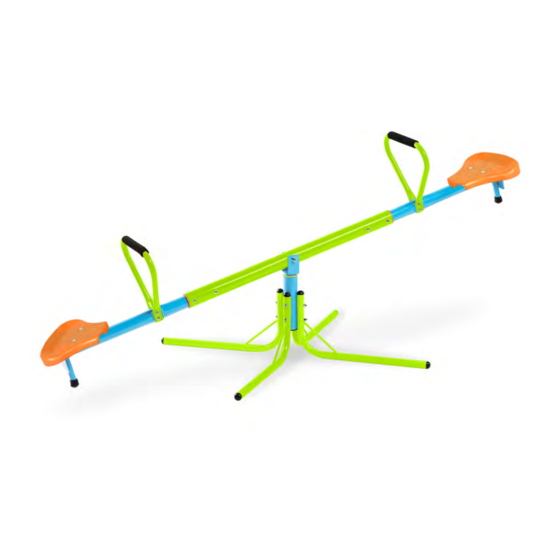
KIDS SWIVEL SEE SAW
MODEL# 9307SS
PRODUCT MANUAL - VERSION 02.18.01
• Adult supervision is required.
• ADULT ASSEMBLY REQUIRED.
• The contents of this package are not suitable
for children under 3 years of age. Contains
small parts which may cause choking.
CUSTOMER SERVICE
GQBrands.com
CustomerService@GQBrands.com
1-866-498-5269
4401 Sammuel Blvd #150
Mesquite, TX 75149
Advertisement
Table of Contents

Summary of Contents for Pure Fun 9307SS
- Page 1 KIDS SWIVEL SEE SAW MODEL# 9307SS PRODUCT MANUAL - VERSION 02.18.01 FOR AGES: 3 - 7 WEIGHT LIMIT: 68 Kgs ADULT(S) NEEDED: TOOLS NEEDED: WARNING/ADVERTENCIA CUSTOMER SERVICE • Please read all the instructions before using • Adult supervision is required.
-
Page 2: Customer Service Information
CUSTOMER SERVICE INFORMATION Thank you for purchasing: KIDS SWIVEL SEE SAW MODEL# 9307SS At Global Quality Brands®, we want all of our customers to be To order these parts, or if you have any other questions or concerns completely satisfied with their purchase. Please take time to review... -
Page 3: Limited Warranty
TO USE. ALL MERCHANDISE IS SOLD ON THIS CONDITION, WHICH NO products are not covered by the product warranty. No other warranty REPRESENTATIVE OF GQ BRANDS® CAN WAIVE OR CHANGE. beyond that specifically set forth above is authorized by GQBrands®. MODEL# 9307SS... -
Page 4: Important Message
WARNINGS IMPORTANT MESSAGE WARNING - PLEASE READ ADULT ASSEMBLY REQUIRED CHOKING HAZARD - Small Parts NOT for children under 3 years of age. WARNING: While every attempt is made to ensure the highest degree of protection in all equipment, we cannot guarantee freedom from injury. The user assumes all risks of injury due to use. - Page 5 It is NOT intended for commercial applications and/or use in • ALWAYS secure the Swivel See Saw public areas such as schools, parks, against unsupervised use. nurseries, day schools, day cares, etc. MODEL# 9307SS...
-
Page 6: Assembly Warnings
ASSEMBLY WARNINGS • When you are ready to start, make sure that you have the correct tools • Enclosed are the current specifications and product features available at hand, and adequate space for assembly. Please refer to the table at time of printing, however, changes may be made in equipment, for part descriptions and numbers. - Page 7 M8 Washer M6 Washer M8 Washer Main Center Bar M8 Nut Upper Support Tube Plastic Tube between K & H Lower Support Tube Small Plastic tube on support Tube Main Side Bar Cap for leg Cap for Lower Support MODEL# 9307SS...
- Page 8 ASSEMBLY INSTRUCTIONS STEP 1: A. Secure a plastic seat (N) onto each end of the Side Bars (K) using 4x M6 25mm Bolts (E), 8x M6 Washers (F), 4x Lock Washers (G), and 4x Nuts (P), as shown in Figure 1. NOTE: Make sure that the Lock Washer is resting against each Nut.
- Page 9 NOTE: If you do not use the D1 bolts, be certain that you keep these bolts in a safe place in case they are needed in the future. MODEL# 9307SS...
- Page 10 ASSEMBLY INSTRUCTIONS STEP 3: WARNING: To avoid your fingers becoming caught during assembly, you must attach the bolts only as noted below. A. Attach 2x Seesaw Legs (L) to the Upper Support Tube: Using 2x M6 110mm Bolts, 4x M6 Washers, 4x M6 Lock Washers, and 2x Nuts attach 2 Legs (L) to the Upper Support Tube (I) as shown in the diagram.
- Page 11 6 feet in all when to replenish and/or redistribute the directions. surfacing. • Do not install loose fill surfacing over hard surfaces such as concrete or asphalt. • Poured-In-Place or Pre-Manufactured Rubber Tiles MODEL# 9307SS...
-
Page 12: Care And Maintenance
CARE & MAINTENANCE • IMPORTANT: While no regular maintenance • Regularly check to see if see saw seats, • Your see saw is designed to be very low is required, you must inspect the see saw steel tubes, and other parts are tightened maintenance.


Need help?
Do you have a question about the 9307SS and is the answer not in the manual?
Questions and answers