Table of Contents
Advertisement
Quick Links
FOR AGES:
WEI GHT LIMIT:
3-9
Manual en
español ubicado
en GQBrands.com
Spanish Manual located
at GQBrands.com
CUSTOMER SERVICE
GQBrands.com • CustomerService
@
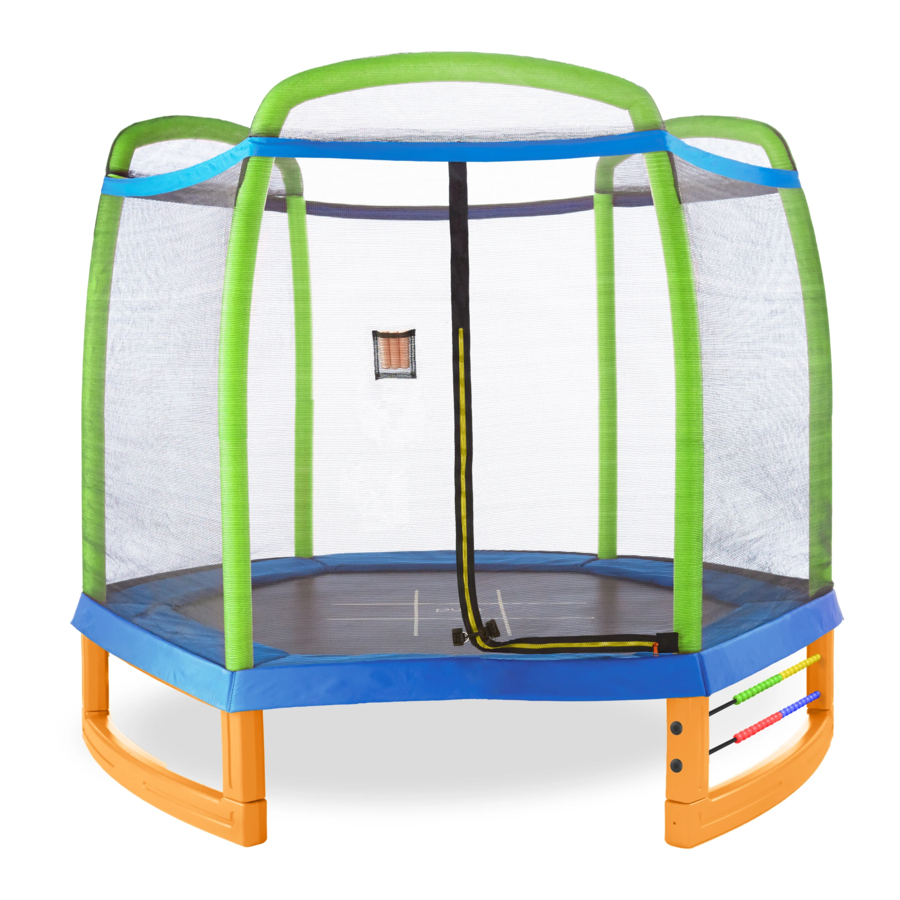
JUMP & PLAY 7-FOOT TRAMPOLINE SET
MODEL# 9307TS
PRODUCT MANUAL - VERSION 4.21.01
TO BUILD:
120
Lbs
54 Kgs
GQBrands.com • 1-866-498-5269 • 4401 Samuell Blvd, Ste 150, Mesquite, TX 75149
TOOLS NEEDED:
2
Tools
X
Provided
P A T E N T
P E N D I N G *
Advertisement
Table of Contents

Related Manuals for Pure Fun JUMP & PLAY 9307TS


Summary of Contents for Pure Fun JUMP & PLAY 9307TS
- Page 1 JUMP & PLAY 7-FOOT TRAMPOLINE SET MODEL# 9307TS PRODUCT MANUAL - VERSION 4.21.01 FOR AGES: WEI GHT LIMIT: TO BUILD: TOOLS NEEDED: Tools Provided 54 Kgs Manual en español ubicado en GQBrands.com Spanish Manual located at GQBrands.com CUSTOMER SERVICE GQBrands.com • CustomerService GQBrands.com •...
-
Page 2: Customer Service Information
CUSTOMER SERVICE INFORMATION Thank you for purchasing: Please Note: In the interest of better quality and value, we are constantly JUMP AND PLAY 7-FOOT improving and updating our product information. Most up to date manuals, warnings and product information can be found at: TRAMPOLINE SET https://www.globalqualitybrands.com/warnings MODEL# 9307TS... -
Page 3: Important Message
WARNINGS IMPORTANT MESSAGE Please read all of the warnings and directions below prior to assembly. This trampoline comes equipped with warnings and instructions for the assembly, care, maintenance and use of the trampoline. This information must be read by all trampoline supervisors and users before any person is allowed to jump on the trampoline. -
Page 4: Warning Label Locations
WARNING LABEL LOCATIONS WARNING ADVERTENCIA DO NOT attempt or allow somersaults. Landing on the head or neck NO intente ni permita saltos mortales. Aterrizar sobre la cabeza o el can cause serious injury, paralysis, or death, even when landing in the cuello puede causar lesiones graves, parálisis o la muerte, incluso al middle of the bed. - Page 5 WARNINGS & SAFETY INFORMATION Please read these warnings and the information in this manual in its entirety. Failure to comply with the following instructions may increase the risk of serious injury and/or death: • ALWAYS remove jewelry, belt buckles or •...
-
Page 6: Product Safety Information
You can purchase an the equipment under any circumstances to avoid the ANCHOR KIT for your trampoline from Pure Fun, by risk of electrocution. visiting us on the web at: www.PureFun.Net •... -
Page 7: Basic Trampoline Skills
BASIC TRAMPOLINE SKILLS Fundamental Bounce Knee Drop Start from a standing position with your head erect Start bouncing from a standing position, keeping your and your eyes on the frame pad. eyes on the frame pad. Swing your arms forward and up in a circular motion. Land on your knees, keeping your back straight and Bring your feet together and point your toes downward your body erect. - Page 8 BASIC TRAMPOLINE SKILLS Half Turntable Swivel Hips Start from the front drop position and push to the left Start with a seat drop. or right with your arms to begin turning your body in Turn your head to the left or right and swing your arms the opposite direction.
- Page 9 BUILDING YOUR TRAMPOLINE This is a 2 person build. Time for build is approximately 2 hours. Choose a good location: On the surface that is soft (wood chippings, sands or grass). Ensure adequate overhead clearance. A minimum of 24ft. (7.3m) from ground level, away from wires, trees and othe possible hazards.
-
Page 10: Parts List
PARTS LIST Jump Mat and Frame Pad Top Rail Corner Top Rail with Socket 5A - 5B - Vertical Leg Extension Plastic Vertical Leg Extension Plastic Vertical Leg Extension-Abacus Plastic Horizontal Leg Base Galvanized Spring 8A - Straight Enclosure Pole Straight Pole Foam 9A - Curved Enclosure Pole... - Page 11 PARTS LIST 11 - 12 - Enclosure Netting Plastic Flat Plate 13 - Chalk Set 14 - Wrench 15 - Spring Washer 16 - 17 - Spring Loading Tool Arc Washer Allen Wrench M8 Nut 18 - Flat Washer Screw Green Abacus Ball Metal Rod Red Abacus Ball...
- Page 12 ASSEMBLY INSTRUCTIONS STEP 1 M8 Nut Flat Washer Tighten to the metal rod the hardware shown to ensure it doesn’t escape. Insert the Metal Rod (22) from the larger TOP opening of he Plastic Vertical Leg Extension (5B) for the Abacus. STEP 2 Red Abacus Ball Blue Abacus Ball...
- Page 13 ASSEMBLY INSTRUCTIONS STEP 3 M8 Nut Flat Washer Push the Vertical Leg Extension towards the Abacus balls to be able to secure the Metal Rod using the hardware provided. STEP 4 Plastic Flat Plate Using 2 Abacus Flat Caps (12), place 1 on each side of the Leg Extension to avoid the metal rod from escaping.
- Page 14 ASSEMBLY INSTRUCTIONS STEP 5 M8 Nut Flat Washer Tighten to the metal rod the hardware shown to ensure it doesn’t escape. Insert the Metal Rod (22) from the larger BOTTOM opening of he Plastic Vertical Leg Extension (5B) for the Abacus. STEP 6 Green Abacus Ball Yellow Abacus Ball...
- Page 15 ASSEMBLY INSTRUCTIONS STEP 7 M8 Nut Flat Washer Push the Vertical Leg Extension towards the Abacus balls to be able to secure the Metal Rod using the hardware provided. STEP 8 Plastic Flat Plate Using 2 Abacus Flat Caps (12), place 1 on each side of the Leg Extension to avoid the metal rod from escaping.
- Page 16 ASSEMBLY INSTRUCTIONS STEP 9 Locate all the Vertical Leg Extensions (4) and twist the Plastic Flat Plates (12) until snug. To make sure they are secure and properly tightened, use the Allen wrench provided. STEP 10 Insert the 2x Vertical Leg Extensions at both openings of the Plastic Horizontal Leg Base (6).
- Page 17 ASSEMBLY INSTRUCTIONS STEP 11 Slide the completed Abacus into the Vertical Leg Extensions with the bottom portion closest to the Horizontal Leg Base The emboss indent at he bottom of the legs will align to the openings of the Horizontal Leg Base.
- Page 18 ASSEMBLY INSTRUCTIONS STEP 13 The Straight Enclosure Poles should have Foam (8A) already pre-installed. Slide into the corner Top Rails from the upper opening, and slide the Top Rail to the arms of the corners. NOTE: Just like the Corners, the openings of the Top Rails must be facing upwards for the springs to be installed...
- Page 19 ASSEMBLY INSTRUCTIONS STEP 15 Complete two more assembled legs STEP 16 Model# 9307TS...
- Page 20 ASSEMBLY INSTRUCTIONS STEP 17 STEP 18 15- Spring Washer M8 Nut Arc Washer 18- Screw 19- Allen Wrench Align all the openings, and with the Screw (18) facing the outside, tighten all hardware shown using the Phillips Screwdriver from the Allen Wrench (19) GQBrands.com CustomerService@GQBrands.com...
- Page 21 ASSEMBLY INSTRUCTIONS STEP 19 3 Completed Legs STEP 20 Once you have 3 completed sections, slide the remainder of the Top Rails facing upwards to the legs of the trampoline. Model# 9307TS...
- Page 22 ASSEMBLY INSTRUCTIONS STEP 21 Place the Jump Mat and Frame Pad (1) with the Logo and Tic-Tac-Toe facing upwards. Each corner of the Jump Mat and Frame Pad will have an opening. Slide the Straight Frame Tubes through these openings. The loop is elastic giving you enough give to stretch and insert.
- Page 23 ASSEMBLY INSTRUCTIONS STEP 23 To ensure that Jump Mat and Frame Pad won’t suffer from any excessive tension that will cause ripping or tearing on the Mat, the springs must be installed in a specific order. Follow the Spring order shown for the best way to properly install and secure the Jump Mat and Frame Pad to the Top Rails.
- Page 24 ASSEMBLY INSTRUCTIONS STEP 24 All ribbons must be attached and secured to the Top Rail to make sure no skipping, tearing, or loose jumping occurs STEP 25 Assemble 3 Upper Arcs GQBrands.com CustomerService@GQBrands.com 1-866-498-5269...
- Page 25 ASSEMBLY INSTRUCTIONS STEP 26 3 Completed Upper Arcs STEP 27 Slide all 3 completed upper arcs to the top section of the Curved enclosure poles NOTE: Make sure arcs are placed away from horizontal bases as shown. Model# 9307TS...
- Page 26 ASSEMBLY INSTRUCTIONS STEP 28 Place the Enclosure Netting (11) on top of the trampoline making sure all arcs are inside. The zipper and safety buckle must be facing the outside of the trampoline. GQBrands.com CustomerService@GQBrands.com 1-866-498-5269...
- Page 27 ASSEMBLY INSTRUCTIONS STEP 29 Pull the Enclosure Netting all the way to the bottom of the trampoline mat. Place all the hoods on top of the netting to each corresponding arc. Push the Velcro between both section to make sure the hood stays on top of the arc of the enclosure.
- Page 28 ASSEMBLY INSTRUCTIONS STEP 30 Secure on the bottom the Enclosure Ribbons to the Top Rail from the Safety Net STEP 31 When the Trampoline is not in use, make sure to close the Enclosure Netting door by using the zippers. For extra security, close the clasps from the outside as shown until the click.
- Page 29 ASSEMBLY INSTRUCTIONS STEP 32 When the trampoline is not in use, make sure to store and put away the chalk in a dry and safe place. Chalk is not resistant to rain or elements and will break if left untended. Model# 9307TS...
-
Page 30: Frequently Asked Questions
FREQUENTLY ASKED QUESTIONS • Question: “The foam padding or mat is • Question: “I had a part missing from damaged, what should I do?” my box” or “something was damaged in shipping, can you send it to me?” Answer: If you are still within your warranty period (90 Days from initial Answer: If it has been 30 days or less purchase) you should contact customer...
Need help?
Do you have a question about the JUMP & PLAY 9307TS and is the answer not in the manual?
Questions and answers