Table of Contents
Advertisement
Advertisement
Table of Contents

Related Manuals for AFINIA LABEL Afinia L501


Summary of Contents for AFINIA LABEL Afinia L501
- Page 1 Afinia L501 Label Printer User Manual Version 1.0.0...
- Page 2 Afinia Label Copyright © 2017 Afinia Label. All rights reserved. No part of this document may be photocopied, reproduced, or translated to another language without the prior written permission of Afinia. Trademarks Firefox is a trademark of the Mozilla Foundation.
-
Page 3: Table Of Contents
Software Tools ............................28 Afinia L501 Toolbox ..........................28 Afinia L501 Ink Cost Calculator ......................30 Add Afinia L501 Network Printer Utility ..................... 32 Printer Maintenance ........................... 33 Replacing an Ink Cartridge ........................33 Dye or Pigment Ink Cartridges ......................33 Changing Printheads .......................... - Page 4 General dust and debris removal ....................... 35 Cutter Maintenance ..........................35 Print Path Maintenance ........................36 Print Carriage Sensor Maintenance ....................36 Pinch Roller Maintenance ........................37 Unwinder Maintenance ........................37 Ink Tray Maintenance ......................... 38 Troubleshooting ............................39 Control Panel LED ............................ 39 Poor Print Quality or Incorrect Printout ....................
-
Page 5: Setting Up The Printer
See the full L501 Label Printer instructional video library at When you see this icon, click for http://afinialabel.com/l501info available video links! Setting up the Printer In the Box Afinia L501 Label Printer 4 Ink Cartridges (1 each) USB Cable Power Supply and Cord Will be either Dye-based or Pigment-based,... -
Page 6: Parts Of The Printer
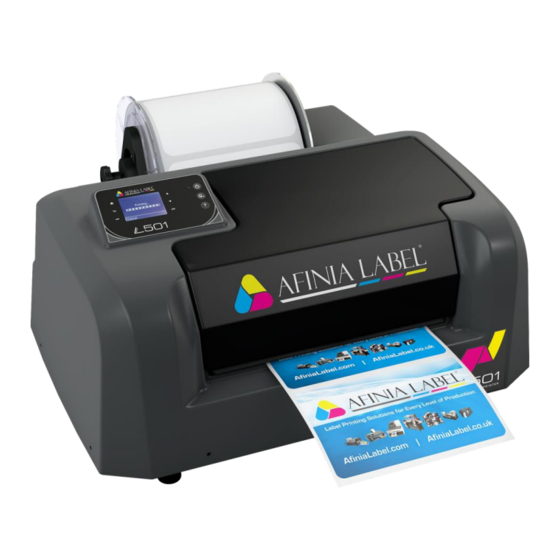
Afinia Label Parts of the Printer Unwinder Ink Cartridge Access Door Control Panel Label Output Front view Rear view Label Guide Network Connection Label Input USB Connection Power Connection 6 | Setting up the Printer... -
Page 7: The Control Panel
L501 Label Printer The Control Panel Up Button Power Button Home Button Back Button Unload Media Down Button Accept Left Option Button Help Button OK/Accept Right Option Button The control panel includes nine buttons to help you navigate through the menu to the various controls and functions. -
Page 8: Unpacking, Setup, And Installation
Afinia Label Unpacking, Setup, and Installation Remove Tape and Foam Lift top foam from the box Remove the Accessory box from the box Lift printer from box Remove the packaging tape from the printer cover (x2) and Ink... -
Page 9: Install Printer Driver
Always trust software from Microboards Technology LLC in the first window. The Afinia Label L501 Label Printer can be connected directly to a PC by USB or can be set up as a network printer. If connecting directly to the PC, click the USB button. -
Page 10: Usb Connection
IP address. For more information on network settings, please see page 19. At the end of the installation, click the Network button to launch the Add Afinia L501 Network Printer utility. 10 | Setting up the Printer... -
Page 11: Install Ink Cartridges
Close the Network Printer Utility once the printer has been added, then click Finish to close the installer. For more information on using the Add Afinia L501 Network Printer utility, please see page 32. Install Ink Cartridges ... - Page 12 Dye or Pigment Ink Cartridges The Afinia L501 can use either the supported Dye-based or Pigment-based ink cartridges. The Afinia Label L501 Label Printer comes with a set of Dye- or Pigment- based cartridges. Each type must be used in separate printheads. To use a different type of ink, you will need to install a second printhead (see Changing Printheads on page 34).
-
Page 13: Align The Printheads
L501 Label Printer Align the Printheads To ensure the best print quality, a Printhead Alignment is triggered the first time the printer is turned on. To perform the alignment: 1. Loosen Unwinder knob and remove end plate 2. Turn mandrel so one of the flat surfaces faces the back of the printer 3. -
Page 14: Using The Printer
L501 Label Printer Chapter 2 Using the Printer Choosing Label Media Ensure that the label media meets the requirements for the printer: Table 1: Media Specifications Media Type and Dimensions Inkjet-printable coating required Media type Gloss, semi-gloss, and matte 1.5” to 8.625” (38.1 mm to 219 mm) Roll Width 1.0”... - Page 15 L501 Label Printer Figure 2: Gap (Transmissive) Media Minimum Maximum 0.125” (3.0 mm) 0.3” (8.0 mm) 0.5” (12.7 mm) 1.5” (38.1 mm) 8.625” (219 mm) 0.75” (19.1 mm) 48.0” (1.219 m) Direction of travel through printer as seen from above Figure 3: Black Mark (Reflective) Media Minimum Maximum...
-
Page 16: Loading The Printer
Afinia Label Loading the Printer The Afinia Label L501 Label Printer requires a 3” ID core with the labels would face out. 1. Cut a clean leading edge on media being loaded a. No partially peeled labels b. No folded edges 2. -
Page 17: Using The Control Panel
L501 Label Printer Using the Control Panel Navigate through the menu by using the Up and Down buttons to highlight your choice and click OK. Help Screen Press the Help button Printer Information: Displays Printer Name, Product Number, Serial Number, Service ID, and Firmware Version Home Screen Go to Setup menu... -
Page 18: Cartridge Information
Cartridge Information Select Cartridge Information on the Home Screen and press OK. Estimated Levels Press OK when selected to view an estimate of the ink levels. This shows the same levels as the Afinia L501 Toolbox. 18 | Using the Printer... -
Page 19: Network
L501 Label Printer Cartridge Low Alert Use the Up and Down buttons to set Alert levels to either Automatic or Custom; press OK when the correct option is selected. Alert levels can be set for each cartridge. If set to Custom, use the Up and Down buttons to set the percentage remaining and click OK when each percentage is set. - Page 20 Afinia Label Ethernet Settings : Advanced Settings (continued) IPv6 This option allows you to turn IPv6 addressing (default) or Off. Host Name and Bonjour Name You can change the Host Name and Bonjour Name with these options. Confirm that you want to change the name by pressing the button when prompted.
-
Page 21: Printing Labels
L501 Label Printer Printing Labels 1. Select the Print command from your application. 2. Select the L501 printer and click the Setup, Properties or similar button. 3. The print settings displayed are the defaults that were set in the printer driver. 4. - Page 22 Afinia Label Settings Set Top and Left print offsets (see below) Select Units of measurement Select Media Inches Roll to Cut Millimeters Roll to Roll No Cut Select Media Type Die Cut Black Mark ...
-
Page 23: Adjusting Alignment For Printing
L501 Label Printer Adjusting Alignment for Printing NOTE: Offsets are made looking at the printed labels right-side up, not as they are printed. NOTE: Top Offset does not apply to Continuous media. Use the Cutter Adjustment to change the amount of unprinted space at the top Left Offset of continuous labels. -
Page 24: Selecting Media Size
Afinia Label Selecting Media Size Change the Media Size by going into the Printer Preferences. 1. Click Advanced on the Layout Paper/Quality 2. Select the correct entry from the Paper Size list and click OK 24 | Using the Printer... -
Page 25: Creating Custom Media Sizes
L501 Label Printer Creating Custom Media Sizes From Advanced Options: Click Manage Custom Sizes and then Properties 2. Check Create a new form 3. Enter the new Form name 4. Enter the Width and Height 5. Click Save Form, then Close NOTE: The new size will not be available until you close the printer preferences. -
Page 26: Canceling A Print
Afinia Label Canceling a Print 1. Display reads “Printing…” 2. Press cancel 3. Display reads “Canceling…” 4. Wait for labels to eject and stop Out of Paper The display will give an out of paper message if a print job is sent without media loaded. -
Page 27: Wrong Media
L501 Label Printer Wrong Media If the media loaded in the printer does not match the Media Type selected in the Preferences, the printer may not print. Media mismatches that will result in an error state are: Continuous loaded, Die Cut or Black Mark selected ... -
Page 28: Software Tools
Software Tools Afinia L501 Toolbox Open the Afinia L501 Toolbox using the desktop icon for printer utilities. If you hae more than one L501 connected to the computer, select the one you want to access. Several of the utilities require continuous label stock at least 4” wide. If media is not loaded before sending the prints, an Out of Paper state will result (see page 26). - Page 29 L501 Label Printer Device Services: Clean Printheads (requires minimum 4” wide continuous stock) If the Print Quality Diagnostic Page shows horizontal gaps in Test Pattern 2, press this button to clean the printheads. When the first cleaning round is complete, the Diagnostic Page will print again.
-
Page 30: Afinia L501 Ink Cost Calculator
Afinia Label Afinia L501 Ink Cost Calculator The Afinia Label L501 Label Printer includes an Ink Cost Calculator tool. Unless you are monitoring the full production print job, these numbers will be estimates only; many factors could change the actual ink usage during a longer print job. - Page 31 L501 Label Printer Configuration Menu : Cost The Cost of the ink cartridges used by the calculator can be changed in this window. You cannot open this menu option while the printer is printing. Manual Menu : Manual End Capture If for some reason the Calculator doesn’t give you the results of a job that completed printing, click the Manual menu and select Manual End Capture to force an ink usage check.
-
Page 32: Add Afinia L501 Network Printer Utility
If you’ve already installed the L501 software and want to add a network L501 printer that is already on your network, use the Add Afinia L501 Network Printer utility to easily connect your computer to the printer. All you will need to know is the IP Address of the printer. -
Page 33: Printer Maintenance
Replacing an Ink Cartridge Dye or Pigment Ink Cartridges The Afinia L501 can use either the supported Dye-based or Pigment-based ink cartridges. However, each type must be used in separate printheads. To use a different type of ink, you will need to install the second printhead (see Changing Printheads on page 34). -
Page 34: Changing Printheads
Afinia Label Changing Printheads The printhead should be changed if you are switching between dye-based ink and pigment-based ink or if print quality issues persist after cleaning and replacing cartridges. Open the Ink Cartridge Access Door Remove ink cartridges If you are changing from one ink type to another, it is recommended that you keep the ink cartridges in the printhead being removed. -
Page 35: Guidelines For Preventative Maintenance
L501 Label Printer Guidelines for Preventative Maintenance Occasional maintenance to remove dust and debris is required for best performance. Do not substitute where lint-free cloth is called for. Using paper towels or regular cloth could damage the printer. General dust and debris removal Tools: Small low-suction hand-held vacuum or compressed air for electronics;... -
Page 36: Print Path Maintenance
Afinia Label Print Path Maintenance With use, ink may accumulate on the plate below the print path. Tools: Lint-free cloth; isopropyl alcohol 1. Turn off printer and unplug 2. Open Cartridge Access door 3. Clean the plate below the print path with a lint-free cloth dampened with alcohol 4. -
Page 37: Pinch Roller Maintenance
L501 Label Printer Pinch Roller Maintenance Tools: Lint-free cloth; isopropyl alcohol 1. Close Cartridge Access door 2. Turn off and unplug printer 3. Open Cartridge Access door 4. Clean each white pinch roller (outlined in green) using lint-free cloth dampened with alcohol 5. -
Page 38: Ink Tray Maintenance
Afinia Label Ink Tray Maintenance With use, the waste Ink Tray pad may become saturated and need to be cleaned. Tools: Nitrile or latex gloves; paper towels, plastic spoon 1. Turn off printer 2. Remove tray from right side of printer 3. -
Page 39: Troubleshooting
L501 Label Printer Chapter 4 Troubleshooting See the full L501 Label Printer Troubleshooting video here Control Panel LED The LED on the control panel indicates a number of printer states: Display 1. Power cable not plugged in 2. Plugged in, but power button not pressed Always On Printer on, stock loaded (ready) -
Page 40: Poor Print Quality Or Incorrect Printout
Afinia Label Poor Print Quality or Incorrect Printout Print Problem Possible Cause Resolution Printhead alignment Toolbox : Device Services : Align Colors not aligned needed Printheads 1. Toolbox: Device Services : Clean Printhead cleaning Printheads needed 2. Run Second Level Clean if needed 1. - Page 41 L501 Label Printer Print Problem Possible Cause Resolution Length of two labels fed through blank, Wrong Media Type Load correct media type and press OK, cuts, media unloads; selected in Settings or press Cancel. LED blinking Cancel job or load media and press OK No paper in printer Printer not printing If using Die Cut or Black Mark media,...
-
Page 42: Clearing A Media Jam
Afinia Label Clearing a Media Jam If the media jams, follow these steps to clear the printer: 1. Turn off printer from control panel and unplug power cord 2. Open Cartridge Access door Cut exposed labels 3. Cut any media past the print zone and pull slowly out through front 4. -
Page 43: L501 Label Printer Control Panel Menu
L501 Label Printer L501 Label Printer Control Panel Menu 1. Setup Printer Settings i. Preferences Date and Time User inputs are in italics. Date Default settings are in bold. i. Enter Date Media needed is in blue. b. - Page 44 Afinia Label 3. Network Ethernet Settings i. View Ethernet Details Can View or Print a. Print requires minimum 4” wide continuous stock ii. Advanced Settings IP Settings a. Automatic b. Manual (Static) i. IP Address 1. Enter IP Address ii. Subnet Mask 1.
-
Page 45: Technical Support
Technical Support For technical questions or support issues, contact Afinia Label Technical Support: PH: 952-279-2643 support@afinia.com www.afinialabel.com/support Please have the Serial Number of your Afinia Label L501 Label Printer available when contacting Technical Support. Date of Purchase: Place Purchased: Serial Number:...
Need help?
Do you have a question about the Afinia L501 and is the answer not in the manual?
Questions and answers