
Related Manuals for AFINIA LABEL AP200


Summary of Contents for AFINIA LABEL AP200
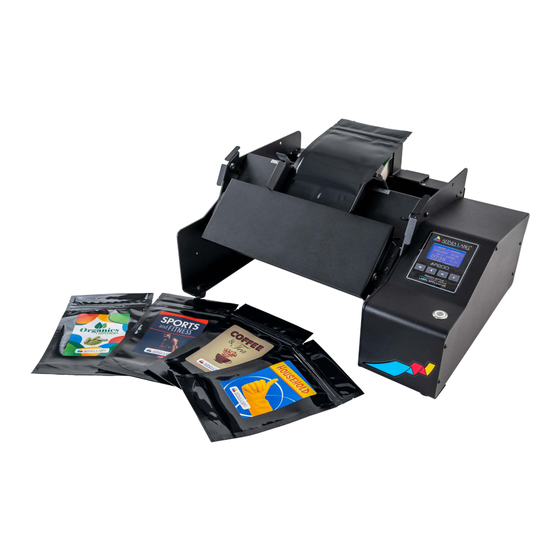
- Page 1 LABEL APPLICATOR BAGS and POUCHES AP200 User Manual V.2.01 www.afinialabel.com...
-
Page 3: Table Of Contents
Content 1. Introduction ....................page 3 Applicator Operation ..................page 4 Description ....................page 5 Scope of delivery ..................page 5 Technical data .................... page 5 Noise information ..................page 6 2. General safety instructions for handling electrical appliances. Safe work ....................page 7 Specific safety instructions ................. -
Page 4: Introduction
In the present Operation Manual have been used the following pictograms. Read the User Manual! Follow safety warnings and instructions! Protect yourself from electric shock. Danger to life! Keep children away from the machine! Risk of life from electric shock when a power cord or plug is damaged! Dispose packaging and appliance in accordance with... -
Page 5: Applicator Operation
Applicator operation The machine is specifically designed to apply labels to a bag or pouch. The labels must be on a single roll or arranged in order on the roll for two label applications. To operate the machine, place the bag or pouch into the guide plate, between the adjustable guides, and the system will automatically start. -
Page 6: Description
Power on / off switch Label roll core holder Label gap sensor Guide shaft Label roll guides Included Items: - 1 AP200 label applicator - 1 power cable 110V or 220V - 1 User manual Technical data. 110V, 60Hz or 220V, 50Hz Supply voltage: Power consumption: <... -
Page 7: Noise Information
fig. 1.1 fig. 1.2 Noise information. Noise level <75dB. - 6 - V.2.01 www.afinialabel.com... -
Page 8: General Safety Instructions For Handling Electrical Appliances
2. General safety instructions for handling electrical appliances. Attention! The following safety precautions must be observed when using electrical appliances to protect against electric shock, risk of injury and fire. Read all of these instructions before using the machine. -Keep the workplace in clean. Clutter in the work area can lead to accidents. -Ensure good lighting in the workplace. -
Page 9: Operating Instructions
3. Operating instructions Attention ! Operators working with this machine (AP200) should be familiar with the user manual. Installation: The machine should be placed on a flat, horizontal surface larger than its base. Provide space around the machine for maintenance, servicing and handling. Only use the power cord supplied with the unit. -
Page 10: Power On
Loading labels and setting up the label sensor. The machine is loaded with a label roll meeting the requirements described in the specifications section. For better access, the media path assembly can be raised. The procedure is performed with the power off. Refer to Chapter 7 - Loading labels. The gap sensor is calibrated with the power on. -
Page 11: Labeling
Labeling The labeling procedure is done by placing a bag in the media path assembly. The display shows executing. When labeling is completed, the machine stops and the label counter increases. Any time you press and hold the button for more than 3 seconds, the counter resets. -
Page 12: Offset Start
The beginning of the bag Offset start Minimum distance Direction of movement 40mm Figure 4.1 The online tool to calculate the values can be found on our website, https:// afinialabel.com/calculate-ap200. This QR code will take you to the webpage. - 11 - V.2.01 www.afinialabel.com... -
Page 13: Offset Stop - Mode 1 Label
Determination of ‘Offset stop’ The online tool to calculate the values can be found on our website, https:// afinialabel.com/calculate-ap200. This QR code will take you to the webpage. Determines the correct position of the next label. There are 3 possible scenarios and they are shown on Figure 5.1... -
Page 14: Offset Stop 1, Offset Stop 2 - Mode 2 Labels
6. Offset stop 1, Offset stop 2 - mode 2 labels. Determination of ‘Offset stop1’,‘Offset stop2’ Determination of Offset stop1 and Offset stop 2 to the right positioning of the beginning end of the following (subsequent label) to the peeling edge. There are some possible variants: Scenario 1: 100mm... - Page 15 Scenario 3: 103mm Front label < 100mm Rear label < 100mm - Figure6.3. Label Label Label There are three options: long short long a). - the sum of the lengths of the two L > 103mm labels and the gap is greater than or equal to 103mm.
-
Page 16: Loading Labels
7. Loading labels. Label rolls are loaded according to the Label Path Diagram - Figure 7.1. The Label roll is placed on Stand for label roller. Pressing shaft is unlocked by lifting the levers on both sides. It is best to remove labels from the roll and the follow the diagram below for loading the label stock. -
Page 17: Calibrating Up The Label Sensor
8. Setting up the label sensor ULTRASONIC LABEL SENSOR The label stock must travel far enough inside the sensor, going past the side arrow markings. The sensor and the label stock must be at rest during calibration! 1. Position the label stock on a gap. Figure 8.1. button for more than 3 seconds - 2. -
Page 18: Working With The Menu And Changing Parameters
9. Working with the user menu and changing parameters. Select ‘ONE LABEL’ mode. SELECT MODE To change modes, press and hold the M button for 3 seconds. Use the ------------------------------ button to select the ONE LABEL mode. (Figure 9.7). Press the M button. The >... - Page 19 The next screen is OFFSET START 2 (Figure 9.14). Refer to chapter 4 to OFFSET START 1 ------------------------------ determine this value. ------------------------------ Enter the OFFSET START 2 value by pressing the button. Once the number [001 ... 999 mm] < is correct, press the button, to move to the next digit.
-
Page 20: Working With The Service Menu And Changing Parameters
Working with the service menu and setting parameters MODE 1 LABEL Access to the parameter change menu is password protected. When you are on ------------------------------ PROGRAM №00 the main screen (Figure 10.1), press and hold the C and M buttons at the same WAIT START time, for 3 seconds. - Page 21 NOTE: The speed of the motor can be changed but should only be done when SPEED instructed by a support technician. Use the button to change the value. Press ------------------------------ 2000 < button to move to the next digit. The value must be between 1000 and 3500 ------------------------------ Hz (Figure 10.7).
-
Page 22: Errors And Actions
11. Errors and events. The rotation of the shaft that moves the bag stops. ERROR 10 (Figure 11.1) MODE 1 LABEL ------------------------------ Possible causes: PROGRAM № 00 ERROR № 10 0006 - Incorrectly entered value for the length of the bag. Measure and 2,2s enter a correct value. -
Page 23: Adjust The Brightness And Contrast Of The Display
Adjusting the brightness and the contrast of the display The menu for changing the display settings is accessed from the operating mode - Figure 12.1. MODE 1 LABEL ------------------------------ PROGRAM №00 WAIT START 0000 0,0s NUMBER LABELS Press and hold the button for 3 seconds. -
Page 24: Service Menu - Counters
Information service menu - counters The menu provides information about number of machine cycles, TC:000000000 number and type of errors as well as last error (Figure 13.1): E10:000 E11:000 E12:000 E13:000 TC:000000000 - total counter of the machine; E14:000 Ехх:000 - error number, number of times;... -
Page 25: Maintenance And Cleaning
15. Maintenance and cleaning Attention! Risk of injury! Always disconnect the plug from the socket before performing any work on the machine. The labeling machine does not require any technical maintenance within the specified service life. Clean the exterior surfaces as needed. Use a brush or a dry cloth. -
Page 26: Warranty
17. Warranty General conditions The applicator is manufactured with care and has been tested thoroughly. It is designed for use in typical climatic conditions and in an environment with normal safety regulations. Please do not expose it to liquids or gases that may harm the external surfaces. -
Page 27: Contact Support
20. Contact Support United Kingdom: USA: PH: 44-845-250-7949 PH: 952-556-1608 Email: support@afinia.co.uk Email: support@afinialabel.com Afinia Label Afinia Label 7 Harriott Drive 8150 Mallory Court Heathcote Industrial Estate Chanhassen, MN 55317 Warwick CV34 6TJ United Kingdom FCC Statement NOTE: This equipment has been tested and found to comply with the limits for a Class A digital device, pursuant to Part 15 of the FCC Rules.
Need help?
Do you have a question about the AP200 and is the answer not in the manual?
Questions and answers