Table of Contents
Advertisement
Quick Links
DLF Training
Contents
DLF Training .........................................................................................................................................................1
DLF-220L .......................................................................................................................................................3
DLF-350L .......................................................................................................................................................3
1.
Installation ...............................................................................................................................................4
Uncrating ......................................................................................................................................................4
Leveling ........................................................................................................................................................4
Waste Compactor Installation .....................................................................................................................5
Dongle and USB Connections .......................................................................................................................8
DLF Software Installation .............................................................................................................................9
2.
Artwork ................................................................................................................................................. 12
Artwork Layout ......................................................................................................................................... 12
Registration Mark (Blackmark) Requirements .......................................................................................... 12
Save the Master File .................................................................................................................................. 15
Save the Print File ..................................................................................................................................... 16
Save the Cut File ........................................................................................................................................ 16
Special Cut Line for perforations............................................................................................................... 16
3.
Loading Media and Laminate ................................................................................................................ 17
Loading Media ........................................................................................................................................... 17
Loading Laminate ...................................................................................................................................... 19
4.
Loading Cutter ....................................................................................................................................... 20
5.
Blade Exposure ...................................................................................................................................... 21
6.
Software Operation............................................................................................................................... 21
Positioning the reg mark in the software image ....................................................................................... 22
Setting the cut parameters ....................................................................................................................... 23
Cut Test ..................................................................................................................................................... 24
Start the cut job ........................................................................................................................................ 25
7.
Waste Removal and Rewinding ............................................................................................................ 26
8.
Slitting ................................................................................................................................................... 29
1
Advertisement
Table of Contents

Related Manuals for AFINIA LABEL DLF L Series


Summary of Contents for AFINIA LABEL DLF L Series
-
Page 1: Table Of Contents
DLF Training Contents DLF Training .................................1 DLF-220L ...............................3 DLF-350L ...............................3 Installation ...............................4 Uncrating ..............................4 Leveling ................................4 Waste Compactor Installation ........................5 Dongle and USB Connections ........................8 DLF Software Installation ..........................9 Artwork ..............................12 Artwork Layout ............................12 Registration Mark (Blackmark) Requirements ..................12 Save the Master File .......................... - Page 2 Adding or Removing Slitter Blade Holders ....................30 Output/Waste Roll Removal ......................... 31 Tension Arm Calibration ........................32 Advanced/Settings Features ......................33 Maintenance ............................. 36 General Cleaning ............................36 Lubrication ..............................36 Consumable Replacement ........................37 Troubleshooting ..........................38...
-
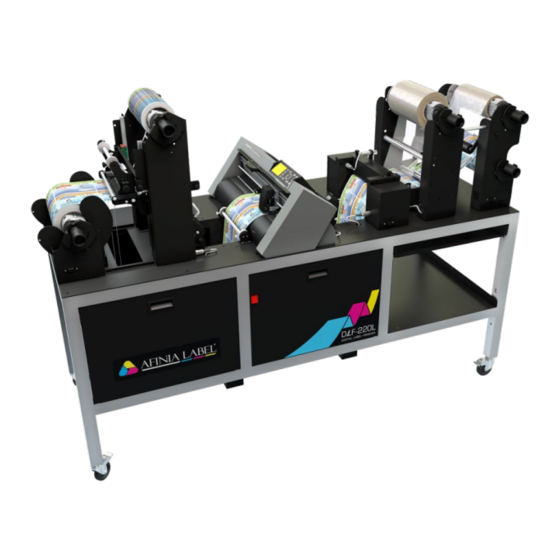
Page 3: Dlf-220L
DLF L Series DLF-220L DLF-350L Input / Output Roll Diameter 9.84” (250 mm) 9.84” (250 mm) Minimum Web Width 4.33” (110 mm) 4.33” (110 mm) Maximum Web Width 8.86” (225 mm) 14” (355 mm) Maximum Cutting Width 7.87” (200 mm) 13”... -
Page 4: Installation
1. Installation Team Lifting is required when moving any of the DLF Series Finishers! Uncrating 1. Remove screws from all clips on the front of the crate a. The top, left, and right sides will have 1 screw on each side of the clip b. -
Page 5: Waste Compactor Installation
Waste Compactor Installation The DLF-220L units come with a waste compactor assembly that needs to be installed once the unit is uncrated. The assembly is installed due to shipping onto the Laminate Mandrel Tower of the unit and looks like the below images when removed from the crate. - Page 6 The assembly is held temporarily with 4 Philips screws. Once the assembly is removed, it is to be installed above the Waste Take-up Mandrel as shown below.
- Page 7 In this location on the Waste Take-up Mandrel Tower there are 10 Philips screws pre-installed that need to be removed. Once the 10 screws are removed, you position the waste compactor onto the Waste Take-up Mandrel Tower and reinstall the screws. Once installed, the Waste Compactor Assembly can be locked in the up postion using the lock pin on the side of it as shown below.
-
Page 8: Dongle And Usb Connections
Dongle and USB Connections Verify power and USB connections to cutter, PC, and dongle is in place DLF-220L a. Power connection is located behind the left front panel, behind the center-left front support beam. The leftmost side panel on the operator side can be removed to view this plug location. -
Page 9: Dlf Software Installation
DLF Software Installation The DLF-Software needs to be installed on a Windows computer. You will want to disable any additional webcams/imaging devices on the computer so the Cutter’s Webcam is properly detected by the software. Run the installer BEFORE turning on the DLF and plugging into the computer. 1. - Page 10 5. Next screen is a confirmation window that the installer is ready to proceed. Click Next. 6. The installer will start running the installation process and provide a progress bar. Once the progress bar is finished a second window will pop up, Device Driver Installation Wizard. Click Next on the Device Driver Installation Wizard Window.
- Page 11 8. The next screen indicates that you might see a Digital Signature Driver install prompt when running this driver installer. Click Next. The next screen will show you the Graphtec Cutter Model Selection Screen. Check the model number on the top of the Graphtec cutter installed on your DLF unit. Select the appropriate Cutter name from the list (typically CE6000Plus or CE7000 depending on age of unit).
-
Page 12: Artwork
2. Artwork The requirements for the artwork, registration mark, and cut lines are the same across all current DLF models. Artwork Layout It is recommended that the artwork be designed to the width of the stock being used. This will help ensure during the design process that there is enough room on the stock for the artwork, registration mark, and any needed blank space for best operation of the finisher. - Page 13 Typical artwork layout, master file: Cut lines in the above file are the red lines. These would be hidden for printing. A. 8.5” wide to match stock width B. Approximately 0.15” horizontal gap between labels for good weeding C. Gaps at top and bottom provide enough separation of pages (> 0.125”) for good weeding D.
- Page 14 Less typical artwork layout, master file: Cut lines in the above file are the red lines. These would be hidden for printing. A. 8.5” wide to match stock width B. Approximately 0.15” horizontal gap between labels for good weeding C. Gaps at top and bottom provide enough separation of pages (> 0.125”) for good weeding D.
-
Page 15: Save The Master File
Unusual artwork layout, master file: This layout would be used to achieve maximum cut width, across the full width of the stock minus the pinch rollers. This type of layout is not an efficient use of stock, as about a half inch of waste between labels will be created. -
Page 16: Save The Print File
Save the Print File To create the Print file, hide the cut lines and save the file as a pdf (if not printing directly out of Illustrator). Save the Cut File To create the Cut file, show the cut lines, delete (don’t hide) the artwork layers, and save as a pdf (required for the cutter control software). -
Page 17: Loading Media And Laminate
3. Loading Media and Laminate Loading Media The DLF-L Series finishers have a maximum input roll OD of 9.84” (250mm) Laminate Roll Laminate Waste Roll Input Roll Tighten or loosen mandrel Clutch... - Page 18 Load the printed input roll onto the input mandrel, pushing the stock up against the mandrel plate. Turn the black knob clockwise to tighten the mandrel on the core. Loosen the thumbscrew on the clutch to change the clutch tension; tighten the thumbscrew when the tension is set correctly.
-
Page 19: Loading Laminate
Loading Laminate Like the media mandrel, the laminate also has a clutch (silver collar) that is used to hold the mandrel in place. Again, the clutch should be tightened only enough to keep the laminate from over-feeding. The laminate should be narrower than the stock; recommend ¼” narrower minimum. Because of this, the laminate should not be pushed all the way back to the laminate mandrel plate, but positioned so that it is centered on the loaded stock. -
Page 20: Loading Cutter
4. Loading Cutter With the right panel switch set to MANUAL, press the FORWARD button to feed media and laminate. The laminate will smooth out as material is being fed. If the laminate is past the edge of the stock, loosen the laminate mandrel and reposition the laminate to a more centered position. -
Page 21: Blade Exposure
5. Blade Exposure Blade exposure is critical to accurate cutting, and should be the same thickness as the material you are cutting through. Too little blade exposure will keep the cut from being clean. Too much blade exposure can result in cutting through the liner and potentially damaging the cut strip. -
Page 22: Positioning The Reg Mark In The Software Image
Once the software opens, you should see the following screen: Cut files are pdf format files. The cut file should only contain the registration mark and cut lines. No hidden layers, vector graphics, or guides are allowed. See Artwork starting on page 9 for more information. Click the Open PDF button to locate and select your cut file. -
Page 23: Setting The Cut Parameters
Setting the cut parameters Black-Mark Mode • o Distance between Black-Marks: When using registration marks, set the distance from the top of one black mark to the top of the next (same edge to same edge measurement). For better operation, adjust the distance figure accordingly if the registration marks ... -
Page 24: Cut Test
Check Force Added in DLF-Software version 2.0.7, there is now a Check Force option to allow you to test your cut force without needing to run an entire Cut Test at first. If you run this function, the cutter will take the input Cut Force as a reference point and cut out 5 squares on the material under the cutter head. -
Page 25: Start The Cut Job
Check Cut Position At the same time as the cut depth is checked, the cut position should be checked and corrected if needed. Adjust the position using the X and Y Offsets near the cut line preview on the left. The offsets are in millimeters. -
Page 26: Waste Removal And Rewinding
7. Waste Removal and Rewinding Once enough material is through the cutter, you can complete the stock path. With the left control switch set to OFF, run the stock under the output tension arm arm. With the clutch assembly lifted and locked, thread the media through the guide with the edge of the media against the rear fixed guide. - Page 27 Lower the clutch and lock it into place via the 7 corresponding holes on the side of the assembly. If you are using max width material (~8.5”), the bottom-most hole is the max you will need; additional pressure beyond that will overstress the rewind mandrels and cause damage to the units.
- Page 28 Be sure to pass the stock under the last roller! O-rings are included on the weed bar to improve the waste removal process. If the labels are fully cut but are lifting off the liner with the waste, position the O-rings so they are over the labels but not on the waste between them.
-
Page 29: Slitting
8. Slitting DLF-220L unit come with four slitter blade holders from the factory, you can add additional cutter blades to the slitter assembly. The slitter assemblies all include three positions: Up, Adjustment, and Slitting. The assembly is held in these positions using locking screws, two on the DLF-L series. -
Page 30: Adding Or Removing Slitter Blade Holders
Adding or Removing Slitter Blade Holders More slitter blade holders can added (purchased separately), with the condition being that the blades cannot be less than 0.75” apart due to the width of the blade holders. Remove the thumbscrew on the right side of the slitter assembly to release the bar (the bar is spring-loaded on the L Series). -
Page 31: Output/Waste Roll Removal
9. Output/Waste Roll Removal Once the job is finished, both the Output and Waste rolls need to be replaced. The Waste and Output Material Rolls are geared to the same turning ratio and will need to match to maintain proper tightness on the rolls and prevent overworking of the motors. -
Page 32: Tension Arm Calibration
Tension Arm Calibration The tension arm sensors occasionally need to be recalibrated; each arm is calibrated individually. The switch for the tension arm that is being recalibrated needs to be in the OFF or MANUAL position. 1. Locate the small programming hole to the right of the switch. -
Page 33: Advanced/Settings Features
Advanced/Settings Features Standard Day to Day operation of the DLF does not require usage of the DLF-Software Advanced Settings typically, but there are several settings that can be useful for certain jobs and scenarios. The following section will go through these settings and address their use cases. 1. - Page 34 a smoother curve edge but also slowing down the cutter as a result. When the option is set to Minimum, the curve approximation is reduced and the cutter will • slow down and make smoother, more accurate curved cuts. Setting it to High will run the cutter at full speed but the curved cuts will be more jagged looking.
- Page 35 9. Check Area This section allows you to adjust the size and position of the blue acquisition box in the • camera viewfinder used to detect the blackmark 1. X and Y Options will allow you to move the acquisition box Left/Right and Up/Down in the viewfinder.
-
Page 36: Maintenance
Maintenance General Cleaning In general, any surface that comes in contact with the stock or liner will require periodic cleaning. Adhesive Adhesive will collect on the media guides and rollers, especially where the edges of the stock are contacted. As this adhesive collects, it starts to drag on the media as it passes through the cutter and may affect cut position. -
Page 37: Consumable Replacement
Consumable Replacement The blade holder, cutter blade, slitter blade, and cutting mat are considered consumables and will need replacing once unable to cut consistently. Cutter Blade/Blade Holder Replacement To replace the cutter blade/blade holder, remove the blade holder from the cutter. replacing blade holder, swap blade to new blade holder with below instructions reinstall. -
Page 38: Troubleshooting
Troubleshooting Issue Cause Solution DLF not connected to computer Connect DLF to computer Load media Media not loaded Software will not start Press 2 on control panel Verify dongle is inserted in DLF Dongle not connected or PC Adjust path. May need to Cut position is shifting side to side Media path not straight rethread path completely... - Page 39 Adjust cut force, blade Cuts not complete Labels not staying on liner while exposure weeding Cuts complete but still coming off Use o-rings to hold labels down liner Issue Cause Solution Use the Forward button in the software to advance to the Mark not in positioning box next mark, center mark vertically in positioning box...
Need help?
Do you have a question about the DLF L Series and is the answer not in the manual?
Questions and answers