Nomadix AG 2400 Quick Start Manual
Access gateway
Hide thumbs
Also See for AG 2400:
- User manual (392 pages) ,
- User manual (376 pages) ,
- User manual (294 pages)
Table of Contents
Advertisement
Quick Links
Nomadix Access Gateway Quick Start Guide
This quick start document provides instructions and reference material for getting started with the
Nomadix Access Gateway products, specifically the AG 2400 and AG 5900. For more detailed
information about the individual gateways, please refer to the user manual and documentation.
User Manual and Documentation
The Nomadix product user manuals, product documentation and support files including MIB, XML DTD
and sample dictionary files are located at the following URL:
http://www.nomadix.com/current_releases.php
If you have any problems, please contact our technical support team at +1.818.575.2590, or via email:
support@nomadix.com
Accessory Box Contents
AG 2400
1 – U.S. (NEMA 5-15p) Power Cord
1 – EU (Schuko CEE7/7) Power Cord
1 – 6' RJ45 – DB9 Console Cable
1 – RJ45 – DB9 Adaptor
2 – Rack Mount Brackets and PS bracket
1 – Bumper and Screw Kit
Start Here
1. Unpack the Nomadix Access Gateway and place the product on a flat and stable work surface.
2. Register the gateway for support services by completing and returning the Nomadix Gateway
Registration Form - hardcopy enclosed or obtain the form online at the following URL:
http://business.nomadix.com/registration
3. Connect the power cord.
4. There are two ways to connect to the Access Gateway (AG):
a. Serial Connection:
i. Connect the RJ45 console cable to the product's console port and the DB9
ii. Start a HyperTerminal (or equivalent) session to communicate with the AG via
Bits per Second
9600
Table 1: Console Configuration Settings.
female to your computer.
the product's console interface. Use the configuration settings in Table 1 for
your session.
Data Bits
8
1
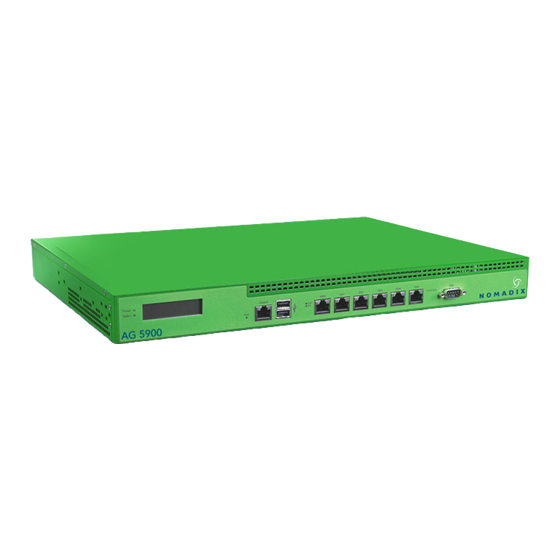
AG 5900
1 – U.S. (NEMA 5-15p) Power Cord
1 – EU (Schuko CEE7/7) Power Cord
1 – 6' RJ45 – DB9 Console Cable
1 – RJ45 – DB9 Adaptor
2 – Rack Mount Brackets
1 – Bumper and Screw Kit
Parity
Stop Bits
None
1
Flow Control
None
02.11.2016
Advertisement
Table of Contents

Related Manuals for Nomadix AG 2400


Summary of Contents for Nomadix AG 2400
- Page 1 1 – Bumper and Screw Kit Start Here 1. Unpack the Nomadix Access Gateway and place the product on a flat and stable work surface. 2. Register the gateway for support services by completing and returning the Nomadix Gateway Registration Form - hardcopy enclosed or obtain the form online at the following URL: http://business.nomadix.com/registration...
- Page 2 IN ORDER TO PROCEED WITH INSTALLATION. SEE USER'S GUIDE FOR LICENSE KEY INFORMATION. INSTALLATION WILL NOW TRY TO CONTACT THE NOMADIX LICENSE KEY SERVER. IN ORDER TO PROCEED, THE NSE MUST BE ABLE TO CONNECT TO THE INTERNET. DO YOU WANT TO CONFIGURE THE NSE'S IP AND DNS SETTINGS? [yes/no]: y...
- Page 3 Gateway IP : Your gateway IP addrss WAN 802.1Q tagging : Disabled VLAN ID DNS Domain Name : nomadix.com DNS Server 1 : Your primary DNS IP address DNS Server 2 DNS Server 3 : 0.0.0.0 Additional NAT IP addresses...
- Page 4 Step 1b: DHCP Client Configuration Type d[hcp] for the configuration mode as shown in Figure 4. Configuring minimal WAN interface connectivity parameters: Configuration Mode [static ] (static, dhcp, pppoe) : d WAN 802.1Q tagging [Disabled VLAN ID DNS Server 3 [0.0.0.0 Figure 4: Selecting DHCP Client for WAN configuration.
- Page 5 PPP Maximum TCP MSS [1452 WAN 802.1Q tagging [Disabled VLAN ID DNS Domain Name [nomadix.com DNS Server 3 [0.0.0.0 Figure 6: Selecting PPPoE with dynamic IP configuration. Figure 7. A WAN port summary page will then be displayed as shown in...
- Page 6 If everything is correct in the summary, type b[ack] to return to the previous menu, and proceed to step 2 to enter location information. Otherwise, select an option from the Ethernet port configuration menu to display or make changes to the WAN port settings. When finished with settings, type b[ack] to return to the previous menu, and go to step 2.
- Page 7 PLEASE READ THE NOMADIX END USER LICENSE AGREEMENT ('AGREEMENT') INCLUDED WITH THE NOMADIX PRODUCT. BY USING THIS SOFTWARE, YOU INDICATE YOUR ACCEPTANCE OF THE AGREEMENT. I AGREE TO THE TERMS AND CONDITIONS OF THE NOMADIX END USER LICENSE AGREEMENT. (Y)ES (N)O The system will now try to contact the Nomadix License Key Server.
- Page 8 DHCP Pool Start IP Address 10.0.0.12 DHCP Pool End IP Address 10.0.0.72 DHCP Lease Minutes 1440 Table 3: DHCP server configuration. Ethenet LED Indicator Status The LED indicator functions for the Ethernet interfaces are shown in Figure 10. Figure 10: Typical Ethernet interface LED linked at 1000Mbps (both amber). The individual LED indicator color and behavior are shown in Table 4.
Need help?
Do you have a question about the AG 2400 and is the answer not in the manual?
Questions and answers