Advertisement
Table of Contents
- 1 Installation Instructions
- 2 Table of Contents
- 3 Important Safety Information
- 4 Product Features
- 5 Electrical Requirements
- 6 Water Requirements
- 7 Fitting Your Shower
- 8 Fitting the Riser Rail
- 9 Commissioning - Testing the System
- 10 Operating the Shower
- 11 Adjusting the Showerhead
- 12 Cleaning & Maintenance
- 13 Troubleshooting
- 14 Spare Parts
- 15 Guarantee
- 16 Service Policy
- Download this manual
Advertisement
Table of Contents

Related Manuals for Bristan Thermostatic Power Shower 1000


Summary of Contents for Bristan Thermostatic Power Shower 1000
-
Page 1: Installation Instructions
Installation Instructions and User Guide Thermostatic Power Shower 1000 Please keep this booklet for future reference. Installer, when you have read these instructions please ensure you leave them with the user. -
Page 2: Table Of Contents
Contents Important safety information ..........3 Product features ..............4 Electrical requirements ............5 Water requirements ............6 Fitting your shower ..............7 Fitting the riser rail .............9 Commissioning - testing the system ........10 Operating the shower ............11 Adjusting the showerhead ..........11 Cleaning & maintenance .............11 Troubleshooting ..............12 Spare parts ................13 Guarantee ................14... -
Page 3: Important Safety Information
Important Safety Information • Please read these instructions thoroughly and retain for future use. • All products manufactured and supplied by Bristan are safe provided they are installed, used correctly and receive regular maintenance in accordance with these instructions. •... -
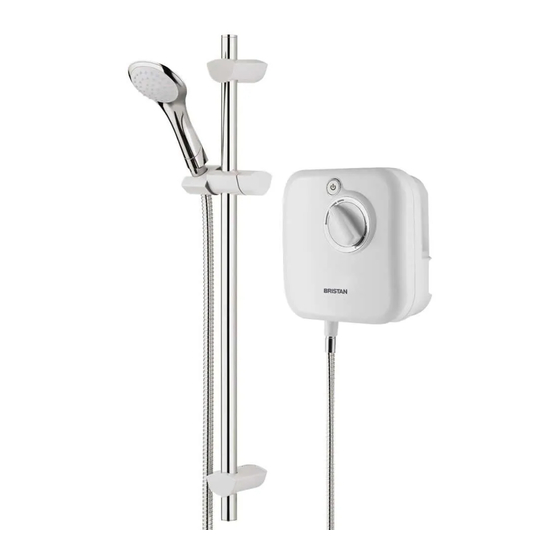
Page 4: Product Features
Product Features 1. Push Button STOP/START Switch Electronic switch 2. Temperature Control Adjustable Temperature Control 3. Hose outlet Shower hose outlet Removing cover 1. Temperature Control Knob 2. Screws (x3) Please note that this product comes packaged with the front cover and control knob already in place. -
Page 5: Electrical Requirements
Electrical Requirements Warning: This appliance MUST be earthed! All electrical wiring for the shower must comply with the current I.E.E. Regulations which includes earth-cross bonding to all metal pipe work. Important: All plumbing connections should be completed before any electrical connections are undertaken. -
Page 6: Water Requirements
Under no circumstances must the Power Shower be connected to the mains cold water supply, or to a combination hot water system. For correct operation of the Bristan 1000 Power Shower both hot and cold supplies to the unit must be gravity fed, at equal pressures, from a cold water storage tank and hot water storage cylinder. -
Page 7: Fitting Your Shower
Fitting your Shower Fitting the Shower We recommend that the shower unit is fitted at chest height, and Reduce Elbow to set to one side of the intended riser rail position, ensuring that the 63mm position of the shower handset when positioned on the wall is at least 1 metre below the cold water storage tank. - Page 8 Fitting your Shower Refit unit to pipes and secure to wall using 32mm x No. 8 screws provided. Connect the wire which may be coloured Brown or Red to the terminal marked L. Connect the wire which may be coloured Black or Blue to the terminal marked N.
-
Page 9: Fitting The Riser Rail
Fitting the Riser Rail Fitting the Riser Rail Before proceeding with fitting the rail, identify each of the items supplied using the illustration on your right. The Slider (1) should not be removed from the rail (2) during fitting. The top of the slider has a smooth profile, whereas the underside has a recess revealing the grooves on the handset holder. -
Page 10: Commissioning - Testing The System
Commissioning - Testing the System With the front cover removed ensure the black ‘purge/shower’ switch inside the base is switched to purge. This enables water to flow without the pump running which is necessary in the following commissioning process. Fit the front cover using the 3 fixing screws. Push the temperature control knob onto the spindle with the marker pointing to the ‘12 o’clock’... -
Page 11: Operating The Shower
Operating the Shower To operate the shower ensure the temperature control knob is set approximately to the ‘12 o’clock’ position and press the stop/start button (1). For a hotter shower turn the control knob anti-clockwise, for a cooler shower turn it clockwise. The handset holder has a friction grip on the rail and simply slides up and down to adjust the height. -
Page 12: Troubleshooting
Troubleshooting Warning: Before carrying out general repairs or testing the shower, ensure that the electricity supply is turned off at the mains and the correct circuit fuse is removed. Symptom Likely Cause Action/Remedy Pump not operating but water Purge/shower switch switched Isolate electrical supply, is flowing to purge... -
Page 13: Spare Parts
Spare Parts 1 (2-13) Part No. Description No. Off SP-087-0603 Base assembly* SP-087-0514 Stop/start button* SP-087-0505 Temperature control knob* SP-087-0608 Front cover* SP-087-0014 Front cover screws SP-087-0230 Solenoid SP-087-0154 Mixer valve assembly SP-087-0211 Purge/shower rocker switch SP-087-0127 Pipe connection SP-087-0110 Pump unit SP-087-0068 Pipe cover*... -
Page 14: Guarantee
The registration of your charges for parts and labour. Charges will also be levied on personal details is purely for Bristan use and the remaining cancelled appointments, unless advised to Bristan at least information helps us to make products for the future. - Page 15 Need help? Give us a call on 0844 701 6273 and speak to one of our trained advisors.
- Page 16 Issue POW SHX 1000 D2 Part Number 131 - 723 Bristan Group Ltd. Birch Coppice Business Park Dordon Tamworth Staffordshire B78 1SG Web: www.bristan.com Email: enquire@bristan.com A Masco Company...
Need help?
Do you have a question about the Thermostatic Power Shower 1000 and is the answer not in the manual?
Questions and answers