Table of Contents
Advertisement
Quick Links
These buttons are located at the cable right next to
the BNC and DC power connectors.
Packing List:
‐ 1 Arlen Screwdriver
‐ 1 mini flat screwdrive
‐ 1 kit with screws and anchors
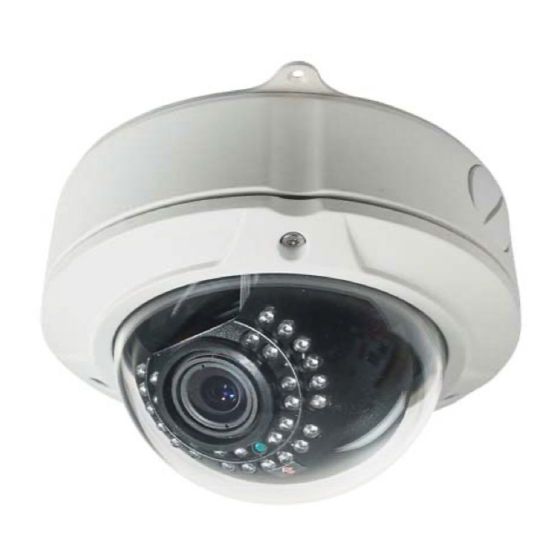
User's Manual
CD260XIRICR‐WDR
Press the center Button to Enter the OSD Menu.
Move Up or Down to move thru the menu options and left or right to
change values on the menu,
Press the center button again to get into sub menus.
Always remember to save before you exit.
When you Highlight the Exit Option, press the right button to either
TOP, RET or ENT.
‐ 1 Specification Sheet
‐ 1 mini flat screwdrive
‐ 1 DC connector
<MAIN MENU>
2. LENS
3. EXPOSURE
4. DAY/NIGHT
5. WDR/BLC/ECLPS
6. WHITE BAL
7. 3D‐DNR
8. EFFECTS
9. SPECIAL
Advertisement
Table of Contents

Subscribe to Our Youtube Channel
Related Manuals for COP-USA CD260XIRICR-WDR


Summary of Contents for COP-USA CD260XIRICR-WDR
- Page 1 User's Manual CD260XIRICR‐WDR <MAIN MENU> 1.CAM NAME Press the center Button to Enter the OSD Menu. 2. LENS Move Up or Down to move thru the menu options and left or right to 3. EXPOSURE change values on the menu, Press the center button again to get into sub menus. 4. DAY/NIGHT Always remember to save before you exit. 5. WDR/BLC/ECLPS When you Highlight the Exit Option, press the right button to either TOP, RET or ENT. 6. WHITE BAL 7. 3D‐DNR 8. EFFECTS 9. SPECIAL These buttons are located at the cable right next to 10.EXIT the BNC and DC power connectors. Packing List: ‐ 1 Arlen Screwdriver ‐ 1 Specification Sheet ‐ 1 mini flat screwdrive ‐ 1 mini flat screwdrive ‐ 1 kit with screws and anchors ‐ 1 DC connector ...
- Page 2 1. CAM NAME CAMERA NAME: ON/OFF Insert the Title name by moving <CAMERA NAME> the joystick up/down/left/right. ABCDEFGHIJKLM and pushing the buttom.use the NOPQRSTUVWYZ bottom arrows if needs to change abcdefghijklm any letter or number on the camera nopqrstuvwyz name. ‐ 123456789 Use CLR to erase <‐ ‐> CLR POS END Use POS to change the name location on the Screen. END to exit the camera name 2. LENS MANUAL (IRIS MANUAL MENU) MANUAL / DC IRIS Manual adjustment for the Iris. Brightness(0~100) Brightness(0 100) REACTION SPEED(0~8) DC IRIS(DC IRIS MENU) Adjust DC IRIS brightness and iris response speed. BRIGHTNESS(0~100) REACTION(0~8) PREVIOUS 3. EXPOSURE OFF/LOW/MIDDLE/HIGH AGC: SENSE‐UP: SHUTTER OFF/A.FLK/(1/160)~(1/90000)/x2~X512/AUTO Automatic Gain Control can be set to LOW, MEDIUM, ...
- Page 3 4. DAY/NIGHT DAY/NIGHT AUTO/DAY/NIGHT/EXT D/N LEVEL: AUTO: This level determines the level of darkness before switching from Day mode to Night mode. D/N LEVEL (LOW / MIDDLE / HIGH) FILTER DLY: FILTER DLY (1~60 SEC) Tells the camera how long to switch over whenever it senses enough light levels to do the switch. The lower the setting, the NIGHT BURST(ON/OFF) less time it will take. If you have areas that have constant rapid light level INITIAL SET changes, you may want to increase this value. PREVIOUS NIGHT BURST: This setting, when left off, will maintain the color burst signal when switching to B/W mode and ultimately create a clearer picture. This usually is set to OFF, the only reason for it to be ON is if you have an extra long cable runs and you notice a poor 5. WDR/BLC/ECLPS OFF/WDR/BLC/ECLPS WDR MENU: WDR is a very similar feature to BLC but instead of brightening the picture in the foreground, WDR simply tries to make the entire picture readable, both foreground and background WDR LEVEL (LOW/MIDDLE/HIGH) PREVIOUS BLC MENU: This option allow you to adjust your camera's backlight compensation. Please switch between BLC LEVELS to see what best suits your scenario best. BLC LEVEL (LOW/MIDDLE/HIGH) PREVIOUS ECLPS MENU: This is konwn as HLI feature that will digitally black out very bright objects out of the picture, such as headlights, allowing you to see details around the areas of the bright light better. Only in very particular scenarios would you need this AREA SETTING (8X8 GRID where you select either ON or OFF ALL AREA SET (ON/OFF) MASK COLOR (GRAY/D.GRAY/BLACK) ECLPS LEVEL (1~5) Select the Intensity of the ECLIPSE feature. the higher the number the more mask area you will get. GAIN CONTROL (ON/OFF) This Function will control the ECLPS funtion by using the light control in dark environment. the ECLPS feature will only be ...
- Page 4 6. WHITE BAL COL‐ROLL ON/OFF PUSH Push the buttom to adjust the white balance to the scene. MANUAL COLOR TEMP (INDOOR / OUTDOOR) (‐100~100) BLUE (‐100~100) INITIAL SET PREVIOUS ATW (recommended to Outdoor Installations) Auto Tracking White Balance, This feature automatically adjusts to various color temperature settings. We Recommend this option for most scenarios. temps. 2500°K ~ 95000°K. COL/ROLL (recommended to Indoor installations) Automatically adjusts the White balance to Indoor spaces. temps. 2000°K~20000°K. PUSH It is use in environment full of none “white” light (like bright yellow light) which affect the AWB and cause a falls color under AWB.In this case you can take a white paper in natural light environment and choose PUSH. The WB values will be set from now and will not change automatically any more. MANUAL COLOR TEMP (select between Indoor or outdoor) (RED/BLUE) Adjust the color between ‐100 to 100. 7. 3D‐DNR ON/OFF 3D‐DNR calculates and compensates for motion in the image to minimize ghosts. The result is a superior noise reduction with less motion blurring artifacts even at extreme low‐light situations. This menu allows the tuning of the camera behavior at low light condition and balance between image quality parameters as noise level versus bluer and ghost. DNR LEVEL: Set the level of noise reduction. The more reduction is set, the image would be more blurry, but with less noise (0‐63) DESTINATION: Set the level of brightness at low‐light conditions.(0‐63) GLOBAL MOVEMENT: Allows more or less Movement vs. Motion blurs.(ON/OFF)
- Page 5 8. EFFECTS IMAGE FREEZE: COLOR ADJUST: DZOOM MODE: (ON/OFF) DZOOM MODE freezes the image.Note that when the Image Freeze is COLOR:(ON/OFF) ON: IMAGE FREEZE ON ,Dzoom mode will be OFF. COLOR LEVEL (0~200) ZOOM (X1.00~X6.13) D‐EFFECT COLOR HUE(‐180~+180) Select the Digital zoom magnification CONTRAST D‐EFFECT:(OFF/V‐FLIP/MIRROR/ROTATE) RED GAIN(‐100~100) and move through the screen using SHARPNESS Select one of these features depending on how the BLUE GAIN(‐100~100) these following features DZOOM PAN camera will be mounted. PREVIOUS COLOR ADJUST and DZOOM TILT INITIAL SET DZOOM PAN (‐100~+100) CONTRAST: INITIAL SET DZOOM TILT(‐100~+100) PREVIOUS Adjusts the Contrast (0~100) RESET TO FACTORY DEFAULT SETTINGS PREVIOUS 9. SPECIAL MOTION DET. ON/OFF L/L SYNC PRIVACY MASK: (ON/OFF) PRIVACY MASK...
Need help?
Do you have a question about the CD260XIRICR-WDR and is the answer not in the manual?
Questions and answers