Panasonic Lumix DC-TS7 Owner's Manual
Hide thumbs
Also See for Lumix DC-TS7:
- Owner's manual (72 pages) ,
- Quick manual (2 pages) ,
- Operating instructions for advanced features (199 pages)
Table of Contents
Advertisement
Quick Links
Please read these instructions carefully before using this product,
Message Display
Troubleshooting
Finding the information you need
Contents
Contents by Function
Menu list
Register online at http://shop.panasonic.com/support
(U.S. customers only)
Owner's Manual
for advanced features
Model No.
and save this manual for future use.
Digital Camera
DC-TS7
P181
P183
P2
P4
P8
P122
DVQP1681ZA
F0618HN0
Advertisement
Table of Contents

Related Manuals for Panasonic Lumix DC-TS7


Summary of Contents for Panasonic Lumix DC-TS7
-
Page 1: Digital Camera
Please read these instructions carefully before using this product, and save this manual for future use. Message Display P181 Troubleshooting P183 Finding the information you need Contents Contents by Function Menu list P122 Register online at http://shop.panasonic.com/support DVQP1681ZA (U.S. customers only) F0618HN0... -
Page 2: Finding The Information You Need
Finding the information you need In this “Owner’s Manual for advanced features”, you can find the information you need from the following pages. By clicking a page number, you can jump to the linked page and quickly find the information. -
Page 3: How To Use This Manual
How to use this manual • The screens used in this owner’s manual are examples provided to describe operations. • The product design and specifications described in this owner’s manual may differ from the actual product due to improvements. About the indication of the applicable mode Applicable modes: The icons indicate the modes available for a function. -
Page 4: Table Of Contents
Contents Finding the information you need................2 How to use this manual.....................3 Contents by Function ....................8 1. Before Use Care of the camera ....................10 (Important) About the Waterproof/Dustproof and Anti-shock Performance of the Camera ........................12 Names and Functions of Components..............18 2. Getting Started/Basic Operations Inserting and Removing the Card (optional)/the Battery .........20 Charging the Battery ....................22 •... - Page 5 Contents • Types of image effects..................54 Taking Pictures that match the Scene being recorded (Scene Guide Mode)..57 Take the Outdoors Scene Expressively ..............60 • Sports Mode ....................60 • Snow Mode ....................60 • Beach & Surf Mode ..................61 • Underwater Mode..................61 Taking panorama pictures (Panorama Shot Mode)..........62 4.
- Page 6 Contents 8. Sensor Sensors (compass/altimeter) are operated ............111 Using the altimeter ....................112 • Adjusting the Altimeter ................. 113 Using the compass....................114 • Adjusting the compass ................. 115 9. Playing Back and Editing Images Playing Back Pictures ................... 116 Playing Back Motion Pictures................117 •...
- Page 7 Contents 12. Connecting to other equipment Playing Back Pictures on a TV Screen ..............171 Saving still pictures and motion pictures on your PC ..........173 • Transferring images to a PC.................173 Printing the Pictures ....................175 13. Others Monitor Display/Viewfinder Display...............177 Message Display....................181 Troubleshooting ....................183 Cautions for Use ....................192...
-
Page 8: Contents By Function
Contents by Function Recording Recording Picture Quality and Color Tone Recording Mode ......[Sensitivity]........P71 Panorama Shot Mode ..... [White Balance]........P73 Macro recording ......[Photo Style] ........P122 [Time Lapse Shot] ......[Picture Size]........P124 [Quality]..........P125 4K photo [i.Dynamic] ........P126 [4K PHOTO] ........[HDR] ..........P126 [Post Focus] ........ - Page 9 Contents by Function Setup/Custom Basic settings Sensor [Format] ........... [Sensor Settings] ......P111 [Clock Set] ........[Altimeter Adjust]......P113 Quick Menu ........[Calibrate compass] .......P115 [Beep] ..........P133 Customization [Economy] ........P135 Function buttons ......P42 [Reset] (initialization) ..... P137 [Custom] menu ......P130 Playback Playback Edit...
-
Page 10: Before Use
Before Use Care of the camera Handling of the camera (to prevent water leakage and malfunction) ∫ • Foreign objects may adhere to the inner side of the side door (around the rubber seal or connecting terminals) when the side door is opened or closed in places with sand or dust, etc. - Page 11 2 hours with the side door open when the temperature of the camera gets close to the ambient temperature. • Contact Panasonic if the fogging does not disappear. Conditions in which inner side may be fogged Condensation may occur and cause the inner side of the lens, viewfinder, and monitor to...
-
Page 12: (Important) About The Waterproof/Dustproof And Anti-Shock Performance Of The Camera
5 devices) Panasonic’s test method is based on the above “MIL-STD 810F Method 516.5-Shock”. However, the drop height was changed from 122 cm (4 feet) to 200 cm (6.6 feet) dropping onto 3 cm (0.1 feet) thick plyboard. - Page 13 • Any malfunction caused by customer misuse, or mishandling will not be covered by the warranty. • Panasonic offers no compensation for any accidents caused by use of the product (including both personal and property damage). • The inside of this unit is not waterproof. Water leakage will cause malfunction.
- Page 14 • The integrity of the rubber seals may decrease after about 1 year, with use and age. To avoid permanently damaging the camera, the seals should be replaced once each year. Please contact Panasonic for related costs and other information. Close the side door securely.
- Page 15 1. Before Use Using the camera underwater • Use the camera underwater to 31 m (102 feet) with the water temperature between 0 oC and 40 oC (32 oF and 104 oF). • Do not use the camera at a depth of over 31 m (102 feet). •...
- Page 16 1. Before Use Caring of the camera after using it underwater Do not open or close the side door until the sand and dust is removed by rinsing the camera with water. Make sure to clean the camera after using it. •...
- Page 17 1. Before Use Tap the camera lightly against your palm while holding it upside down and then with the illustrated side facing down, and then wipe off the water droplets with a soft, dry cloth. • Repeat this step a few times if water is left in the microphone A or speaker B hole. If water is left in the microphone or speaker hole, weak or distorted audio may be recorded and played back.
-
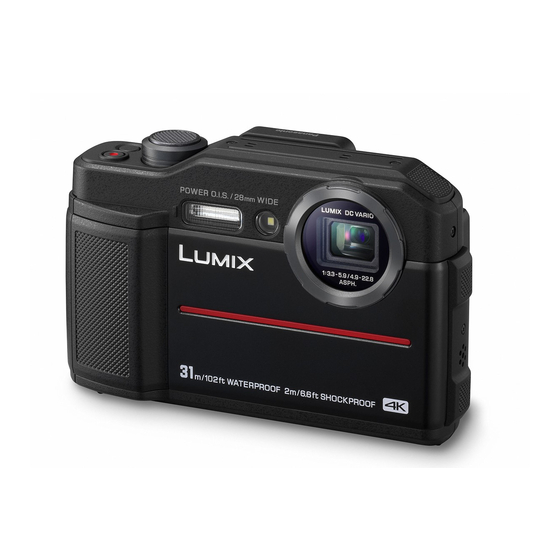
Page 18: Names And Functions Of Components
1. Before Use Names and Functions of Components Camera [ON/OFF] button (P31) [HDMI] socket (P171) Motion picture button (P105) Battery slot (P20) Shutter button (P35) [LOCK] switch (P14) Flash (P101) Release lever (P20) Stereo microphone (P194) Strap eyelet • Be careful not to cover the microphone with •... - Page 19 1. Before Use Monitor (P34) [MENU/SET] button (P36, ] (Post Focus) button (P83)/ Charging lamp (P23)/ [Fn2] button (P42) Wi-Fi ® connection lamp (P149) ] (Delete) button (P121)/ [LVF] button (P34) ] (Cancel) button/ Viewfinder (P34) [Q.MENU] button (P41) Diopter adjustment dial (P34) ] (4K Photo Mode) button (P76)/ [Fn1] button...
-
Page 20: Getting Started/Basic Operations
2: Slide the release lever B and open the side door. • Always use genuine Panasonic batteries. • If you use other batteries, we cannot guarantee the quality of this product. Battery: Being careful about the battery orientation, insert all the way until you hear a locking sound and then check that it is locked by lever C. - Page 21 2. Getting Started/Basic Operations Close the side door until it clicks, and then lock the [LOCK] switch by sliding it toward [2]. • Confirm that the red part E on the [LOCK] switch is not showing. • Remove the battery after use. (The battery will be exhausted if left for a long period of time after being charged.) •...
-
Page 22: Charging The Battery
Please be advised that we are not liable for any accident or failure occurring as a result of use of a counterfeit battery pack. To ensure that safe products are used, we recommend that a genuine Panasonic battery pack is used. -
Page 23: Charging
2. Getting Started/Basic Operations Charging • Charge the battery in areas with an ambient temperature, between 10 oC and 30 oC (50 oF and 86 oF) (same as the battery temperature), is recommended. Insert the battery into this unit. Check that this unit is turned off. ... - Page 24 2. Getting Started/Basic Operations About the charging lamp ∫ Lit: Charging. Off: Charging has completed. (When charging is complete, disconnect the camera from the power outlet or computer.) • When the charging lamp flashes – The battery temperature is high or low. Reconnect the USB connection cable (supplied) in a location where the ambient temperature (and the temperature of battery) is in a 10 oC to 30 oC (50 oF to 86 oF) range, and try charging again.
- Page 25 2. Getting Started/Basic Operations • Do not leave any metal items (such as clips) near the contact areas of the power plug. Otherwise, a fire and/or electric shocks may be caused by short-circuiting or the resulting heat generated. • Do not use any other USB connection cables except the supplied one. This may cause malfunction.
-
Page 26: Approximate Operating Time And Number Of Recordable Pictures
• The numbers of recordable pictures listed here are based on the CIPA (Camera & Imaging Products Association) standard. • When a Panasonic SDHC memory card and the supplied battery are used. Recording still pictures (when using the Monitor) ∫... -
Page 27: Card Information
SDHC/SDXC memory cards. SDHC Memory Card • Operation of the cards on the left has been confirmed with (4 GB to 32 GB) Panasonic’s cards. SDXC Memory Card (48 GB to 128 GB) About motion picture/4K photo recording and speed class ratings ∫... -
Page 28: Formatting The Card (Initialization)
2. Getting Started/Basic Operations • If you set the Write-Protect switch A to “LOCK”, you may not be able to write, delete or format the data or display it by recording date. • The data on the card may be damaged or lost due to electromagnetic waves, static electricity or breakdown of the camera or the card. -
Page 29: Approximate Number Of Recordable Pictures And Available Recording Time
• The numbers of recordable pictures listed here are based on the CIPA (Camera & Imaging Products Association) standard. • When a Panasonic SDHC memory card and the supplied battery are used. Number of recordable pictures ∫ • Aspect ratio [4:3], Quality [A]... - Page 30 2. Getting Started/Basic Operations • Depending on the recording conditions and the type of card, the number of recordable pictures and available recording time vary. • Continuous motion picture recordable times Continuous [Rec Quality] Size interval for dividing files recordable time When an SDHC card is used: Files exceeding 4 GB in size will be divided into smaller files for recording and playback.
-
Page 31: Setting Date/Time (Clock Set)
2. Getting Started/Basic Operations Setting Date/Time (Clock Set) • The clock is not set when the camera is shipped. Press camera [ON/OFF] button. • If the language select screen is not displayed, proceed to step Press [MENU/SET]. Press 3/4 to select the language, and press [MENU/SET]. Press [MENU/SET]. - Page 32 2. Getting Started/Basic Operations When [The clock setting has been completed.] is displayed, press [MENU/SET]. When [Please set the home area] is displayed, press [MENU/SET]. Press 2/1 to select the home area, and then press [MENU/SET]. [Precautions] [Precautions] will be displayed. Be sure to check this so that you can maintain the waterproof performance.
-
Page 33: Basic Operations
2. Getting Started/Basic Operations Basic Operations Fit the strap and hold the camera carefully Hold the camera gently with both hands, keep your arms still at your side and stand with your feet slightly apart. • Before using the camera, be sure to attach the supplied strap and fasten it to your wrist to avoid dropping the camera. -
Page 34: Using The Viewfinder
2. Getting Started/Basic Operations Using the Viewfinder Diopter adjustment Rotate the diopter adjustment dial. • Adjust until you can see the characters displayed in the viewfinder clearly. Switching the Monitor/Viewfinder Press [LVF] to switch between the Monitor and Viewfinder. Press [LVF]. -
Page 35: Shutter Button (Taking Pictures)
2. Getting Started/Basic Operations Shutter button (Taking pictures) The shutter button works in two steps. Press the shutter button halfway to focus. • Aperture value and shutter speed are displayed. • Once the subject is in focus, the focus indication is displayed. (When the subject is not in focus, the indication flashes.) A Aperture value B Shutter speed... -
Page 36: [Mode] Button (Selecting A Recording Mode)
2. Getting Started/Basic Operations [MODE] button (Selecting a Recording Mode) Press [MODE]. Press 3/4/2/1 to select the Recording Mode. Press [MENU/SET]. Intelligent Auto Mode (P45) Program AE Mode (P49) Manual Exposure Mode (P50) Creative Control Mode (P52) Scene Guide Mode (P57) Sports Mode (P60) -
Page 37: [Disp.] Button (Switching The Displayed Information)
2. Getting Started/Basic Operations [DISP.] button (Switching the displayed information) Press [DISP.]. In Recording Mode • Viewfinder display Environment With information Without information ¢ information • Monitor display Environment Without With information Turned off information ¢ information 98 98 98 ¢... -
Page 38: In Playback Mode
2. Getting Started/Basic Operations In Playback Mode Detailed Histogram Environment With information information display information display F3.3 1/98 1/98 STD. STD. STD. F3.3 60 10:00 DEC.1.2018 F3.3 100-0001 1/98 100-0001 Without information... -
Page 39: Setting Menu Items
2. Getting Started/Basic Operations Setting menu items Press [MENU/SET]. Press 2. Press 3/4 to select a menu selector icon, such as [ This menu lets you set the aspect ratio, number of pixels, 4K [Rec] (P122) Photo and other aspects of the pictures you are recording. [Motion Picture] This menu lets you set the [Rec Quality], and other aspects (P129) - Page 40 2. Getting Started/Basic Operations Press 3/4 to select the menu item and press [MENU/SET]. • You can also turn pages by pressing [DISP.] or the zoom button. Press 3/4 to select the setting and press [MENU/SET]. • Depending on the menu item, its setting may not appear or it may be displayed in a different way.
-
Page 41: Calling Frequently-Used Menus Instantly (Quick Menu)
2. Getting Started/Basic Operations Calling frequently-used menus instantly (Quick Menu) • The descriptions in this section use the monitor screen as examples. Press [Q.MENU] to display the Quick Menu. Press 2/1 to select a menu item, and press 60 p 4 or 3. -
Page 42: Assigning Frequently Used Functions To The Buttons (Function Buttons)
2. Getting Started/Basic Operations Assigning frequently used functions to the buttons (function buttons) You can assign recording functions, etc. to specific buttons. Select the menu. > [Custom] > [Fn Button Set] > [Setting in REC mode]/[Setting MENU in PLAY mode] Press 3/4 to select the function button you want to assign a function to and then press [MENU/SET]. -
Page 43: Using The Function Buttons During Recording
2. Getting Started/Basic Operations Using the function buttons during recording You can use assigned functions by pressing a function button when recording. Functions that can be assigned in [Setting in REC mode] ∫ – [4K Photo Mode] (P76): [Fn1] ¢ –... -
Page 44: Entering Text
2. Getting Started/Basic Operations Entering Text Press 3/4/2/1 to select text and then press [MENU/SET] to register. • To continuously enter the same character, move the cursor by pressing [T] on the zoom button. • The following operations can be performed by moving the cursor to the item and pressing [MENU/SET]: –... -
Page 45: Recording Modes
Recording Modes Taking Pictures using the Automatic Function (Intelligent Auto Mode) Recording Mode: In this mode, the camera makes the optimal settings for the subject and scene, so we recommend it when you wish to leave the settings to the camera and record without thinking about them. - Page 46 3. Recording Modes The camera detects scenes automatically (Scene Detection) : When taking pictures, : When recording motion pictures) ¢1 [i-Portrait] [i-Scenery] [i-Macro] [i-Night Portrait] [i-Night Scenery] [iHandheld Night [i-Sunset] [i-Low Light] ¦ Shot] ¢2 ¢1 Only displayed when the flash is set to [ ¢2 Only displayed when [iHandheld Night Shot] is set to [ON].
-
Page 47: Recording Night Scenes ([Ihandheld Night Shot])
3. Recording Modes Recording night scenes ([iHandheld Night Shot]) Recording Mode: When [ ] is detected while taking handheld night shots, pictures of the night scenery will be taken at a high burst speed and composed into a single picture. >... -
Page 48: Combining Pictures Into A Single Picture With Rich Gradation ([Ihdr])
3. Recording Modes Combining pictures into a single picture with rich gradation ([iHDR]) Recording Mode: When there is, for example, strong contrast between the background and the subject, multiple still pictures are recorded with differing exposures and combined to create a single still picture rich in gradation. -
Page 49: Taking Pictures With Automatically Adjusted Aperture And Shutter Speed (Program Ae Mode)
3. Recording Modes Taking Pictures with Automatically Adjusted Aperture and Shutter Speed (Program AE Mode) Recording Mode: The camera automatically sets the shutter speed and the aperture value according to the brightness of the subject. You can take pictures with greater freedom by changing various settings in the [Rec] menu. -
Page 50: Taking Picture By Setting The Exposure Manually (Manual Exposure Mode)
3. Recording Modes Taking picture by setting the exposure manually (Manual Exposure Mode) Recording Mode: Determine the exposure by manually setting the aperture value and the shutter speed. Press [MODE]. Press 3/4/2/1 to select [ ], and then press [MENU/SET]. Press 3. - Page 51 3. Recording Modes Optimizing the ISO sensitivity for the shutter speed and aperture value When the ISO sensitivity is set to [AUTO], the camera sets the ISO sensitivity automatically so that the exposure will be appropriate for the shutter speed and aperture value. •...
-
Page 52: Taking Pictures With Different Image Effects (Creative Control Mode)
3. Recording Modes Taking Pictures with different image effects (Creative Control Mode) Recording Mode: You can set the effects to add by selecting example images and checking them on the screen. Press [MODE]. Press 3/4/2/1 to select [ ], and then press [MENU/SET]. Press 3/4 to select the image effects (filters). - Page 53 3. Recording Modes • If you select the [ ] tab on the menu screen, you can select the following menu items: – [Filter Effect]: Displays the image effect (filter) selection screen. – [Simultaneous Record w/o Filter]: Allows you to set the camera to take a picture with and without an image effect simultaneously.
-
Page 54: Types Of Image Effects
3. Recording Modes Types of image effects [Expressive] [Retro] [Old Days] [High Key] [Low Key] [Sepia] [Monochrome] [Dynamic [Rough Monochrome] Monochrome] [Silky [Impressive Art] [High Dynamic] Monochrome] [Cross Process] [Toy Effect] [Toy Pop] [Bleach Bypass] [Miniature Effect] [Soft Focus] [Fantasy] [Star Filter] [One Point Color] [Sunshine]... - Page 55 3. Recording Modes Setting the type of defocus ([Miniature Effect]) ∫ Select [Miniature Effect], and press [MENU/SET]. Press 3/4 or 2/1 to move the in-focus portion. Frame Button Description of operation orientation operation Moves the frame up and down. Changes the frame ...
- Page 56 3. Recording Modes Set the color to leave in ([One Point Color]) ∫ Select [One Point Color], and press [MENU/SET]. Fit the color you want to leave in the frame at the center of the screen, and then press [MENU/SET]. Check the color you have set, and then press [MENU/SET].
-
Page 57: Taking Pictures That Match The Scene Being Recorded (Scene Guide Mode)
3. Recording Modes Taking Pictures that match the Scene being recorded (Scene Guide Mode) Recording Mode: If you select a scene to suit the subject and recording conditions with reference to the example images, the camera will set optimal exposure, color, and focus, allowing you to record in a manner appropriate to the scene. - Page 58 3. Recording Modes Types of Scene Guide Mode Displaying the description of each scene and recording tips Press [DISP.] while the scene selection screen is displayed. • When it is set to the guide display, detailed explanations and tips for each scene are displayed. Normal display Guide display List display...
- Page 59 3. Recording Modes [Clear Nightscape] [Cool Night Sky] [Warm Glowing Nightscape] [Glittering Illuminations] [Handheld Night Shot] [Clear Night Portrait] • Do not move the unit during • We recommend using a tripod the continuous shooting after and the self-timer. pressing the shutter button. •...
-
Page 60: Take The Outdoors Scene Expressively
3. Recording Modes Take the Outdoors Scene Expressively Recording Mode: By setting the Recording Mode to [ ], [ ], [ ] or [ ] pictures can be taken more effectively matching the conditions such as Sports, Snow, Beach & Surf Mode. •... -
Page 61: Beach & Surf Mode
3. Recording Modes Beach & Surf Mode This is optimal for recording images underwater at a depth of up to 3 m (9.8 feet) and at the beach. Press [MODE]. Press 3/4/2/1 to select [ ], and then press [MENU/SET]. Fixing the focus (AF Lock) ∫... -
Page 62: Taking Panorama Pictures (Panorama Shot Mode)
3. Recording Modes Taking panorama pictures (Panorama Shot Mode) Recording Mode: Consecutive photos taken while the camera is moved are combined to form a panorama. Press [MODE]. Press 3/4/2/1 to select [ ], and then press [MENU/SET]. • After the screen that asks you to check the recording direction is displayed, the horizontal/vertical guidelines will be displayed. - Page 63 3. Recording Modes Changing panorama picture settings ∫ > [Rec]>[Panorama Settings] MENU [Direction] Sets the recording direction. Sets the angle of view (image size). [Picture Size] [STANDARD]/[WIDE] • You can add the same image effect as the Creative Control Mode with the same operation as the mode.
- Page 64 3. Recording Modes About playback ∫ Pressing 3 will start scrolling playback automatically in the same direction as the recording. 1/98 1/98 1/98 1/98 • The following operations can be performed during scrolling playback. ¢ Start panorama playback/Pause Stop ¢ You can perform frame-by-frame forward/rewind by pressing during a pause.
-
Page 65: Focus, Brightness (Exposure) And Color Tone Settings
Focus, Brightness (Exposure) and Color tone Settings Adjusting Focus Automatically Applicable modes: This allows the focusing method that suits the positions and number of the subjects to be selected. Select the menu. > [Rec] > [AF Mode] MENU The camera automatically detects the person’s face. - Page 66 4. Focus, Brightness (Exposure) and Color tone Settings Up to 49 AF areas can be focused. This is effective when a subject is not in the center of the screen. ([49-Area]) The camera focuses on the subject in the AF area on the screen.
- Page 67 4. Focus, Brightness (Exposure) and Color tone Settings Subjects and recording conditions which are difficult to focus • Fast-moving subjects, extremely bright subjects or subjects without contrast. • When recording subjects through windows or near shiny objects. • When it is dark or when jitter occurs. •...
-
Page 68: Setting Up Position Of The Af Area
4. Focus, Brightness (Exposure) and Color tone Settings Setting up position of the AF area Applicable modes: You can set the AF area position with [š], [ ], [Ø] or [Ù] of Auto Focus Mode. • With [š], if you move the AF area to anywhere other than detected faces, Auto Focus operates in the same way as when using [Ø]. -
Page 69: Taking Close-Up Pictures
4. Focus, Brightness (Exposure) and Color tone Settings Taking Close-up Pictures Applicable modes: This mode allows you to take close-up pictures of a subject, e.g. when taking pictures of flowers. Press 2 (#). Press 2/1 to select the mode and then press [MENU/SET]. -
Page 70: Compensating The Exposure
4. Focus, Brightness (Exposure) and Color tone Settings Compensating the Exposure Applicable modes: Use this function when you cannot achieve appropriate exposure due to the difference in brightness between the subject and the background. Press 3 (È). Press 2/1 to compensate the exposure and then press [MENU/SET]. -
Page 71: Setting The Light Sensitivity
4. Focus, Brightness (Exposure) and Color tone Settings Setting the Light Sensitivity Applicable modes: This allows the sensitivity to light (ISO sensitivity) to be set. Select the menu. > [Rec] > [Sensitivity] MENU Press 2/1 to select the ISO sensitivity. Press [MENU/SET] to set. - Page 72 4. Focus, Brightness (Exposure) and Color tone Settings Characteristics of the ISO sensitivity 3200 Recording location When it is light (outdoors) When it is dark Shutter speed Slow Fast Noise Less Increased Jitter of the subject Increased Less • For information on the focus range of flash when [AUTO] is set, refer to P104. •...
-
Page 73: Adjusting The White Balance
4. Focus, Brightness (Exposure) and Color tone Settings Adjusting the White Balance Applicable modes: In sunlight, under incandescent lights or in other such conditions where the color of white takes on a reddish or bluish tinge, this item adjusts to the color of white which is closest to what is seen by the eye in accordance with the light source. - Page 74 4. Focus, Brightness (Exposure) and Color tone Settings Under fluorescent lighting, LED lighting fixture etc., the appropriate White Balance will vary depending on the lighting type, so use [AWB] or [ Ò • The White Balance is only calculated for subjects within the range of the camera’s flash. (P104) •...
-
Page 75: Finely Adjusting The White Balance
4. Focus, Brightness (Exposure) and Color tone Settings Finely adjusting the White Balance Applicable modes: You can finely adjust the White Balance when you cannot acquire the desired hue by setting the White Balance. Select the White Balance and then press 4. Press 3/4/2/1 to fine-adjust the White Balance. -
Page 76: K Photo And Drive Settings
4K Photo and Drive Settings Recording 4K Photos Applicable modes: The camera allows you to take burst pictures of 8 million pixels (approx.) at 30 frames/ second. After taking these pictures, you can save the desired moment extracted from their burst file. -
Page 77: Drive
5. 4K Photo and Drive Settings Record a 4K photo. • [Continuous AF] will work during recording. Focus will be adjusted continuously. Press the shutter button halfway. Press and hold the shutter button fully for as long as you ... -
Page 78: Notes On The 4K Photo Function
5. 4K Photo and Drive Settings Canceling 4K Photo ∫ In step , select [ (P76) • The operation can be canceled by pressing [ ] (4) and then selecting [ ] ([Single]) or Battery drainage and camera temperature • When [ ] ([4K Pre-Burst]) is set, the battery drains faster and the camera temperature rises. -
Page 79: Drive
5. 4K Photo and Drive Settings The camera’s setup for the 4K Photo function ∫ The camera’s setup is automatically optimized for 4K photo recording. • The following [Rec] menu items are fixed to the settings below: [4K] (8M) [Quality] [4:3]: 3328k2496 Fixed to the [Shutter Type]... -
Page 80: Selecting Pictures From 4K Burst File And Saving
5. 4K Photo and Drive Settings Selecting pictures from 4K burst file and saving Select an image with the [ ] icon on the playback screen, and press 3. • The slide view screen, where you select pictures, is displayed. Press 2/1 to select the frame to be saved as a picture. -
Page 81: Operations During Selecting Pictures
5. 4K Photo and Drive Settings Operations during selecting pictures Navigating the slide view screen ∫ Position of the displayed frame Button operation Description of operation Selects a frame. • You can select a frame from 60 frames (continuous burst time of approximately 2 seconds). -
Page 82: Drive
5. 4K Photo and Drive Settings Navigating the 4K burst playback screen ∫ During pause During continuous playback Button operation Description of operation Continuous playback/Pause (during continuous playback). Continuous rewind/Pause (during continuous rewind). Fast forward/Frame-by-frame forward (during pause). Fast rewind/Frame-by-frame rewind (during pause). Enlarges the display (during pause). -
Page 83: Controlling Focus After Recording (Post Focus)
5. 4K Photo and Drive Settings Controlling Focus After Recording (Post Focus) Applicable modes: The camera allows you to take 4K burst pictures while shifting the focus to different areas. After taking these pictures, you can select the desired focus area. This function is suited for recording still objects. -
Page 84: Drive
5. 4K Photo and Drive Settings Press the shutter button fully to start recording. • The focus point changes automatically while recording. When the icon ( B ) disappears, recording automatically ends. From the time you press the shutter button halfway until the end of recording: •... -
Page 85: Selecting The Desired Focus Area And Saving A Picture
5. 4K Photo and Drive Settings Selecting the desired focus area and saving a picture Select an image with the [ ] icon on the playback screen, and press 3. Press 3/4/2/1 to select the focus area. • If a picture that is in focus is not available for the selected area, a red frame will be displayed. -
Page 86: Select A Drive Mode
5. 4K Photo and Drive Settings Select a Drive Mode Applicable modes: You can change what the camera will do when you press the shutter button. Press 4 ( Press 2/1 to select the drive mode, and then press [MENU/SET]. When the shutter button is pressed, only one picture is 1 [Single] recorded. -
Page 87: Taking Pictures Using Burst Mode
AF tracking of the card ¢ When recording is performed under the test conditions specified by Panasonic. The burst speed will become slower halfway. However, pictures can be taken until the capacity of the card becomes full. Depending on recording conditions, the number of burst pictures that can be taken will be reduced. - Page 88 5. 4K Photo and Drive Settings • When [ ] is set, the exposure and White Balance will be fixed to the settings of the first picture. When [ ] or [ ] is set, the exposure and White Balance will be adjusted for each picture. •...
-
Page 89: Taking Pictures Using Auto Bracket
5. 4K Photo and Drive Settings Taking Pictures using Auto Bracket Applicable modes: Maximum of 7 pictures will be recorded with different exposure settings following the Exposure Compensation range every time the shutter button is pressed. Compensation range: [3•1/3] 1st picture 2nd picture 3rd picture d0 EV... - Page 90 5. 4K Photo and Drive Settings Canceling the Auto Bracket ∫ Select [ ] ([Single]) or [ ] from among the drive modes. (P86) • When taking pictures using Auto Bracket after setting the Exposure Compensation value, the pictures taken are based on the selected Exposure Compensation value. Not available in these cases: •...
-
Page 91: Taking Pictures With The Self-Timer
5. 4K Photo and Drive Settings Taking Pictures with the Self-timer Applicable modes: Press 4 ( Press 2/1 to select the self-timer icon ], etc.), and then press 3. Press 2/1 to select the time setting for the self-timer, and then press [MENU/SET]. Picture is taken 10 seconds after shutter is pressed. -
Page 92: Motion Picture
5. 4K Photo and Drive Settings Canceling the self-timer ∫ Select [ ] ([Single]) or [ ] from among the drive modes. (P86) • The self-timer can also be canceled by turning off the camera. (When [Self Timer Auto Off] (P136) is set to [ON]) •... -
Page 93: Taking Pictures Automatically At Set Intervals ([Time Lapse Shot])
5. 4K Photo and Drive Settings Taking Pictures Automatically at Set Intervals ([Time Lapse Shot]) Applicable modes: The camera can automatically take pictures of subjects such as animals or plants as time elapses and create a motion picture. • Set the date and time settings in advance. (P31) •... - Page 94 5. 4K Photo and Drive Settings Press the shutter button fully. • The recording starts automatically. • During recording standby, the power will turn off automatically if no operation is performed for a certain period. The Time Lapse Shot is continued even with the power turned off.
- Page 95 5. 4K Photo and Drive Settings • This function is not for use in a security camera. • Recording for long periods in cold places such as ski resorts or places at high altitude, or in warm, wet environments may cause a malfunction, so please be careful. •...
-
Page 96: Stabilizer, Zoom And Flash
Stabilizer, Zoom and Flash Image Stabilizer Applicable modes: Using this mode, jitter during picture taking is detected, and the camera automatically compensates for the jitter, enabling jitter-free images to be taken. > [Rec] > [Stabilizer] MENU Vertical and horizontal shake are compensated for. ([Normal]) Camera shake is corrected for up/down movements. - Page 97 6. Stabilizer, Zoom and Flash • It is recommended to disable the Image Stabilizer when using a tripod. • The Stabilizer function may not be effective in the following cases. Be careful of camera jitter when you press the shutter button. –...
-
Page 98: Taking Pictures With The Zoom
6. Stabilizer, Zoom and Flash Taking Pictures with the Zoom You can zoom in to make people and objects appear closer or zoom out to record landscapes in wide angle. To make subjects appear further away use (Wide) Press [W] on the zoom button. To make subjects appear closer use (Tele) Press [T] on the zoom button. -
Page 99: Motion Picture
6. Stabilizer, Zoom and Flash Extended Optical Zoom Applicable modes: This function works when any of the picture sizes (P124) indicated with is selected. You can zoom in further than you can with the Optical Zoom without deteriorating the image quality. Maximum magnification: 9k (This includes the optical zoom magnification. -
Page 100: Motion Picture
6. Stabilizer, Zoom and Flash Digital Zoom Applicable modes: Although the image quality deteriorates every time you zoom in further, you can zoom in up to four times the original zoom magnification. > [Motion Picture] > [Digital Zoom] [Rec]/ MENU Settings: [ON]/[OFF] •... -
Page 101: Taking Pictures By Using The Flash
6. Stabilizer, Zoom and Flash Taking pictures by using the flash Applicable modes: A Flash • Do not cover the flash with your fingers or other objects. In the following cases, the flash is fixed to [Œ] (forced flash off). •... -
Page 102: Changing Flash Mode
6. Stabilizer, Zoom and Flash Changing Flash Mode Set the flash to match the recording. Press 1 (‰). Press 2/1 to select the mode and then press [MENU/SET]. The flash is automatically activated when the recording conditions ([Auto]) ‡ make it necessary. ([Auto]) ¢1 The flash is automatically activated when the recording conditions... - Page 103 6. Stabilizer, Zoom and Flash Available flash settings by Recording Mode ∫ The available flash settings depend on the Recording Mode. (±: Available, —: Not available, ¥: Initial setting of Scene Guide Mode) Recording Mode ‡ ‰ Œ Program AE Mode ±...
- Page 104 6. Stabilizer, Zoom and Flash The available flash range (approximation) ∫ The edges of flash pictures taken without using the zoom at short distances (close to the wide end) may appear dark. This may be alleviated by zooming in a little further. Wide Tele [AUTO] in...
-
Page 105: Recording Motion Pictures
Recording Motion Pictures Recording Motion Picture/4K Motion Picture Applicable modes: You can record motion pictures and 4K motion pictures in MP4 recording format. Audio is recorded in stereo. Start recording by pressing the motion picture button. A Elapsed recording time B Available recording time •... -
Page 106: Motion Picture
7. Recording Motion Pictures • The operational sound of the zoom or button operation may be recorded when it is operated during the recording of a motion picture. • The zoom speed decreases during the recording of a motion picture. •... -
Page 107: Setting The Size And Recording Frame Rate
7. Recording Motion Pictures Setting the size and recording frame rate > [Motion Picture] > [Rec Quality] MENU Item Size Recording frame rate Sensor output Bit rate ¢ [4K/100M/30p] 3840k2160 30 frames/second 100 Mbps [4K/100M/24p] ¢ 3840k2160 24 frames/second 100 Mbps [FHD/28M/60p] 1920k1080 60 frames/second... -
Page 108: How To Set Focus When Recording A Motion Picture ([Continuous Af])
7. Recording Motion Pictures How to set focus when recording a motion picture ([Continuous AF]) Applicable modes: Set the Auto Focus operation to be performed during motion picture recording. > [Motion Picture] > [Continuous AF] MENU [ON] The camera automatically keeps focusing on subjects during recording. [OFF] The camera maintains the focus position at the start of recording. -
Page 109: Recording Still Pictures While Recording Motion Pictures
7. Recording Motion Pictures Recording still pictures while recording motion pictures Applicable modes: You can record still pictures while recording a motion picture. (Simultaneous recording) During motion picture recording, press the shutter button fully to record a still picture. • Simultaneous recording indicator is displayed while recording still pictures. -
Page 110: Recording Slow Motion Pictures ([High Speed Video])
7. Recording Motion Pictures Recording slow motion pictures ([High Speed Video]) Applicable modes: You can record motion pictures in approximately 1/4k slow motion by performing high-speed recording at 120 frames/second. The motion is displayed slower during playback. • Recording will be performed at [HD/10M/30p]. Select the menu. -
Page 111: Sensor
Sensor Sensors (compass/altimeter) are operated Applicable modes: • Information measured on this unit is only a rough indication. Do not use it for technical purposes. • When using this unit for full-scale mountain climbing, trekking, use the measured information (direction, altitude) only as a rough indication, and always carry a map and purpose-built measurement tools. -
Page 112: Using The Altimeter
8. Sensor Using the altimeter Applicable modes: You can check the altitude of the current location. Altimeter is not adjusted at the time of purchase. • Displaying range is j500 m (j1640 feet) to 9000 m (29530 feet). A Altitude B Current altitude About altitude conversion ∫... -
Page 113: Adjusting The Altimeter
8. Sensor Adjusting the Altimeter You can manually adjust the altimeter. To measure altitude with greater accuracy, we recommend that you make adjustments regularly by comparing a reference altitude on a sign or other accurate altitude information with the altitude indicated by the camera. Select the menu. -
Page 114: Using The Compass
8. Sensor Using the compass Applicable modes: 16 bearings are displayed based on the direction the lens of the camera is pointing in. • The colored portion of the needle points north. A North • It may not measure correctly when you measure with this unit upside down. -
Page 115: Adjusting The Compass
8. Sensor Adjusting the compass Adjust the compass when the measurement value does not match the actual bearing. Select the menu. > [Setup] → [Calibrate compass] MENU Securely hold the unit vertically, and adjust by turning it in a figure of 8 by rolling your wrist a few times. -
Page 116: Playing Back And Editing Images
Playing Back and Editing Images Playing Back Pictures Press [(]. Press 2/1. 1/98 1/98 1/98 1/98 2: Play back the previous picture 1: Play back the next picture • If you press and hold 2/1, you can play back the pictures in succession. -
Page 117: Playing Back Motion Pictures
9. Playing Back and Editing Images Playing Back Motion Pictures This unit was designed to play motion pictures using the MP4 format. • Motion pictures are displayed with the motion picture icon Press 3 to play back. A Motion picture recording time •... -
Page 118: Creating Still Pictures From A Motion Picture
9. Playing Back and Editing Images Creating Still Pictures from a Motion Picture Press 3 to pause motion picture playback. • Press 2/1 to fine-adjust the pause position while the motion picture is paused. Press [MENU/SET]. • Still pictures will be saved with [Aspect Ratio] set to [16:9] and [Quality] set to [ A ]. The number of pixels will differ according to the motion picture you play back. -
Page 119: Switching The Playback Method
9. Playing Back and Editing Images Switching the Playback Method Using the Playback Zoom Press [T] on the zoom button. 2.0X 2.0X 2.0X 2.0X 1k > 2k > 4k > 8k > 16k • After enlarging the display, if you press [W] on the zoom button, the magnification will be reduced. -
Page 120: Playing Back Group Pictures
9. Playing Back and Editing Images Playing Back Group Pictures A picture group consists of multiple pictures. You can play back pictures in a group either continuously or one by one. • You can edit or delete all pictures in a group at once. (For example, if you delete a picture group, all pictures in the group are deleted.) A picture group saved at once with [4K PHOTO Bulk Saving]. -
Page 121: Deleting Pictures
9. Playing Back and Editing Images Deleting Pictures Once deleted, pictures cannot be recovered. To delete a single picture ∫ In Playback Mode, select the picture to delete and then press [ Press 3 to select [Delete Single] and then press [MENU/SET]. -
Page 122: Using Menu Functions
Using Menu Functions Menu list [Rec] P122 [Custom] P130 [Playback] P138 [Motion P129 [Setup] P132 Picture] [Rec] menu • [Photo Style] (P122) • [iHandheld Night Shot] (P47) • [Aspect Ratio] (P124) • [iHDR] (P48) • [Picture Size] (P124) • [HDR] (P126) •... - Page 123 10. Using Menu Functions Adjusting the picture quality ∫ Press 2/1 to select the type of Photo Style. ±0 ±0 Press 3/4 to select the items, and then press 2/1 ±0 to adjust. ±0 DISP.カスタム登録 Increases the difference between the brightness and the darkness in the picture.
-
Page 124: Picture Size]
10. Using Menu Functions [Aspect Ratio] Applicable modes: This allows you to select the aspect ratio of the pictures to suit printing or the playback method. > [Rec] > [Aspect Ratio] MENU [4:3] [Aspect Ratio] of a 4:3 TV [3:2] [Aspect Ratio] of a 35 mm film camera [16:9] [Aspect Ratio] of a high-definition TV, etc. -
Page 125: Quality]
10. Using Menu Functions [Quality] Applicable modes: Set the compression rate at which the pictures are to be stored. > [Rec] > [Quality] MENU Settings File format Description of settings A JPEG image in which image quality was given priority. A standard image quality JPEG image. -
Page 126: I.dynamic]
10. Using Menu Functions [i.Dynamic] Applicable modes: Contrast and exposure are compensated when the brightness difference between the background and subject is great, etc. > [Rec] > [i.Dynamic] MENU Settings: [AUTO]/[OFF] Not available in these cases: • Compensation effect may not be achieved depending on the recording conditions. •... - Page 127 10. Using Menu Functions [Shutter Type] Applicable modes: You can use either of the two shutters to take pictures: the mechanical shutter or the electronic shutter. > [Rec] > [Shutter Type] MENU Switches the shutter type automatically between the mechanical shutter and [AUTO] the electronic shutter to suit the recording conditions and shutter speed.
- Page 128 10. Using Menu Functions [Red-Eye Removal] Applicable modes: When Red-Eye Reduction ([ ], [ ], [ ]) is selected, Red-Eye Removal is performed whenever the flash is used. The camera automatically detects red-eye and corrects the picture. > [Rec] > [Red-Eye Removal] MENU Settings: [ON]/[OFF] •...
-
Page 129: [Motion Picture] Menu
10. Using Menu Functions [Motion Picture] menu • [Photo Style] (P122) • [Metering Mode] (P125) • [Rec Quality] (P107) • [i.Dynamic] (P126) • [High Speed Video] (P110) • [i.Zoom] (P99) • [AF Mode] (P65) • [Digital Zoom] (P100) • [Continuous AF] (P108) •... -
Page 130: [Custom] Menu
10. Using Menu Functions [Custom] menu • [AF Assist Lamp] (P130) • [Remaining Disp.] (P131) • [Histogram] (P130) • [Auto Review] (P131) • [Guide Line] (P131) • [Fn Button Set] (P42) • [Rec Area] (P131) > [Custom] MENU [AF Assist Lamp] AF assist lamp will illuminate the subject when the shutter button is pressed half-way making it easier for the camera to focus when recording in low light conditions. - Page 131 10. Using Menu Functions [Guide Line] This will set the pattern of guide lines displayed when taking a picture. When [ ] is set, guideline positions can be set by pressing 3/4/2/1. • The guideline is not displayed in the Panorama Shot Mode. [Rec Area] This changes the angle of view during motion picture recording and still picture recording.
-
Page 132: [Setup] Menu
10. Using Menu Functions [Setup] menu • [Precautions] (P13) • [LED Light] (P135) • [Online Manual] (P132) • [Economy] (P135) • [Clock Set] (P31) • [m/ft] (P136) • [World Time] (P133) • [Language] (P136) • [Wi-Fi] (P133) • [Version Disp.] (P136) •... -
Page 133: [Beep]
10. Using Menu Functions [World Time] Sets the times for the region where you live and your holiday destination. • [Destination] can be set after setting up [Home]. After selecting [Destination] or [Home], press 2/1 to select an area, and press [MENU/SET] to set. -
Page 134: Monitor Luminance
10. Using Menu Functions [Live View Mode] Set the frame rate of the recording screen (Live View screen). [30fps] Reduces the power consumption, extending the operating time. [60fps] Displays movements smoother. • The [Live View Mode] setting does not affect recorded images. •... -
Page 135: [Economy]
10. Using Menu Functions [LED Light] The LED light comes on while recording motion pictures. To use a simple light If you set to [ON], and press and hold down 1 (‰) on the recording standby screen, the LED light will come on for approximately 60 seconds. - Page 136 10. Using Menu Functions [m/ft] Select how distance is displayed, in “ft” or “m”. [Language] Set the language displayed on the screen. • If you set a different language by mistake, select [~] from the menu icons to set the desired language.
- Page 137 10. Using Menu Functions [No.Reset] Reset the file number of the next recording to 0001. • The folder number is updated and the file number starts from 0001. • A folder number between 100 and 999 can be assigned. The folder number should be reset before it reaches 999. We recommend formatting the card (P28) after saving the data on a PC or elsewhere.
-
Page 138: [Playback] Menu
10. Using Menu Functions [Playback] menu • [Slide Show] (P139) • [Video Divide] (P144) • [Playback Mode] (P140) • [Time Lapse Video] (P144) • [Location Logging] (P141) • [Resize] (P145) • [4K PHOTO Bulk Saving] (P142) • [Cropping] (P146) • [Title Edit] (P142) •... -
Page 139: [Slide Show]
10. Using Menu Functions [Slide Show] You can play back the pictures you have taken in synchronization with music, and you can do this in sequence while leaving a fixed interval between each of the pictures. You can also put together a slide show composed of only still pictures, only motion pictures, etc. -
Page 140: Screen
10. Using Menu Functions Changing the slide show settings ∫ You can change the settings for slide show playback by selecting [Effect] or [Setup] on the slide show menu screen. This allows you to select the screen effects when switching from one picture [Effect] to the next. -
Page 141: [Location Logging]
• You can send location information and write it on images using a smartphone. (P157) • You need to install “Panasonic Image App” on your smartphone. (P151) • Read the [Help] in the “Image App” menu for further details on how to operate. -
Page 142: [Title Edit]
10. Using Menu Functions [4K PHOTO Bulk Saving] You can save pictures of a 4K burst file that were extracted from any 5 second period at once. > [Playback] > [4K PHOTO Bulk Saving] MENU Press 2/1 to select the 4K photo burst files and press [MENU/SET]. •... -
Page 143: [Text Stamp]
10. Using Menu Functions [Text Stamp] You can stamp recording information on recorded images. > [Playback] > [Text Stamp] MENU Select the picture. (P138) • [‘] appears on screen if the picture is stamped with text. Press 3/4 to select [Setup], and then press [MENU/SET]. Press 3/4 to select the item, and press [MENU/SET]. - Page 144 10. Using Menu Functions [Video Divide] Recorded motion picture can be divided in two. It is recommended for when you want to divide a part you need with a part you do not need. Dividing a motion picture is permanent. Decide before you divide! >...
- Page 145 10. Using Menu Functions [Resize] To allow easy posting to web pages, attachment to e-mail etc., picture size (number of pixels) is reduced. > [Playback] > [Resize] MENU Select the picture and size. [Single] setting 1 Press 2/1 to select the picture, and then press [MENU/SET].
- Page 146 10. Using Menu Functions [Cropping] You can enlarge and then clip the important part of the recorded picture. > [Playback] > [Cropping] MENU Press 2/1 to select the picture, and then press [MENU/SET]. Use the zoom button and press 3/4/2/1 to select the parts to be cropped. : Reduction : Enlargement : Move...
-
Page 147: [Protect]
10. Using Menu Functions [Protect] You can set protection for pictures you do not want to delete by mistake. > [Playback] > [Protect] MENU Select the picture. (P138) Canceling all the [Protect] settings ∫ Press 3/4 to select [Cancel], and then press [MENU/SET]. Even if you do not protect pictures on a card, they cannot be deleted when the card’s Write-Protect switch is set to [LOCK]. -
Page 148: Using The Wi-Fi Function
Using the Wi-Fi function ® What you can do with the Wi-Fi function Controlling with a Smartphone/Tablet (P151) Recording with a smartphone (P155) Playing back or saving images stored on the camera, or uploading them on social media sites (P156) Writing location information on images stored in the camera (P157) Easy connection... -
Page 149: Wi-Fi Function
11. Using the Wi-Fi function Wi-Fi function Before Use ∫ • Set the date and time settings in advance. (P31) • To use the Wi-Fi function on this unit, a wireless access point or a destination device equipped with the wireless LAN function is required. About the Wi-Fi connection lamp ∫... -
Page 150: Wi-Fi
11. Using the Wi-Fi function • The camera cannot be used to connect to a public wireless LAN connection. • Use a IEEE802.11b, IEEE802.11g or IEEE802.11n compatible device when using a wireless access point. • We strongly recommend that you set an encryption to maintain information security. •... -
Page 151: Controlling With A Smartphone/Tablet
With a smartphone, you can record images remotely, play back images on the camera or save them to the smartphone. • You need to install “Panasonic Image App” (referred to as “Image App” from this point on) on your smartphone. -
Page 152: Connecting To A Smartphone/Tablet
11. Using the Wi-Fi function Connecting to a smartphone/tablet Connecting without using the password You can easily set up a direct connection to your smartphone without entering a password. On the camera > [Setup] > [Wi-Fi] > [Wi-Fi Function] > MENU Select [Wi-Fi] of [Settings] from [New Connection] >... -
Page 153: Wi-Fi
11. Using the Wi-Fi function Using a password to set up a connection Connecting with a password further enhances security. You can scan a QR code or manually enter a password to set up a connection. Preparations: (On the camera) >... -
Page 154: Wi-Fi
11. Using the Wi-Fi function Manually entering a password to set up a connection ∫ On the camera > [Setup] > [Wi-Fi] > [Wi-Fi Function] > MENU [New Connection] > [Remote Shooting & View] A SSID and password B QR code •... -
Page 155: Taking Images Via A Smartphone (Remote Recording)
11. Using the Wi-Fi function Taking images via a smartphone (remote recording) Connect to a smartphone. (P152) Operate the smartphone. 1 Select [ 2 Record an image. • The recorded images are saved in the camera. • Some functions, such as 4K Photo, Post Focus, and 4K motion picture recording, are not available. -
Page 156: Playing Back/Saving Images Stored On The Camera, Or Uploading Them On Social Media Sites
11. Using the Wi-Fi function Playing back/saving images stored on the camera, or uploading them on social media sites Connect to a smartphone. (P152) Operate the smartphone. 1 Select [ • You can switch the images to be displayed by selecting the icon (A) ... -
Page 157: Adding Location Information To Images Stored In The Camera From A Smartphone
11. Using the Wi-Fi function Adding location information to images stored in the camera from a smartphone You can send location information acquired with a smartphone to the camera. After sending the information, you can also write it on images stored in the camera. •... -
Page 158: Wi-Fi
11. Using the Wi-Fi function Recording location information and images ∫ Start recording location information with the smartphone. 1 Start “Image App”. (P151) 2 Select [ 3 Select [Geotagging]. 4 Select [ ] to start recording location information. Record images with the camera. Stop recording the location information with the smartphone. -
Page 159: Sending Images
11. Using the Wi-Fi function Sending images When sending images, select the method for sending them after selecting [New Connection]. After the connection has been completed, settings for sending, such as the image size for sending, can also be changed. Images that can be sent ∫... -
Page 160: Wi-Fi
11. Using the Wi-Fi function Send Images Stored in the Camera ∫ Images can be selected and sent after recording. [Single Select] setting Press 2/1 to select the picture. Press [MENU/SET]. [Multi Select] setting Press 3/4/2/1 to select the picture and then press [MENU/SET] (repeat). -
Page 161: Sending Images To A Smartphone/Tablet
11. Using the Wi-Fi function Sending images to a smartphone/tablet Preparations: • Install the “Image App” in advance. (P151) Select the menu. > [Setup] > [Wi-Fi] > [Wi-Fi Function] > [New Connection] > MENU [Send Images While Recording] or [Send Images Stored in the Camera] >... -
Page 162: Wi-Fi
11. Using the Wi-Fi function Press 3/4 to select the smartphone you want to connect to, and then press [MENU/SET]. Check the send setting, and then press [MENU/SET]. • To change the send setting, press [DISP.]. (P160) When [Send Images While Recording] has been selected Take pictures. -
Page 163: When Sending Images To Pc
11. Using the Wi-Fi function When sending images to PC Preparations: • Turn the computer on. • Prepare folders for receiving images on the PC. (P163) • If the workgroup of the destination PC has been changed from the standard setting, change the setting of this unit in [PC Connection]. -
Page 164: Sending Images To A Pc
11. Using the Wi-Fi function Sending images to the PC ∫ Select the menu. > [Setup] > [Wi-Fi] > [Wi-Fi Function] > [New Connection] > MENU [Send Images While Recording] or [Send Images Stored in the Camera] > [PC] > [Via Network] Press 3/4 to select the connection method, and then press [MENU/SET]. - Page 165 11. Using the Wi-Fi function Press 3/4 to select the PC you want to connect to, and then press [MENU/ SET]. • When the PC you want to connect to is not displayed, select [Manual Input], and enter the computer name of the PC (NetBIOS name for Apple Mac computers). Press 3/4 to select the destinations folder of the PC, and then press [MENU/ SET].
- Page 166 11. Using the Wi-Fi function If you are not sure about the WPS compatibility (connecting by [From List]) • Confirm encryption key of the selected wireless access point if the network authentication is encrypted. Press 3/4 to select the wireless access point you are connecting to, and press [MENU/SET].
-
Page 167: Connecting Quickly With The Same Settings As The Previous Ones
11. Using the Wi-Fi function Connecting quickly with the same settings as the previous ones When the Wi-Fi function is used, a record is saved in the history. You can register records as favorites. Using the history or favorites list, you can easily connect with the same settings as used previously. - Page 168 11. Using the Wi-Fi function Editing the history registered to favorites ∫ Select the menu. > [Setup] > [Wi-Fi] > [Wi-Fi Function] > [Select a destination MENU from Favorite] Press 3/4 to select the history record in the favorites list you want to edit, and press 1.
-
Page 169: [Wi-Fi Setup] Menu
11. Using the Wi-Fi function [Wi-Fi Setup] Menu Configure the settings required for the Wi-Fi function. The settings cannot be changed when connected to Wi-Fi. > [Setup] > [Wi-Fi] > [Wi-Fi Setup] MENU [Wi-Fi Password] You can improve security by enabling password entry for a direct connection to a smartphone. - Page 170 11. Using the Wi-Fi function [Wi-Fi Function Lock] To prevent incorrect operation or use of the Wi-Fi function by a third party and to protect saved personal information, it is recommended that you protect the Wi-Fi function with a password. Setting a password will automatically display the password input screen when the Wi-Fi function is used.
-
Page 171: Connecting To Other Equipment
Connecting to other equipment Playing Back Pictures on a TV Screen Preparations: Turn the camera and the TV off. Connect the camera and the TV with an HDMI micro cable. • Check the direction of the terminals and plug in/out straight holding onto the plug. (It may result in malfunction by the deforming of the terminal if it is plugged in obliquely or in wrong direction.) Do not connect devices to incorrect terminals. - Page 172 12. Connecting to other equipment • Depending on the [Aspect Ratio], black bands may be displayed on the top and bottom or the left and right of the pictures. • Change the screen mode on your TV if the picture is displayed with the top or bottom cut off. •...
-
Page 173: Saving Still Pictures And Motion Pictures On Your Pc
12. Connecting to other equipment Saving still pictures and motion pictures on your PC You can acquire recorded pictures to a PC by connecting the camera and the PC. • Some PCs can read directly from the card removed from the camera. For details, refer to the operating instructions of your PC. - Page 174 12. Connecting to other equipment • Use a battery with sufficient battery power. If the remaining battery power becomes low while the camera and the PC are communicating, the alarm beeps. Disconnect the USB connection cable safely. Otherwise, data may be destroyed. •...
-
Page 175: Printing The Pictures
12. Connecting to other equipment Printing the Pictures If you connect the camera to a printer supporting PictBridge, you can select the pictures to be printed out and instruct that printing be started on the camera’s monitor. • Group pictures will not be displayed as group pictures but as single pictures. •... - Page 176 12. Connecting to other equipment Make print settings. [Print with Date] Sets date printing. [Num.of prints] Sets the number of pictures to be printed (up to 10 pictures). [Paper Size] Sets the paper size. Sets whether or not to add borders and how many pictures to [Page Layout] be printed on each sheet of paper.
-
Page 177: Others
Others Monitor Display/Viewfinder Display • The descriptions in this section use the monitor screen as examples. In recording 60 p 98 98 60 60 › Quality (P125) EXPS EXPS Recording Mode (P36) AF Mode (P65) Ù... - Page 178 13. Others Current date and time/Travel destination setting ¢2 : “ White Balance Fine (P133) Adjustment (P75) Exposure meter White Balance (P73) Ò VÐîÑ Zoom (P98) Number of recordable pictures (P29) Available recording time ¢1 8m30s AF area (P68) (P29) Spot metering target (P125) ¢1 m: minute, s: second...
- Page 179 13. Others In playback 1/98 1/98 1/98 F3.3 F3.3 F3.3 60 60 60 Icon indicating the presence of a Playback Mode (P140) marker (P81) Protected picture (P147) 4K Photo (4K burst file) (P76) Location Information display (P141) Post Focus (P83)
-
Page 180: Histogram Display
13. Others In playback Detailed information display F3.3 STD. STD. STD. 10:00 DEC.1.2018 100-0001 Recording information Picture size/Aspect Ratio (P124) Intelligent Dynamic Range Control Recording quality (P107) 60 p (P126) 120fps High Speed Video (P110) HDR (P126)/iHDR (P48) Quality (P125) -
Page 181: Message Display
13. Others Message Display Confirmation messages or error messages will be displayed on the screen in some cases. The major messages are described below as examples. [Some pictures cannot be deleted]/[This picture cannot be deleted] • This feature can only be used with pictures that comply with the DCF standard. Perform formatting (P28) on this unit after saving necessary data on a PC, etc. - Page 182 13. Others [To prevent water leakage, ensure that the door is locked properly.] • Refer to “About the water leakage warning message” on for details. [Failed to connect wireless access point]/[Connection failed]/[No wireless access point found] • The wireless access point information set on this unit is wrong. Check the authentication type, encryption type, and encryption key.
-
Page 183: Troubleshooting
13. Others Troubleshooting First, try out the following procedures (P183 to P191). If the problem is not resolved, it may be improved by selecting [Reset] (P137) the [Setup] menu. Battery and power source The camera cannot be operated even when it is turned on. The camera turns off immediately after it is turned on. - Page 184 13. Others The recorded picture is too bright or dark. • Check that the exposure is correctly compensated. (P70) Multiple pictures are taken at one time. • Is the drive mode set to a mode other than [Single]? (P86) The subject is not focused properly. •...
-
Page 185: Motion Pictures
13. Others The brightness or the hue of the recorded picture is different from the actual scene. • When recording under fluorescent or LED lighting fixture, etc., increasing the shutter speed may introduce slight changes to brightness and color. These are a result of the characteristics of the light source and do not indicate a malfunction. - Page 186 13. Others Flash The flash is not activated. • Is the flash setting set to [Œ]? > Change the flash setting. (P102) • When the electronic shutter is used, the flash is not activated. > Set [Shutter Type] to [MSHTR]. (P127) Monitor/Viewfinder The Monitor/Viewfinder turns off although the camera is turned on.
- Page 187 13. Others Wi-Fi function A Wi-Fi connection cannot be established. Radio waves get disconnected. Wireless access point is not displayed. General tips for using a Wi-Fi connection ∫ • Use within the communication range of the device to be connected. •...
- Page 188 13. Others When I try to set up a Wi-Fi connection with a Windows 8 PC, my user name and password are not recognized, so I cannot connect to the PC. • Some OS versions, including Windows 8, use two types of accounts: a local account and a Microsoft account.
-
Page 189: Pictbridge
13. Others TV, PC and printer The picture does not appear on the TV. • Is the camera connected to the TV correctly? (P171) > Set the TV’s input to the HDMI input. Cannot communicate with the PC. • Is the camera recognized by the PC correctly? >... - Page 190 13. Others Others [Precautions] is displayed repeatedly whenever this unit is turned on. • Press [MENU/SET] after viewing the last screen (12/12). For details, refer to P13. A rattling or similar sound is heard from the camera. • This is the sound of the lens moving and not a malfunction in the following cases: >...
- Page 191 13. Others The side door will not close. • Have foreign objects become trapped? > Remove the foreign objects. (P14) • When closing, do not set the [LOCK] switch to the locked side. Doing so may cause damage or leaks. >...
-
Page 192: Cautions For Use
13. Others Cautions for Use About the waterproof/dustproof and anti-shock performance of the camera • For more detail, refer to “(Important) About the Waterproof/Dustproof and Anti-shock Performance of the Camera” (P12). When using in a cold climate or at low temperatures •... - Page 193 13. Others Optimal use of the camera Keep this unit as far away as possible from electromagnetic equipment (such as microwave ovens, TVs, video games etc.). • If you use this unit on top of or near a TV, the pictures and/or sound on this unit may be disrupted by electromagnetic wave radiation.
- Page 194 13. Others About the Monitor/Viewfinder • Do not press the monitor with excessive force. Doing so may cause malfunction. • If the camera gets very cold in cold places such as ski resorts or places at high altitude, performance of the monitor may temporarily drop immediately after turning this unit on, e.g. the picture on the monitor being slightly darker than usual or ghost images appearing.
- Page 195 13. Others Battery The battery is a rechargeable lithium ion battery. Its ability to generate power comes from the chemical reaction that takes place inside it. This reaction is susceptible to the surrounding temperature and humidity. If the temperature is too high or too low, the operating time of the battery will become shorter.
- Page 196 • Information including personal information may be altered or vanish due to erroneous operation, effect of static electricity, accident, malfunction, repair, or other handlings. Please note in advance that Panasonic is not liable in any way for any direct or indirect damage from the alteration or vanishing of information or personal information.
- Page 197 About the picture data • Recorded data may be damaged or lost if the camera breaks down due to inappropriate handling. Panasonic will not be liable for any damage caused due to loss of recorded data. About tripods or unipods •...
- Page 198 There is the risk that the camera violates the radiowave regulations if used in countries other than those where this camera is sold, and Panasonic takes no responsibility for any violations. There is the risk that data sent and received via radio waves may be intercepted ∫...
- Page 199 • SDXC Logo is a trademark of SD-3C, LLC. • The terms HDMI and HDMI High-Definition Multimedia Interface, and the HDMI Logo are trademarks or registered trademarks of HDMI Licensing Administrator, Inc. in the United States and other countries. • Adobe is a trademark or registered trademark of Adobe Systems Incorporated in the United States and/or other countries.
Need help?
Do you have a question about the Lumix DC-TS7 and is the answer not in the manual?
Questions and answers