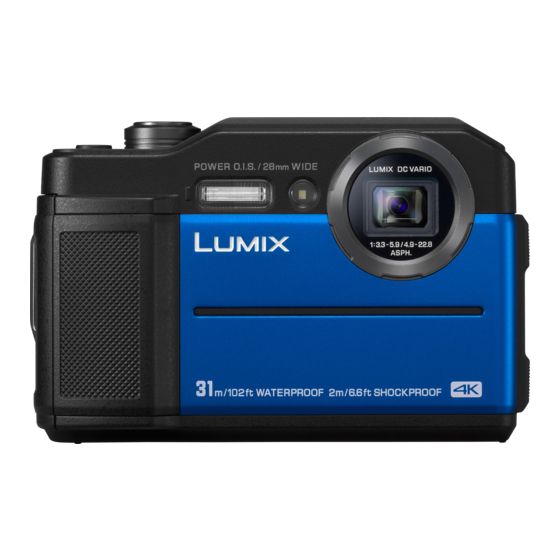
Panasonic Lumix DC-TS7 Owner's Manual
Compact rugged camera
Hide thumbs
Also See for Lumix DC-TS7:
- Owner's manual (199 pages) ,
- Quick manual (2 pages) ,
- Operating instructions for advanced features (199 pages)
Table of Contents
Advertisement
Quick Links
Download this manual
See also:
Owner's Manual
Please read these instructions carefully before using this
product, and save this manual for future use.
More detailed owner's manual is available in "Owner's Manual for
advanced features (PDF format)". To read it, download it from the
website. (P64)
Register online at http://shop.panasonic.com/support
(U.S. customers only)
If you have any questions, visit:
USA : http://shop.panasonic.com/support
Canada : www.panasonic.ca/english/support
P
PP
Basic Owner's Manual
Model No.
Digital Camera
DC-TS7
DVQX1500ZA
F0518HN0
Advertisement
Table of Contents

Related Manuals for Panasonic Lumix DC-TS7


Summary of Contents for Panasonic Lumix DC-TS7
-
Page 1: Digital Camera
More detailed owner's manual is available in “Owner’s Manual for advanced features (PDF format)”. To read it, download it from the website. (P64) Register online at http://shop.panasonic.com/support (U.S. customers only) If you have any questions, visit: USA : http://shop.panasonic.com/support Canada : www.panasonic.ca/english/support... - Page 2 Dear Customer, Thank you for choosing Panasonic! You have purchased one of the most sophisticated and reliable products on the market today. Used properly, we’re sure it will bring you and your family years of enjoyment. Please take time to fill in the information below. The serial number is on the tag located on the underside of your camera.
-
Page 3: Information For Your Safety
Information for Your Safety WARNING: To reduce the risk of fire, electric shock or product damage, • Do not let water or other liquids drip or splash inside the unit. • Do not expose accessories (battery pack, battery charger, AC adaptor, SD memory card and etc.) to rain, moisture, dripping or splashing. - Page 4 (2) this device must accept any interference received, including interference that may cause undesired operation. Declaration of Conformity Trade Name: Panasonic Model No.: DC-TS7 Responsible Party: Panasonic Corporation of North America Two Riverfront Plaza, Newark, NJ 07102-5490 Support Contact: http://shop.panasonic.com/support DVQX1500 (ENG)
- Page 5 THE FOLLOWING APPLIES ONLY IN THE U.S.A. DC-TS7 Certification and Compliance See Camera for the certification and compliance mark specific to that device. Select [Wi-Fi] in the [Setup] menu Select [Wi-Fi Setup] in the [Wi-Fi] Press to select [Approved Regulations], and press [MENU/SET] Contains FCC ID: 2AAD3AA2G1J1 This transmitter must not be co-located or operated in conjunction with any other antenna or transmitter.
- Page 6 THE FOLLOWING APPLIES ONLY IN CANADA. Certification and Compliance See Camera for the certification and compliance mark specific to that device. Select [Wi-Fi] in the [Setup] menu Select [Wi-Fi Setup] in the [Wi-Fi] Press to select [Approved Regulations], and press [MENU/SET] CAN ICES-3(B)/NMB-3(B) Contains IC : 10290A-AA2G1J1 This device complies with Industry Canada’s licence-exempt RSSs.
- Page 7 ∫ About the battery pack CAUTION Battery pack (Lithium ion battery pack) • Use the specified unit to recharge the battery pack. • Do not use the battery pack with equipment other than the specified unit. • Do not get dirt, sand, liquids, or other foreign matter on the terminals. •...
- Page 8 ∫ About the AC adaptor (supplied) CAUTION! To reduce the risk of fire, electric shock or product damage, • Do not install or place this unit in a bookcase, built-in cabinet or in another confined space. Ensure this unit is well ventilated. AC adaptor This AC adaptor operates on AC between 110 V and 240 V.
- Page 9 • Before cleaning the camera, remove the battery or disconnect the power plug from the outlet. • Do not press the monitor with excessive force. • Do not press the lens with excessive force. • Do not spray the camera with insecticides or volatile chemicals. •...
-
Page 10: Table Of Contents
Contents Playback Information for Your Safety ....3 Preparation/Basic Playing Back Pictures ......45 Menu Care of the camera ......11 Standard Accessories ......13 Menu list ..........46 About cards that can be used with this unit ............14 Wi-Fi (Important) About the Waterproof/ Dustproof and Anti-shock Performance ®... -
Page 11: Preparation/Basic
2 hours with the side door open when the temperature of the camera gets close to the ambient temperature. • Contact Panasonic if the fogging does not disappear. Conditions in which inner side may be fogged... -
Page 12: How To Use This Manual
Preparation/Basic ∫ When using in a cold climate or at low temperatures • The performance of the battery (number of recordable pictures/operating time) may decrease temporarily when using in a temperature between j10 oC and 0 oC (14 oF and 32 oF) (cold places such as ski resorts or places at high altitude). -
Page 13: Standard Accessories
• The card is optional. (For U.S.A. only) • If accessories are lost, customers can visit us at http://shop.panasonic.com/support for further information about obtaining replacement parts. (For Canada only) • If any accessories are lost, customers in Canada should visit our support page at www.panasonic.ca/english/support for further information about obtaining replacement... -
Page 14: About Cards That Can Be Used With This Unit
(512 MB to 2 GB) standard SDHC/SDXC memory cards. • Operation of the cards on the left has been confirmed SDHC Memory Card with Panasonic’s cards. (4 GB to 32 GB) SDXC Memory Card (48 GB to 128 GB) ∫ About motion picture/4K photo recording and speed class ratings Use a card that meets the following ratings of the SD Speed Class or UHS Speed Class. -
Page 15: (Important) About The Waterproof/Dustproof And Anti-Shock Performance Of The Camera
5 devices) Panasonic’s test method is based on the above “MIL-STD 810F Method 516.5-Shock”. However, the drop height was changed from 122 cm (4 feet) to 200 cm (6.6 feet) dropping onto 3 cm (0.1 feet) thick plyboard. - Page 16 • Any malfunction caused by customer misuse, or mishandling will not be covered by the warranty. • Panasonic offers no compensation for any accidents caused by use of the product (including both personal and property damage). • The inside of this unit is not waterproof. Water leakage will cause malfunction.
-
Page 17: Check Before Using Underwater
• The integrity of the rubber seals may decrease after about 1 year, with use and age. To avoid permanently damaging the camera, the seals should be replaced once each year. Please contact Panasonic for related costs and other information. (ENG) DVQX1500... -
Page 18: Using The Camera Underwater
Preparation/Basic Close the side door securely. A Red part B [LOCK] switch C Released state D Locked state • Lock the [LOCK] switch securely until the red part is no longer visible. • To prevent water intrusion, be careful not to catch foreign objects such as liquids, sand, hair, dust, or the strap cord. -
Page 19: Caring Of The Camera After Using It Underwater
Preparation/Basic Caring of the camera after using it underwater Do not open or close the side door until the sand and dust is removed by rinsing the camera with water. Make sure to clean the camera after using it. • Thoroughly wipe off any water droplets, sand, and saline matter on your hands, body, hair, etc. - Page 20 Preparation/Basic Tap the camera lightly against your palm while holding it upside down and then with the illustrated side facing down, and then wipe off the water droplets with a soft, dry cloth. • Repeat this step a few times if water is left in the microphone A or speaker B hole.
-
Page 21: Names And Functions Of Components
Preparation/Basic Names and Functions of Components Camera [ON/OFF] button (P26) Battery slot (P23) Motion picture button (P42) [LOCK] switch (P18, 23) Shutter button (P29) Release lever (P23) Flash Strap eyelet • Be sure to attach the strap when using Stereo microphone the camera to ensure that you will not •... - Page 22 Preparation/Basic 18 19 Monitor (P54) [MENU/SET] button (P30) ] (Post Focus) button (P40)/[Fn2] Charging lamp (P25)/ button (P34) ® Wi-Fi connection lamp (P48) [LVF] button (P27) ] (Delete) button (P45)/[ (Cancel) button/[Q.MENU] button Viewfinder (P27, 54) ] (4K Photo Mode) button (P37)/ Diopter adjustment dial [Fn1] button (P34) •...
-
Page 23: Preparations Before Recording
2: Slide the release lever B and open the side door. • Always use genuine Panasonic batteries (DMW-BCM13PP). • If you use other batteries, we cannot guarantee the quality of this product. Battery: Being careful about the battery... - Page 24 Preparation/Basic Charging the Battery The battery that can be used with this unit is DMW-BCM13PP. • Charge the battery in areas with an ambient temperature, between 10 oC and 30 oC (50 oF and 86 oF) (same as the battery temperature), is recommended. Insert the battery into this unit.
- Page 25 Preparation/Basic ∫ Charging from the power outlet Connect the AC adaptor (supplied) and this camera with the USB connection cable (supplied), and insert the AC adaptor (supplied) into the power outlet. ∫ Charging from a computer Connect the computer and this camera with the USB connection cable (supplied).
- Page 26 Preparation/Basic Setting Date/Time (Clock Set) • The clock is not set when the camera is shipped. Press camera [ON/OFF] button. Press [MENU/SET]. Press 3/4 to select the language, and press [MENU/SET]. Press [MENU/SET]. Press 2/1 to select the items (year, month, day, hour, minute), and press 3/4 to set.
-
Page 27: Basic Operations
Preparation/Basic Basic Operations Tips for taking good pictures Hold the camera gently with both hands, keep your arms still at your side and stand with your feet slightly apart. • Before using the camera, be sure to attach the supplied strap and fasten it to your wrist to avoid dropping the camera. -
Page 28: Optical Zoom
Preparation/Basic Zoom button (zoom operations) You can zoom in to make people and objects appear closer or zoom out to record landscapes in wide angle. [W]: To make subjects appear further away use (Wide) [T]: To make subjects appear closer use (Tele) Optical Zoom Zooms in without deteriorating the image quality. - Page 29 Preparation/Basic Shutter button (Taking pictures) Press the shutter button halfway to focus. • Aperture value and shutter speed are displayed. • Once the subject is in focus, the focus indication is displayed. (When the subject is not in focus, the indication flashes.) A Aperture value B Shutter speed...
- Page 30 Preparation/Basic Cursor buttons/[MENU/SET] button Pressing the cursor button: Selection of items or setting of values etc., is performed. • This owner's manual expresses the up, down, left, and right of the cursor button as 3/4/2/1. Pressing [MENU/SET]: Confirmation of setting contents, etc., is performed. ∫...
- Page 31 Preparation/Basic [MODE] button (Selecting a Recording Mode) Press [MODE]. Press 3/4/2/1 to select the Recording Mode. Press [MENU/SET]. (ENG) DVQX1500...
- Page 32 Preparation/Basic Intelligent Auto Mode (P36) Program AE Mode Records at the aperture value and shutter speed set by the camera. Manual Exposure Mode The exposure is adjusted by the aperture value and the shutter speed which are manually adjusted. Creative Control Mode Record while checking the image effect.
-
Page 33: Setting Menu Items
Preparation/Basic Setting menu items Press [MENU/SET]. Press 2. Press 3/4 to select a menu selector icon, such as [ [Rec] (P46) [Motion Picture] (P46) [Custom] (P47) [Setup] (P47) [Playback] (P47) Press [MENU/SET]. Press 3/4 of the cursor button to select the menu item and press [MENU/ SET]. -
Page 34: Assigning Frequently Used Functions To The Buttons (Function Buttons)
Preparation/Basic Assigning frequently used functions to the buttons (function buttons) You can assign recording functions, etc. to specific buttons. Select the menu. > [Custom] > [Fn Button Set] > [Setting in REC MENU mode]/[Setting in PLAY mode] Press 3/4 to select the function button you want to assign a function to and then press [MENU/SET]. - Page 35 Preparation/Basic ∫ Display the compass and altimeter The current bearing and altitude are displayed during recording, while the bearing and altitude at the time of recording are displayed during playback. To switch the environment information screen, press [DISP.] several times. ...
-
Page 36: Recording
Recording Taking Pictures using the Automatic Function (Intelligent Auto Mode) Recording Mode: In this mode, the camera makes the optimal settings for the subject and scene, so we recommend it when you wish to leave the settings to the camera and record without thinking about them. -
Page 37: Recording 4K Photos
Recording When recording motion pictures > [i-Portrait] [i-Scenery] ¦ [i-Macro] [i-Low Light] • [ ] is set if none of the scenes are applicable, and the standard settings are set. ¦ ∫ Face Detection The Auto Focus Mode is automatically set to [š]. ∫... - Page 38 Recording For capturing the best shot of a fast-moving subject Burst recording is performed while the shutter button is [4K Burst] pressed and held. A Press and hold B Recording is performed For capturing unpredictable photo opportunities Burst recording starts when the shutter button is pressed and stops when pressed again.
- Page 39 Recording ∫ Canceling 4K Photo In step , select [ • When [ ] ([4K Pre-Burst]) is set, the battery drains faster and the camera temperature rises. Select [ ] ([4K Pre-Burst]) only when recording. • Recording stops when the continuous recording time exceeds 29 minutes and 59 seconds.
-
Page 40: Controlling Focus After Recording (Post Focus)
Recording Controlling Focus After Recording (Post Focus) Applicable modes: The camera allows you to take 4K burst pictures while shifting the focus to different areas. After taking these pictures, you can select the desired focus area. This function is suited for recording still objects. •... - Page 41 Recording Selecting the desired focus area and saving a picture Select an image with the [ ] icon on the playback screen, and press 3. Press 3/4/2/1 to select the focus area. • If a picture that is in focus is not available for the selected area, a red frame will be displayed.
-
Page 42: Recording Motion Picture/4K Motion Picture
Recording Recording Motion Picture/4K Motion Picture Applicable modes: You can record motion pictures and 4K motion pictures in MP4 recording format. Audio is recorded in stereo. Start recording by pressing the motion picture button. A Elapsed recording time B Available recording time •... - Page 43 Recording • Continuous motion picture recordable times Continuous [Rec Quality] Size interval for dividing files recordable time When an SDHC card is used: Files exceeding 4 GB in size will be divided into smaller files for ¢1 recording and playback. 29 minutes and When an SDXC card is used: Files are not 59 seconds...
-
Page 44: Playback
Recording Recording slow motion pictures ([High Speed Video]) You can record motion pictures in approximately 1/4k slow motion by performing high-speed recording at 120 frames/second. The motion is displayed slower during playback. • Recording will be performed at [HD/10M/30p]. Select the menu. >... -
Page 45: Playing Back Pictures
Playback Playing Back Pictures Press [(]. Press 2/1. Play back the previous picture Play back the next picture ∫ To finish playback Press [ ] again or press the shutter button halfway. • When the camera is turned off, press and hold [(]. If you turn it on this way, the playback screen will be displayed automatically. -
Page 46: Menu
Menu Menu list • The description of each menu or setting item is displayed on the menu screen. [Rec] menu [Photo Style] [4K PHOTO] (P37) [Shutter Type] [Aspect Ratio] [Auto Bracket] [Red-Eye Removal] [Picture Size] [Self Timer] [ISO Limit Set] [Quality] [i.Dynamic] [Extended ISO]... - Page 47 Menu [Custom] menu [AF Assist Lamp] [Rec Area] [Fn Button Set] (P34) [Histogram] [Remaining Disp.] [Guide Line] [Auto Review] [Setup] menu ¢ [Precautions] (P16) [Beep] [Version Disp.] [Online Manual] [Live View Mode] [Exposure Comp. Reset] [Monitor Display]/ [Clock Set] (P26) [Self Timer Auto Off] [Viewfinder] [World Time]...
-
Page 48: Wi-Fi
Wi-Fi ® What you can do with the Wi-Fi function • The camera cannot be used to connect to a public wireless LAN connection. Controlling with a Smartphone/Tablet (P49) • Recording with a smartphone (P51) • Playing back or saving images stored on the camera, or uploading them on social media sites (P52) •... -
Page 49: Controlling With A Smartphone/Tablet
Wi-Fi Controlling with a Smartphone/Tablet Installing the smartphone/tablet app “Image App” The “Panasonic Image App” (hereafter “Image App”) is an application provided by Panasonic. • OS App for Android Android 4.2 or higher App for iOS: iOS 9.0 or higher Connect the smartphone to a network. - Page 50 Wi-Fi Connecting to a smartphone/tablet Connecting without using the password You can easily set up a direct connection to your smartphone without entering a password. On the camera > [Setup] > [Wi-Fi] > [Wi-Fi MENU Function] > [New Connection] > [Remote Shooting &...
- Page 51 Wi-Fi Terminating the connection Press any button on the camera, and press [MENU/SET]. • Confirmation screen is displayed. It is executed when [Yes] is selected. On the smartphone, close “Image App”. Taking images via a smartphone (remote recording) Connect to a smartphone. (P50) Operate the smartphone.
- Page 52 Wi-Fi Playing back/saving images stored on the camera, or uploading them on social media sites Connect to a smartphone. (P50) Operate the smartphone. 1 Select [ • You can switch the images to be displayed by selecting the icon (A) on ...
- Page 53 Wi-Fi Adding location information to images stored in the camera from a smartphone You can send location information acquired with a smartphone to the camera. After sending the information, you can also write it on images stored in the camera. ...
-
Page 54: Others
Others Monitor Display/Viewfinder Display • The descriptions in this section use the monitor screen as examples. In recording 60 p Image size (Panorama STD. WIDE Shot Mode) Image effect (filter) EXPS EXPS adjustment display Recording Mode (P31) EXPS Image effect (filter) setting Card (displayed only during... - Page 55 Others › Quality AF area Spot metering target š Ø AF Mode Ù Self-timer Post Focus (P40) Metering Mode Burst Aperture value (P29) 4K Photo (P37) Shutter speed (P29) Auto Bracket Exposure compensation Self-timer value Manual Exposure Battery indication Assistance Macro recording ISO sensitivity 120fps...
-
Page 56: Troubleshooting
Others Troubleshooting First, try out the following procedures. If the problem is not resolved, it may be improved by selecting [Reset] on the [Setup] menu. • Please also refer to the “Owner’s Manual for advanced features (PDF format)”, which describes more detailed information. Multiple pictures are taken at one time. - Page 57 Others The flash is not activated. • Is the flash setting set to [Œ]? > Change the flash setting. • When the electronic shutter is used, the flash is not activated. > Set [Shutter Type] to [MSHTR]. (P46) A Wi-Fi connection cannot be established. Radio waves get disconnected.
- Page 58 Others The sound from the speaker is weak. Difficult to hear the recorded sound. • Water is left in the speaker or microphone hole. Drain the water. (P20) The side door will not close. • Have foreign objects become trapped? >...
-
Page 59: Specifications
Others Specifications Specifications are subject to change without notice. Digital Camera: Information for your safety Power source: Power consumption: 4.4 W (When recording with Monitor) 4.4 W (When recording with Viewfinder) 2.0 W (When playing back with Monitor) 2.0 W (When playing back with Viewfinder) Camera effective 20,400,000 pixels pixels... -
Page 60: Exposure Compensation
Others Shutter speed Still picture: 4 seconds to 1/1300th of a second (Mechanical shutter), 1 second to 1/16000th of a second (Electronic shutter) Motion picture: 1/30th of a second to 1/16000th of a second Exposure (AE) Program AE (P) / Manual Exposure (M) Exposure 1/3 EV Step, j5 EV to i5 EV compensation... - Page 61 Others Recording file format Still picture JPEG (based on “Design rule for Camera File system”, based on “Exif 2.31” standard) Motion picture Audio compression AAC (2 ch) Interface [HDMI] microHDMI Type D [USB/CHARGE] USB 2.0 (High Speed) Micro-B Dimensions Approx. 116.7 mm (W)k76.1 mm (H)k37.3 mm (D) [4.59q (W)k2.99q (H)k1.46q (D)] Mass (Weight) Approx.
- Page 62 (If failure occurs during the test, a new set is used to pass the drop orientation test within a total of 5 devices) • Panasonic’s test method is based on the above “MIL-STD 810F Method 516.5-Shock”. However, the drop height was changed from 122 cm (4 feet) to 200 cm (6.6 feet)
- Page 63 Output: 1.0 A Operating temperature: 0 oC to 40 oC (32 oF to 104 oF) Battery pack (lithium-ion) (Panasonic DMW-BCM13PP): Information for your safety Voltage/capacity: 3.6 V / 1250 mAh The symbols on this product (including the accessories) represent the following: Class II equipment (The construction of the product is double-insulated.)
-
Page 64: Reading The Owner's Manual (Pdf Format)
More detailed owner's manual is available in “Owner’s Manual for advanced features (PDF format)”. To read it, download it from the website. http://panasonic.jp/support/dsc/oi/index.html?model=DC-TS7&dest=P • Click the desired language. ∫ To check the URL and QR code on the camera >... -
Page 65: Limited Warranty (Only For U.s.a.)
Limited Warranty Coverage (For USA Only) If your product does not work properly because of a defect in materials or workmanship, Panasonic Corporation of North America (referred to as “the warrantor”) will, for the length of the period indicated on the chart below, which starts with the date of original purchase (“warranty period”), at its option either (a) - Page 66 Owner’s Manual, and send it prepaid, adequately insured and packed well in a carton box. When shipping Lithium Ion batteries please visit our Web Site at http://shop.panasonic.com/support as Panasonic is committed to providing the most up to date information. Include a letter detailing the complaint, a return address and provide a daytime phone number where you can be reached.
- Page 67 Service Center. If the problem is not handled to your satisfaction, then write to: Consumer Affairs Department Panasonic Corporation of North America 661 Independence Pkwy Chesapeake, VA 23320 PARTS AND SERVICE, WHICH ARE NOT COVERED BY THIS LIMITED WARRANTY, ARE YOUR RESPONSIBILITY.
- Page 68 Others As of July 2015 DVQX1500 (ENG)
-
Page 69: Limited Warranty (Only For Canada)
This warranty is given only to the original purchaser, or the person for whom it was purchased as a gift, of a Panasonic brand product mentioned above sold by an authorized Panasonic dealer in Canada and purchased and used in Canada, which product was not sold “as is”, and which product was delivered to you in new... - Page 70 DOES NOT COVER normal wear and tear or cosmetic damage. The warranty ALSO DOES NOT COVER damages which occurred in shipment, or failures which are caused by products not supplied by Panasonic Canada Inc., or failures which result from accidents, misuse, abuse, neglect, mishandling, misapplication, alteration, faulty...
- Page 71 [MENU/SET] > [Setup] > [Version Disp.] > [Software info]. At least three (3) years from delivery of this product, Panasonic will give to any third party who contacts us at the contact information provided below, for a charge no more than our cost of physically performing source code distribution, a complete machine- readable copy of the corresponding source code covered under GPL V2.0 or LGPL...
- Page 72 AVC Video. No license is granted or shall be implied for any other use. Additional information may be obtained from MPEG LA, L.L.C. See http://www.mpegla.com Panasonic Corporation of North America Two Riverfront Plaza, Newark, NJ 07102-5490 http://shop.panasonic.com Panasonic Canada Inc.
Need help?
Do you have a question about the Lumix DC-TS7 and is the answer not in the manual?
Questions and answers