Table of Contents
Advertisement
Quick Links
Advertisement
Table of Contents

Related Manuals for Glunz & Jensen PlateWriter 8000


Summary of Contents for Glunz & Jensen PlateWriter 8000
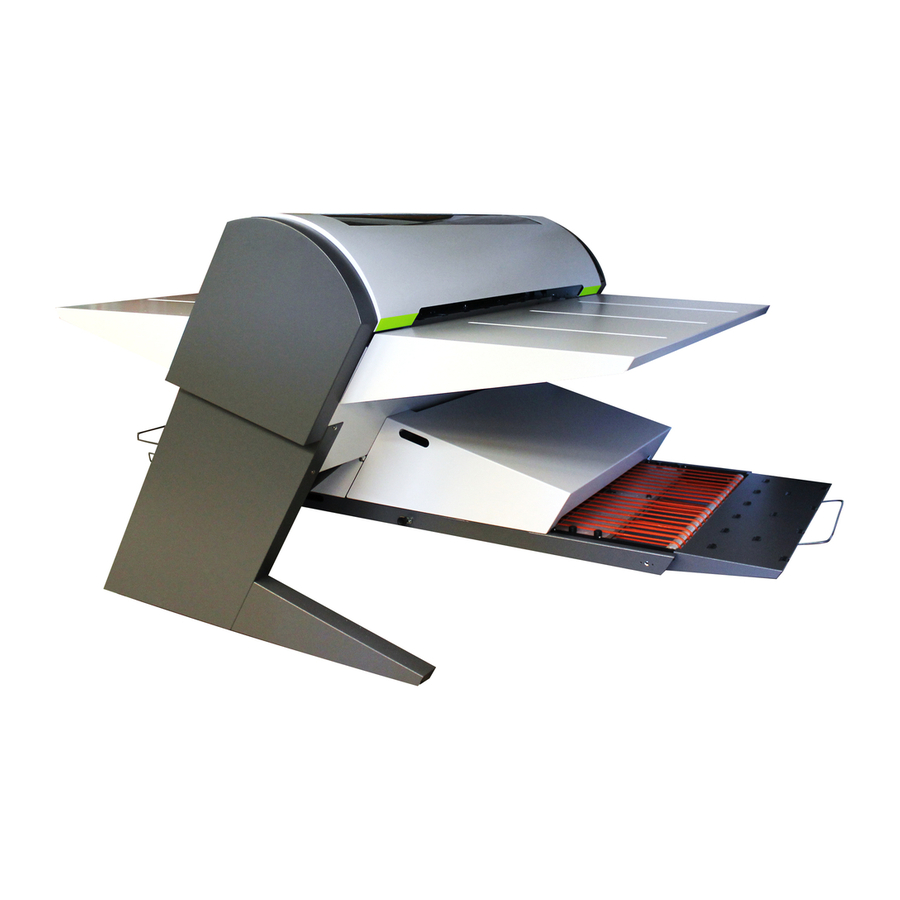
- Page 1 Hardware Installation PlateWriter™ 8000...
-
Page 3: Table Of Contents
Hardware Installation PlateWriter™ 8000 T11320 Edition AA, August 2014 This book has part No 10076511... - Page 4 This manual is published by: GLUNZ & JENSEN A/S Selandia Park 1 DK-4100 Ringsted Denmark Phone:+45 57 68 81 81 E-mail: gjhq@glunz-jensen.com Internet: www.glunz-jensen.com © 2014 Glunz & Jensen A/S. All rights reserved. Hardware Installation - PlateWriter™ 8000 1434...
-
Page 5: Table Of Contents
Table of Contents Table of Contents Part 1: Introduction ..........1-1 About this manual . - Page 6 Table of Contents Part 3: Completing the installation ........3-1 Installation check list .
-
Page 7: Part 1: Introduction
Introduction About this manual Part 1: Introduction About this manual Intended use of this manual This manual describes how to prepare the installation site for the installation of the • PlateWriter System. The procedures described in this manual require a reasonable level of technical skill and access to the proper tools. -
Page 8: Notes, Cautions, And Warnings
Introduction Important Notes, cautions, and warnings ! Throughout the manual notes, cautions, and warnings are written in bold like the example below: Always replace a fuse with one of the same size and rating as the old one. Symbol Meaning Explanation The operator should observe and/or act according to the "... -
Page 9: Part 2: Installation
Installation Overview Part 2: Installation Overview The installation procedure described in this chapter covers the following issues: Preparation of the installation site • Unpacking • Transportation of the System into the installation site • Installation of the finishing unit • Connecting the cables •... -
Page 10: Power Outlet Requirements
Installation Preparing the installation site Power outlet requirements If not already present, main power outlets should be installed in the room where the unit will be situated. Max. distance to the machine 2 m (6 ft.). Due to high leakage current, earth connection is essential before connecting power supply. -
Page 11: Power Cables
Installation Preparing the installation site Power cables " The equipment is delivered with the power cables required for the installation (USA only, outside USA these must be ordered separately). Cables are placed in the same box as imaging unit. If, for some reason, you decide to use cables others than the supplied, make sure that they conform to the directions given below. -
Page 12: Finishing Unit (Usa)
Installation Preparing the installation site Finishing unit (USA) à à Equipment Power Outlet T11136 1. Appliance coupler 16A (IEC 60320) 2. Plug type NEMA L6-15P, 230V AC, 15A 3. Cable min. 3 x 18 AWG, type SJT or harder service Finishing unit (rest of world) à... -
Page 13: Free Space Around The Platewriter
Installation Preparing the installation site Free space around the PlateWriter Decide where the unit shall be placed and make sure that the free space around it makes operation and servicing possible. Be aware of the following: Liquid Dot cartridges need to be replaced on the left side of the unit. •... -
Page 14: Unpacking
Installation Unpacking Unpacking The PlateWriter System is shipped in one crate. Carefully unpack the crate and boxes and verify that all parts are present according to the enclosed packing list and that nothing has been damaged during transportation. Crate contents PlateWriter imaging unit mounted onto the stand, with mounted tables, finishing unit, curing oven cover, and dryer cover RIP workstation (incl. - Page 15 Installation Unpacking T32346 1434 Hardware Installation - PlateWriter™ 8000...
-
Page 16: Tool Box Contents
Installation Unpacking Tool box contents The tool box contains various items for installation purposes as well as a few spare parts. See also illustration on previous page or inside the tool box. Item No. Description Qty. Remarks Bottle, 50 ml For printer Screw, M6 x 16 mm Spare parts... -
Page 17: Transportation Of The System Into The Installation Site
Installation Transportation of the System into the installation site Transportation of the System into the installation site You will need the following item(s) from the tool box (see page 2-8 for details): • T32358 Remove all tapes, cable ties and packing materials securing the System to the pallet. •... - Page 18 Installation 2-10 Transportation of the System into the installation site Now the System can be tranported into the installation site on its wheels. • " Four persons are required for moving the System out of the pallet. T32357 " When the PlateWriter System is positioned on its place, remove the wheels (7), shafts (6) and split pins (5) by using the four adjustable legs (2).
-
Page 19: Installation Of The Finishing Unit
Installation 2-11 Installation of the finishing unit Installation of the finishing unit Attaching the short finisher extension Remove the dryer cover (1) and curing oven cover (2). • Slide out the finishing unit forward. • Pull out (A) the button (3), turn it clockwise (B) and slide out the finishing unit by •... -
Page 20: Mounting The Curing Oven
Installation 2-12 Installation of the finishing unit Mounting the curing oven Underneath the curing oven (1) locate the positioning "cut outs" (2) in the ends of the • metal strips along the curing oven's right and left sides and the electrical connectors (3) and the safety switch activator (4). -
Page 21: Connecting The Imaging Unit Power Cable & Usb
Installation 2-13 Installation of the finishing unit Connecting the imaging unit power cable & USB You will need the following items from the tool box (see page 2-8 for details): • rest of world next to the RIP workstation box T32359 Loosen the six screws securing the cover for printer electronics and remove the cover. -
Page 22: Leveling
Installation 2-14 Installation of the finishing unit Leveling You will need the following item from the tool box (see page 2-8 for details): • T32362 " It's important that the finishing unit is in level in order to ensure an even distribution of gum supply on the gum rollers. -
Page 23: Attaching The Plate Exit Tray
Installation 2-15 Installation of the finishing unit Attaching the plate exit tray You will need the following item(s) from the tool box (see page 2-8 for details): • T32352 Position the plate exit tray (1), then attach it to the main chassis (2) using the screws (3) •... -
Page 24: Mounting The Gum Dryer
Installation 2-16 Installation of the finishing unit Mounting the gum dryer Like the curing oven, the gum dryer is fitted underneath with positioning "cut outs" • and the electrical connectors and the safety switch activator. T32351 The gum dryer (1) must be placed onto the main chassis frame (2) in a similar way as •... -
Page 25: Filling/Attaching The Gum/Finisher And Waste Ink Bottles
Installation 2-17 Installation of the finishing unit Filling/attaching the gum/finisher and waste ink bottles During finishing, gum/finisher solution is applied to the plate. The solution from the bottle is recirculated, meaning that any excess solution runs back into the bottle to be used for the next plate. -
Page 26: Connecting The Print Bed And Registration System Cables
Installation 2-18 Installation of the finishing unit Connecting the print bed and registration system cables Connect the registration system cable (1), print bed control (2) and power (3) cables • to the plugs underneath the finishing unit as shown below. To connect the print bed power cable (3) properly, first connect the plug, then tighten the union into the socket. -
Page 27: Connecting The Mains Supply Cable And Usb
Installation 2-19 Installation of the finishing unit Connecting the mains supply cable and USB Opposite the gum/finisher container are the connectors for the mains supply of the fin- • ishing unit and the print bed and USB port for the connection of the finishing unit with the RIP workstation. -
Page 28: Filling/Attaching The Water Tank
Installation 2-20 Installation of the finishing unit Filling/attaching the water tank During finishing, demineralised water is applied to the plate. The water from the tank is recirculated, meaning that any excess water runs back into the tank to be used for the next plate. -
Page 29: Reinstalling The Dryer And Curing Oven Covers
Installation 2-21 Installation of the finishing unit Reinstalling the dryer and curing oven covers Put the dryer (1) and curing oven (2) covers back into their position as shown below. • T32371 1434 Hardware Installation - PlateWriter™ 8000... -
Page 30: Attaching The Side Panels
Installation 2-22 Installation of the finishing unit Attaching the side panels Loosen the screws (1) on both sides. • Hang both side panels (2) onto imaging unit brackets and tighten both screws (1). • T32364 Hardware Installation - PlateWriter™ 8000 1434... -
Page 31: Program Control And Status Indicator
Installation 2-23 Installation of the finishing unit Program control and status indicator Finishing unit parameter BWS is set to 3 from the factory (backside wash is on). Adjusting parameters via the HyperTerminal is described in Software Installation PCB PCU available from www.glunz-jensen.com or www.platewriter.com. -
Page 32: Flow Diagrams
Installation 2-24 Installation of the finishing unit Flow diagrams This diagram illustrates the gum/finisher and wash flow of the finishing unit. SYSTEM WITH BACKSIDE WASH COUNTER VALVE PUMP WATER PUMP (2-WAY) CURING OVEN DRYER COUNTER VALVE MANUAL DRAIN VALVE WATER BOTTLE TANK T32373... -
Page 33: Part 3: Completing The Installation
Completing the installation Installation check list Part 3: Completing the installation Installation check list In extension of the hardware installation procedure the following must be checked to ensure that all procedures have been completed and to ensure proper plate making quality after completing the installation of the equipment (text in italics refers to other documents): Check item... - Page 34 Completing the installation Installation check list Setting the plate temperature and parameters of the finishing unit Run a plate through the finishing unit with heat sensitive strips mounted on all sides and in the center of the plate. Make sure to use the correct program with respect to the plate gauge.
-
Page 35: Disassembling Of The System
Appendix A Disassembling of the System Appendix A Disassembling of the System You will need the following item from the tool box (see page 2-8 for details): • T32380 If the door width is 1400 - 1900 mm Remove the dryer cover (1) and curing oven cover (2). •... - Page 36 Appendix A Disassembling of the System Pull out the finishing unit. Pull out (A) the button (1), turn it clockwise (B) and slide • out the finishing unit out of the rails by using the handle (2). T32376 Hardware Installation - PlateWriter™ 8000 1434...
- Page 37 Appendix A Disassembling of the System Dismount the six screws and washers (1) from both finishing unit rails (2) and re- • move them. T32377 1434 Hardware Installation - PlateWriter™ 8000...
- Page 38 Appendix A Disassembling of the System Loosen the four upper screws (1), dismount the outstanding six screws and remove • the exit table (2). T32387 Push the two locks (3) of the control panel from the bottom side of the input table to •...
- Page 39 Appendix A Disassembling of the System The System now can be transported into the installation site by using a fork-lift or • hand-powered pallet mover and four persons. T32381 Reinstall all dismounted parts in reverse order and continue with the installation on •...
-
Page 40: If The Door Width Is Less Than 1400 Mm
Appendix A Disassembling of the System If the door width is less than 1400 mm It is recommended to follow this procedure also when the System need to be transported to the floor. Five persons are required for lifting and handling the imaging unit. Dismount the two screws (1) securing the imaging unit (2) and remove it. - Page 41 Appendix A Disassembling of the System Dismount the six screws (1) on both sides and remove the leg assemblies (2) from • the stand base (3). T32379 All dismounted parts now can be transported into the installation site. • Reinstall all dismounted parts in reverse order and continue with the installation on •...
- Page 42 Disassembling of the System Hardware Installation - PlateWriter™ 8000 1434...
Need help?
Do you have a question about the PlateWriter 8000 and is the answer not in the manual?
Questions and answers