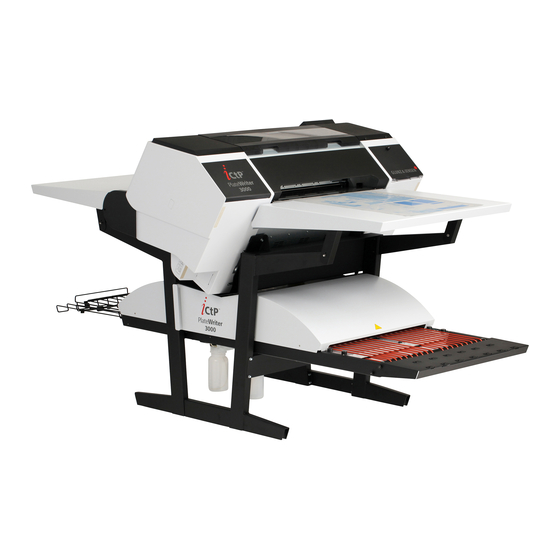
Glunz & Jensen PlateWriter 3000 Installation Manual
Hide thumbs
Also See for PlateWriter 3000:
- Service manual (152 pages) ,
- Operating manual (98 pages) ,
- Operating manual (92 pages)
Advertisement
Quick Links
Installation
2-34
Adjustment of PlateWriter 3000
Adjustment of PlateWriter 3000
After installing the PlateWriter 3000 and after removing the print bed or replacing the
print head it is essential to check and adjust the printer on the following parameters:
Head slant (PF)/tilt and head height
•
Head slant (CR)/bias
•
Bi-directional manual adjustment on a plate
•
The adjustment head slant/tilt is referred to PF Head Slant in the printer service
manual. Head bias is referred to CR Head Slant in the printer service panel.
Before continuing the procedure you need to establish what plate size the system
needs to be adjusted for. Please use the table below:
Adjustment
media available
0.15 plate
0.2 plate
0.3 plate
0.15 and 0.3 plate
0.2 and 0.3 plate
$
Important: Always run Narrow on 0.15 mm plates and Standard on 0.2 - 0.3
mm plates.
1126
Head slant
Head slant
(PF)/tilt and
(CR)/bias
head height
0.15 plate
0.15 plate
0.6 mm on plate
0.2 plate
0.2 plate
0.8 mm on plate
0.3 plate
0.3 plate
0.8 mm on plate
0.15 plate
0.15 plate
0.6 mm on plate
0.2 plate
0.2 plate
0.8 mm on plate
Hardware Installation Manual - PlateWriter
Bi-directional
RIP plug-in
manual
setting
0.15 plate
Narrow
Narrow
Plate gauge 0.2
8 Mill
0.2 plate
Standard
Standard
Plate gauge 0.2
8 Mill
0.3 plate
Standard
Standard
Plate gauge 0.3
12 Mill
0.15 and 0.3 plate
Narrow/Standard
Narrow on 0.15
Plate gauge 0.2
and Standard on
(Narrow) and 0.3
0.3
(Standard)
8 Mill and 12 Mill
0.2 plate
Standard
Standard
Plate gauge 0.2
8 Mill
(Standard) and 0.3
(Standard)
TM
3000
Advertisement

Related Manuals for Glunz & Jensen PlateWriter 3000


Summary of Contents for Glunz & Jensen PlateWriter 3000
- Page 1 Adjustment of PlateWriter 3000 Adjustment of PlateWriter 3000 After installing the PlateWriter 3000 and after removing the print bed or replacing the print head it is essential to check and adjust the printer on the following parameters: Head slant (PF)/tilt and head height •...
- Page 2 Installation 2-35 Adjustment of PlateWriter 3000 Serviceman mode and uncapping the head When adjustments of the head height, tilt and bias are carried out the printer must be turned on in the Serviceman mode. Start the printer in the Serviceman mode •...
-
Page 3: Initial Adjustment Of Print Bed/Print Plane
Installation 2-36 Adjustment of PlateWriter 3000 1. Initial adjustment of print bed/print plane When the print bed has been removed make a basic adjustment by measuring dimension a on both sides of the print bed. Dimension a must be 4.1 mm ± 0.1 mm and is adjusted on the small cup point screws (1) (see the pictures below). - Page 4 Installation 2-37 Adjustment of PlateWriter 3000 2. Adjusting the front registration system Load a 0.15, 0.2 or 0.3 plate, depending on the selected adjustment scenario. Smaller • formats should be loaded in landscape so that the front register pins are used.
- Page 5 Installation 2-38 Adjustment of PlateWriter 3000 If d1 and d2 are different, then remove the printer top cover (1), exit cover (2), and • the printer exit guide (3) by unscrewing the four screws (4). T11268 " Before adjusting, note the position of the top screws (5) and loosen them gently until it loses the contact with the print bed.
- Page 6 Installation 2-39 Adjustment of PlateWriter 3000 3. Adjusting the side registration system Load the plate according to the instruction described in the Part 2 in the Operating • Manual using the button. While observing the plate edge in relation to the pinch roller (distance d), eject the •...
- Page 7 Installation 2-40 Adjustment of PlateWriter 3000 Mount the side register cover to the input table and secure it with 7 screws and • washers (no. 30) from the tool box as shown. T11256 1126 Hardware Installation Manual - PlateWriter 3000...
- Page 8 Installation 2-41 Adjustment of PlateWriter 3000 4. Initial adjustment of the head height " This adjustment has to be carried out only if the print bed/ print plane has been removed from the system. This adjustment is not needed if the print head has been replaced.
- Page 9 Installation 2-42 Adjustment of PlateWriter 3000 Use a feeler gauge to check the height • on both sides of the head. You only need to measure the height on the front end. Use a feeler gauge of 0.6 mm when using 0.15 plates on Narrow and 0.8 mm if using 0.2 or 0.3 plates on...
- Page 10 Installation 2-43 Adjustment of PlateWriter 3000 The test job for the slant/tilt (PF) contains of a series of lines 1-8 and this is repeated • across the plate. Each line contains a series of lines close • together and then 1 single lines that are supposed to be as close as possible to the series of lines.
-
Page 11: Print Head Slant (Cr)/Bias Adjustment
Installation 2-44 Adjustment of PlateWriter 3000 Loosen the screw that holds the head slant lever. Pull it up or down and tighten the • screw again. Head height levers Head slant levers " Note that the tilt lever must be held while tightening the screw. -
Page 12: Reference Line
Installation 2-45 Adjustment of PlateWriter 3000 The test job for the slant/bias (CR) consists of identical rows across the page. The test • pattern should be aligned when the adjustment is performed correctly. The reference line 1 and 2 and the two adjustment lines should be aligned perfectly when slant is adjusted correctly. - Page 13 Installation 2-46 Adjustment of PlateWriter 3000 Turn the adjustment dial to adjust the • slant of the print head. Tighten the 6 screws again and close the top cover. • Print the adjustment pattern again and check the adjustment result. Repeat the steps •...
- Page 14 Installation 2-47 Adjustment of PlateWriter 3000 7. “Bidir manual” adjustment If using bi-directional printing it necessary to do a bidirectional adjustment. The adjustment has to be done Narrow and Standard head height if both are in use. For Narrow head height on a 0.15 mm plate, set paper thickness before the adjustment to 8mil (0.2 mm): MENU ->...
- Page 15 Installation 2-48 Adjustment of PlateWriter 3000 If paper used is smaller than 407 mm the print will be split up, when the first page • finishes return to main menu using q, release page and the second page. When pattern job finishes, paper will be released automatically and parameter menu •...
- Page 16 Installation 2-49 Adjustment of PlateWriter 3000 With a magnifier, find the pattern that look must uniform and do not have vertical • white or black lines. Notice the number and go to the next pattern. The current setting is 4.
- Page 17 Installation 2-50 Adjustment of PlateWriter 3000 8. Adjustment of the printer feed The feed adjustment need to be done in order to secure the correct image length on the plate. The printer already has a feed adjustment built in but since the correction depends on the plate thickness the correction value must be set in the page setup.
- Page 18 If the value turns out to be different you can key in the value in the relevant page setup(s). We recommend that the feed is checked regularly depending on the system usage. • The PlateWriter 3000 is now adjusted and ready to print. 1126 Hardware Installation Manual - PlateWriter 3000...
- Page 19 Installation 2-52 Adjustment of PlateWriter 3000 Hardware Installation Manual - PlateWriter 3000 1126...
Need help?
Do you have a question about the PlateWriter 3000 and is the answer not in the manual?
Questions and answers