
Related Manuals for Avonic CM60-IP


Summary of Contents for Avonic CM60-IP
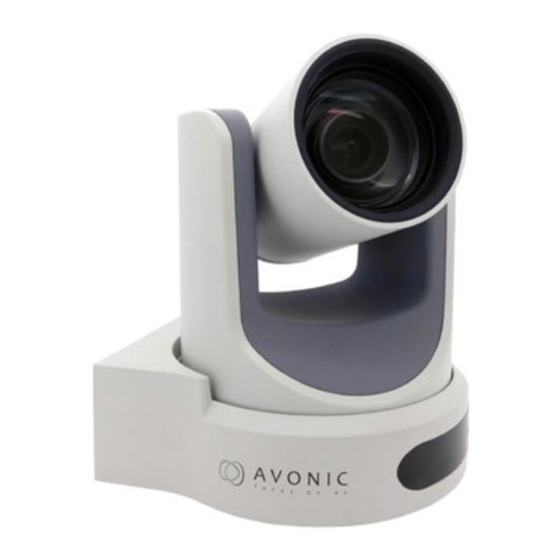
- Page 1 Avonic CM60-IP / CM61-IP / CM63-IP HD Video Conferencing IP Camera with PoE User Manual Version 2.1 Join Avonic Update notes: linkedin.com/company/avonic Visca over IP commands twitter.com/avonic1 • facebook.com/avonic...
-
Page 2: Table Of Contents
COM port settings ........................................... 17 Command List ................................................ 18 Network Function ..............................................19 Operating Environment ......................................19 Equipment Installation ......................................19 LAN Access and Control ......................................19 Visit/Access IP Camera ......................................20 TCP/UDP Control ..........................................21 WebGUI Homepage ............................................21 www.avonic.eu... - Page 3 VISCA Camera Control Command List ................................33 VISCA Query Command List ......................................37 Pelco-D Protocol Command List ....................................42 Pelco-P Protocol Command List ....................................42 VISCA over IP commands ........................................43 Appendix B Quick Start ..............50 Appendix C Dimensions ..............51 www.avonic.eu...
-
Page 4: Introduction
Before cleaning, unplug the power cable. Use a soft, damp cloth to clean the device, do • not use strong or abrasive detergent to clean that will damage the device. If you wish to dispose this product, please contact Avonic to obtain info about the take- • back procedure. -
Page 5: Product Overview
Panasonic CMOS sensor combined with a glass high-quality glass lens with 12x /20x /30x optical zoom. Control these cameras over RS232/485 with the Avonic CM-CON100 PTZ controller or any third party controller that supports VISCA, Pelco-P/D protocols. -
Page 6: Main Unit
Input and Output Description Audio LINE IN Interface CVBS Interface System select switch 4. RS485 interface 5. RS232 IN interface 6. RS232 OUT interface Network Interface 8. HDMI Interface 9. SDI Interface 10. USB2.0 (update only) DC 12V jack 12. Power switch www.avonic.eu... -
Page 7: Ir Remote Controller
MANUAL button, and adjust it with [Far] (Focus on far object) and [NEAR] (Focus on near object) 10. Camera Select Buttons Press the button corresponding to the camera you want to operate with the remote controller. # Button Used with other buttons Set Camera IR Address Buttons [*]+[#]+[F1]: Address1 www.avonic.eu... - Page 8 19. Shortcut Set [*]+[#]+[1]: OSD menu default English [*]+[#]+[3]: OSD menu default Chinese [*]+[#]+[4]: Default IP address [*]+[#]+[5]: Save OSD [*]+[#]+[6]: Quickly recover the default [*]+[#]+[8]: Look the camera version [*]+[#]+[9]: Quickly set up inversion www.avonic.eu...
-
Page 9: Installation
Installation Connection Diagram System Select Switch Setting of the system select switch. The option of video format: VIDEO SYSTEM 1080p60 720p30 1080p50 720p25 1080i60 1080i50 720p60 720p50 576i www.avonic.eu... -
Page 10: Power Adapter
After changing the switch, you need to restart the camera to take effect. b. 720 p30 and 720 p25 only under the HDMI output. Power adapter This equipment is equipped with a 12V/2A DC power supply. Insert the power supply according to the requirements, turn on the power switch. RS232 Interface www.avonic.eu... -
Page 11: Visca Network Connection Diagram
VISCA network connection diagram www.avonic.eu... -
Page 12: Operation
Move the cursor to the Exposure item in the main menu and press [home] button, EXPOSURE menu appears, as shown in the following figure. EXPOSURE Mode Auto ExpCompMode Off Backlight Gain Limit Anti-Flicker 50Hz Select Item Change Value [Menu] Back www.avonic.eu... - Page 13 BG: Blue gain. Optional items: 0~255 (Effective only in Manual mode) RG Tuning: Red gain fine-tuning, Optional items: -10 ~ +10(Effective only in AWB sens is Low) BG Tuning: Blue gain fine-tuning, Optional items: -10 ~ +10(Effective only in AWB sens is Low) www.avonic.eu...
- Page 14 B&W-Mode: Image color. Optional items: On, Off Gamma: Optional items: Default, 0.45, 0.5, 0.56, 0.63 Style: Optional items: Norm, Clarity, Bright, Soft, V500. LDC: Optional items: On, Off. Note: 1080p60 and 1080p50 not support the lens distortion. 5. P/T/Z www.avonic.eu...
- Page 15 NR3D-Level D-HotPixel Select Item Change Value [Menu] Back NR2D-Level: 2D noise reduction. Optional items: Off, Auto, 1 ~ 5 NR3D-Level: 3D noise reduction. Optional items: Off, 1 ~ 8 D-HotPixel: Dynamic bad points, Optional items: Off, 1 ~ 5 www.avonic.eu...
- Page 16 Baudrate: Serial port baud rate. Optional items: 2400, 4800, 9600 8. RESTORE DEFAULT Move the cursor to the Restore Default item in the main menu and press [home] button, RESTORE DEFAULT menu appears, as shown in the following figure. www.avonic.eu...
-
Page 17: Serial Communication Control
• Parity bit: none. • Pan-Tilt will rotate to the maximum position of top right after the camera started, then it return to the center, the process of initialization is finished. (Note: If the position preset 0 has been www.avonic.eu... -
Page 18: Command List
0 will be called up after initialization) Then the users can control the camera with commands in the command list. Command List See Appendix A www.avonic.eu... -
Page 19: Network Function
"admin", password "admin". To find camera IP, press * and # and 4 on remote controller one by one, IP address will be shown on screen. Change IP address: On web control page, find "Network"--->Change IP---->Click "Apply"----> Restart camera www.avonic.eu... -
Page 20: Visit/Access Ip Camera
Visit/Access IP Camera Input http://192.168.100.88 to web browser, a login window pop up, input login name: admin password: admin A window like the following will appear: www.avonic.eu... -
Page 21: Tcp/Udp Control
TCP/UDP Control The Avonic IP camera is implemented with a TCP server inside. The default TCP port number is 5678. This number can be changed in the WebGUI in the Network Menu. Once the connection between client and server is set up, the client will be able to send VISCA PTZ commands to the server. - Page 22 Set/Call: When PTZ turn to expected position, can set up a number of preset that user want. click "Set" button, when PTZ turn to other position, click "Call" button, PTZ turn back to preset position. Language selection Available options are: Chinese/English/Russian www.avonic.eu...
-
Page 23: Video
Video 720p120 : On, Off Video Format : 50HZ(PAL) 60HZ(NTSC) Dial priority Encode Protocol : H.264 H.265 MJPEG Encode Level : baseline, mainprofile, highprofile Resolution www.avonic.eu... -
Page 24: Image Setup
Bit Rate control : Constant bit rate Variable bit rate Fluctuate level Restrain the fluctuation magnitude of variable rate, grade 1 ~ 6 Image Setup Brightness Image bright 0~14, slider control, on the right shows the corresponding numerical. Default 6. Saturation www.avonic.eu... -
Page 25: Audio Setup
Audio Switch (on off) Audio Type (AAC) Sample rate (44.1K 48K) Bit rate (96k,128k,256k) Input Type (line in only) Input Vol. L The volume of the left channel Input Vol. R The volume of the right channel ADTS Options (On Off) www.avonic.eu... -
Page 26: System Setting
Click the "Reboot" button, system restart. User and password The user can modify the password (letters and numbers only) Apply / Cancel Modify password and click the "apply" button to the login page, press "cancel" button to cancel password change. www.avonic.eu... -
Page 27: Network Setting
Network Setting Lan Settings Default the IP address is 192.168.100.88, The MAC address can be modified. www.avonic.eu... -
Page 28: Rtsp Stream Media Player
HTTP Port range : 80; 1024-65535 (default 80) RTSP Port range : 554; 1024-65535 (default 554) PTZ Port range : 1024-65535 (default 5678) Multicast Port range : 1024-65535 (default 6688) Device Information Show the current device information, as shown below. www.avonic.eu... - Page 29 If you need the camera upgrade program, please contact Avonic. www.avonic.eu...
-
Page 30: Maintenance
1. Access to the network with PC can test whether network works, in this way to get rid of cable failure, network failure caused by PC virus until the PC can be Ping. 2. Disconnect IP Camera with network, IP Camera and PC are connected, according to the www.avonic.eu... -
Page 31: Control
2. Check control cable is connected correctly. Contact For any questions or suggestions, contact the reseller or the local distributor of Avonic. Find the local distributor on the website of Avonic. For the recent manual or datasheet, look at the Avonic website. -
Page 32: Visca Camera Return Command List
60 02 FF Returned when the Messages command format is different or when a command with illegal command parameters is accepted. Command Buffer z0 60 03 FF Indicates that two sockets Full are already being used(executing two commands) and the www.avonic.eu... -
Page 33: Visca Camera Control Command List
Direct 8x 01 04 47 0p 0q 0r pqrs: Zoom Position tuvw: Focus Position 0t 0u 0v 0w FF CAM_WB Auto 8x 01 04 35 00 FF Normal Auto Indoor mode 8x 01 04 35 01 FF Indoor mode www.avonic.eu... - Page 34 Gain Position CAM_Bright Reset 8x 01 04 0D 00 FF Bright Setting 8x 01 04 0D 02 FF Down 8x 01 04 0D 03 FF Direct 8x 01 04 0D 00 00 0p pq: Bright Position 0q FF www.avonic.eu...
- Page 35 8x 01 04 66 03 FF CAM_RegisterValue 8x 01 04 24 mn 0p 0q Register (=00-7F) pp: Register Value (=00-7F) CAM_ColorGain Diret 8x 01 04 49 00 00 00 p: Color Gain setting 0p FF 0h (60%) to Eh www.avonic.eu...
- Page 36 Sensitivity High/Normal/Low Normal 8x 01 04 58 02 FF 8x 01 04 58 03 FF CAM_SettingReset Reset 8x 01 04 A0 10 FF Reset Factory Setting CAM_Brightness Direct 8x 01 04 A1 00 00 0p Brightness 0q FF Position www.avonic.eu...
-
Page 37: Visca Query Command List
50 00 00 0p 0q FF pq: R Gain CAM_BGainInq 8x 09 04 44 FF y0 50 00 00 0p 0q FF pq: B Gain CAM_AEModeInq 8x 09 04 39 FF y0 50 00 FF Full Auto y0 50 03 FF Manual www.avonic.eu... - Page 38 Value (00 to FF) CAM_ColorGainInq 8x 09 04 49 FF y0 50 00 00 00 0p FF p: Color Gain setting 0h (60%) to Eh (200%) CAM_IDInq 8x 09 04 22 FF y0 50 0p 0q 0r 0s FF pqrs: Camera ID www.avonic.eu...
- Page 39 Mode0 y0 50 02 FF Mode2 CAM_GainLimitInq 8x 09 04 2C FF y0 50 0q FF p: Gain Limit CAM_DHotPixelInq 8x 09 04 56 FF y0 50 0q FF p: Dynamic Hot Pixel Setting (0: 0ff, level 1 to www.avonic.eu...
- Page 40 Exp Comp. Position CAM_OtherBlockInq 8x 09 7E 7E 02 FF y0 50 0p 0q 00 0r 00 00 p.bit0: Power 1:On, 0:Off 00 00 q.bit2: LR Reverse 1:On, 00 00 00 00 00 FF 0:Off r.bit3~0: Picture Effect Mode www.avonic.eu...
- Page 41 0q rr 0s 0t 0u FF 0:Off) rr.bit6~3: Color Gain (0h(60%) to Eh(200%)) s: Flip(0: Off, 1:Flip-H, 2:Flip-V, 3:Flip-HV) t: bit2~0: NR2D level u: Gain limit Remark: 1.[x] in the above list refer to the camera address, [y] = [x + 8] www.avonic.eu...
-
Page 42: Pelco-D Protocol Command List
0xAF Focus Far 0xA0 Address 0x00 0x80 0x00 0x00 0xAF Focus Near 0xA0 Address 0x01 0x00 0x00 0x00 0xAF Set Preset 0xA0 Address 0x00 0x03 0x00 Preset ID 0xAF Clear Preset 0xA0 Address 0x00 0x05 0x00 Preset ID 0xAF www.avonic.eu... -
Page 43: Visca Over Ip Commands
The server then parses and executes the PTZ command. The Avonic IP Camera has also implemented a UDP server. The UDP port number is fixed on 1259. Once the connection between client and server is set up, the client will be able to send PTZ commands to the server. - Page 44 Wide(Standard) 81 01 04 07 03 FF Tele(Variable) 81 01 04 07 2p FF p = 0(low) - 7(high) Wide(Variable) 81 01 04 07 3p FF Direct 81 01 04 47 0p 0q 0r 0s FF pqrs: Zoom Position www.avonic.eu...
- Page 45 Gain Position CAM_Bright Reset 81 01 04 0D 00 FF Bright Setting 81 01 04 0D 02 FF Down 81 01 04 0D 03 FF Direct 81 01 04 0D 00 00 0p 0q FF pq: Bright Position www.avonic.eu...
- Page 46 81 01 06 01 VV WW 02 03 FF YYYY: Pan Position Upleft 81 01 06 01 VV WW 01 01 FF ZZZZ: Tilt Position Upright 81 01 06 01 VV WW 02 01 FF DownLeft 81 01 06 01 VV WW 01 02 FF www.avonic.eu...
- Page 47 90 50 02 FF Auto Focus eInq 90 50 03 FF Manual Focus CAM_FocusPosInq 81 09 04 48 FF 90 50 0p 0q 0r 0s FF pqrs: Focus Position CAM_WBModeInq 81 09 04 35 FF 90 50 00 FF Auto www.avonic.eu...
- Page 48 81 09 06 06 FF 90 50 02 FF 90 50 03 FF CAM_LR_ReverseI 81 09 04 61 FF 90 50 02 FF 90 50 03 FF CAM_PictureFlipIn 81 09 04 66 FF 90 50 02 FF 90 50 03 FF www.avonic.eu...
- Page 49 90 50 00 00 00 0p FF p: Color Hue setting 0h (− 14 degrees) to Eh ( +14 degrees) CAM_AWBSensitivi 81 09 04 A9 FF 90 50 00 FF High tyInq 90 50 01 FF Normal 90 50 02 FF www.avonic.eu...
-
Page 50: Appendix B Quick Start
Step4. Pan-Tilt will rotate to the maximum position of top right after the camera started, then it return to the center, the process of initialization is finished. (Note: If the position preset 0 has been stored, the position preset 0 will be called up after initialization) www.avonic.eu... -
Page 51: Appendix C Dimensions
Appendix C Dimensions All sizes are in mm Weight: 2.4 kg www.avonic.eu...
Need help?
Do you have a question about the CM60-IP and is the answer not in the manual?
Questions and answers