
Related Manuals for Avonic AV-CM22-VCU


Summary of Contents for Avonic AV-CM22-VCU
- Page 1 Avonic 4K Conference Camera USB3.0 AV-CM22-VCU www.avonic.com | User Manual | Version 1.0.1...
-
Page 2: Table Of Contents
Join Avonic ................ -
Page 3: Introduction
For any questions or suggestions, contact your reseller or the local distributor of Avonic. Find the local distri- butor on the website of Avonic. For the most recent version of the manual or datasheet, look at the Avonic website: www.avonic.com. -
Page 4: Safety Notes
Installation Set up this Product on a hard, stable surface or mount it to a wall or ceiling. Use the connected Avonic mount for mounting to a wall or ceiling. Ensure the mounting construction is capable of supporting four times the weight of the Product. - Page 5 USB cable and Power supply To operate the Avonic Power adapter and USB cable safely and reduce the possibility of heat-related injury or damage, plug the Power adapter and/or USB cable directly into Power outlet or an USB port of a computer.
-
Page 6: Package Contents And Accessories
PACKAGE CONTENTS AND ACCESSORIES Contents Quantity Description Avonic SKU 1 pc CM22 Camera AV-CM22-VCU 4 pc USB Power Adaptor (EU, UK, AV-CM20-PSU US, AUS) 1 pc Remote Control CM-RC 1 pc USB 3.0 cable AV-USB30-AB Handling precautions Be cautious to take the camera by its base and do not touch the lens. -
Page 7: Product Overview
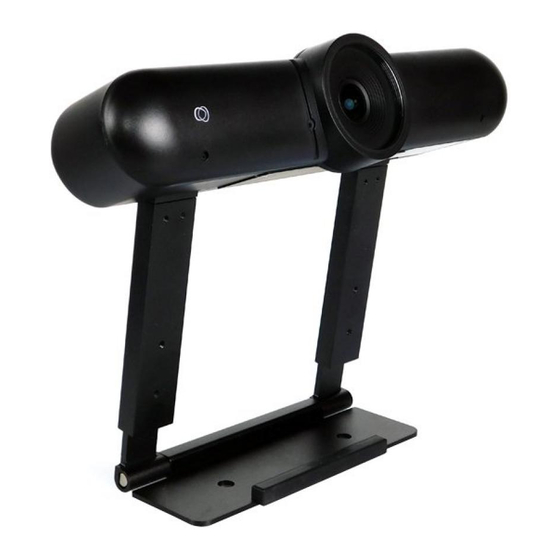
PRODUCT OVERVIEW The Avonic CM22-VCU boasts a 4K, wide angle lens up to 120 degrees FOV that makes sure you can capture all attendees. It’s Smart automatic and fully user configurable modes guarantee crystal clear video even under the most challenging light conditions. Built in user configurable dual microphones allow for easy audio capture. -
Page 8: Installation
INSTALLATION Connections HDMI output USB 3.0 connector Camera placement The CM22 comes with a detachable integration mount with multiple placement options: 1. Monitor placement www.avonic.com Back to top... - Page 9 3. Wall mounted below a screen The minimum (depending on connector type used) and maximum depth are indicated, due to the dual articulated sliding mount design there are numerous variations to make. 174mm 207mm 174mm 174mm 70mm 174mm 207mm 70mm 70mm www.avonic.com Back to top...
-
Page 10: Operation
4. Preset Key 13. Reset Key 5. Home key 14. PTZ control key 15. Menu Key 6. Return Key 7. Zoom Button 16. Backlight Key 8. Left/Right 17. PTZ reset key Setting Key 9. Focus Key www.avonic.com Back to top... - Page 11 This Menu button opens of closes the the OSD menu. If the menu is not in English, please press [*]+[#]+[1] to change the Menu language to English. Backlight Key This button has no function with this camera. PTZ Reset Key This button has no function with this camera. www.avonic.com Back to top...
-
Page 12: Quick Codes List
[*]+[#]+[4] : 1080P@30fps default hdmi resolution [*]+[#]+[5] : Disable microphone, setting is persistant even after power cycle [*]+[#]+[6]: Factory default [*]+[#]+[7]: 1080P@60fps default resolution [*]+[#]+[9]: Enable microphone, setting is persistant even after power cycle Contact Avonic for latest firmware info@avonic.com www.avonic.com Back to top... -
Page 13: Osd Menu
Remote Control and a third party UVC based videoconference application; such as many Media players like VLC or Potplayer, the standard windows camera application etc. In the following pages, the navigation is described for using the IR Remote Control. www.avonic.com Back to top... -
Page 14: First Operation
Full Auto / Bright / Shutter Priority ExpCompMode ON / OFF Exposure Compensation -7 ~ 7 Gainlimit 0 ~ 15 Backlight ON / OFF DRC Strength 0 ~ 8 Antiflicker 50hz / 60hz / OFF Select Item Change Value [Menu] Back www.avonic.com Back to top... - Page 15 Keep in mind that the shutter speed is the amount of time that each frame of the sensor has been exposed to light. To compensate for poor lighting conditions, it is possible to adjust the DRC Strength. See the DRC Strength paragraph on this page for more information. www.avonic.com Back to top...
-
Page 16: Color
WB mode: Indoor/ Outdoor Select these modes when you are filming inside (indoor) or outside rooms or buildings (outdoor). It is possible to change saturation (saturation of image colors) and Hue settings (balance between green and red). www.avonic.com Back to top... -
Page 17: Image
Artificial contrast, be careful no to set this too high as it will create a sort of halo around sharp edges of filmed objects. The setting of sharpness coincides with the setting of noise reduction. Flip-H, Flip-V The Flip-H mode turns the picture horizontally, while the Flip-V mode turns it vertical by 180 degrees. www.avonic.com Back to top... - Page 18 (making the picture ball). It can also be used to widen the angle of the image. Settings range from -10 to “off” and from “off” to 10. Lens Distortion Correcten on -10 Lens Distortion Correction on 10 www.avonic.com Back to top...
-
Page 19: Noise Reduction
Under setting it is possible to change the language, the DVI mode (change between DVI and HDMI), HDMI Format and Auto Framing options. You can change also DPTZ and Uvc EXT settings. Language It is possible to change the language to English or Chinese. www.avonic.com Back to top... -
Page 20: Information
Read out of (Firmware) Version, (Product) Model and (installation) date RESTORE DEFAULT RESTORE DEFAULT Restore default? YES / NO / RETURN Select Item Change Value [Menu] Back [Home] OK Here you can restore the factory default settings. www.avonic.com Back to top... -
Page 21: Maintenance
TROUBLESHOOTING General advise • Turn the camera off and on again and check if the problem persists. • Restore to factory Defaults. Power Issues • No power LED Check the USB cable Check the power supply www.avonic.com Back to top... -
Page 22: Image
Check options in OSD, like exposure, color temp, Red and Blue tuning Control • Remote Controller does not work Check batteries of the controller Note: When you experience one or more of the above mentioned problems check also our Appendix D - CMOS characteristics www.avonic.com Back to top... -
Page 23: Appendix A - Dimensions
APPENDIX A - DIMENSIONS www.avonic.com Back to top... -
Page 24: Appendix B - Cmos Image Sensor Characteristics
In this example, the dots represent the sampled data and the curve represents the original signal. Because there are too few sampled data points, the resulting pattern produced by the sampled data is a poor representation of the original. www.avonic.com Back to top... - Page 25 Depending on lighting types, such occurrences may not be improved with the antiflicker setting. It is recommended to set the shutter speed to 1/100 sec. in the areas of 50 Hz power supply frequency and to 1/60 in the areas of 60 Hz. www.avonic.com Back to top...
Need help?
Do you have a question about the AV-CM22-VCU and is the answer not in the manual?
Questions and answers