
Related Manuals for Avonic AV-CM22-VCU


Summary of Contents for Avonic AV-CM22-VCU
- Page 1 Avonic 4K Conference Camera USB3.0 AV-CM22-VCU www.avonic.com | User Manual | Version 1.11...
-
Page 2: Disclaimer, Contact, Ip Rating And Ce Marking
“look and feel” and arrangement of such Content, contained in this Manual is owned, controlled or licensed by or to Avonic, and is protected by trade dress, copyright, patent and trademark laws, and various other intellectual property rights and unfair competition laws. -
Page 3: Eu Declaration Of Conformity
EU Declaration of Conformity The Avonic Declaration of Conformity is in accordance with EN ISO/IEC 17050-1 and generated using the ProductIP compliance platform. Table 1: CE Declaration of Conformity 1. Models No: AV-CM22-VCU-B 2. Brand Name: Avonic 3. Product Name: 4K Video Conference Camera USB3.0 &... -
Page 4: Important Information
Important Information Liability Avonic will NOT be held responsible for any damage or injury caused by unqualified persons carrying out these tasks, or by not following the instructions in this Manual. Intended Use and Non-Intended Use Installation The following applies to the installation of the camera: •... - Page 5 Black Light Control CMOS Complementary Metal Oxide Semiconductor Dynamic Range Compression Exposure Value High Definition HDMI High-Definition Multimedia Interface MJPEG Motion-JPEG Noise Reduction On-Screen Display Pan / Tilt / Zoom Stock Keeping Unit Signal to Noise Ratio User Manual | www.avonic.com...
-
Page 6: Table Of Contents
1. Standby Key....................17 2. Number Key....................17 3. *Key........................18 4. Preset Key.......................18 5. Home......................18 6. Return Key...................... 18 7. Zoom + -......................18 8. Left/ Right Setting Key..................18 9. Focus Key......................18 10. Camera IR Selection Key................19 User Manual | www.avonic.com... - Page 7 Color issues......................33 Autofocus Issues....................34 Control......................... 34 IR Remote Controller does not work..............34 Appendix A - Dimensions....................... 35 Appendix B - CMOS Image Sensor Characteristics..............36 White Flecks......................... 36 Aliasing.........................36 Focal Plane........................36 Flash Band........................36 Flicker...........................36 User Manual | www.avonic.com...
-
Page 8: Introduction
This Manual describes the safety precautions and the instructions for safe unpackaging, installation, operation, maintenance and disposal of the Avonic CM22-VCU camera. In this Manual the Avonic CM22-VCU camera is referred to as the 'Product'. Target Audience This Manual is developed for installation technicians who install the Product at client sites, and for IT professionals who are responsible for operating the Product. -
Page 9: Safety
• Set up this Product on a hard, stable surface or mount it to a wall or (computer) screen. • ONLY use an Avonic mount for mounting to a wall or (computer) screen. • Ensure the mounting construction is capable of supporting four times the weight of the Product. (See 'General Specifications >... -
Page 10: Ventilation
• Don’t open this Product and don’t attempt to repair it yourself. Disassembling the Product may damage it or may cause injury to you. • If this Product is damaged, malfunctioning, or if it comes into contact with liquid, contact Avonic or an Avonic Authorized Service Provider. -
Page 11: Product Overview
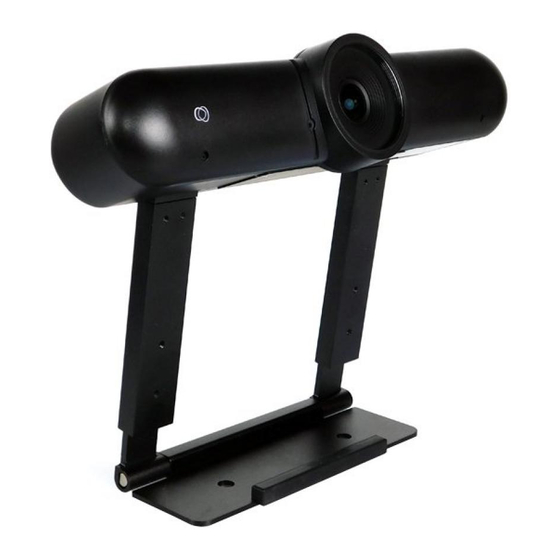
Product Overview Description The Avonic CM22-VCU boasts a 4K, wide angle lens up to 120 degrees FOV that makes sure you can capture all attendees. It’s Smart automatic and fully user configurable modes guarantee crystal clear video even under the most challenging light conditions. Built in user configurable dual microphones allow for easy audio capture. -
Page 12: Unpacking
3. Unpacking the Camera 4. Return Procedure Package Contents The following tables contains an overview of the package contents of the Product. Quantity Description Avonic SKU 1 pc CM22 Camera AV-CM22-VCU 4 pc USB Power Adaptor (EU, UK, US, AUS) -
Page 13: Unpacking The Camera
Mounting and Installation Return Procedure If, for any reason, you have to return the camera to Avonic, Execute the following steps: 1. Place the camera back in its protective foam with the lens up in the box! Put the covering foam on top. -
Page 14: Mounting And Installation
• Set up this Product on a hard, stable surface, or mount it to a wall or (computer) screen. • ONLY use an Avonic mount for mounting to a wall or (computer) screen. • Ensure the mounting construction is capable of supporting four times the weight of the Product. (See 'General Specifications >... -
Page 15: Wall Mounted Above A Screen
2. Pull the feet of the camera to the wall. (see the picture at the right below). The minimum (depending on connector type used) and maximum depth are indicated. Due to the dual articulated sliding mount design, there are numerous variations to make. User Manual | www.avonic.com... -
Page 16: Connecting The Components To The Camera
"Audio Settings". You will now see the image from the CM22-VCU. The current IR-channel setting and IP Address of the camera are displayed on the Menu. From this point onwards, the user can start controlling the camera. User Manual | www.avonic.com... -
Page 17: Operation
This button has no function with this camera. 2. Number Key Call preset PTZ position. Press the number [0-9] of the desired preset and the camera will respond accordingly (See 13. Reset on how to set & clear presets). User Manual | www.avonic.com... -
Page 18: Key
1. Push the button [manual focus] first before using the focus buttons. 2. Focus the camera with the [+] and [–] button. If the camera does not respond, check if the camera is set to auto-focus. User Manual | www.avonic.com... -
Page 19: Camera Ir Selection Key
As is mentioned under Preset Key, you can make and delete presets between 0-9, since the camera has no output for a serial or IP connection needed to make and delete presets of 10 and higher. User Manual | www.avonic.com... -
Page 20: Ptz Control Key
Disable microphone, setting is persistent even after power cycle [*] → [#] → [6] Factory default [*] → [#] → [7] 1080P@60fps default resolution [*] → [#] → [9] Enable microphone, setting is persistent even after power cycle Contact Avonic for latest firmware info@avonic.com User Manual | www.avonic.com... -
Page 21: Osd Menu
UVC based video-conference application; such as many Media players like VLC or Potplayer, the standard windows camera application etc. In the following pages, the navigation is described. Figure 7: OSD menu structure User Manual | www.avonic.com... -
Page 22: First Operation
] to change settings. Press [MENU] again to go back. Note that, when you are zooming in to the picture, the text of the OSD menu will be enlarged. Make first your adjustments in the OSD Menu before you are zooming in. User Manual | www.avonic.com... -
Page 23: Exposure
This can be a particular helpful setting when the light conditions are challenging. The differences should be clearly visible in dark parts of the image, as they will become lighter/more grey as the level of DRC increases. User Manual | www.avonic.com... -
Page 24: Color
Bright level, Gain limit and DRC as low as possibly acceptable to avoid getting too much noise in the picture. If the level of noise in the image becomes unacceptable, you can use noise reduction to smooth the picture over. 1.2 COLOR Figure 10: OSD - COLOR User Manual | www.avonic.com... - Page 25 This mode allows you to change the color (temperature) settings: • RG Tuning • BG Tuning • Saturation • Hue • Colortemp The Colortemp of 2500K will give the image cold (blue) colors, while 8000K will give the image warm (yellow) colors. User Manual | www.avonic.com...
-
Page 26: Image
The gamma curve selection has to do with the perception of the human eye to lighter and darker. If you select a higher rate of gamma, you will see that the picture become darker, but you get also more detail. Gamma on Default Gamma on 0.63 User Manual | www.avonic.com... -
Page 27: Noise Reduction
• Be careful when adjusting the noise reduction, it can take away the natural ‘crispness’ of the image! Better practice is to add light to the filmed object to avoid this. User Manual | www.avonic.com... -
Page 28: Setting
You can use the CM22, beside using the USB port of the camera, also over HDMI: 1. Change DVI mode to HDMI 2. Set HDMI Enable to ON 3. Choose the HDMI Format you want (4K@30 - 1080p30) User Manual | www.avonic.com... -
Page 29: Information
By selecting Uvc EXT setting it is possible to change video coding settings such as H264. 1.6 INFORMATION Figure 14: OSD - INFORMATION 1.7 RESTORE DEFAULT Figure 15: OSD - RESTORE DEFAULT Here you can restore the factory default settings. User Manual | www.avonic.com... -
Page 30: Maintenance
• Do not film extreme bright objects for a prolonged period of time, such as sunlight, light sources, etc. • Do not operate in unstable lighting conditions, otherwise the produced image could be less than optimal. • Do not operate close to powerful electromagnetic radiation, such as TV or radio transmitters, etc. User Manual | www.avonic.com... -
Page 31: Transport And Storage
Specific guidelines apply to the environmental temperature and humidity when operating and storing the camera. See 'Operating humidity' and 'Storage temperature' in the provided Datasheet for the applicable values. User Manual | www.avonic.com... -
Page 32: Disposal And Recycling
In general, the term 'E-Waste' applies to items of all types of electrical and electronic equipment and its parts that have been discarded by the owner as waste without the intention of re-use. Avonic outsources the disposal and recycling of its E-Waste camera materials to the Stichting Open. https://stichting-open.org/ for more information about the disposal and recycling. -
Page 33: Troubleshooting
3. Check the Noise Reduction settings in the OSD. Color issues Check options in OSD, like exposure, color temp, Red and Blue tuning When experiencing image problems, you may also check Appendix D - CMOS Image Sensor Characteristics. User Manual | www.avonic.com... -
Page 34: Autofocus Issues
• When the camera itself moves, or when the iris is narrowed down When you experience one or more of the above mentioned problems check also our Appendix - CMOS characteristics Control IR Remote Controller does not work 1. Check the batteries of the controller. User Manual | www.avonic.com... -
Page 35: Appendix A - Dimensions
Appendix A - Dimensions User Manual | www.avonic.com... -
Page 36: Appendix B - Cmos Image Sensor Characteristics
Depending on lighting types, such occurrences may not be improved with the anti-flicker setting. It is recommended to set the shutter speed to 1/100s in areas of 50 Hz power supply frequency, and to 1/60s in areas of 60 Hz power supply frequency. User Manual | www.avonic.com... - Page 37 Avonic 4K Conference Camera USB3.0 AV-CM22-VCU Version 1.11 © March 2022...
Need help?
Do you have a question about the AV-CM22-VCU and is the answer not in the manual?
Questions and answers