Table of Contents
Advertisement
Quick Links
BERTAZZONI SpA
Via Palazzina 8
42016 Guastalla RE
WWW.BERTAZZONI.COM
5000980
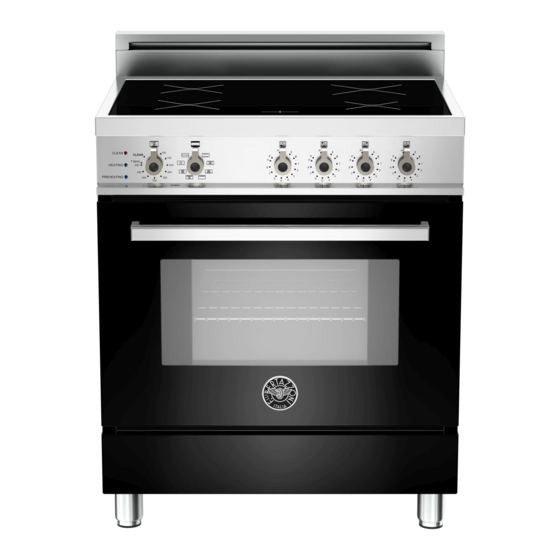
REF. PRO304INSX
REF. PRO304INSAR
REF. PRO304INSNE
REF. PRO304INSRO
REF. PRO304INSVI
REF. PRO304INSBI
REF. PRO304INSGI
REF. MAS304INSXT
ITALY
Model [M70QPTU1XE.UP]
Model [M70QPTU1SE.UP]
Model [M70QPTU1NE.UP]
Model [M70QPTU1RE.UP]
Model [M70QPTU1LE.UP]
Model [M70QPTUWXE.UP]
Model [M70QPTU1IE.UP]
Model [M70QPTA1XE.UP]
From the desk of the President
Dear new owner of a Bertazzoni product,
I want to thank you for choosing one of our
beautiful PRO ranges. We know that you have many
brands and products to choose from and we are
thrilled that you have decided to take one of our
products into your home.
We take as much pride in making our ranges as we
hope you will in owning them. My family started
manufacturing cooking appliances in 1882. Each of
our products is a blend of Italian design finesse and
superior appliance technology. While we can not
replace your unique talent at cooking delicious
recipes for yourself, your family and your friends,
we try our best to make cooking easier, more
effective and more fun.
Our appliances are designed according to the
strictest safety and performance standard for the
European and the North American market. We
follow the most advanced manufacturing
philosophy. Each appliance leaves the factory after
thorough quality inspection and testing. Our
distributors and our service partners are ready to
answer any questions you may have regarding how
to install, use and care for your Bertazzoni product.
This manual will help you learn to use the product
in the safest and most effective manner and care
for it so that it may give you the highest satisfaction
for years to come.
The manual also includes directions for the
professional installer that will install the product in
your home. We recommend using factory‐trained
professionals for the delicate task of installing and
testing appliances in your home. Please call
Customer Service if you need help locating a
factory‐trained professional installer in your area.
Please keep this manual for future use.
Grazie!
2
Advertisement
Table of Contents

Related Manuals for Bertazzoni PRO304INSX


Summary of Contents for Bertazzoni PRO304INSX
- Page 1 This manual will help you learn to use the product in the safest and most effective manner and care for it so that it may give you the highest satisfaction for years to come. 5000980 The manual also includes directions for the professional installer that will install the product in your home. We recommend using factory‐trained REF. PRO304INSX Model [M70QPTU1XE.UP] professionals for the delicate task of installing and REF. PRO304INSAR Model [M70QPTU1SE.UP] REF. PRO304INSNE Model [M70QPTU1NE.UP] testing appliances in your home. Please call REF. PRO304INSRO Model [M70QPTU1RE.UP] Customer Service if you need help locating a REF. PRO304INSVI Model [M70QPTU1LE.UP] factory‐trained professional installer in your area. REF. PRO304INSBI Model [M70QPTUWXE.UP]...
-
Page 2: Before Installation
BEFORE INSTALLATION INSTALLING THE LEGS This appliance shall only be installed by an Bertazzoni ranges must be used only with the authorized professional. legs properly installed. This appliance shall be installed in accordance Four height‐adjustable legs are shipped with the with the manufacturer’s installation instructions. range in the polystyrene container situated over This appliance must be installed in accordance the appliance. with the norms & standards of the country where Before installing the legs, position the appliance it will be installed. The installation of this ... -
Page 3: Installing The Backguard
INSTALLING THE BACKGUARD Assemble back part with front part of the The back guard must be installed prior to backguard and fix them with a screws supplied operation of the appliance for appropriate with the backguard kit. ventilation of the oven compartment. Remove n°2 screws fixing worktop as shown below. Place front part of the backguard and attach it from bottom side with the two removed screw (point 2) as shown below. ... -
Page 4: Installation Requirements
INSTALLATION REQUIREMENTS INSTALLING THE ANTI‐TIP Stability DEVICE ELECTRICAL The anti‐tip bracket shipped with the range must A properly grounded and horizontally‐mounted be properly secured to the rear wall as shown in electrical receptacle Type NEMA 14‐50R should the picture below. be installed no higher than 3" (7.6 cm) above the The height of the bracket from the floor must be floor, no less than 2” (5 cm) and no more than 8” determined after the range legs have been (20,3 cm) from the left side (facing product); adjusted to the desired height and after the refer ... -
Page 5: Exhaust Hood Installation
CABINETS This range will best perform when used with PRO line Bertazzoni exhaust hoods. These hoods have WARNING been designed to work in conjunction with the To eliminate the risk of burns or fire by reaching Bertazzoni range and have the same finish for a over heated surface units, cabinet storage space perfect look. located above the surface units should be For maximum performance, the height of the avoided. If cabinet storage is to be provided, the bottom of the hood from the worktop should be ... -
Page 6: Electrical Connection
‐ Connect the NEUTRAL receptacle terminal to ELECTRICAL CONNECTION the incoming NEUTRAL (WHITE) electrical supply wire The appliance shall be connected to a single phase electric line rated at 120/208Vac or ‐ Connect the GROUND receptacle terminal to 120/240Vac and 60Hz frequency. the incoming GROUND (GREEN) electrical ... -
Page 7: Electrical Grounding
5) Remove damaged supply cord set by taking off the 4 electrical connection screws (block L1, N, L2 and Ground screw, see diagram) 6) Insert the new supply cord set in the strain relief and lock it with two strain relief's screws in suitable position. 7) Fix well the ring terminals G, L1, N, L2 of the new supply cord set as shown in diagram with its 4 screws ... -
Page 8: Wiring Diagram
A= Rating plate(s) located under front edge of LOCATION OF APPLIANCE PLATES cooktop The data rating plate shows the model and serial B= Wiring / schematic diagram placed on number of your range. It is located under the backside panel and on installation booklet front edge of the range cooktop, and is visible when the oven door is open (see illustration) WIRING DIAGRAM ... -
Page 9: Installation Checklist
FINAL PREPARATION INSTALLATION Checklist All stainless steel body parts should be wiped 1. Is the range mounted on its legs? with hot, soapy water and with a liquid stainless steel cleanser. 2. Is the back guard securely connected? If build‐up occurs, do not use steel wool, abrasive cloths, cleaners, or powders! If it is necessary to 3. Has the anti‐tip device been properly scrape stainless steel to remove encrusted installed? materials, soak with hot, wet cloths to loosen the material, then use a wood or nylon scraper. Do 4. Does the clearance from the side cabinets not use a metal knife, spatula, or any other metal tool to scrape stainless steel! Scratches are comply with the manufacturers directions? almost impossible to remove. 5. Is the electricity properly grounded? Before using the oven for food preparation, wash the cavity thoroughly with a warm soap and water solution to remove film residues and any dust or debris from installation, then rinse and wiped dry. ...
Need help?
Do you have a question about the PRO304INSX and is the answer not in the manual?
Questions and answers