
Related Manuals for Measuretek EHC-PF-6


Summary of Contents for Measuretek EHC-PF-6
- Page 1 EHC-PF User / Technical Manual Contents subject to change without notice Version 1.0 01/2017...
-
Page 2: Table Of Contents
TABLE OF CONTENTS Introduction ........................1 General and Safety Information ......................1 1.1. Specifications ..........................1 1.2. Outline ............................2 1.3. Unpacking and setup ......................2 Packing List ..........................2 Display and keypad ....................... 2 Faceplate ............................ 2 Symbol meaning on Faceplate ......................3 Keypad function .......................... -
Page 3: Introduction
If the operating time is no longer acceptable even after recharging, the battery must be replaced. Electronic scales are precision instruments. Do not operate near cell phones, radios, computers or other electronic devices that emit radio frequencies that may cause unstable readings. 1.2. Specifications Model EHC-PF-6 EHC-PF-15 EHC-PF-30 EHC-PF-30D 30kg / 60lb /... -
Page 4: Outline
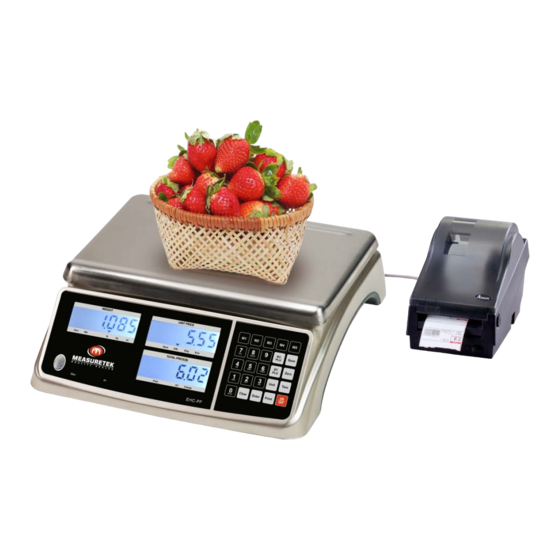
1.3. Outline Interface: (1) Rocker switch (2) AC power adapter input (3-4) RS232 and USB if these interface installed 2. Unpacking and setup Take out the scale from the box and place it on a firm, level surface. Avoid locations with rapid temperature changes, excessive dust, moisture, air currents, vibrations, electromagnetic fields, heat or direct sunlight. -
Page 5: Symbol Meaning On Faceplate
(Rear Display) (Rear Display) (Rear Display) 3.2 Symbol meaning on Faceplate WEIGHT - Weight display window Zero - Scale is zeroed, gross weight is 0, tare is 0 NET - Display reading is net weight; tare is not 0 ... -
Page 6: Key Function In Input Alphabet Mode
M1-M5: Direct PLU keys, Used to directly recall the stored unit price CLEAR: Used to clear the recorded data ENTER: Used to confirm the operation or entered data SAVE: Save the tare weight and unit price when input the unit price, so that the data will not be cleared after one weighing operation. - Page 7 À Â Æ Ç È É Ê Ë Î Ï Ô Ù Û Ü EHC-PF...
-
Page 8: Weighing Operations
4. Weighing operations 4.1 Normal Weighing Mode 4.1.1 Place the scale on a flat, stable surface. Level the scale using the leveling bubble at the lower left side of the display. 4.1.2 With the weighing platter empty, turn on rocker switch (located underneath on the right-hand side of the scale). Due to the high resolution of this scale, allow 10 minutes for the scale to warm up before use for optimum results. -
Page 9: Save Function
4.4 Save function 4.4.1 Under non-save mode, tare and unit price will be cleared automatically; Press SAVE key to enter save mode. 4.4.2 Under save mode, tare and unit price will not be cleared automatically; Press SAVE key to exit save mode, if the gross weight is 0, clear tare weight and unit price. -
Page 10: Input The Unit Price Directly
4.6 Input the unit price directly 4.6.1 Use numerical key to enter unit price (range: 0000.00~9999.99) 4.6.2 Press ENTER key within 3s to confirm the unit price 4.6.3 Press CLEAR key to remove the input number 4.6.4 Put the weighing objects, the WEIGHT window will show its weight and TOTAL PRICE window will show it total value. Note: After unit price is entered, if there is no operation in 3s, the scale with automatically confirm the unit price and exit the mode. -
Page 11: Recall Direct Plu
4.8 Recall direct PLU Recall the stored direct unit price by pressing 1-9 key down more than 2.5s, the recalled unit price will be displayed in UNIT duP. x x PRICE window. The TOTAL PRICE window will display “ ”, then followed by the actual total price. 4.9 Recall indirect PLU rc.PLU 4.9.1 Under the normal weighing mode, press RC.PLU key to enter this mode, and display "... - Page 12 (RS232 output content format) and the TOTAL PRICE window shows one of following content: HOST EHC-PF is connected with host device, e.g. a PC; PRTd40 : EHC-PF is connected with the OS-203/213, label dimension is 58mm × 40mm, date will be printed on label;...
- Page 13 Press ENTER key to confirm the input and finish the setting, or use ON/OFF key to exit this mode. OUT.P. R NOTE: If the “Price” and “Item code” can’t be filled into the format you selected, “ ” will show in weight 232.
-
Page 14: Date And Time Setting
SCALE --------------------------CABLE(9 pins)--------------------------- HOST DB9(Female) --------------DB9(Male)------------DB9(Female) --------------- DB9(Male) PIN2 TXD ------------------2--------------------------2----------------------- PIN2 RXD PIN3 RXD ------------------3--------------------------3----------------------- PIN3 TXD PIN5 GND ------------------5--------------------------5----------------------- PIN5 GND PIN4 DSR ------------------4--------------------------4----------------------- PIN4 DTR PIN6 DTR ------------------6--------------------------6----------------------- PIN6 DSR PIN7 CTS ------------------7--------------------------7----------------------- PIN7 RTS PIN8 RTS ------------------8--------------------------8----------------------- PIN8 CTS PIN1 NC... -
Page 15: Os-2130D Back Feed Setting
5.7 OS-2130D Back Feed setting 5.7.1 Under the normal working mode, press and hold ON/OFF and 7 key for more than 3s to enter this mode. In this mode, you can set the back feed (OS-2130D). SETUP BAK. F ED 5.7.2 The WEIGHT window displays “... -
Page 16: Calibration
(c) Press 2 key --- segments on different COMs will be shown; (d) Press ENTER key ---segments will be shown in turn of above a-b-c steps 5.11.3 Press ON/OFF key --- exit this mode. 6. Calibration The calibration switch is located underneath the platform. -
Page 17: The Meaning Of Some Displayed Symbols
UNLOAD “ ”(this means that the scale is ready to calibrate the zero point position, please remove any weight on the scale),the total price window display the output inner code of A/D. When the scale is stable and the unit indicator stops flashing, press ENTER key to confirm the zero point calibration. -
Page 18: Troubleshooting
INP. L D: To input load weight. CAL. O N: Calibration enable switch is ON. CAL. O FF: Calibration enable switch is OFF. OUT. P . R : Data is out of printed barcode range. Data. c h: Data has been changed. Save: Data is being saved. -
Page 19: Battery And Charging
The platform is not laid in level; Four feet are Lay the platform in the same level; Set Linearity is not not laid in level; Moveable leg lock the seal the four feet in the same level; Check the good cover of the foot;...
Need help?
Do you have a question about the EHC-PF-6 and is the answer not in the manual?
Questions and answers