Table of Contents
Advertisement
Advertisement
Table of Contents

Subscribe to Our Youtube Channel
Related Manuals for Vimtag P1


Summary of Contents for Vimtag P1
- Page 1 Complete Surveillance User Guide...
- Page 2 Use of the Vimtag web-based application and/or Windows or MAC versions is subject to the terms detailed below, except as expressly provided in any written license agreement from Vimtag LLC. © 2016 Vimtag LLC. All rights reserved.
-
Page 3: Table Of Contents
VIMTAG SURVEILLANCE SOLUTION USER GUIDE Introduction ................3 Key Benefits of the Vimtag Solution............4 Overview of the Vimtag Workflow ............5 Vimtag Devices ................6 Installing the Vimtag App ............9 Creating an Account ................10 Installing the Camera and VimBox ..........13 Installation Prerequisites ................ -
Page 4: Introduction
You can customize the size of your solution by adding devices to your account at any time, making the Vimtag fully scalable to meet the needs of any commercial or private entity. This document details how to install and work with the Vimtag solution as well as its key benefits. -
Page 5: Key Benefits Of The Vimtag Solution
VIMTAG SURVEILLANCE SOLUTION USER GUIDE Key Benefits of the Vimtag Solution Traditional IP cameras tend to be difficult to install and use. The Vimtag IP cameras are simple to set up and operate. They offer the ease of a truly Plug and Play system with many distinct features and functions. -
Page 6: Overview Of The Vimtag Workflow
The advanced web-based application enables you to access and view surveillance activity via a wide variety of mobile devices, including both iOS and Android devices. Another benefit of the Vimtag solution is its cost-effectiveness, making it an ideal solution both for large corporations... -
Page 7: Vimtag Devices
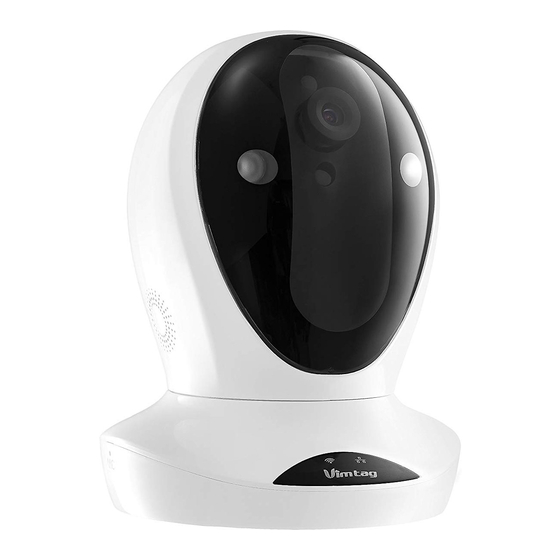
VIMTAG SURVEILLANCE SOLUTION USER GUIDE 2. Vimtag Devices The Vimtag solution is a fully scalable, modular system built by adding one or more cameras to your account. It can be expanded, as needed, to include VimBoxes and additional cameras. All of the Vimtag cameras offer... - Page 8 VIMTAG SURVEILLANCE SOLUTION USER GUIDE Model Image Description Vimtag VT-361 Vimtag’s VT-361 supports two-way voice intercom, pan/tilt capabilities up to 120°, zoom and the ability to rotate and broadcast images of nearly 360°. The camera has built-in Infrared LED and...
- Page 9 VIMTAG SURVEILLANCE SOLUTION USER GUIDE Model Image Description Vimtag M1 The M1 Series offers a small, elegant, compact, indoor camera that can be mounted or placed in small or inconspicuous places. It offers HD video, motion detection notifications, 2- way voice with high echo cancellation.
-
Page 10: Installing The Vimtag App
VIMTAG SURVEILLANCE SOLUTION USER GUIDE 3. Installing the Vimtag App You can operate and control the Vimtag cameras in several ways by downloading and installing the Vimtag app, available for the following platforms: iOS or Android devices (both phones and tablets). To use the application, you need to have: iOS devices: iOS 5.0 or above... -
Page 11: Creating An Account
To use the cloud-based Vimtag solution, you will need to set up an account with Vimtag. To create an account: 1. Locate the Sign up link: In the Vimtag app on your mobile device, press I am a new user Sign up >>. Using your Internet browser, navigate to www.vimtag.com locate the Sign up option under the Sign in form and click the link. - Page 12 VIMTAG SURVEILLANCE SOLUTION USER GUIDE 2. The Sign Up page opens. Create a User name and a Password. Note: The user name should have 6-20 characters containing only numbers and letters. The user name is not case-sensitive. The password should also contain 6-20 characters. The password IS case sensitive.
- Page 13 Sign up. (Sign up is only used once to create your account.) To log in to your Vimtag account: 1. Locate the Sign up link: In the Vimtag app on your mobile device, press Existing account Sign in >>. Using your Internet browser, navigate to www.vimtag.com...
-
Page 14: Installing The Camera And Vimbox
Vimtag cameras have been designed to be easy-to-install. All of the cameras also have the ability to be used with an SD card. Note: The Vimtag B1 has a built-in, 32 GB SD card pre-installed. Alternatively, you can purchase and use the VimBox, which is available in two models with storage capacities of either 1 Terabyte or 2 Terabytes. -
Page 15: Package Contents
There are slight variations in what is shipped with each camera or VimBox. A basic package will contain the following: The device Ethernet cable Ethernet adaptor, relevant for models: EagleCam (P1) and PearlCam (M1) Power adapter Stand and installation kit (where applicable) ... -
Page 16: Adding A Device
VIMTAG SURVEILLANCE SOLUTION USER GUIDE Vimtag site and add the device using the Add a device option (+ on mobile devices), to get it started. Wi-Fi: If you plan to connect through Wi-Fi, you will find the camera on the network with a mobile device once it is hooked up and the power is turned on. - Page 17 To add a device using a mobile device: Note: For adding a device on a computer, see the following section. 1. Log into the Vimtag app and on the main page, click + to add a device. Note: You only need to add a device once. After that, the device will appear in the account, regardless of whether you access the account on an iOS device, an Android device or a computer.
- Page 18 Ethernet connection. 1. Open the Vimtag app and log in to your account (or you can also add a device while logged in to your account on the www.vimtag.com...
- Page 19 VIMTAG SURVEILLANCE SOLUTION USER GUIDE On a mobile device: a QR scanner opens, enabling you to scan the QR code found on the device. Scan the code and the default password is entered automatically. 3. Click Add. This moves you to the next step: Modify Password.
-
Page 20: Deleting A Device
Click Delete. Installing the Camera on Walls and Ceilings Before mounting the Vimtag camera on a wall or ceiling, you should first add the camera (device) to your account. This will enable you to see the area that the camera can cover when installed in a location. -
Page 21: Storing The Vimbox
VIMTAG SURVEILLANCE SOLUTION USER GUIDE If you place the camera upside down, the viewed image will be upside down when you view it through the monitoring site. To reverse the image so it appears right side up, use the Flip function. See Settings and Options. - Page 22 VIMTAG SURVEILLANCE SOLUTION USER GUIDE You might want to consider putting the VimBox in an inconspicuous place, safe from getting damaged or stolen. Note: The VimBox needs to be connected via an Ethernet cable while in use. Page...
-
Page 23: Using The Website Interface Or Web App
To log in to the Vimtag website: 1. In your Web browser, go to www.vimtag.com. The following window appears: Enter your User name and Password, and click Sign in. - Page 24 VIMTAG SURVEILLANCE SOLUTION USER GUIDE Overview of the Dashboard When you first open the Vimtag app and log in, the main Dashboard appears. Although there are some differences between the various platforms, all Vimtag apps have the following elements: Element...
- Page 25 Multiple cameras also work well for large sites, such as big homes and public institutions, which require optimal security. When the camera is offline, an “X” will appear in the Vimtag app on the camera when offline. If you are unable to confirm that the camera is...
-
Page 26: Controlling The Camera Display
You can set or change the name of the camera by accessing the Settings window, as follows: 1. In the Vimtag Web App, select the relevant device. When the device results are loaded, click the Settings icon ( 2. In the Settings options, click Nickname. The display name of the camera appears. -
Page 27: Controlling The Camera Movement
Camera. Controlling the Camera Movement Depending on the camera model, one important advantage of the Vimtag solution is the ability to not only see the camera view from remote locations, but also the ability to control the camera. While viewing the live image on your mobile device, you can swipe to the right or the left to move the camera in that direction. -
Page 28: Operating The Camera
To operate the camera: 1. On the Dashboard of the Vimtag app, there is a thumbnail image for each device that has been associated to the account. Select the device you want to view from the dashboard by clicking the image related to that device. - Page 29 VIMTAG SURVEILLANCE SOLUTION USER GUIDE Icon Action Start recording a video. Note: Camera must be equipped with a SD card unless you are recording on to a mobile device (where the recordings are saved to > Account > My folder).
- Page 30 VIMTAG SURVEILLANCE SOLUTION USER GUIDE Icon Action Adjust picture quality. Mode: Click appropriate button for setting based on the time of day or the room setting: Day - The video will be in color. Night – The video will be in black and white...
-
Page 31: Managing Your Account
Auto Managing Your Account The Vimtag app offers you access to view, monitor and configure your devices. The app also has an option to view or configure your Account information. Vimtag enables you to configure two types of settings: Account settings and Device settings. - Page 32 User guest password – If you wish to allow someone access to your Vimtag solution, you can assign them a user guest password, which can be disabled at any time. Guests can view what the cameras are broadcasting and can move the cameras, but they will not be able to make any changes in the settings or use the remote microphone.
- Page 33 User guest password – If you wish to allow someone access to your Vimtag solution, you can assign them a user guest password, which can be disabled at any time. Guests can view what the cameras are broadcasting and can move the cameras, but they will not be able to make any changes in the settings or use the remote microphone.
- Page 34 VIMTAG SURVEILLANCE SOLUTION USER GUIDE In the Others section: Software version Rate us (for Android only) At the bottom of the screen, there is a Clear cache button. Click this to clear the cache on your mobile device. The original snapshots and/or videos stored on either your SD card or your Storage Device are not deleted when you click Clear Cache.
-
Page 35: Overview Of The Device Settings Page
VIMTAG SURVEILLANCE SOLUTION USER GUIDE Overview of the Device Settings Page In addition to being able to configure Account-related settings (see Managing Your Account), you can also set many Device-related settings, which are accessed by pressing the Settings icon ( In the Device Settings page you can configure the following values for each camera selected. -
Page 36: System Settings
VIMTAG SURVEILLANCE SOLUTION USER GUIDE Option Explanation Note: On the Vimtag app for Windows and MAC, these features are located in the Motion Sensitivity and Motion Detection options on the computer. Scheduling Alerts Schedule specific times when alerts should be active. - Page 37 (where the device password will return to be admin. Device Guest Password If you wish to grant someone access to your Vimtag solution, you can assign them a device guest password, which can be disabled at any time. Guests can view what the cameras are broadcasting and can move the cameras, but they will not be able to make any changes in the settings or use the remote microphone.
- Page 38 VIMTAG SURVEILLANCE SOLUTION USER GUIDE To enable guests to access the device, each guest must have a Vimtag account created and the device added to that account. Once this is done, the guest can either use Vimtag app or access the Vimtag website interface.
-
Page 39: Initial Settings
VIMTAG SURVEILLANCE SOLUTION USER GUIDE access points from the drop-down list. If you do not see your network, refresh the list. On this list, you will be able to view the strength of the Wi-Fi signal. Multiple bars indicate a stronger connection. -
Page 40: Storage Options
VIMTAG SURVEILLANCE SOLUTION USER GUIDE Note: The camera device ID is not the Nickname you may have assigned to the camera but the actual device ID number assigned by Vimtag. You can see the device ID on the Settings page in the About option. - Page 41 VIMTAG SURVEILLANCE SOLUTION USER GUIDE can use the edge of a paperclip or pen to push it into place. It will not damage the camera. If the camera does not recognize the SD card, remove the card and unplug the camera. Put the SD card back in, plug the camera back in and restart it.
-
Page 42: Working With The Camera
Storage Device Using the Storage Device option, you can introduce another element of the Vimtag solution, the VimBox. The VimBox is an ideal DIY (Do It Yourself) security solution for homes and small businesses that require the recording of many hours of continuous video. - Page 43 VIMTAG SURVEILLANCE SOLUTION USER GUIDE Select the Motion Detection tab to determine how sensitive the camera is when it comes to sensing motion. You can change the sensitivity settings for day and night operation separately to improve motion detection. Note: It is recommended that...
- Page 44 VIMTAG SURVEILLANCE SOLUTION USER GUIDE Scheduling Alerts The Schedule Alerting tab enables you to specify the days and times of the week when you want to receive alerts and during that time, automatically record any motion in the viewing area. An alert would be triggered based on detected motion.
- Page 45 VIMTAG SURVEILLANCE SOLUTION USER GUIDE Schedule Recording Times Under the Schedule Recording tab, you have the ability to enable recordings based on two different options: 24/7 and Scheduled. You should enable one of these options if you wish to schedule recording times automatically.
-
Page 46: Recording A Video
VIMTAG SURVEILLANCE SOLUTION USER GUIDE To set up the first scheduled recording: 1. Click Schedule 1. 2. Select the days of the week that you want to record. In addition to specifying specific days, you can also select All to configure the system to record every day of the week. - Page 47 You can capture a video either to an SD card in your camera (if you have one), or to the VimBox, which can be managed by the Vimtag App on your computer, your mobile device, or the Vimtag website.
- Page 48 (either a VimBox or the SD card that has been inserted into the camera). If the video is stored on the VimBox, use the Vimtag App to navigate to the video you wish to download and click on it. ...
-
Page 49: System
VIMTAG SURVEILLANCE SOLUTION USER GUIDE 4. Click the download icon ( ). Your video will begin downloading. To access the downloaded video: On a mobile device, you can access the downloaded video by opening the Account > My folder page. - Page 50 Update. Ideally, this field should display “No update available,” indicating that your Vimtag device is using the latest upgrade available. Restore to factory settings If you click Restore, it will restore the camera to the factory defaults, which can be helpful in case you have made changes to the camera and want to cancel these changes.
-
Page 51: Others
VIMTAG SURVEILLANCE SOLUTION USER GUIDE Others Use the sliders to adjust the Speaker and the Microphone. You can make the volume higher or lower with these sliders. Sliding to the right makes the volume go higher, and sliding to the left makes it lower. -
Page 52: Troubleshooting
VIMTAG SURVEILLANCE SOLUTION USER GUIDE 7. Troubleshooting For the Camera If the camera is not connecting properly, you can try several things: Make sure that there is a network connection to the camera. You will see a green light flash every three seconds when the camera is successfully connected.
Need help?
Do you have a question about the P1 and is the answer not in the manual?
Questions and answers