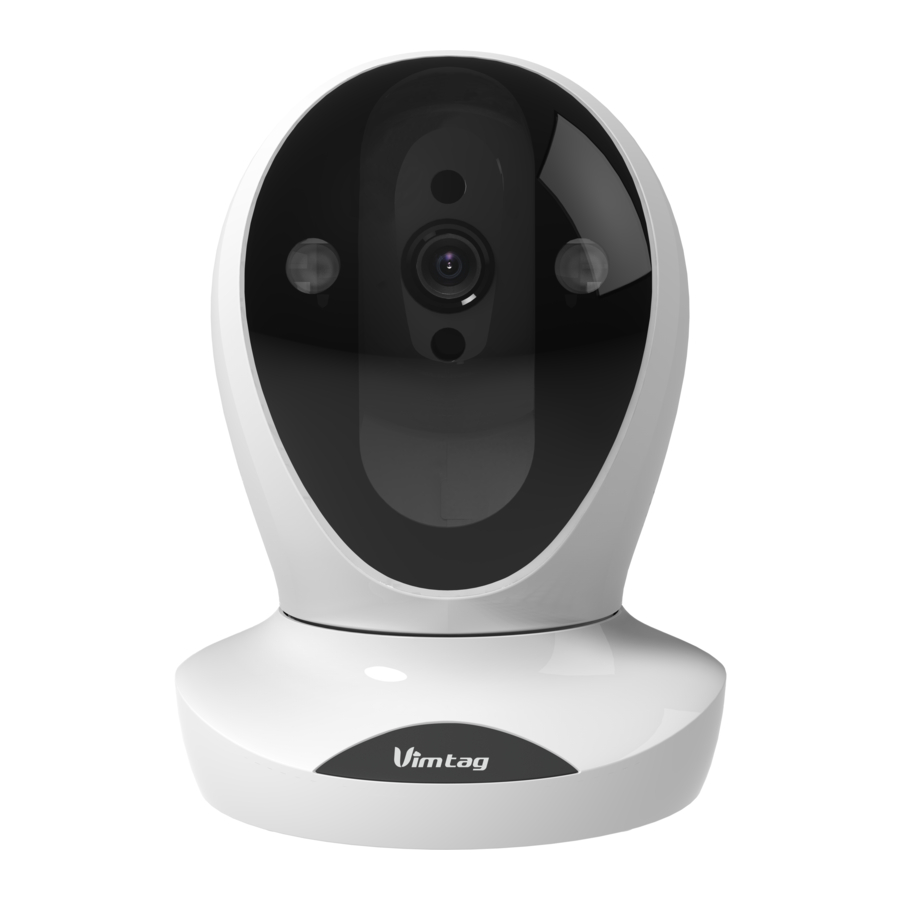
Vimtag P1 Series - Cloud IP Camera Quick Installation Guide
- User manual (52 pages)
Advertisement

Product Diagram
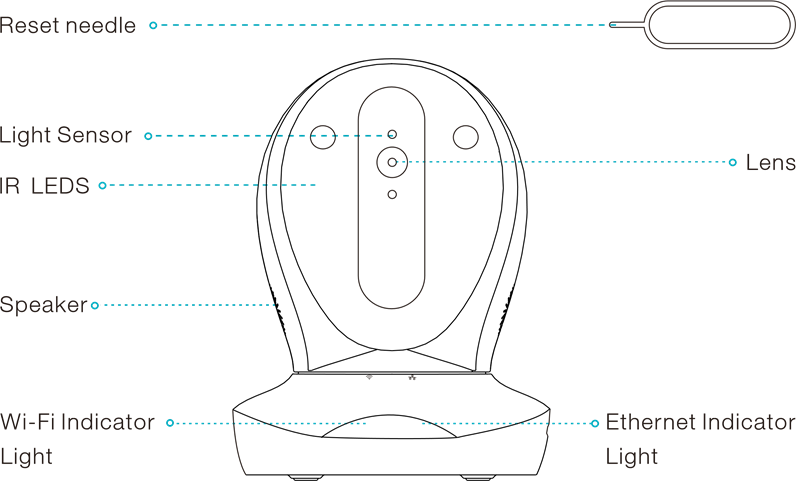
| Description | Introduction |
| Reset needle | For clicking the reset hole |
| Light Sensor | Infrared light adjustment. |
| IR LEDS | Supply light under low-light condition |
| Speaker | Audio from the APP side. |
| Ethernet Indicator Light | Green light flashes 3 times that shows Ethernet connection successfully. |
| Wi-Fi Indicator Light | Green light flashes 3 times that shows Wi-Fi connection successfully. |
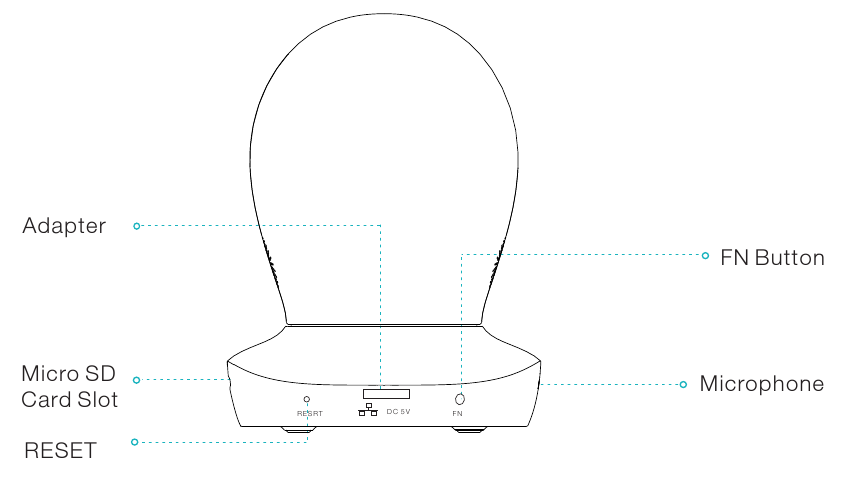
| Description | Introduction |
| Adapter | To connect Ethernet and Power. |
| FN Button | Reserved function key. |
| Microphone | Transfer the voice to vimtag APP. |
| Micro SD Card Slot | Support Micro SD Card Storage ( up to 64G). |
| RESET | Long press RESET button when device is running normal and after hear the hint tone, device will restore factory settings and restart |
'Vimtag' APP Installation
Note: PC users pls download it as:http://vimtag.com/download/;
Add Camera to APP

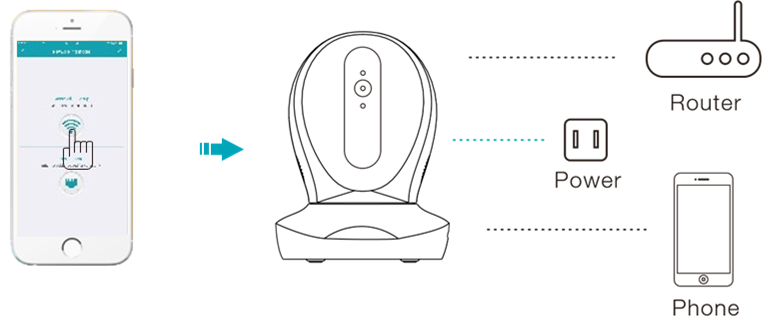
- Assemble the camera and connect to power, download the Vimtag APP, then register an account and login in.
- Enter 'Device List' and click '+' icon at the top of left corner. Then scan the QR code (or enter the ID code in the label directly) to finish the 'add devices'.
Network Connection
Method 1: Ethernet connection
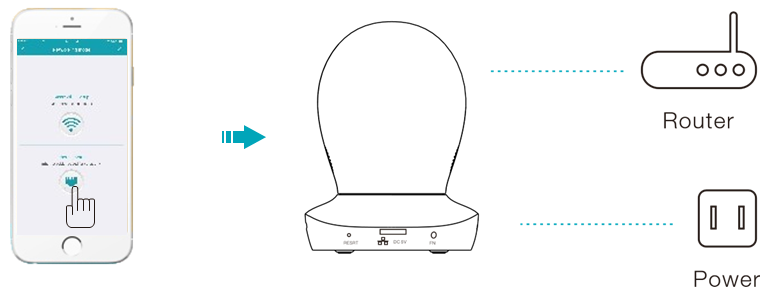
- Connect cable and click the Ethernet icon.
- When Ethernet indicator light flashes three times in green every three seconds, which means the camera is connected to network successfully.
Method 2: Wi-Fi connection
Click the Wi-Fi connection icon, operate it under the APP instructions.
Note: please press RESET button for 1 second before operate, then can enter the Wi-Fi configuration mode.
Create Username & Sign in
New Account - Select 'Sign up' from the Home Screen, input a username and password of your choice, confirm the password. Select 'Sign up'.
Existing Account – Input existing Username and password. Press 'Sign in'.
 Sign in
Login your existing username.
Sign up
Click to register the username.
Try it
Click it for free Experience.
Account
Manage personal account or the cloud IP camera's video by mobile storage.
Device list
When you login to the account and access the device list, it will show multiple cameras you have added at the same time. You can also use 'Add device' setting and check the 'alarm message' on the interface.
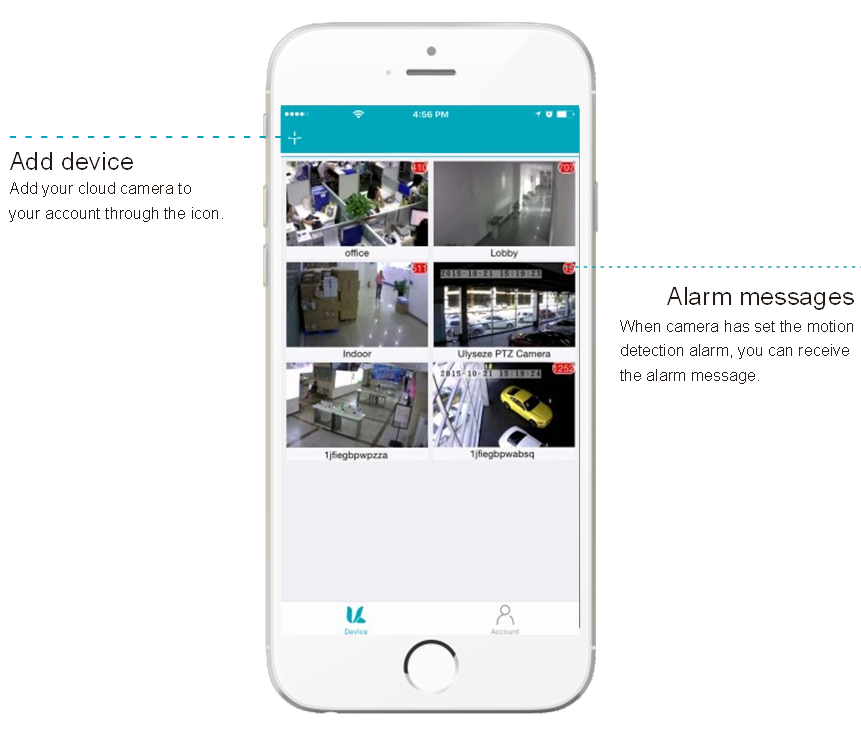
Add device
Add your cloud camera to your account through the icon.
Alarm messages
When the camera has set the motion detection alarm, you can receive the alarm message.
View the video
Click the camera icon so that you can view the camera video, after you login to the device list, you can skip the screen to control horizontal and vertical rotation.
You can also operate the 'video photo', 'Two-way audio' and 'setting'.
 View the video records and alarm messages
Click the icon to view the video recording and alarm message.
Voice
Turn on the mic and speaker then speak.
Photograph
Can take a real time photo when viewing the video.
Local video
Take a video for the monitoring screen, when returning to the monitoring video, that is the end of the recording.
Device settings
It provides personalized settings.
Two-way audio
Speak when pressing the two-way audio button.
Screen setting
Adjust the camera mode, brightness, contrast, saturation, sharpness.
Check the video and alarm message
Enter into the interface of 'information and video viewing' can see the alarm information and video of storage device (Micro SD or cloud box), users can quickly search the information and video by choose the time or category.
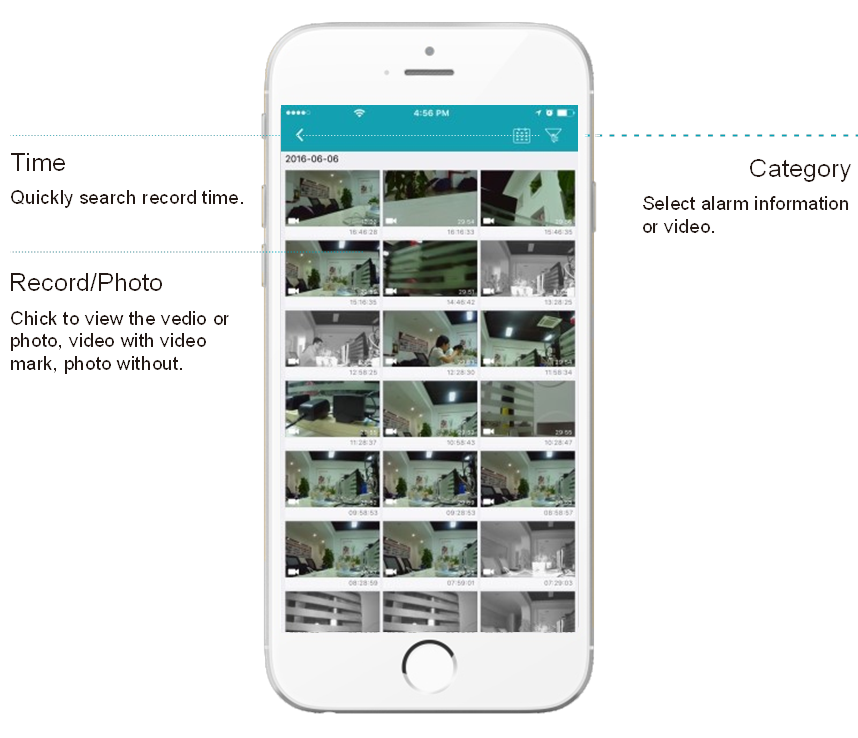
Time
Quickly search record time.
Record/Photo
Chick to view the video or photo, video with video mark, photo without.
Category
Select alarm information or video.
Device settings
To access the settings interface, you can set all specifications and functions of the camera. Such as: check camera details, change your password or configure the camera network. You can manage the specifications and functions based on your requirements.
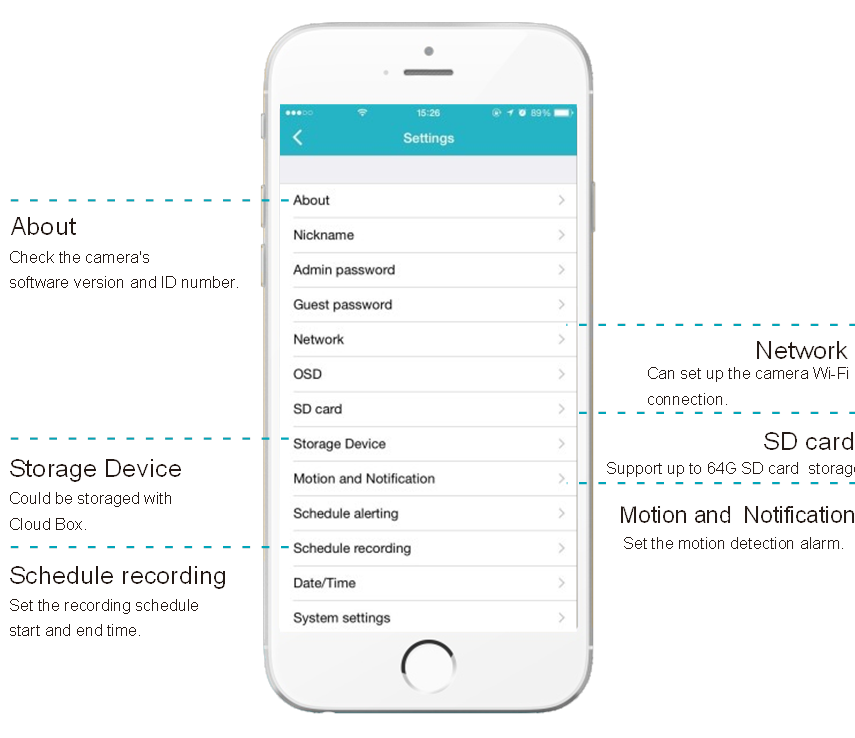
About
Check the camera's software version and ID number.
Storage Device
Could be storaged with Cloud Box.
Schedule recording
Set the recording schedule start and end time.
Network
Can set up the camera Wi-Fi
Can set up the camera Wi-Fi connection.
SD card
Support up to 64G SD card storage.
Motion and Notification
Set the motion detection alarm.
Note: For Vimtag APP upadtes continuously, there may be operational guidelines do not same as the APP UI, the latest operational guidelines please login our official website www.vimtag.com to download and read.

Documents / Resources
References
Download manual
Here you can download full pdf version of manual, it may contain additional safety instructions, warranty information, FCC rules, etc.
Download Vimtag P1 Series - Cloud IP Camera Quick Installation Guide
Advertisement


Need help?
Do you have a question about the P1 Series and is the answer not in the manual?
Questions and answers