
Subscribe to Our Youtube Channel
Related Manuals for Rosemount 8712EM


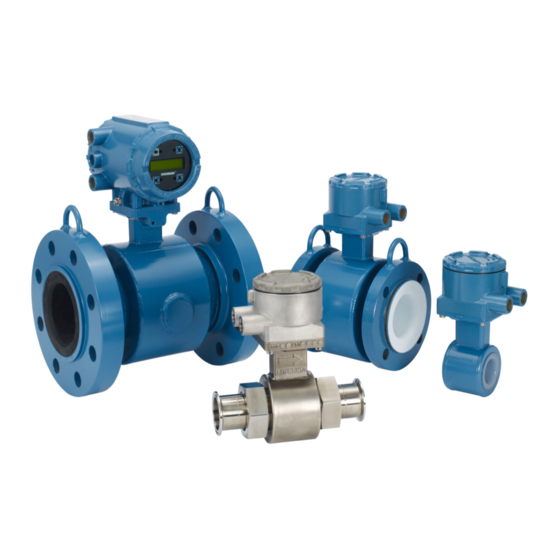
Summary of Contents for Rosemount 8712EM
- Page 1 Keco Engineered Controls 1200 River Avenue, Bldg. 3A Lakewood, NJ 08701 Quick Install Guide ph. 732 901-5900 00825-0100-4727, Rev DC e-mail: keco@optonline.net November 2017 ® Rosemount 8700 Magnetic Flowmeter Sensor...
- Page 2 The sensor liner is vulnerable to handling damage. Never place anything through the sensor for the purpose of lifting or gaining leverage. Liner damage can render the sensor useless. • Do not drop the device from any height. Rosemount 8700 Magnetic Flowmeter Sensor...
- Page 3 November 2017 Quick Install Guide Lifting lugs CAUTION! If provided, use the lifting lugs on each flange to handle the Magnetic Flowmeter when it is transported and lowered into place at the installation site. If lifting lugs are not provided, the Magnetic Flowmeter must be supported with a lifting sling on each side of the housing.
-
Page 4: Return Policy
Quick Install Guide November 2017 Introduction This document provides basic installation guidelines for the Rosemount 8700 Magnetic Flowmeter sensor. • For transmitter installation instructions, refer to the appropriate Rosemount quick installation guide: Product name Document number ® 8732EM Transmitter with HART... -
Page 5: Emerson Flow Customer Service
November 2017 Quick Install Guide Emerson Flow customer service Email: • Worldwide: flow.support@emerson.com • Asia-Pacific: APflow.support@emerson.com Telephone: North and South America Europe and Middle East Asia Pacific United States 800 522 6277 U.K. 0870 240 1978 Australia 800 158 727 Canada +1 303 527 The Nether-... -
Page 6: Location And Position
In reduced straight run installations, the meter may not meet absolute accuracy specifications. Reported flow rates will still be highly repeatable. Flow direction The sensor should be mounted so that the arrow points in the direction of flow. Rosemount 8700 Magnetic Flowmeter Sensor... - Page 7 November 2017 Quick Install Guide Figure 3-2: Flow direction arrow Quick Install Guide...
- Page 8 Vertical installation with upward process fluid flow keeps the cross- sectional area full, regardless of flow rate. • Horizontal installation should be restricted to low piping sections that are normally full. Figure 3-3: Sensor orientation A. Flow direction Rosemount 8700 Magnetic Flowmeter Sensor...
-
Page 9: Electrode Orientation
November 2017 Quick Install Guide Electrode orientation The electrodes in the sensor are properly oriented when the two measurement electrodes are in the 3 and 9 o’clock positions or within 45 degrees from the horizontal, as shown on the left side of Figure 3-4. -
Page 10: Sensor Installation
Figure 4-1: Gasket placement for flanged sensors A. Grounding ring and gasket (optional) B. Customer-supplied gasket Bolts Note Do not bolt one side at a time. Tighten both sides simultaneously. Example: 1. Snug upstream Rosemount 8700 Magnetic Flowmeter Sensor... - Page 11 November 2017 Quick Install Guide 2. Snug downstream 3. Tighten upstream 4. Tighten downstream Do not snug and tighten the upstream side and then snug and tighten the downstream side. Failure to alternate between the upstream and downstream flanges when tightening bolts may result in liner damage. Suggested torque values by sensor line size and liner type are listed in Table 4-2 for ASME B16.5 flanges and...
- Page 12 F - ETFE N - Neoprene A - PFA L - Linatex (Natural Rubber) K - PFA+ D - Adiprene Table 4-2: Suggested flange bolt torque values for Rosemount 8705 (ASME) Fluoropolymer liners Other liners Size Class 150 Class 300...
- Page 13 November 2017 Quick Install Guide Table 4-3: Suggested flange bolt torque values for Rosemount 8705 sensors with fluoropolymer liners (EN 1092-1) Fluoropolymer liners (in Newton-meters) Size code Line size PN 10 PN 16 PN 25 PN 40 0.5-in. (15 mm) 1-in.
-
Page 14: Wafer Sensors
Quick Install Guide November 2017 Table 4-4: Suggested flange bolt torque values for Rosemount 8705 sensors with non-fluoropolymer liners (EN 1092-1) (continued) Non-fluoropolymer liners (in Newton-meters) Size Code Line Size PN 10 PN 16 PN 25 PN 40 18-in. (450 mm) 20-in. - Page 15 Alignment spacers On 1.5 inch through 8 inch (40 through 200 mm) line sizes, Rosemount requires installing the alignment spacers to ensure proper centering of the wafer sensor between the process flanges. To order an Alignment Spacer Kit...
- Page 16 Nominal sensor size Stud specifications 0.15–1-in. (4–25 mm) 316 SST ASTM A193, Grade B8M, Class 1 threa- ded mounted studs 1½–8-in. (40–200 mm) CS, ASTM A193, Grade B7, threaded mounting studs Figure 4-4: Flange bolt torquing sequence Rosemount 8700 Magnetic Flowmeter Sensor...
- Page 17 Note Gaskets are supplied between the IDF fitting and the process connection fitting, such as a Tri-Clamp fitting, on all Rosemount 8721 Sanitary sensors except when the process connection fittings are not supplied and the only connection type is an IDF fitting.
- Page 18 Quick Install Guide November 2017 Figure 4-5: Sanitary sensor gasket and clamp alignment A. User supplied clamp B. User supplied gasket Rosemount 8700 Magnetic Flowmeter Sensor...
-
Page 19: Process Reference Connection
November 2017 Quick Install Guide Process reference connection The figures shown in this chapter illustrate process reference connections only. Earth safety ground is also required as part of this installation, but is not shown in the figures. Follow national, local, and plant electrical codes for safety ground. - Page 20 Grounding with grounding rings or lining protectors in conductive pipe A. Grounding rings or lining protectors Figure 5-3: Grounding with grounding rings or lining protectors in non- conductive pipe A. Grounding rings or lining protectors Rosemount 8700 Magnetic Flowmeter Sensor...
- Page 21 November 2017 Quick Install Guide Figure 5-4: Grounding with reference electrode in conductive unlined pipe Figure 5-5: Grounding for line sizes 10-in. and larger Quick Install Guide...
-
Page 22: Wiring Sensor To Transmitter
Quick Install Guide November 2017 Wiring sensor to transmitter Figure 6-1: Wiring 8732ES using component cable Rosemount 8700 Magnetic Flowmeter Sensor... - Page 23 November 2017 Quick Install Guide Figure 6-2: Wiring 8732ES using combination cable Quick Install Guide...
- Page 24 Quick Install Guide November 2017 Figure 6-3: Wiring 8712ES using component cable Rosemount 8700 Magnetic Flowmeter Sensor...
- Page 25 November 2017 Quick Install Guide Figure 6-4: Wiring 8712ES using combination cable Quick Install Guide...
- Page 26 Quick Install Guide November 2017 Figure 6-5: Wiring 8732EM using component cable Rosemount 8700 Magnetic Flowmeter Sensor...
- Page 27 November 2017 Quick Install Guide Figure 6-6: Wiring 8732EM using combination cable Quick Install Guide...
- Page 28 2017 Rosemount, Inc. All rights reserved. 1-2-5, Higashi Shinagawa The Emerson logo is a trademark and service mark Shinagawa-ku of Emerson Electric Co. Rosemount, 8600, 8700, Tokyo 140-0002 Japan 8800 marks are marks of one of the Emerson T +81 3 5769-6803 Automation Solutions family of companies.
Need help?
Do you have a question about the 8712EM and is the answer not in the manual?
Questions and answers