Table of Contents
Advertisement
Quick Links
Download this manual
See also:
Instruction Manual
Advertisement
Table of Contents

Related Manuals for Olympus E-3


Summary of Contents for Olympus E-3
- Page 2 ’ ’ A Southern Shutterbug Book...
- Page 3 Close- up images of camera controls taken with Olympus 1040SW on Super-macro mode. The input, comments and assistance of Brian Grey (UK), Noel Hammond (SA), Karl Ludik (Aus), Carl Dionisio (NZ) plus many other E-3 users in addition to JEL Corporation South Africa, agents for Olympus in Southern Africa,...
- Page 4 However, the overall package, of ergonomics, ruggedness and user-friendly layout of the E-3 camera itself, does place the E-3 in a niche of its own. While many detractors may point to the “low megapixel sensor”...
- Page 5 For many happy owners it was “worth the wait” and it is a camera that they hold in high regard. Indeed, nearly a year after its launch the E-3 was awarded the “Best Advanced Camera in Europe 2008/2009” award by EISA – a European consortium of more than 50 magazine editors in the imaging and sound industries.
- Page 6 “shutter-finger” time spent on newspapers, magazines and as a consultant in retail outlets. He is well acquainted with the Olympus camera family having owned and used various Olympus products since 1974. He has also counted amongst his camera gear various Canon, Nikon, Yashica and Contax...
- Page 7 IF YOU THINK THE E-3 IS A GREAT CAMERA, YOU ARE NOT ALONE! As at date of writing, the E-3 had been honoured with the following awards from photographic magazines, web-sites and professional organisations. Aside from gaining praise for overall design, there are awards for top image quality and one for robustness and build quality.
- Page 8 The 1960s saw the launch of the Olympus Trip 35 camera which did more to place a 35mm camera in households around the planet than any other design before or since. The camera was ruggedly made from metal and boasted a simple-to-understand automatic light metering system that set speeds and apertures.
- Page 9 Pre OM-1 and post OM-1. The OM system changed the course of SLR camera design and helped to popularise the concept of an affordable, portable and reliable SLR system camera. Olympus followed this up with OM-2 which heralded many firsts.
- Page 10 Olympus four-thirds D-SLR ever since the launch of the venerable E-1 – giving Olympus a 5 year head-start in this particular field which is why it is widely proclaimed as the most effective system of its kind on the market.
- Page 11 Maitani- Olympus Pursuit, 1984 Effectively, to this day, the Olympus designers strive to make the camera do as much of the technical drudgery of photography for you as possible. This is done so as to leave you free to...
- Page 12 units, the size of the image circle cast by the lenses as well as the distance between the last lens element and the sensor itself were all agreed upon and bound into a single standard. telecentric Key to top performance was a near lens design which ensures that the light from the image always strikes the sensor at, or as near as possible to, 90 degrees.
- Page 13 “open system” whereby any interested manufacturer may make use of the standard if it so wishes. This offers users of Four-Thirds cameras such as the Olympus E-3 the benefit of not being “tied in” to a single brand when deciding on an upgrade...
-
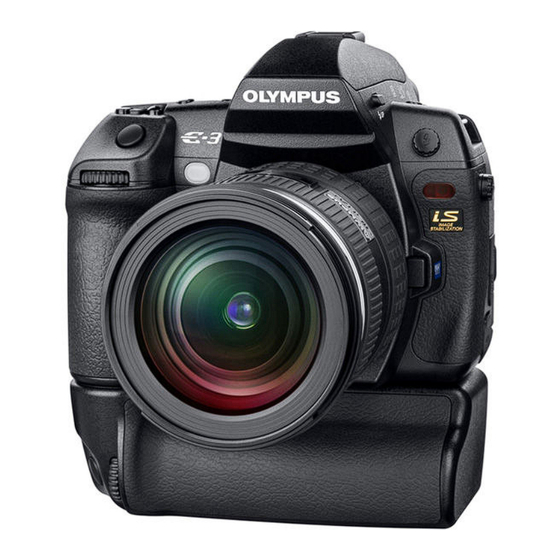
Page 14: Power Options
POWER OPTIONS The E-3 can be powered by any one of 5 potential power source combinations when taken in combination with the power grip HLD-4 or the mains power supply AC-1. - Page 15 90 minutes on a battery that has been previously cycled through a charge/discharge session. Usefully, however, the BCM-1 charger has a charge-completed indicator which lights green when charging is complete so there is no need for stop-watches or guesswork. When you place a battery onto the charger, the charge-state light will normally glow a constant red while charging a depleted battery and turn green once charging is completed.
- Page 16 LET’S TAKE A TOUR OF YOUR E-3 In this section we will give you a quick tour of your camera. In later sections, each dedicated to a particular feature, we will go “in-depth” to fully discuss the various features and options offered by the camera as well as detailing how to customise any given feature or operation.
- Page 17 “left” most function of the two) and the front input wheel is further to the right of the rear wheel thus operating the function marked on the right of the button. You can, however, change which input wheel changes the left or right function using the custom setting menu if you wish to do so.
- Page 18 The small round button closest to the viewfinder is set flush with the surface and this activates a light to illuminate the LCD display when needed. The light is switched off again by pressing the button or if the camera’s main power switch is turned off. Next to this is a raised button, twice as large as the first, which changes the white-balance setting of the camera.
- Page 19 You can also set this dial to adjust exposure bias instead. This means you can simply dial-in the desired amount of exposure compensation without having to press the +/- button first. If the flash is activated or an Olympus FL-series flash is attached, this function used...
- Page 20 E-3 will automatically switch the camera to live view mode with the aperture stopped-down to permit viewing of depth of field on the monitor. So, if your camera has ever appeared to “…suddenly switch to live preview mode for no reason…” check your setting of the Fn button! Right, now back to the top of the camera.
- Page 21 Just below the LCD display, to the right of the main input wheel, you will find two buttons. The dome-shaped one at the extreme right marked with three squares in a bracket allows you to [- - -] change the focus area (from among the 11 available) to suit your particular requirements.
- Page 22 If screen turned inwards (i.e. The Olympus logo is facing outwards) and locked in place, this button is de-activated and will not do anything. Assuming the screen is turned outwards (or is unclipped from its recess) you will see your last photograph displayed on the screen.
- Page 23 4 thumbnails, 9 thumbnails, 16 thumbnails, 25 thumbnails and then a calendar view. Once at the calendar view you can use the directional arrows surrounding the OK button on the rear of the camera to move the green highlight box to any given day. Once you have selected a day, pressing the OK button will display a full-screen view of the first image taken on that particular date.
- Page 24 arrow key to select the function you want and then press OK again to confirm your choice. Another way to do this is to press the OK button to place a yellow cursor box on a control option. Use the arrow pad keys to move the cursor so that it highlights the control you wish to change.
- Page 25 etc.) without the camera trying to “cancel out” the sideways movement as you swing the camera to follow your subject. If the camera has been set to LIVE VIEW mode, pressing this button in will activate the image stabiliser (you will hear and feel a vibration as the sensor movement mechanism gets to work) but, if you are hand-holding the camera, the image on the screen will stabilise noticeably.
- Page 26 Some professional users have reported that, in isolated instances, if your battery is about to be exhausted the activation of the re- setting mechanism might just be enough to “tip the balance” of available power so that the re-setting cycle can be activated but not fully completed.
- Page 27 The xD slot operation is a simple push to insert and lock in place/push to eject system similar to the system used with SD cards and memory stick cards. You can operate the camera with a CF card and an xD card loaded.
- Page 28 He held the camera out past the buildings viewing the scene on the display while he remained safe from any stray bullets flying around in the vicinity. Your need may not be as dramatic but suffice to say that this E-3...
- Page 29 A magnified view of the subject is also available. So, now that you are a bit more familiar with the geography of the E-3, let’s get down to the really good stuff!
-
Page 30: Exposure Control
METERING – AE LOCK – COMPENSATION – PROGRAMME MODES - FLASH EXPOSURE METERING The E-3 offers you 5 (yes five!) light metering options. Until the latter part of 2008, the Olympus D-SLR cameras were virtually unique in offering a method of biasing exposure towards... - Page 31 In the digital age, where dynamic range and highlight burn-out are factors to consider for any serious photographer, the ability to carefully meter the lighting in any scene is vital. Therefore, the available metering options presented on the E-3 are as follows: Electro-Selective...
- Page 32 Press either the shutter button or the OK button to confirm your selection. POWER USER TIP: The author and most professional users of the E-3 suggest that you get into the habit of using the function button plus the main/sub input dial to make selections.
-
Page 33: Centre Weighted Metering
subject. You could ameliorate this by using ESP+AF which links the “focus” of the pattern to the AF target being used.(UMPg46) CENTRE WEIGHTED METERING In cases where the ESP metering is not especially suitable, the good old fashioned centre-weighted averaging metering system will provide a solution as you can stop the camera looking “everywhere”... - Page 34 the shutter release fully. Your subject should now be correctly exposed. POWER USER TIP: You can set the AEL button to “memory” setting so that you do not have to keep it pressed down to retain the meter reading you have “locked-in”. This is useful if you are doing a sequence of the same subject (like a bird on a branch) as it avoids you having to re-set the exposure off the subject after each frame is exposed.
- Page 35 When the light meter is set to Spot-Hi, the reading obtained from within the spot meter circle is continually adjusted to “lighten” the area being measured. This is accomplished by adding to the exposure time that would otherwise be set with a “normal reading”.
- Page 36 Shutter Shutter AEL/AFL AF Mode Half Pressure Full Pressure Button Down [S-AF] Focus Exposure Focus Exposure Focus Exposure Mode 1 S-AF Locked Locked Mode-2 S-AF Locked Locked Mode-3 Locked S-AF [C-AF] Focus Exposure Focus Exposure Focus Exposure Mode 1 C-AF start Locked Locked Locked...
- Page 37 subject such as in Spot-Hi or Spot-Shadow metering modes. In a case where there are no spikes at either end of the histogram, and the graph starts and ends near the edges, you have used the entire tonal range available to you and your metering was correct for the general tone of the entire scene.
-
Page 38: Exposure Bracketing
Another sure-fire, and fast, method of ensuring correct exposure is to make use of the AEB (Auto Exposure Bracketing) function offered by the E-3. In effect, this produces a sequence of photographs of any given image with differing exposure settings. The camera permits 3 or five frame sequences to be exposed at intervals of 1/3 of an exposure value difference up to a maximum of 1EV value. - Page 39 If the camera is set to single frame shooting, the camera will take a photograph in the sequence each time the shutter button is pressed. If you have not completed the sequence (i.e. you have taken only one or two frames and not the full three or five selected) then the AEB signal will blink in the viewfinder display, the top LCD and on the super control panel.
-
Page 40: Iso Bracketing
A very useful addition to the AEB function on the E-3 as opposed to some other professional models on the market is that the AEB function also operates in MANUAL mode. This makes it possible for you to, for example, use AEB even though you have set the camera exposure manually and still benefit from the rapid AEB setting changes. -
Page 41: White Balance
One of the universally praised features of the E-3 is its uncannily accurate white balance algorithm. It renders true to life colours in... - Page 42 The white balance system of the E-3 makes use of two sensors coupled to the light metering system. The main sensor is situated behind the opaque white window below the model number on the right-hand front face of the camera.
-
Page 43: Custom White Balance
Remember to re-set to AUTO once you have finished your set otherwise subsequent scenes may have an unwelcome colour cast to them. CUSTOM WHITE BALANCE There are times when the automatic white balance setting cannot accurately decide which correction to apply. This commonly occurs in areas of mixed lighting temperatures such as where video lights, candles and diffused daylight may be present such as in a marquee. -
Page 44: White Balance Bracketing
WHITE BALANCE BRACKETING Aside from determining a particular white balance setting and adjusting the camera to same, you can additionally ask the camera to bracket any given white balance setting. The camera does this electronically after taking just one frame. Thus, other than in the exposure and ISO bracketing features, one press of the shutter accomplishes the storage of 3 files –... -
Page 45: Programme Mode
PROGRAMME MODE The E-3, in addition to offering shutter priority (S) and aperture priority (A) modes, has a powerful automatic exposure calculation function called Programme (P) mode. Now, for a lot of posers who lay claim to being professional photographers, the use of the P mode will be derided as not being “serious”... - Page 46 45 degree graphical scale. This was not conducive to ensuring soft focus behind a super-model! Luckily, however, the E-3 has a programme mode designed to relieve you of the drudgery but still permit you full creative control of your image.
- Page 47 The beauty of the E-3 system is that, unlike many other the shifted value is not re-set after the programme shift modes, exposure .
- Page 48 If you couple this option to the AEB and other bracketing commands available in the E-3 there is no end to the variety of settings and results that can be obtained in programme – or indeed any other – mode on the camera. (Note: Programme shift...
-
Page 49: A (Aperture Priority) Mode
POWER USER TIP: You can set the shift function to change values in 1/3, 2/3 or full EV steps so as to speed up the shift function operation. This will, if set to 1 EV step as an example, allow you to go from 1/125 second at f=11 to 1/60 sec at f=16 with one “click”... -
Page 50: M (Manual) Mode
• If you set the ISO to AUTO, then you can set a shutter/aperture combination of your choice and leave the E-3 to adjust the ISO automatically up or down the scale in order to balance your exposure. Yes, that’s right, set your favourite aperture and shutter speed values and fire away! The electronic brain of the E- 3 will try and save your bacon if at all possible…and remember... -
Page 51: Flash Exposure
Then fire away and let the AUTO ISO setting adjust for ambient lighting while the flash fills-in. FLASH EXPOSURE The flash exposure system of the E-3 is a development of the ground-breaking system first revealed on the legendary OM-2n and OM-4Ti models. - Page 52 Electronic Flash Emission Time (ms) Now, to understand the next component we need to remember that a focal plane shutter (as fitted to a D-SLR) consists of two curtains. The shutter-speed set for any given exposure denotes the delay between the departure of the first curtain to uncover the sensor to the incoming light, and the departure of the second curtain to blank it off again.
- Page 53 portion of the frame exposed by flash illumination and the balance of the frame by ambient light. The FP (full synchro) flash operates like most other flash units at speeds up to the X-synchronisation setting but it then turns back the clock to the early days of photography and behaves like the flash illuminators one often sees in period comedies where magnesium powder is set in a tray and ignited by a spark.
- Page 54 The range of an FP unit’s emission is comfortably within the normal portrait photography camera-to-subject distance ranges. In addition, the Olympus FL- 36/50 flash units constantly provide an available range read out on their display panels so all that is needed is a glance at the information display to check that you are within range.
-
Page 55: Ttl Flash
The same calculation on the FL 50R would yield the following result: 50 (Guide number in m at ISO100)/11=4.54 meters The built-in unit of the E-3 has a guide number of 13, thus at f=11 you would have an operating range of 1.2 m (approx). The above results, however, are the theoretical limits when there is no other lighting present. - Page 56 (UMPg79) REMOTE (WIRELESS) FLASH SYSTEM Remote control operation of dedicated flash units, such as that offered by the E-3 via its pop-up flash unit and the Olympus FL-R flash unit range, has opened up an entirely new vista in photography.
- Page 57 2/3 power. Simply by highlighting the unit you wish to control on the super control panel of the E-3 you can decide to increase the power of the main light to full power with a few pushes of the arrow pad keys.
- Page 58 As has been said before, the possibilities offered by the E-3 and its system of accessories are, indeed, endless. You need, however, to let your imagination probe beyond the limits of what has hitherto been thought of as “normal photography”...
- Page 59 The Super Control Panel Display for Wireless Flash Setup POWER USER TIP: If working with numerous flashes in different groups, it has been proven useful to make a sketch of the groups in block format on a note pad and to number the flashguns with visible numbers stuck to the rear-facing surface of the flash (Just do not cover the red filtered area as this is the receiver/transmitter region).
- Page 60 Next, just below this setting you will find the channel selector which offers 4 channels with which to control the units. This is useful when shooting at events or locations where other E-3 users might be present and making use of remote flash operation.
-
Page 61: Built-In Flash
POWER USER TIP: If you really need to cover as many lighting set ups as possible, and there are no other E-3 camera users in the area using remote flash operation, you can set up four different groups of remote flash units and allocate each one of these a control channel in the sequence 1, 2, 3 or 4. - Page 62 of which are also available when using the FL-20, FL36R and FL50R: TTL Auto • Manual at full power • Manual with power level settings • TTL with first curtain synchronisation • TTL with second curtain synchronisation • Flash OFF •...
- Page 63 (by default 1/250 second on the E-3) is too short for any of the dimly lit buildings to register during the exposure. If, however, the shutter speed is dropped to a few seconds, there will be time enough for the dim light in the background to register and you can thus show your subject in context.
- Page 64 When the flash is ready and you subject has been briefed, trip the shutter. If using P, A or S modes, the camera will first fire a pre-flash metering burst from the built-in unit (irrespective of the AF ILLUMINAT setting). This is used to calculate the correct amount of flash power needed for the main subject.
- Page 65 USING NON-OLYMPUS FLASH EQUIPMENT The E-3 provides a PC synchronisation socket on the front left face for triggering of studio flash equipment. Ensure the PC conenctor cable has the correct polarity and set the appropriate shutter speed to match the flash timing (Typically 1/60 second).
- Page 66 Still with us so far? Good. Grab another cuppa and a re-fill of nibbles and let’s investigate the many focus options crammed into the E-3 camera. As always, however, a little bit of background can do no harm… AUTO FOCUS 101…...
- Page 67 Some later competitor models have now added cross-sensor array technology to a selection of the sensor points but, at as at the date of writing, the E-3 is still the only professional D-SLR that has cross-type sensors at all focus points.
- Page 68 One vital fact, however, is that the system needs to be able to analyse the differences in the two side’s light patterns. If there are no differences – as in when the camera’s focus point is seeing only one shade or colour without any contrasting line falling within the area of the focus point - both sides will “look”...
- Page 69 Contrast AF, however, has its advantages when focusing in LIVE VIEW mode and it is fitted to the Olympus E420, E520 and E30 cameras for use with their respective live view modes. Right, with that behind us, let us look at how you can control the behaviour of the E-3 AF system.
- Page 70 lighting of a green dot in the viewfinder and the sounding of a double beep. POWER USER TIP: The AF confirmation beep can be overly conspicuous in a very quiet environment such as at a wedding or a concert. You can switch off the confirmation beep by pressing the MENU button and pressing the DOWN arrow pad key twice.
- Page 71 OK. Another useful feature offered by the E-3 is the ability to change the direction in which the focus collar of the lens operates. This is especially useful if you are upgrading to the E-3 from another camera where the near-far focus was achieved with, for example, a twist of the focus collar in a clockwise direction.
-
Page 72: Af Target Selection
AF TARGET SELECTION Manual Selection – Single Target mode The 11 AF targets of the E-3 are visible in the viewfinder as black squares. They have been positioned after analysis of thousands of photographs to determine the most common subject location areas. - Page 73 POWER USER TIP: Pressing the OK button with any target highlighted sends the target to the centre of the array. This applies in single target and dynamic single target modes. The behaviour of the input dial as far as the movement of the target selection sequence is concerned can be adjusted between LOOP and SPIRAL movements.
- Page 74 illuminate in the viewfinder) and press the shutter button to confirm your selection. Target Selection – Single Dynamic mode Press the target selection button and move the target selector to the bottom graphic by rotating an input dial. Now when you press and release the target selection button, the highlighted target in the viewfinder is the central one of four which can be used as the camera needs.
- Page 75 TARGET ZONE SIZE A final option to consider is the size of the AF target itself. Yes, indeed, on the E-3 you can set the area within which the camera This is only active when determines focus around each target. ( using single AF target mode.)
- Page 76 PLAYBACK Right, if you have progressed thus far you ought to have a number of photographs on your camera’s memory card. Time to find out how to have a look at them and, if needed, change them a bit and then transfer them to your computer or, if you wish, we can simply print them out directly from the camera using a compatible printer.
-
Page 77: Shooting Information
appear. This displays the first image of any given day in the date block on which it was taken. Use the arrow pad keys to move the highlight box to any given date and then turn the main input dial to the right. -
Page 78: Slideshow Display
OK button without first selecting a view in the playback menu will result in the image on display being marked for deletion. EDITING IMAGES The E-3 has a number of useful image editing options built-in to the camera. These include basic RAW image editing, conversion... - Page 79 of large files to thumbnails for e-mailing purposes and the application of Shadow Adjustment Technology to brighten under-exposed images. The original image is never changed but a new file is created with the edited data in addition to the original. Press the MENU button and then the DOWN arrow pad key to highlight the playback menu (It is the central one on the list).
-
Page 80: Protect Files
RAW images in Olympus Master or other software in a rush. PROTECT FILES While an image is displayed in the playback mode, pressing the AEL/AFL button will set a green key symbol on the top right of the image. -
Page 81: Transferring Images To Your Computer
USB cable shipped with the camera. As soon as the USB cable is plugged-in to the E-3 and connected to the computer, a screen will appear on the camera (if it is switched-on) to ask you how to treat the new connection. - Page 82 MENUS The menu system on the E-3 stands at the heart of this versatile photographic machine. Every adjustment option available on the camera – even where dedicated buttons are provided for the particular feature – is available through the menu system.
- Page 83 Once you have selected the main area in which you need to make adjustments, simply press the RIGHT arrow key to open up the sub-menu pages applicable to that set of controls. The sub-menus are all arranged in the same manner as the main menu –...
- Page 84 HIGH KEY – Boosts contrast LOW KEY – Reduces contrast FILE SIZE (UMPg65): RAW – Files saved in ORF (Olympus Raw Format) – no white balance, sharpening or other processing applied. LF/LN*/MN/SN – Various options for JPEG file sizes RAW+LF/RAW+LN/RAW+MN/RAW+SN – Options to save two versions of each photograph.
- Page 85 WB (UMPg67): Select your choice of AUTO* or manual white balance settings. A full list is provided in the appendices and on page 67 of the user manual. ISO (UMPg50): Choose from AUTO* setting or any option within the range of ISO100 to ISO3200. NOISE REDUCTION (UMPg74): ON* - Camera takes a reading of sensor after shutter has closed on exposures of 2 seconds or longer to identify...
- Page 86 CAMERA MENU 2 METERING (UMPg46): ESP/ESP+AF* – Electro Selective Pattern or Electro Selective Pattern coupled to the active AF target in use. CENTRE-WEIGHTED AVERAGE SPOT SPOT HI SPOT SHADOW RC MODE (UMPg82): OFF* ON – Select to use wireless remote flash facilities. +/- (UMPg79): Adjust flash emission by up to 3.0 EV values.
-
Page 87: Playback Menu
AE BKT (UMPg48): OFF* 3 or 5 frames at 0.3 EV intervals up to +/- 1.0 EV WB BKT (UMPg48): A-B/G-M – OFF*/3 Frames with 2/3 or 4 Steps FL BKT (UMPg80): OFF*/3 Frames with 0.3/0.7 or 1.0 EV steps ISO BKT (UMPg51) OFF*/3 Frames with 0.3/0.7 or 1.0 EV steps PLAYBACK MENU... - Page 88 TOOLS 1 MENU AF/MF AF ILLUMINAT OFF/ON* (UMPg96) Controls low light strobing off flash unit to assist AF. Switch it off here. FOCUS RING * / (UMPg96) Provides “common feel” with existing lenses already owned by photographer. C-AF LOCK OFF*/ON (UMPg96) Defines individual frame focusing AF AREA POINTER...
-
Page 89: Button Timer
AEL/AFL S-AF* Modes 1*/ 2 / 3 C-AF Modes 1 / 2*/ 3 / 4 Modes 1*/ 2 / 3 (UMPg98) AEL/AFL MEMO OFF*/ON (UMPg99) Fn FUNCTION PREVIEW*/LIVE PREVIEW/WHITE BALANCE MEASUREMENT/FOCUS TARGET HOME/ONE TOUCH MANUAL FOCUS/ONE TOUCH RAW RECORDING/P/A/S/M/TEST PICTURE/MY MODE/UNDERWATER MODE/OFF (UMPg99) MY MODE SETUP MY MODE1/MY MODE2... -
Page 90: Rls Priority C
RLS PRIORITY C OFF/ON* Permits triggering of shutter in C-AF mode even when focus has not been confirmed. (UMPg101) L fps 1 fps/2 fps/3 fps*/4 fps Lets you determine how many frames per second are exposed on mutiple frame drive mode “low” setting. -
Page 91: Usb Mode
USB MODE AUTO*/ STORAGE / MTP / CONTROL / EASY PRINT / CUSTOM PRINT Controls how your E-3 interfaces with computers Pictbridge printers. CONTROL permits you to “drive” the camera from a computer via Olympus Studio Software for full remote operation. (UMPg102) -
Page 92: Iso-Auto-Set
ISO STEP 0.3*/1.0 EV (UMPg103) ISO-AUTO-SET HIGH LIMIT/DEFAULT Decide how high the camera may automatically set the ISO value and/or determine the preferred ISO speed to be used when setting ISO automatically. (UMPg103) ISO –AUTO P, A, S*/ ALL Determines which modes the ISO AUTO SET function may operate in. -
Page 93: Colour Space
FILE SIZE/COLOR/WB ALL WB ALL SET (A and B -7 to +7) ALL RESET – YES/NO (UMPg104) Apply the same compensation to all settings and/or re-set compensation settings on all WB channels at once. COLOUR SPACE sRGB* / Adobe RGB A Power User Tip is to set the colour space to Adobe RGB as this offers the wider Gamut. -
Page 94: Priority Set
RAW+JPEG ERASE JPEG/RAW/RAW+JPEG* (UMPg105) FILE NAME AUTO* / RESET (UMPg106) This setting determines if your files get numbered sequentially or if the camera starts numbering from zero each time a card is inserted or formatted. Pro users suggest leaving this setting at AUTO unless you have a specific filing system that requires the number and folder to re-set itself. -
Page 95: Ext Wb Detect
WB sensor on the front of the camera. This could adversely influence WB readings. In such cases de-activate the sensor here and let the E-3 use only the internal WB sensor. - Page 96 (UMPg107) LANGUAGE Choose your menu language here. You can download a limited number of additional languages from the Olympus Master Software link. (UMPg 107) VIDEO OUT PAL / NTSC* Determines the video signal sent to AV equipment from the camera via the AV cable.
- Page 97 (each is independent). At time of writing current body release Version 1.2. Check for updates via Olympus Master software using USB cable linked to your computer while on-line. Ensure battery is fully charged prior to connecting to update firmware. (UMPg108)
- Page 98 APPENDICES OLYMPUS E-3 LENS/HAND-HELD SHUTTER SPEEDS GUIDE Due to the compact size of the Zuiko Digital standard lenses, you can hold the camera steady at slightly slower speeds than normal for the equivalent focal length. However, generally speaking, the faster your shutter speed, the sharper will be your shot.
- Page 99 would be (400x1.4=1/560 sec). Use of a 2x converter would make the minimum speed on a 200mm lens 1/800 sec.
Need help?
Do you have a question about the E-3 and is the answer not in the manual?
Questions and answers