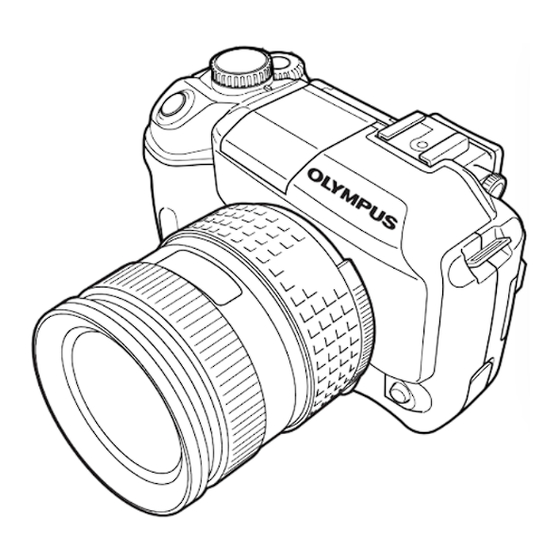
Olympus E300 - 14-54mm f/2.8-3.5 Zuiko ED Digital SLR Lens Basic Manual
Evolt e-300 basic manual (english)
Hide thumbs
Also See for E300 - 14-54mm f/2.8-3.5 Zuiko ED Digital SLR Lens:
- Manuel avancé (212 pages) ,
- Basic manual (34 pages) ,
- Manuel de base (34 pages)
Table of Contents
Advertisement
Quick Links
Download this manual
See also:
Advanced Manual
Advertisement
Table of Contents

Subscribe to Our Youtube Channel
Related Manuals for Olympus E300 - 14-54mm f/2.8-3.5 Zuiko ED Digital SLR Lens


Summary of Contents for Olympus E300 - 14-54mm f/2.8-3.5 Zuiko ED Digital SLR Lens
- Page 1 DIGITAL CAMERA BASIC MANUAL ENGLISH...
- Page 2 Thank you for purchasing an Olympus digital camera. Before you start to use your new camera, please read these instructions carefully to enjoy optimum performance and a longer service life. This manual explains shooting and playback basics. For details on functions, read the advanced manual.
-
Page 3: Unpacking The Box Contents
Body cap Eyepiece cover Strap Lithium ion battery Lithium ion battery USB cable Video cable (BLM-1) charger (BCM-2) OLYMPUS Master Basic manual Advanced manual Warranty card CD-ROM (CD-ROM) Registration card Registration card is not provided in some areas. Contents vary depending on the area where you purchased this camera. - Page 4 PC or printer... pictures directly with a Once you’ve transferred images to PictBridge-compatible printer your PC, you can take advantage without using your PC. of many more editing, viewing and printing functions with the provided OLYMPUS Master.
-
Page 5: Table Of Contents
Power off ..........29 What you can do with OLYMPUS Master software ....30 Information . -
Page 6: Safety Precautions
DO NOT OPEN CAUTION: TO REDUCE THE RISK OF ELECTRICAL SHOCK, DO NOT REMOVE COVER (OR BACK). NO USER-SERVICEABLE PARTS INSIDE. REFER SERVICING TO QUALIFIED OLYMPUS SERVICE PERSONNEL. Lightning flash with an arrowhead, An exclamation mark enclosed in a triangle... - Page 7 Safety precautions Lightning — If a lightning storm occurs while using a specified AC adapter, remove it from the wall outlet immediately. To avoid damage from unexpected power surges, always unplug the AC adapter from the power outlet and disconnect it from the camera when the camera is not in use.
- Page 8 Take the camera outdoors, away from flammable objects, and carefully remove the battery. Never remove the battery with bare hands. Contact the nearest Olympus service center immediately. Do not use the camera with wet hands.
- Page 9 Ensure the adapter used is designed for your region or country. For more information, contact the nearest Olympus service center or the store of purchase. Olympus makes no representations or warranties regarding any damages caused by AC adapters not recommended by Olympus.
- Page 10 If the battery leaks, becomes discolored or deformed, or appears abnormal in any way during operation, stop using the camera immediately. Contact your dealer or an authorized Olympus service center. Continued use may result in fire or electric shock. If the battery leaks fluid onto your clothing or skin, remove the clothing and flush the affected area with clean, running cold water immediately.
- Page 11 – Consult your dealer or an experienced radio/TV technician for help. Only the OLYMPUS-supplied USB cables should be used to connect the camera to USB-enabled personal computers (PC). Any unauthorized changes or modifications to this equipment would void the user's authority...
-
Page 12: Attaching The Strap
Attach the strap correctly as shown above so that the camera does not fall off. If the strap is attached incorrectly and the camera falls off, Olympus is not responsible for any damage. -
Page 13: Charging The Battery
Charging the battery This camera uses an Olympus lithium ion battery (BLM-1). Never use any other type of battery. The battery is not fully charged when purchased. Before use, be sure to charge the battery with the specified provided charger (BCM-2). - Page 14 Be careful not to lose the battery protection cap, since it is needed when storing the battery. If the charging indicator blinks in red, unplug the AC cable and contact Olympus customer support center. Before charging the battery, be sure to read “Safety precautions” ( P. 6)
-
Page 15: Loading The Battery
Loading the battery Make sure that the camera's power switch is set to Power switch Battery compartment lock Slide the battery compartment lock to and open the battery compartment cover. Battery compartment cover Load the battery as shown in the illustration. - Page 16 Loading the battery Slide the battery compartment lock to Battery compartment cover Battery compartment cover When using the optional power battery detaching pin holder, remove the battery compartment cover by sliding the detaching pin in the direction of the arrow. Other power sources AC Adapter T The optional AC Adapter (AC-1) lets you use the camera without worrying...
-
Page 17: Attaching A Lens To The Camera
AF (auto focus) and light metering will not function correctly. In some cases, other functions may not work either. *Four Thirds mount: Standard developed by Olympus. Lens mount of Four Thirds system. Developed from the ground up, these all-new interchangeable lenses are based on optic engineering exclusively for digital cameras. - Page 18 Attaching a lens to the camera Make sure the power switch is set to Power switch Remove the body cap from the camera. Body cap Remove the rear cap from the lens. Rear cap...
- Page 19 Attaching a lens to the camera Align the lens attachment mark (red) on the camera with the alignment mark (red) on the lens, then insert the Lens attachment mark (Red) lens into the camera’s body. Rotate the lens clockwise until you hear it click.
-
Page 20: Inserting A Card
Inserting a card Usable cards “Card” in this manual refers to a recording medium. This camera can use a Compact Flash or Microdrive (optional). An xD-Picture Card can also be used with a card adapter (optional). Microdrive Compact Flash A Microdrive is a medium that uses a A Compact Flash is a large-capacity large-capacity compact hard disk drive. - Page 21 Inserting a card Open the card cover. Card cover ß Insert the card fully with the mark side facing toward the monitor side (the camera’s rear side) as illustrated. ß If you cannot see the mark on the card, ß make sure the card is facing the correct way.
- Page 22 Inserting a card Removing the card Make sure that the card access lamp is not illuminated. Open the card cover. Card access lamp Press the eject button gently and let it pop out, then press it again all the way in. The card will be ejected a short way so that you can pull it out.
-
Page 23: Power On
Power on SSWF indicator Set the power switch to To turn off the power, set the power switch to Set the mode dial to –.– – – –.– .– Monitor When the camera is turned on, the control AUTO AUTO AUTO panel screen is displayed on the monitor. - Page 24 Power on Holding the camera Hold the camera's grip with your right hand and keep your elbow at your side. Rest your elbow gently against your body and hold the lens section firmly from underneath with your left hand. Take a picture. Putting one leg a little forward helps stabilize your upper body.
-
Page 25: Adjusting The Viewfinder's Diopter
Adjusting the viewfinder’s diopter While looking though the viewfinder, rotate AF frame the diopter adjustment dial little by little. When you can see the AF frame clearly, adjustment is complete. Viewfinder Diopter adjustment dial Eyecup You can remove the eyecup attached to the viewfinder’s eyepiece and replace it with a different one. -
Page 26: Shooting
Shooting Shutter button Place the AF frame on the subject while viewing through the viewfinder. AF frame Viewfinder Card access lamp Adjust the focus. Halfway down Press the shutter button gently (halfway). The focus is locked. The AF confirmation mark and the AF focusing frame light up in the viewfinder. - Page 27 Shooting Each time you press the shutter button, the memory gauge lights on the control panel screen, indicating that the picture you have just taken is being recorded onto the card. The memory gauge changes according to how many pictures the camera is processing. Shoot Shoot Shoot...
-
Page 28: Playback
Playback button Press the (playback mode) button. The monitor turns off after about 1 minute if no operations are performed. After about 1 hour without being used, the camera will turn off automatically. Turn on the camera again. MENU The last recorded image appears. Arrow pad ’04. -
Page 29: Power Off
Power off Set the power switch to... -
Page 30: What You Can Do With Olympus Master Software
OLYMPUS Master*. * Install OLYMPUS Master on your computer from the provided CD-ROM. OLYMPUS Master allows you to register as the camera’s owner. Doing so will enable you to receive information on software or firmware upgrades from Olympus. -
Page 31: Information
Information Specifications —Camera Product type Product type : Single-lens reflex digital camera with interchangeable lens system Lens : Zuiko Digital, Four Thirds System Lens Lens mount : Four Thirds Mount Equivalent focal length on a 35 mm film camera : Approx. twice the focal length of the lens Image pickup element Product type : 4/3 type full frame transfer primary color CCD... - Page 32 Information Exposure control Metering system : TTL full-aperture metering system (1) Digital ESP metering (2) Center weighted average metering (3) Spot metering (approx. 2% for the viewfinder screen) Metering range : (1) EV 2 - 20 (Digital ESP metering, Center weighted average metering) (2) EV 3 - 17 (Spot metering) (At normal temperature, 50 mm F2, ISO 100)
-
Page 33: Specifications - Provided Accessories
Information External connector USB connector (mini-B), DC-IN jack, VIDEO OUT jack Power supply Battery : BLM-1 Lithium-ion Battery AC power supply : AC-1 AC adapter (optional) Dimensions/weight Dimensions : 146.5 mm (W) x 85 mm (H) x 64 mm (D) (5.8" x 3.3" x 2.5") (excluding protrusions) Weight : Approx. - Page 34 Our phone customer support is available from 8 am to 10 pm (Monday to Friday) ET E-Mail: e-slrpro@olympusamerica.com Olympus software updates can be obtained at: http://www.olympus.com/digital Premises: Wendenstrasse 14-18, 20097 Hamburg, Germany Tel. +49 40 - 23 77 3-0 / Fax +49 40 - 23 07 61...
Need help?
Do you have a question about the E300 - 14-54mm f/2.8-3.5 Zuiko ED Digital SLR Lens and is the answer not in the manual?
Questions and answers