Table of Contents
Advertisement
Quick Links
A
SSEMBLY
M
ANUAL FOR
R
ADIANT
INDEX
Introduction and Document Index
Installation Requirements -------------------------------------------------1
Assembly Instructions------------------------------------------------------2
Commissioning Instructions ----------------------------------------------3
Servicing Instructions ------------------------------------------------------4
Spare Parts -------------------------------------------------------------------5
Fault Finding Guide --------------------------------------------------------6
Replacing Parts -------------------------------------------------------------7
User and Operating Instructions ----------------------------------------8
WARNINGS
AmbiRad equipment must be installed and maintained in accordance with the relevant
provisions of the Gas Safety (Installations and Use) Regulations 1998 for gas fired products.
Due account should also be taken of any obligations arising from the Health and Safety at
Works Act 1974 or relevant codes of practice. In addition the installation must be carried out
in accordance with the current IEE wiring regulations (BS 7671), BS 6896 (Industrial &
Commercial) and any other relevant British Standards and Codes of Practice by a qualified
installer. All external wiring MUST comply with the current IEE wiring regulations.
, I
NSTALLATION
A
R
MBI
T
UBE
& S
V
AD
ISION
H
EATERS
ERVICING
VSXE
®
.
Section
Advertisement
Table of Contents

Related Manuals for Ambirad VSXE20UT


Summary of Contents for Ambirad VSXE20UT
-
Page 1: Table Of Contents
User and Operating Instructions ----------------------------------------8 WARNINGS AmbiRad equipment must be installed and maintained in accordance with the relevant provisions of the Gas Safety (Installations and Use) Regulations 1998 for gas fired products. Due account should also be taken of any obligations arising from the Health and Safety at Works Act 1974 or relevant codes of practice. -
Page 2: Installation Requirements
Introduction. Welcome to the new range of high efficiency and attention is required to ensure that working AmbiRad Vision radiant tube heaters. Local at height regulations are adhered to at the regulations may vary in the country of use and mounting heights specified. - Page 3 Isolate all electrical supplies to the These radiant tube heaters can be wall mounted heater & controller before proceeding. using the appropriate bracket (AmbiRad part no WMB-13-22-38). For your own safety we recommend the use of safety boots and leather faced gloves when When using the wall mounting brackets the handling sharp or heavy items.
- Page 4 Figure 1.b. Recommended Methods of Heater Suspension.
- Page 5 Clearance to Combustibles. The minimum clearances to combustible materials are given in the tables below. These minimum distances MUST be adhered to at all times. Figure 2 Diagram illustrating the clearance to combustibles VSXEUT 20/25/30 35/40 Above Reflector Above Burner / Heater Outlet To the Sides 1300 1300...
- Page 6 AmbiRad and must only be carried out by a qualified/competent gas Take care when making a gas connection engineer.
- Page 7 Standard heater 116W. frost thermostat. Current rating 0.55 amp max (inductive). We recommend use of AmbiRad approved controls. Please refer to control manual for Fuse: external 3 amp. siting and installation details.
- Page 8 Figure 5. Internal Burner Wiring Diagram. GREY VACUUM SWITCH SOLENOID VALVE N.C. N.O. GREEN/YELLOW VALVE J.S.T. EMC FILTER MAINS INPUT GRN/YLW BLUE BLUE BURNER MAINS BLUE LAMPS BROWN BROWN PINK WHITE MAIN J.S.T. YELLOW GREY...
- Page 9 0.5 air changes per hour Ventilation Requirements using appropriately sized fans and interlocked with the heaters. AmbiRad tube heaters can be operated as Natural Ventilation flued or unflued appliances in accordance with Low level ventilation openings with a free area the relevant national requirements in the of at least 2cm²/kW shall be provided.
- Page 10 exceeding 70kW net (1st, 2nd and 3rd family The flue system must be terminated vertically gases), and the flue system manufacturers only and in accordance with the British instructions as supplied with the flue. Standard Code of Practice BS 5440: Part 1 - Installation and maintenance of flues and See reference BS 6896.
- Page 11 Option 1 - Figure 6.a. Forced Burner with Heat Exchanger (Standard Flue) For flued products of combustion and no ducted air Products of combustion Inlet Firing tube Products of combustion Maximum flue length = 9.5m @ Ø125mm E Forced Burner Maximum no of bends = 2 All flues must terminate vertically.
- Page 12 Option 2 - Figure 6.b. Forced Burner with Heat Exchanger (No External Flue) For ducted air and products of combustion to ventilated area Fresh Products of combustion to ventilated area Firing tube Products of combustion Ventilation requirements are as detailed in E Forced Burner section 1.9 Heat Exchanger...
- Page 13 Option 3 - Figure 6.c. Forced Burner with Heat Exchanger (with Concentric Flue) For flued products of combustion and ducted air via concentric pipe. Products of combustion IMPORTANT NOTE This option is a type B flue system with ducted air and is not a room sealed balanced flue product.
-
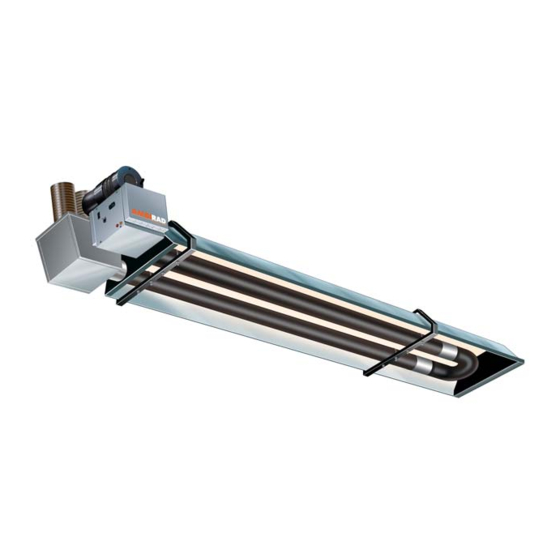
Page 14: Assembly Instructions
Injector Injector Heater Size Weight Flowrate Pressure Size Rating Model (h x l x w) (Kg) Type Gross Nett (m³/hr) (mbar) (mm) VSXE20UT 20.0 18.0 10.0 420x4100x675 2501 VSXE25UT 25.0 22.5 420x4100x675 2507 VSXE30UT 32.0 28.8 13.0 420x4100x675 2507 VSXE35UT 36.0... - Page 15 Tools Required. The following tools and equipment are advisable to complete the tasks laid out in this manual. Suitable alternative tools may be used. 10mm, Trestles Leather Pozidrive 12mm & Faced Screwdriver 13mm Gloves Spanners 4 & 5mm Tape Wrench with 13mm Allen Measure...
- Page 16 All reflectors must be positioned/ attached to the brackets exactly as detailed in the assembly drawings. 2.2.4 U Bend. For VS(A) ‘U’ tube heaters only. Slide the ‘U’ 2.2.7 End Caps bend onto the tube ends with the clamping bolts facing upwards until the predefined stop Position the end cap with no tube holes beneath position.
- Page 17 Figure 7. Vision Heater Assembly: Models VSXE U tube 20/25/30kW.
- Page 18 Figure 8. Vision Heater Assembly: Models VSXE U tube 35/40/45kW.
- Page 19 Figure 9. Vision Heater Assembly: Models VSXE U tube 50kW.
-
Page 20: Commissioning Instructions
3. Commissioning Instructions. These appliances should be commissioned by a qualified engineer. Tools Required. to complete the tasks laid out in this manual. Suitable alternative tools may be used. The following tools and equipment are advisable Large Adjustable Leather Pozidrive Spanners or 22, 26 &... -
Page 21: Servicing Instructions
4. Servicing Instructions. These appliances should be serviced annually by a competent person to ensure safe and efficient operation. In exceptional dusty or polluted conditions more frequent servicing may be required. The manufacturer offers a maintenance service. Details available on request Tools Required. - Page 22 4.3 Burner Removal (All Options) Step 4 Slacken the grub screws on the burner support casting using a 4mm Allen key to Step 1 Isolate mains electric and gas enable the burner to be removed from the supplies. Unplug the fan and mains radiant tube.
- Page 23 Step 3 The gas injector can be inspected and removed. See previous photo. This can be replaced if contaminated or blocked. cleaned together with the Inside of the burner head. Step 2 The pepper pot burner head can be replaced ensuring the 5 holes on the outer ring are aligned alongside the probes.
- Page 24 4.6 Combustion Fan Assembly Powered Burner Step 1 Slacken jubilee clip and remove the flexible hose from the burner. Step 6 Remove any dust from fan scroll and from around the motor. Step 7 Ensure the impeller rotates freely. Step 8 Refit components. Step 2 Remove fan spigot fixings.
- Page 25 Step 5 The turbulators should be cleaned with Step 3 Remove any dust and dirt from the heat a soft brush. exchanger & refit. 4.9 Reflector Servicing Step 1 The condition of the reflectors should be noted. If necessary the reflectors can be cleaned with a mild detergent.
-
Page 26: Spare Parts
Required Spares Note Any spare part components that are In order to aid troubleshooting and servicing we not approved by AmbiRad could invalidate recommend that the components shown in this the approval of the appliance and validity of the section should be stocked. -
Page 27: Fault Finding Guide
1. Burner controller If the heater still fails to valve open? 2. Replace gas valve operate normally, please contact the AmbiRad service department. Check: 1. Burner inlet pressure 2. Burner nozzle pressure 3. Check live & neutral polarity 4. Check presence of good earth... -
Page 28: Replacing Parts
7. Replacing Parts. 7.1 Burner Controller Replacement 7.2 Air Pressure Switch Replacement Step 1 Slacken screw in burner lid and open the Step 1 Disconnect the two silicone impulse right hand burner access door. tubes and three wiring connections making note of replacement positions. - Page 29 7.3 Gas Valve Replacement Step 5 From within the combustion chamber, remove the two screws holding the front of the Step 1 Remove the burner assembly as gas valve. described in the section 4.3 Servicing. Step 2 Open the left hand access door and detach the impulse hoses from the air pressure switch.
- Page 30 Step 9 The two screws retaining the gas valve can then be removed. Step 10 The gas valve can now be replaced. Step 11 Refit all components in reverse order. Step 12 Ensure step screw is in the correct position as indicated in the diagram below. Step Screw Adjustment Step 13 Set gas pressures to data badge or as...
- Page 31 Notes.
-
Page 32: User And Operating Instructions
Brierley Hill West Midlands DY5 1QA United Kingdom. Telephone 01384 489700 Facsimile 01384 489707 Email info@ambirad.co.uk Website www.ambirad.co.uk AmbiRad is a registered trademark of AmbiRad Limited. Because of continuous product Technical Support www.s-i-d.co.uk innovation, AmbiRad reserve the right to change product specification without due notice...
Need help?
Do you have a question about the VSXE20UT and is the answer not in the manual?
Questions and answers