Table of Contents
Advertisement
Advertisement
Table of Contents

Related Manuals for Custom Audio Electronics PLUS4


Summary of Contents for Custom Audio Electronics PLUS4
- Page 1 USER MANUAL PLUS4...
- Page 3 CUSTOM S .p .A . GENERAL SAFETY INFORMATION THE CE MARK AFFIXED TO Your attention is drawn to the following THE PRODUCT CERTIFY Via Berettine 2/B actions that could compromise the char- THAT THE PRODUCT SAT- 43010 Fontevivo (PARMA) - Italy acteristics of the product: ISFIES THE BASIC SAFETY Tel .
- Page 5 MANUAL For details on the commands, refer to the manual with code 77200000002100...
-
Page 7: Table Of Contents
TABLE OF CONTENTS 1 INTRODUCTION . . . . . . . . . . . . . . . . . . . . . . . . . . . . . . . . . . . . . . . . . . . . . . . . . . . . . . . . . . . . . . 9 1 .1 Document structure . - Page 8 7 SPECIFICATIONS . . . . . . . . . . . . . . . . . . . . . . . . . . . . . . . . . . . . . . . . . . . . . . . . . . . . . . . . . . . . 51 7.1 ...
-
Page 9: Introduction
1 INTRODUCTION 1.1 Document structure This document includes the following chapters: 1 INTRODUCTION information about this document 2 DESCRIPTION general description of device 3 INSTALLATION information required for a correct installation of the device 4 OPERATION information required to make the device operative 5 ... -
Page 11: Description
2 DESCRIPTION 2.1 Unpacking the device Remove the device from its carton being careful not to damage the packing material so that it may be re-used if the printer is to be transported in the future . Make sure that all the components illustrated below are present and that there are no signs of damage . If there are, contact Customer Service . -
Page 12: Device Component: External Views
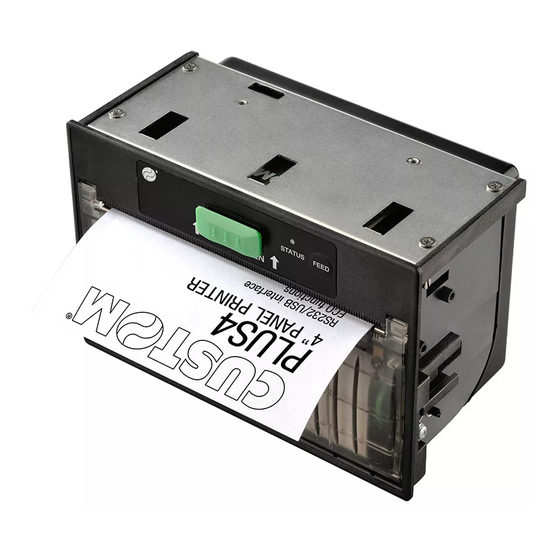
2.2 Device component: external views Model without interconnection module 1 . Frontal cover 7 . Seat for fixing hook 2 . Paper output 8 . Connector for interconnection module (optional) 3 . Serrated blade for manual tear off 9 . USB interface connector (miniUSB) 4 . - Page 13 Model with interconnection module 1 . Frontal cover 7 . Seat for fixing hook 2 . Paper output 8 . RS232/TTL serial interface connector 3 . Serrated blade for manual tear off 9 . Parallel interface connector 4 . Release lever for cover 10 .
-
Page 14: Device Component: Internal View
2.3 Device component: internal view 1 . Printing roller 2 . Printing head with temperature sensor 3 . Sensors for detecting paper presence 2.4 Product label PC = Product code (14 digits) SN = Serial number HW = Hardware release XXXXXXXXXXXXXX 0000000000000000000... -
Page 15: Key Functions
2.5 Key functions The following figures show the functions of key according to the operating condition of the device. POWER UP STANDBY FEED FEED Hold Hold down down Print the advance the paper SETUP report (manual feed) FEED FEED Fast Fast Hold Hold push push down down enter the skip the SETUP MODE SETUP MODE FEED FEED Fast... -
Page 16: Status Led Flashes
2.6 Status led flashes The status led indicates hardware status of device . Given in the table below are the various led signals and the correspond- ing device status . STATUS LED DESCRIPTION PRINTER OFF GREEN PRINTER ON: NO ERROR RECEIVE DATA RECEPTION ERRORS GREEN... -
Page 17: Installation
3 INSTALLATION 3.1 “EASYLOCK” fastening The device includes two plastic hooks for the “Easylock” fastening. This system allows to fix the device to panels of variable thickness from a minimum of 3mm and a maximum of 8mm and requires no tools . To use the fixing hooks, proceed as follows: NOTE: All the dimensions shown in following figures are in millimetres. Insert the fixing hooks into the seat on both the device sides MAX. 8 Insert the device inside the panel Push the two fixing hooks to strike the panel... - Page 18 To remove the fixing hooks lift the lever shown in figure with a small screwdriver...
-
Page 19: Fixing With Screws (Model Without Interconnection Module)
3.2 Fixing with screws (model without interconnection module) The device is provided with six fixing holes in the back side. To install the device on a panel it is possible to use three M3 threaded screws into the holes indicated by the letter A or three screws for plastic d = 3 (length 6 mm) into the holes indicated by the letter B (see following figure). -
Page 20: Connections
3.3 Connections The following figures show the possible connections for device. Model without interconnection module USB device Power supply serial device ATTENTION: In some using conditions, we recommend the installation of a ferrite core on the power supply cable . NOTE: If RS232 and USB connectors are inserted, communication port is USB . - Page 21 Model with interconnection module Power supply serial device USB device ATTENTION: In some using conditions, we recommend the installation of a ferrite core on the power supply cable . NOTE: If RS232 and USB connectors are inserted, communication port is USB .
-
Page 22: Pinout (Model Without Interconnection Module)
3.4 Pinout (model without interconnection module) POWER SUPPLY JST male connector 90° (S4B-XH-A-1) 1 +VL 2 +VP 3 GND 4 GND ATTENTION: Respect power supply polarity . NOTE: Power supply cable The following figure shows the connector pinout of the power supply cable for the device: Female JST connector Power supply cable series XHP-4 Cable Segnal color... - Page 23 RS232/TTL SERIAL INTERFACE Molex male connector 53261 series (90°) 1 RT 2 TX During transmission, oscillates between “0” and “1” depending on data 3 RX During reception, oscillates between “0” and “1” depending on data 4 GND 5 EXT-PUSH 6 EXT-LEDV NOTES: Given the presence of the RS232 standard, logic value “0”...
-
Page 24: Pinout (Model With Interconnection Module)
3.5 Pinout (model with interconnection module) POWER SUPPLY Tripolar female connector 1 GND 2 +VRE 3 GND 4 Frame GND 5 Frame GND ATTENTION: Respect power supply polarity . NOTE: Power supply cable The following figure shows the connector pinout of the power supply cable for the device: Tripolar male connector n.c. +24 V Power supply cable USB INTERFACE Female USB type B connector... -
Page 25: Rs232 Serial Interface
RS232 SERIAL INTERFACE DB9 female connector 1 n .c . 2 TX During transmission, takes the value “0” and “1”, depending on data 3 RX During reception, takes the value “0” and “1”, depending on data 4 n .c . 5 GND 6 n .c . - Page 26 PARALLEL CENTRONICS/TTL INTERFACE DB25 female connector 1 STROBE (in) 2 AD0 (in) 3 AD1 (in) 4 AD2 (in) 5 AD3 (in) 6 AD4 (in) 7 AD5 (in) 8 AD6 (in) 9 AD7 (in) 10 ACK (out) 11 BUSY (out) 12 PAP-END (out) 13 VCP (out)
-
Page 27: Serial Port Setting (Model Without Interconnection Module)
3.6 Serial port setting (model without interconnection module) To set the serial port of the device, slide the switch shown in figure in the correct position: RS232 RS232 In the serial protocol, the signals which distinguish the communication are TD, RD, and RTS if the RTS/CTS protocol has been selected while, if the XON/XOFF protocol has been selected, the signals are TD and RD . Transmission format NEXT START... -
Page 28: Parallel Port Setting (Model With Interconnection Module)
XON/XOFF protocol STOP STOP DATO ATTESA DATO START BIT START BIT STOP STOP $13XOFF $11XON START BIT START BIT 3.7 Parallel port setting (model with interconnection module) To set the parallel port of the device, proceed as follows: Lift the release lever to unhook the frontal cover and completely open the cover to the maximum opening position... - Page 29 Unscrew the 3 fixing screws and remove the rear cover Unscrew the 3 fixing screws and remove the interconnection board...
- Page 30 Rotate the interconnection board TTL parallel interface Centronics parallel interface INTERCONNECTION INTERCONNECTION BOARD BOARD Close the jumpers JP1 and JP2 as shown in figure according to the desiderd setting SEE PREVIOUS STEPS Assemble the device by reversing the previous steps...
- Page 31 For models with parallel TTL interface, the communication signals are: 8 bit DATA BUS, STROBE (indicate the data validity) and BUSY (indicate that the device is ready to receive data) . Transmission format D0...D7 DATI VALIDI DATI VALIDI STROBE BUSY Flow diagram START TIMEOUT...
-
Page 32: Driver And Sdk
3.8 Driver and SDK The drivers are available for the following operating system: OPERATING DESCRIPTION INSTALLATION PROCEDURE SYSTEM Driver per Windows XP From the START menu, press Run Driver per Windows VISTA (32/64bit) and type-in the path where the SW Windows was saved on your PC, then click OK . -
Page 33: Operation
4 OPERATION 4.1 Adjusting paper width The device includes two plastic guides for the adjustment of paper width to 144mm or 112mm . To adjust the paper width proceed as follows . Lift the release lever and completely open the frontal cover to the maximum opening position Check the number impressed on the visible side of guides. - Page 34 ATTENTION: While using the screwdriver, be carefull not to damage the two guides and the paper compartment Remove the two guides by gently levering with a small screwdriver at the point shown in the figure Rotate the guides and hook them into the seat of the paper compartment with the correct side facing inwards NOTE: The assembly procedure for the adapter guides is the same for all the device models .
-
Page 35: Paper Roll Insertion
4.2 Paper roll insertion At every change of paper roll, check inside the device . To change the paper roll, proceed as follows: SEE PREVIOUS PARAGRAPHS Adjust the paper width Insert the paper roll so that it unrolls correctly as shown in figure Pull out of the paper compartment a few centimeters of paper and close the frontal cover... -
Page 37: Configuration
5 CONFIGURATION 5.1 Configuration mode To enter the configuration mode and print a SETUP report with the operating parameters of the device, proceed as follows. Models without interconnection module Models with interconnection module While pressing the FEED key, switch on the device by inserting the power supply cable. -
Page 38: Printer Settings
PLUS4 printer SCODE. <code> rel 1.00 PRINTER SETTINGS PRINTHEAD SELFTEST 1 •••••••••• 832 PRINTHEAD WORKING GOOD! PRINTER TYPE ........PLUS4 PRINTING HEAD TYPE ......<type> INTERFACE ..........USB PROGRAM MEMORY TEST....OK DYNAMIC RAM TEST......OK The device prints the report with parameters for settings... -
Page 39: Setup Report
RELEASE RS232 Handshaking ....... : Xon/Xoff PRINTER SETTINGS PRINTHEAD SELFTEST PRINTING HEAD 1 •••••••••• 832 STATUS PRINTHEAD WORKING GOOD! PRINTER TYPE ........PLUS4 PRINTING HEAD TYPE ......<type> INTERFACE ..........USB PROGRAM MEMORY TEST....OK DEVICE DYNAMIC RAM TEST......OK STATUS EEPROM TEST........OK HEAD VOLTAGE... -
Page 40: Printer Status
5.3 Printer status Device operating status is indicated in the configuration print-out in which, next to the name of the components displayed, the following information is given: PRINTER TYPE device model PRINTING HEAD TYPE print head model INTERFACE interface present PROGRAM MEMORY TEST OK appears if functioning and NOT OK if faulty DYNAMIC RAM TEST OK appears if functioning and NOT OK if faulty EEPROM TEST OK appears if functioning and NOT OK if faulty HEAD VOLTAGE... -
Page 41: Printer Parameters
5.4 Printer parameters This device allows the configuration of the parameters listed in the following table. The parameters marked with the symbol are the default values . Settings remain active even after the device has been turned off and they are stored in non-volatile memory . PRINTER EMULATION Available emulations for the device: ESC/POS™... - Page 42 USB ADDRESS NUMBER Numerical address code for the univocal identification of the USB device (in case of more than a USB device connected with the same PC): PRINT MODE Printing mode: Normal = enables printing in normal writing way Reverse = enables printing rotated 180 degrees AUTOFEED Setting of the Carriage Return character: CR disabled = Carriage Return disabled...
- Page 43 SPEED / QUALITY Setting of printing speed and printing quality: High Quality Normal PRINT WIDTH Width of printing area: 76mm 82mm 88mm 94mm 100mm 78mm 84mm 90mm 96mm 102mm 80mm 86mm 92mm 98mm 104mm PAPEREND BUFFER Cleaning mode of the data in receive buffer, if the printing is stopped due to lack of paper: CLEAR Disabled = The data remain in the receive buffer.
-
Page 44: Hexadecimal Dump
5.5 Hexadecimal dump This function is used for the diagnosis of the characters received from the communications port . Characters are printed as hexadecimal code and the corresponding ASCII code (see below) . Each line is preceded by a counter in hexadecimal that indicates the number of bytes received . -
Page 45: Maintenance
6 MAINTENANCE 6.1 Planning of cleaning operations The regular cleaning of the device keeps the print quality and extends its life . The following table shows the recommended planning for the cleaning operations . EVERY PAPER CHANGE Printhead Use isopropyl alcohol Rollers Use isopropyl alcohol EVERY 5 PAPER CHANGES... -
Page 46: Cleaning
6.2 Cleaning For periodic cleaning of the printer, see the instructions below . Sensors Paper compartment Disconnect the power supply cable and open Disconnect the power supply cable and open the frontal cover of the device (see par. 4.1) the frontal cover of the device (see par. 4.1) Remove any scraps of paper and the accumulated paper dust into the paper compartment Clean the device sensor... - Page 47 Printing head Printing roller Disconnect the power supply cable and open Disconnect the power supply cable and open the fronal cover of the device (see par. 4.1) the frontal cover of the device (see par. 4.1) ISOPROPYL ALCOHOL ISOPROPYL ALCOHOL Clean the printing head by using Clean the printing roller by using a non-abrasive cloth moistened with isopropyl...
- Page 48 Case Disconnect the power supply cable To clean the device, use compressed air or a soft cloth ATTENTION: Do not use alcohol, solvents, or hard brushes. Do not let water or other liquids get inside the device. Alcohol, solvent...
-
Page 49: Firmware Upgrade
6.3 Firmware upgrade 9 . Select item USB and then select the USB device among ATTENTION: those proposed (e .g . PLUS4): During communication between PC and device for the firmware update it is strictly forbidden to disconnect the communication cable or to remove the power supply of... -
Page 51: Specifications
7 SPECIFICATIONS 7.1 Hardware specifications GENERAL Sensors Paper presence, printing head temperature MTBF 118 000 hours Emulations ESC/POS™ Windows XP, Windows VISTA (32/64bit), Windows 7 (32/64bit), Printing driver Windows 8 (32/64bit), Linux, Android INTERFACES models without interconnection module USB connector 12 Mbit/sec (USB 2 .0 full speed) Serial RS232/TTL connector from 1200 to 115200 bps... - Page 52 Printing method Thermal, fixed head Printing width from 76mm to 104mm (2mm step) Printing mode Normal, 90°, 180°, 270° Printing format Height/width from 1 to 8, bold, reverse, underlined, italic 54 character code tables (see par .7 .5) Character fonts Extended Chinese GB18030-2000 UPCA, UPCE, EAN13, EAN8, CODE39, ITF Printable barcode CODABAR, CODE93, CODE128, CODE32...
- Page 53 Stand-by consumption models without interconnection module 0,085 A models with interconnection module 0,097 A ELECTRICAL SPECIFICATIONS POWER SUPPLY cod .963GE020000003 (OPTIONAL) Power supply voltage from 100 Vac to 240 Vac Frequency from 50 Hz to 60 Hz Current (output) 2 .5 A Power ENVIRONMENTAL CONDITIONS Operating temperature...
-
Page 54: Character Specifications In Esc/Pos™ Emulation
7.2 Character specifications in ESC/POS™ emulation Character set Character density 11 cpi 15 cpi 20 cpi Number of columns Chars / sec Lines / sec 8,75 8,75 8,75 Characters (L x H mm)-Normal 2,25 x 3 1,625 x 3 1,25 x 3 7.3 Device dimensions Length 148 mm... - Page 55 Models without interconnection module 152,2...
- Page 56 Models with interconnection module 152,2...
-
Page 57: Power Supply Dimensions Cod.963Ge020000003 (Optional)
7.4 Power supply dimensions cod.963GE020000003 (optional) Length 127 mm Height 35,5 mm Width 56 mm NOTE: All the dimensions shown in following figures are in millimetres. AC INLET +24V DC OUTPUT WIRE... -
Page 58: Character Sets In Esc/Pos™ Emulation
7.5 Character sets in ESC/POS™ emulation The device has 3 fonts of varying width (11, 15 and 20 cpi) which may be related one of the coding tables provided on the device . To know the coding tables actually present on the device, you need to print the font test (see par .2 .5) . You can set font and coding table by using the commands (see the Commands Manual of the device) or using the “Code Table”... -
Page 59: Consumables
8 CONSUMABLES The following table shows the list of available consumables for device: DESCRIPTION CODE 67300000000309 THERMAL PAPER ROLL wight = 55g/m width = 112mm Ø external = 48mm Ø core = 12mm... -
Page 61: Accessories
9 ACCESSORIES The available accessories for the device are listed in the following table: DESCRIPTION CODE 963GE020000003 POWER SUPPLY (for technical specification, see paragraph 7.1) models without interconnection module 44000000002500 CABLES KIT POWER SUPPLY + SERIAL/TTL INTERFACE 5-8 VOLT 976GJ020000001 INTERCONNECTION MODULE (see paragraphs 9 .1) models with interconnection module 26600000000012 POWER SUPPLY CABLE... -
Page 62: Interconnection Module (Models Without Interconnection Module)
9.1 Interconnection module (models without interconnection module) An interconnection module kit (cod .976GJ020000001) is available for the device . The kit includes (see figure): 1 . Interconnection board 2 . No.3 fixing screws for interconnection board 3 . No.3 fixing screws for rear cover 4 . Rear cover 5 . Instruction sheet NOTE: To assemble the interconnection module, refer to the instruction sheet provided with the kit . -
Page 63: Technical Service
PLUS4 printer SCODE. <code> rel 1.00 PRINTER SETTINGS PRINTHEAD SELFTEST 1 •••••••••• 832 PRINTHEAD WORKING GOOD! PRINTER TYPE ........PLUS4 PRINTING HEAD TYPE ......<type> INTERFACE ..........USB PROGRAM MEMORY TEST....OK DYNAMIC RAM TEST......OK EEPROM TEST........OK HEAD VOLTAGE = 07,00 Print a Setup report (see paragraph 5.1) - Page 64 CUSTOM S.p.A. World Headquarters Via Berettine, 2/B - 43010 Fontevivo, Parma ITALY Tel. +39 0521 680111 - Fax +39 0521 610701 info@custom.biz - www.custom.biz All rights reserved www.custom.biz...
Need help?
Do you have a question about the PLUS4 and is the answer not in the manual?
Questions and answers