Table of Contents
Advertisement
Available languages
Available languages
ISTRUZIONI PER L'USO
INSTRUCTION MANUAL
ISTRUZIONI PER L'USO
INSTRUCTION MANUAL
ISTRUZIONI PER L'USO
INSTRUCTION MANUAL
ISTRUZIONI PER L'USO
INSTRUCTION MANUAL
ISTRUZIONI PER L'USO
INSTRUCTION MANUAL
ISTRUZIONI PER L'USO
ISTRUZIONI PER L'USO
INSTRUCTION MANUAL
ISTRUZIONI PER L'USO
INSTRUCTION MANUAL
ISTRUZIONI PER L'USO
INSTRUCTION MANUAL
ISTRUZIONI PER L'USO
INSTRUCTION MANUAL
ISTRUZIONI PER L'USO
INSTRUCTION MANUAL
ISTRUZIONI PER L'USO
INSTRUCTION MANUAL
ISTRUZIONI PER L'USO
INSTRUCTION MANUAL
ISTRUZIONI PER L'USO
INSTRUCTION MANUAL
ISTRUZIONI PER L'USO
INSTRUCTION MANUAL
ISTRUZIONI PER L'USO
INSTRUCTION MANUAL
ISTRUZIONI PER L'USO
INSTRUCTION MANUAL
ISTRUZIONI PER L'USO
INSTRUCTION MANUAL
ISTRUZIONI PER L'USO
INSTRUCTION MANUAL
ISTRUZIONI PER L'USO
INSTRUCTION MANUAL
ISTRUZIONI PER L'USO
INSTRUCTION MANUAL
ISTRUZIONI PER L'USO
INSTRUCTION MANUAL
ISTRUZIONI PER L'USO
ISTRUZIONI PER L'USO
INSTRUCTION MANUAL
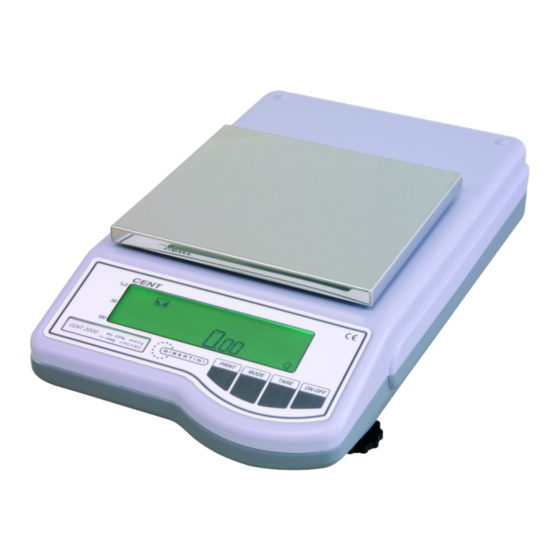
Serie Cent
Bilancia Tecnica
Advertisement
Table of Contents

Related Manuals for Gibertini CENT 2000


Summary of Contents for Gibertini CENT 2000
- Page 1 ISTRUZIONI PER L'USO INSTRUCTION MANUAL ISTRUZIONI PER L'USO INSTRUCTION MANUAL ISTRUZIONI PER L'USO INSTRUCTION MANUAL ISTRUZIONI PER L'USO INSTRUCTION MANUAL ISTRUZIONI PER L'USO INSTRUCTION MANUAL ISTRUZIONI PER L'USO ISTRUZIONI PER L'USO INSTRUCTION MANUAL ISTRUZIONI PER L'USO INSTRUCTION MANUAL ISTRUZIONI PER L'USO INSTRUCTION MANUAL ISTRUZIONI PER L'USO INSTRUCTION MANUAL...
- Page 3 Tutti i diritti riservati. E’ vietata qualsiasi forma di stampa, duplicazione, riproduzione o pubblicazione di questo manuale, o parte di esso, senza l’autorizzazione scritta da parte della GIBERTINI ELETTRONICA Srl. All rights reserved. Forbidden any form of print, duplication, reproduction and publication...
-
Page 4: Table Of Contents
ITALIANO NOTA Leggere le istruzioni con molta attenzione prima di utilizzare la bilancia. E’ uno strumento di precisione e deve essere maneggiato con cura. INDICE GARANZIA AVVERTENZE IMPORTANTI DICHIARAZIONE DI CONFORMITÀ AVVERTENZE …………………………………………………………………………….…….… Pag. 5 CARATTERISTICHE TECNICHE …………………………………………………………..…… Pag. 6 POSIZIONAMENTO …………………………………………………………………………….…... -
Page 5: Avvertenze
ITALIANO 1 AVVERTENZE Il gruppo d’alimentazione della bilancia CENT è conforme alla Categoria II di Protezione Elettrica. Prima della connessione elettrica controllare che la tensione di funzionamento indicata sul gruppo d’alimentazione, corrisponda con quella di rete (100 / 240 Vac). CENT PUÒ’... -
Page 6: Caratteristiche Tecniche
ITALIANO 2 CARATTERISTICHE TECNICHE MODELLI CENT 2000 CENT 2000 CENT 4000 CENT 4000 CENT 6000 CENT 6000 Fondo-Scala & Risoluzione 2200 g / 0,01 g 4200 g / 0,01 g 6300 g / 0,1 g Linearità ± 0,02 g ± 0,2 g... -
Page 7: Installazione
ITALIANO 4 INSTALLAZIONE Disimballare la bilancia e i relativi accessori. Svitare il pomolo posto sul cilindro d’imballo ♦ verso indicato dalla freccia (senso antiorario). Conservare l’apposito cilindro d’imballo per un eventuale ritorno della bilancia agendo con procedura inversa a quella sopra indicata. Cilindro FIG. -
Page 8: Comandi D'utilizzo Della Bilancia
ITALIANO 5 COMANDI D’UTILIZZO DELLA BILANCIA FIG. 3 1. Piatto di pesata 2. Display 3. Tasto Print 4. Tasto Mode 5. Tasto Tare 6. Tasto ON-OFF ISTRUZIONI PER L’USO Bilancia Tecnica CENT 60.50.670 3^ Edizione luglio 2005 Pagina 8 di 40... -
Page 9: Modalità D'impiego
ITALIANO 6 MODALITÀ D’IMPIEGO Dopo l’accensione, attendere almeno quindici minuti prima di effettuare qualsiasi operazione di pesatura. È consigliabile lasciare la bilancia sempre accesa (collegata alla rete elettrica). Con il tasto ON/OFF premuto per più’ di un secondo, la bilancia spegne l’illuminazione del display ed appare la scritta OFF. -
Page 10: Funzioni Tastiera
ITALIANO 7 FUNZIONI TASTIERA La tastiera possiede quattro tasti denominati: PRINT, MODE, TARE, ON-OFF (Fig. 4). Essi eseguono una funzione specifica, ma ai tasti MODE, TARE e ON-OFF è associata una seconda funzione. I tasti, se premuti per meno di un secondo, attivano la prima funzione, se premuti per più di un secondo, attivano la seconda (solo i tasti MODE e ON-OFF). -
Page 11: Tara
ITALIANO 8 TARA Dopo aver posto un contenitore sul piatto, premere il tasto TARA. La bilancia ha una capacità di tara fino alla sua portata massima. Posizionare il campione da pesare sul piatto di pesatura. Il display mostrerà il peso netto del campione. È... -
Page 12: Unit2
ITALIANO 9.1 UNIT 2 GR ( Grammi ) OZ ( Once ) 1 Oz = 28,34952 g LB ( Libbre ) 1 Lb = 453,59237 g CT ( Carati ) 1 Ct = 0,2 g PCS ( Pezzi ) ( Percentuale ) Con questa funzione lo strumento può... - Page 13 ITALIANO 9.1.3 BILANCIA CON FUNZIONE DI CALCOLO PERCENTUALE Selezionare, come precedentemente descritto, la funzione %. Premere per piu’ di un secondo il tasto MODE. Il display mostra la scritta - 100 - lampeggiante. Porre sul piatto di pesatura il campione di riferimento. Quando il simbolo di dato stabile è...
-
Page 14: Setup
ITALIANO 9.2 SETUP SERIAL 9600 BAUD 4800 2400 1200 7 E 1 BYTE FOR 7 O 1 7 N 2 7 E 2 7 O 2 8 N 1 8 E 1 8 O 1 8 N 2 EURO PROTOC CRYSTAL PRINTER TRANS... -
Page 15: Serial
ITALIANO 9.2.1 SERIAL Consente di modificare tutti i parametri relativi alla comunicazione seriale. 9.2.1.1 BAUD Velocità di trasmissione seriale, selezionabile da 1200 9600 baud. 9.2.1.2 BYTE FOR FORMATO DATI DATA BIT TIPO DI PARITÀ STOP BIT 7 E 1 PARI 7 0 1 DISPARI 7 N 2... -
Page 16: Cal On
ITALIANO 9.2.2 CALIBR La funzione di calibrazione è selezionabile dall’utente. 9.2.2.1 CAL OFF Nessun processo di calibrazione può essere eseguito. Selezionando questa scelta la possibilità di calibrazione esterna CAL E ed interna (se presente) sono inibite. 9.2.2.2 CAL ON Con quest’opzione attiva è possibile effettuare sia la calibrazione esterna sia quella interna ( se presente ) 9.2.2.3 CAL AUTO Con quest’opzione attiva è... -
Page 17: Calibrazione Esterna
ITALIANO CALIBRAZIONE 9.3.1 CALIBRAZIONE ESTERNA Quando è attivata questa funzione, il processo di calibrazione è immediatamente eseguito. Automaticamente si esce da tutte le funzioni di menù e sul display compare la scritta “LOAD”. In questa fase la bilancia “aspetta” sul piatto di pesata una massa di calibrazione il cui peso deve essere funzione del valore di fondo scala della bilancia stessa. - Page 18 ITALIANO 10 RIPRISTINO DEI PARAMETRI DI DEFAULT Se, erroneamente, sono modificati i parametri di SETUP con una configurazione non valida, è possibile ripristinare i parametri di default (impostazioni di fabbrica) attraverso un semplice metodo. Togliere il connettore d’alimentazione della bilancia posto sul retro della stessa. ♦...
-
Page 19: Trasmissione Seriale
ITALIANO 11 TRASMISSIONE SERIALE La trasmissione seriale della bilancia utilizza lo standard EIA RS232. La risposta ad un comando seriale valido, avviene ogni decimo di secondo. 11.1 COLLEGAMENTO DELL’USCITA SERIALE BILANCIA CONNETTORE DB9 (9 poli) CONNETTORE DB25 (25 poli) RS 232 Out Pin 2 Pin 3 RS 232 In... -
Page 20: Protocollo Euro
ITALIANO Codici di stato per il carattere F1: Il valore trasmesso è un dato La bilancia è in over range La bilancia è in under range Tara in esecuzione Calibrazione in esecuzione Acquisizione di zero Test iniziale Codici di stato per il carattere F2: Misura stabile (stable) Misura instabile (instable) -
Page 21: Comandi Seriali
ITALIANO Il formato d’uscita è: D0 D1 D2 D3 D4 D5 D6 D7 D8 D9 B CR LF 10 11 12 13 14 15 Il campo di misura (1…10) fornisce il peso applicato al piatto. E’ giustificato a destra e contempla sia il punto decimale sia il segno della misura (un carattere di spazio nel –... - Page 22 NOTE Read the instructions carefully before operating the Balance. This is an accuracy instrument and must be handled with care. INDEX WARRANTY WARNING DECLARATION OF CONFORMITY WARNING ………………………………………………………………………………..…………………. Pag. 23 TECHNICAL CHARACTERISTICS……………………………………………………………… Pag. 24 LOCATION ……… ………………………………………………………………………………… Pag. 24 INSTALLATION …………………………………………………………………………….…..… Pag.
- Page 23 ENGLISH 1 WARNING The power supply pack of the CENT balance complies with Electrical Protection Class II. Before connecting the power, check that the operating voltage, indicated on the Power supply pack, matches the line voltage (100 / 240 Vac). CENT BALANCE MAY ONLY BE USED WITH THE POWER SUPPLY PACK.
- Page 24 2 TECHNICAL CHARACTERISTICS MODELS CENT 2000 CENT 2000 CENT 4000 CENT 4000 CENT 6000 CENT 6000 Capacity and readability 2200 g / 0,01 g 4200 g / 0,01 g 6300 g / 0,1 g Linearity ± 0,02 g ± 0,2 g...
- Page 25 ENGLISH 4 INSTALLATION Instructions to remove the locking device of the balance Unpack the balance and all its accessories. Unscrew the knob on the locking bracket as ♦ indicated by the arrow (anti clockwIse). Retain the locking bracket in case the balance has to be returned to the supplier.
- Page 26 5 OPERATING CONTROLS OF THE BALANCE FIG. 3 Weighing pan Display Print Key Mode Key Tare Key ON-OFF Key INSTRUCTION MANUAL CENT series balances 60.50.670 3rd issue july 2005 Page 26 di 40...
-
Page 27: Operating Instructions
ENGLISH 6 OPERATING INSTRUCTIONS Wait for about 15 minutes after power up before performing any weighing operation. It’s advisable to leave the balance permanently connected to the Ac line. Press the ON/OFF key more than one second. The LCD backlight will be turned off and on the display will appear the message “OFF”. - Page 28 7 KEYBOARD FUNCTION The Cent’s keyboard has four key labeled: PRINT, MODE, TARE and ON-OFF. Every key has at least one function (called short function) while key MODE and ON/OFF also activate a second function (called long function) To activate short function presses the key and release it before one second. To get long function press the key and keep pressed for more than one-second .
- Page 29 ENGLISH 8 TARE After a container is placed on the pan, press the TARE key. The LCD display will show zero value. The balance has a tare capacity up to its measuring range. Place the sample to be weighed in the container. The display shows the sample weight.
- Page 30 9.1 UNIT 2 GR ( Grammi ) OZ ( Once ) 1 Oz = 28,34952 g LB ( Libbre ) 1 Lb = 453,59237 g CT ( Carats ) 1 Ct = 0,2 g PCS ( Piece ) ( Percentage ) With this function the balance can be programmed to operate with different measuring units.
- Page 31 ENGLISH 9.1.3 PERCENTAGE FUNCTION The function is selected as above with the menu item %. A new reference may be acquired pressing the MODE key for more than 1 second. The display will show – 100 – blinking. Now the reference quantity may be weighed, pressing the ON-OFF key, when the stable symbol lights on the display, the new reference value is acquired and the balance starts to display the weight as a percentage of the reference acquired.
- Page 32 SET-UP 9600 SERIAL BAUD 4800 2400 1200 7 E 1 BYTE FOR 7 O 1 7 N 2 7 E 2 7 O 2 8 N 1 8 E 1 8 O 1 8 N 2 EURO PROTOC CRYSTAL PRINTER TRANS REQUIEST CONTINUE...
- Page 33 ENGLISH 9.2.1 SERIAL This menu controls the serial output control parameters. 9.2.1.1 BAUD It defines the transmission baud rate of the serial output from 1200 to 9600 baud. 9.2.1.2 BYTE FOR It defines the format of the transmitted byte and may be set as: DATA FORMATS DATA BIT PARITY CHECK BIT STOP...
- Page 34 9.2.2 CALIBR The CENT balance may be calibrated with an external mass. 9.2.2.1 CAL OFF Both calibration are disabled 9.2.2.2 CAL ON Both calibration are enabled 9.2.2.3 CAL AUTO With this selection the calibration is enabled and a timer activates the internal calibration every 3 hour.
- Page 35 ENGLISH CALIBRATION 9.3.1 EXTERNAL CALIBRATION Once the external calibration function is started the display shows “LOAD” and the reference weight acquisition is active: a reference weight of E2 class is required for calibration, with value function of the range, the value of the weight is automatically detected and checked by the balance. When the value of the reference weight is acquired, the display shows the “UNLOAD”...
- Page 36 10 QUICK RESTORE OF DEFAULT PARAMETERS If configuration parameters are modified, so that a wrong setup is stored, a quick restore function of the factory parameters is available. Remove the power supply plug from the rear of the balance Press and keep pressed the ON/OFF key Reinsert the power supply plug Wait until the display shows “CENT”...
- Page 37 ENGLISH 11 SERIAL OUTPUT CENT serial output is compatible with EIA RS232 standard. Every answer from balance is sent every 100 ms. 11.1 SERIAL OUTPUT CONNECTION BALANCE DB9 CONNECTOR (9 pole) DB25 CONNECTOR (25 pole) RS 232 Out Pin 2 Pin 3 RS 232 In Pin 3...
- Page 38 Status information of the F1 character Transmitted data is valid Balance in over range Balance in under range Tare Calibration process in progress Zero acquisition Init test Status information of the F2 character Measure is stable Measure is not stable Error Automatic calibration (when F1 = C)
- Page 39 ENGLISH Field N°15 and 16 are: CR carriage returns ASCII code. LF line feed ASCII code. Note Data will be printed if and only if the weight on pan is stable. 11.3 SERIAL COMMANDS The balance responds to the following commands only if a CRYSTAL or EURO protocol is selected: SERIAL REMOTE CONTROLS TABLE COMMAND FUNCTION...
- Page 40 INSTRUCTION MANUAL CENT series balances 60.50.670 3rd issue july 2005 Page 40 di 40...
Need help?
Do you have a question about the CENT 2000 and is the answer not in the manual?
Questions and answers