Moxa Technologies CN2510-8 User Manual
Cn2510 series async server
Hide thumbs
Also See for CN2510-8:
- User manual (236 pages) ,
- Brochure & specs (31 pages) ,
- Quick installation manual (8 pages)

Related Manuals for Moxa Technologies CN2510-8


Summary of Contents for Moxa Technologies CN2510-8
- Page 1 CN2510 Async Server User’s Manual Edition 7.0, January 2018 www.moxa.com/product © 2018 Moxa Inc. All rights reserved.
-
Page 2: Copyright Notice
CN2510 Async Server User’s Manual The software described in this manual is furnished under a license agreement and may be used only in accordance with the terms of that agreement. Copyright Notice © 2018 Moxa Inc. All rights reserved. Trademarks The MOXA logo is a registered trademark of Moxa Inc. -
Page 3: Table Of Contents
Desktop ............................. 2-2 Rackmount ..........................2-2 Wiring Requirements ........................2-2 Connecting CN2510-8/16’s Power....................2-3 Connecting CN2510-8/16-48V’s Power ................... 2-3 Grounding CN2510-8/16-48V ......................2-3 Connecting to the Network ......................2-4 Connecting to a Serial Device ....................... 2-4 Connecting to the Console Port ..................... 2-4 Accessing the Console Utility ........................ - Page 4 Selecting the Application ........................6-2 Configuring RAW UDP Mode ......................... 6-4 Configuring the Serial Ports........................6-5 Save ..............................6-6 Restart .............................. 6-7 Setting Up Reverse Terminal ......................7-1 Accessing the Console Utility ........................ 7-2 Selecting the Application ........................7-2 Configuring RTELNET Mode ........................7-4 Configuring the Serial Ports........................
- Page 5 Configuring RIP ..........................13-3 Configuring the Static Routing Table ....................13-4 Static Routing Examples ........................13-5 Configuring Routes to the Internet ....................13-5 Configuring Routes to the Internet and Intranet ................13-6 Configuring Multiple-Point Routes ....................13-7 Save ............................... 13-8 Restart ............................
-
Page 6: Introduction
Introduction Welcome to Moxa CN2510 Async Server. Models are available with 8 or 16 asynchronous RS-232 ports, and all models come with one 10/100 Mbps Ethernet LAN port. CN2510 Async Server is used to connect terminals, modems, printers, and other asynchronous serial devices to LAN hosts. CN2510 complies with TCP/IP and IEEE 802.3 specifications using standard Ethernet 10/100BaseT and twisted pair 10/100BaseTX cable as the data transmission medium. -
Page 7: Product Features
CN2510 Introduction Product Features Hardware • 1 LAN port (auto-detecting 10/100 Mbps Ethernet) • Surge protection for each serial port • 4 MB RAM, 2 MB Flash ROM • Tx/Rx LED for each serial port • System Status LEDs • Ethernet Status LEDs •... -
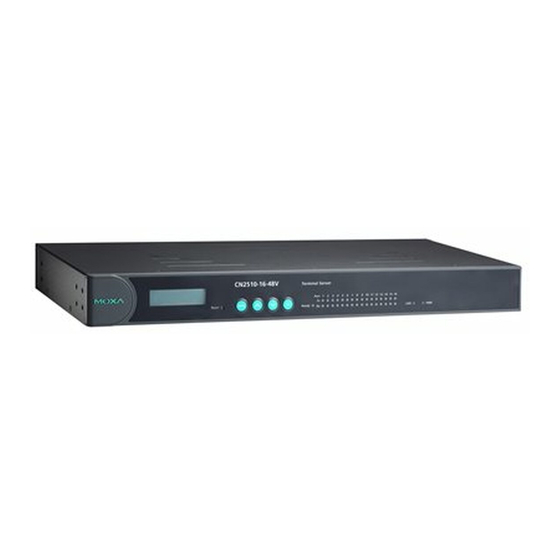
Page 8: Front Panel
Indicates serial port reception Rear Panel Socket / Port Description AC Power Input CN2510-8 and CN2510-8: Automatic detection of 100-240V, 47-63 Hz AC power supply DC Power Input CN2510-8-48V and CN2510-8-48V: Automatic detection of 48 VDC or -48 VDC power supply Power On/Off Switch I indicates power on;... -
Page 9: Getting Started
The following topics are covered in this chapter: Hardware Installation Desktop Rackmount Wiring Requirements Connecting CN2510-8/16’s Power Connecting CN2510-8/16-48V’s Power Grounding CN2510-8/16-48V Connecting to the Network Connecting to a Serial Device ... -
Page 10: Hardware Installation
CN2510 Getting Started Hardware Installation Desktop Place your CN2510 on a clean, flat, well-ventilated desktop. For better ventilation, attach the 4 pads from the desktop kit to the bottom of the unit, and leave some space between the CN2510 and other equipment. Do not place equipment or objects on top of the unit, as this might damage the server. -
Page 11: Connecting Cn2510-8/16'S Power
If the power is properly supplied, the “Ready” LED will show a solid red color until the system is ready, at which time the color changes to green. NOTE Use 8 kg-cm of screw torque and 22-14 AWG electric wire to connect CN2510-8/16-48V’s power cord to its terminal block. Grounding CN2510-8/16-48V Grounding and wire routing helps limit the effects of noise due to electromagnetic interference (EMI). -
Page 12: Connecting To The Network
CN2510 Getting Started Connecting to the Network Connect one end of the Ethernet cable to CN2510’s 10/100M Ethernet port and the other end of the cable to the Ethernet network. There are 2 LED indicators located on the top left and right corners of the Ethernet connector. If the cable is properly connected, CN2510 will indicate a valid connection to the Ethernet in the following ways: The top right corner LED indicator maintains a solid green color when the cable is properly connected to a 100 Mbps Ethernet network. -
Page 13: Accessing The Console From A Telnet Terminal
CN2510 Getting Started Accessing the Console from a Telnet Terminal Connect CN2510 to your LAN and then turn on the power. Use the Moxa Windows Utility to find CN2510’s IP address, and then telnet to the IP address to enter the CN2510 console. CN2510 Windows Utility The CN2510 Utility is a convenient Windows utility that can be used to find both the name and IP address of your CN2510. -
Page 14: Using Telnet
1. Telnet over the network to the server’s IP address. 2. Type 1 to choose ansi/vt100, and then press Enter. Telnet 192.168.127.254 Async Server CN2510-8 Console terminal type (1: ansi/vt100, 2: vt52) : 1 3. CN2510’s MAIN MENU will open, as shown below. -
Page 15: Accessing The Console From A Console Terminal
CN2510 Getting Started Use the following keystrokes to navigate CN2510’s console utility. Action [Up/Down/Left/Right] Arrow Key or [Tab] Key Move Jump to next menu, or [Enter] Key Select item [Esc] Key Return to previous menu, or Close pop up selector Shortcut Key Capitalized letter of the word Accessing the Console from a Console Terminal... - Page 16 CN2510 Getting Started 3. Select the I Agree option and then click on Next. 4. Select a directory in which to install the CN2510 Utility, and then click on Next.
- Page 17 CN2510 Getting Started 5. Click on Next to continue. 6. Wait while the PComm Lite software is installed.
- Page 18 CN2510 Getting Started 7. Click on Close. 8. When the installation is complete, select Start Programs PComm Terminal Emulator to run PComm Terminal Emulator. 9. Use an RJ45 to DB25 female cable to connect to the CN2510 console port. Start PComm Terminal, and then click on the left-most icon to open a new connection.
- Page 19 CN2510 Getting Started 10. Click on the Communication Parameter tab, select the COM port (COM2 in this example) for console connection, 115200 for Baud Rate, 8 for Data Bits, None for Parity, and 1 for Stop Bits. 11. Click on the Terminal tab and select VT100 for terminal type. Press Enter to confirm. 12.
-
Page 20: Configuring Cn2510-The Server Menu
In this section, we describe both basic and advanced configuration tasks. We use the Telnet interface to illustrate (the Serial Console interface is the same). Server Configuration—Info. 1. From the MAIN MENU, use the arrow keys to select Server, and then press Enter. CN2510-8 CN2510-8_5631 V2.0 MAIN MENU... -
Page 21: Server Configuration-Lan
Only use the console password when absolutely necessary. NOTE Write your console password in a safe place before setting the password. Server Configuration—LAN 1. From the MAIN MENU, use the arrow keys to select Server, and then press Enter. CN2510-8 CN2510-8_5631 V2.0 MAIN MENU ------------------------------------------------------------------------------ [Server]... -
Page 22: Server Configuration-Adv
Getting Started 3. The Lan page contains input/display fields for DHCP (client), Async server IP address, Async server IP netmask, Default gateway IP address, Ethernet speed, and Ethernet address. Each item is described in detail below. CN2510-8 CN2510-8_5631 V2.0 ------------------------------------------------------------------------------ Info. - Page 23 3. The Adv. page contains input/display fields for RADIUS server IP, RADIUS key, UDP port, Enable RADIUS accounting, SNMP community name, SNMP trap server IP address, Ethernet IP forwarding, Routing protocol, TCP retransmission timeout, and SIO data transfer timeout. Each item is described in detail below. CN2510-8 CN2510-8_5631 V2.0 ------------------------------------------------------------------------------ Info.
-
Page 24: Server Configuration-Host_Table
SIO data transfer timeout—This is the amount of time (in milliseconds) CN2510 waits to send serial data to the Ethernet. Use a shorter timeout to improve efficiency. Server Configuration—Host_table 1. From the MAIN MENU, use the arrow keys to select Server, and then press Enter. CN2510-8 CN2510-8_5631 V2.0 MAIN MENU... -
Page 25: Server Configuration-User_Table
CN2510 Getting Started 3. The Route_table specifies routing parameters. The Route_table page contains input/display fields for Entry, Gateway, Destination, Netmask, and Metric. Each item is described in detail below. CN2510-8 CN2510-8_5631 V2.0 ----------------------------------------------------------------------- Info. Lan Adv. Host_table [Route_table] User_table Quit... -
Page 26: Save
CN2510 Getting Started Save When exiting the SERVER MENU, you will be prompted to save settings. Press Y to save. CN2510-8 CN2510-8_5631 V2.0 MAIN MENU ------------------------------------------------------------------------------ Info. Lan Adv. Host_table Route_table [User_table] Quit Examine/modify async server basic configuration Enter: select... -
Page 27: Knowing Your Application
Knowing Your Application This chapter discusses a variety of applications for CN2510 Async Server. Refer to the diagrams in each section to see which application most closely matches your own. Determining which application you should choose will save time configuring both the hardware and software. CN2510 is an Async Server that can support simultaneously different operation modes for different serial ports. -
Page 28: Windows Real Com (Nt Real Com)
CN2510 Knowing Your Application Windows Real COM (NT Real COM) Moxa provides CN2510 COM port drivers for all Windows operating systems. The COM port driver serves a dual purpose—(1) convert serial data into Ethernet packets, (2) convert Ethernet packets into serial data—as outlined in the following table: PC ... -
Page 29: Linux Real Tty/Unix Fixed Tty (Nt Real Com)
CN2510 Knowing Your Application Linux Real TTY/Unix Fixed TTY (NT Real COM) Real TTY drivers that control Moxa CN2510 Async Server’s serial ports are provided for Linux environments. This means that CN2510 Async Server can be used with existing Linux-based applications that use multiport serial boards, since the host PC will recognize CN2510’s COM ports as real TTY ports. -
Page 30: Device Control (Device Control)
CN2510 Knowing Your Application Device Control (Device Control) The CN2510 Device Control application allows you to choose between two different operation modes: ASPP and RAW. ASPP Mode—For applications that require setting up communication parameters or controlling modem signals (DTR, RTS, Break, etc.), take advantage of Moxa’s ASPP lib to simplify your programming tasks. ASPP takes care of the more basic protocol-level programming tasks, and allows you to concentrate your energy on higher level, application-specific tasks. -
Page 31: Udp Communication (Raw Udp)
CN2510 Knowing Your Application UDP Communication (Raw UDP) UDP is a non connection-oriented data transmission protocol that has the advantages of efficient, high-speed, high-volume data transmission. Since UDP does not use TCP’s handshaking procedure, it does not re-assemble and retransmit packets when data is missing. This means that data integrity is sacrificed for higher transmission speed. -
Page 32: Console Management (Reverse Terminal)
CN2510 Knowing Your Application Console Management (Reverse Terminal) The Reverse Terminal application, which uses Rtelnet mode, is used with routers, switches, and UPS equipment for console management applications. Rtelnet mode is similar to RAW mode, in that after booting up it listens to one specific TCP port for network hosts to initiate a connection. -
Page 33: Terminal Access (Terminal)
CN2510 Knowing Your Application Terminal Access (Terminal) CN2510’s Terminal Access application is used to connect terminals to Unix or Windows Servers over a network. The terminals connect to CN2510’s serial ports at a remote site, with terminal commands transmitted over the network via CN2510’s Ethernet port. -
Page 34: Multi-Host Tty (Multi-Host Tty)
CN2510 Knowing Your Application Multi-host TTY (Multi-host TTY) The Multi-host TTY application is ideal for connecting over a network to multiple Unix hosts from several sessions simultaneously. When communication begins, the networked Unix server must first enable Moxattyd to activate the TTY port’s mapping function. Moxattyd will initiate the connection with the CN2510, and the CN2510 will listen to the connection requests issued by various Moxattyd over different TCP ports. -
Page 35: Dial-In/Out-Of-Band Management (Dialin/Out)
CN2510 Knowing Your Application Dial-in/Out-of-Band Management (Dialin/out) Moxa CN2510 Async Server provides dial-up/dial-out access for ISPs and enterprises that need a remote access solution. When a user at a remote site uses a PPP dial-up connection to access CN2510, CN2510 plays the role of dial-up server, but also ensures the user has legal access to the network by verifying the user’s identity with its Local User Table or RADIUS. -
Page 36: Network Printer (Printer)
CN2510 Knowing Your Application Network Printer (Printer) CN2510 Async Server’s printing program (running under UNIX) provides an excellent solution for banking and stock exchange services with huge printing demands. Use a Windows or Unix host’s network printer function via RAW mode, and assign a specific IP address and TCP port number to specify the printer’s location. You can also connect to the printer via LPD mode when LPD protocol is needed to operate the printer. -
Page 37: Multiplexor Access (Multiplex)
CN2510 Knowing Your Application Multiplexor Access (Multiplex) If are using a multiport serial board installed in a UNIX host, but wish to extend the device control range without dismantling the host, you can accomplish this with CN2510. Multiplex and De-multiplex solutions use CN2510’s RTelnet and terminal modes, eliminating the need to modify existing software. -
Page 38: Setting Up Windows Real Com/Linux Real Tty/Unix Fixed Tty
Setting Up Windows Real COM/Linux Real TTY/Unix Fixed TTY CN2510 Async Server supports Real COM/TTY drivers for Windows and Linux, allowing CN2510’s serial ports to be recognized as Real COM ports by the Windows operating system, or Real TTY ports by Linux operating systems. -
Page 39: Accessing The Console Utility
1. Telnet over the network to the server’s IP address. 2. Type 1 to choose ansi/vt100, and then press Enter. Telnet 192.168.127.254 Async Server CN2510-8 Console terminal type (1: ansi/vt100, 2: vt52) : 1 3. CN2510’s MAIN MENU will open, as shown below. - Page 40 CN2510 Setting Up Windows Real COM/Linux Real TTY/Unix Fixed TTY 2. From the PORT MENU, select Mode, and then press Enter. CN2510-8 CN2510-8_5631 V2.0 PORT MENU ------------------------------------------------------------------------------ [Mode] Line mOdem Welcome_MSG Quit Examine/modify the operation mode of async ports Enter: select ESC: previous menu 3.
-
Page 41: Configuring Aspp Mode
CN2510 Setting Up Windows Real COM/Linux Real TTY/Unix Fixed TTY Configuring ASPP Mode Follow these steps to configure ports for ASPP mode: 1. Move the cursor to the Description/more setting column and press Enter. CN2510-8 CN2510-8_5631 V2.0 ------------------------------------------------------------------------------ [Mode] Line mOdem Welcome_MSG Quit... -
Page 42: Configuring The Serial Ports
3. Press ESC to return to the PORT MENU. Configuring the Serial Ports Open Port Menu Line to configure serial port settings. 1. From the MAIN MENU, select Port, and then press Enter. CN2510-8 CN2510-8_5631 V2.0 MAIN MENU ------------------------------------------------------------------------------... -
Page 43: Save
CN2510 Setting Up Windows Real COM/Linux Real TTY/Unix Fixed TTY Save When exiting the SERVER MENU, you will be prompted to save settings. Press Y to save. CN2510-8 CN2510-8_5631 V2.0 SERVER MENU ------------------------------------------------------------------------------ Info. Lan Adv. Host_table Route_table [User_table] Quit... -
Page 44: Setting Up Hosts
CN2510 Setting Up Windows Real COM/Linux Real TTY/Unix Fixed TTY Setting up Hosts After using CN2510 Console Utility to set up Async Server’s ports for the NT Real COM application (ASPP mode), you will need to install port drivers on every computer used to access CN2510’s ports. In this section we explain how to set up Windows hosts Setting up Windows XP/2003 Hosts In this section, we use Windows XP to illustrate the installation procedure. - Page 45 CN2510 Setting Up Windows Real COM/Linux Real TTY/Unix Fixed TTY 4. Wait patiently while the Wizard searches for servers connected to the network. 5. The next window to open will ask you if the hardware is connected. Select Yes, I have already connected the hardware, and click on Next to continue.
- Page 46 CN2510 Setting Up Windows Real COM/Linux Real TTY/Unix Fixed TTY 6. Select Add a new hardware device, and then click on Next to continue. 7. Select Install the hardware that I manually select from a list (Advanced) to install the hardware, and then click on Next to continue.
- Page 47 CN2510 Setting Up Windows Real COM/Linux Real TTY/Unix Fixed TTY 8. The window that opens next will ask you to select the type of hardware you are installing. Select Multi-port serial adapters, and then click on Next to continue. 9. The window that opens next will ask you to select the device driver you want to install for this hardware. Click on Have Disk…...
- Page 48 CN2510 Setting Up Windows Real COM/Linux Real TTY/Unix Fixed TTY 10. Locate and then select the driver file NPSERVER.INF. Click on Open to proceed with the installation. 11. Select the correct CN2510 model, and then click on Next to continue. 4-11...
- Page 49 CN2510 Setting Up Windows Real COM/Linux Real TTY/Unix Fixed TTY 12. The Wizard will start installing the driver, and automatically search the network for copies of the CN2510 model you selected in the previous step. 13. Although the next window to open states that the software hasn’t passed Windows Logo testing, you can rest assured that this driver has already been tested and been shown that it can support this Windows OS.
- Page 50 CN2510 Setting Up Windows Real COM/Linux Real TTY/Unix Fixed TTY 15. You can select the CN2510 that was located automatically, or select Manually Enter the IP address of NPort Server / Async Server and then enter the IP address of a different server. Click on Next to finish installing the CN2510 driver.
- Page 51 CN2510 Setting Up Windows Real COM/Linux Real TTY/Unix Fixed TTY 17. Click on Finish to complete the installation of the server driver. This will automatically trigger the port installation procedure. Installing Ports 1. After the CN2510 server driver has been installed, Windows will notify you that new hardware has been found.
- Page 52 CN2510 Setting Up Windows Real COM/Linux Real TTY/Unix Fixed TTY 2. Select Include this location in the search, and then click on Next to continue. 3. Although the next window to open states that the software hasn’t passed Windows Logo testing, you can rest assured that this driver has already been tested and been shown that it can support this Windows OS.
- Page 53 CN2510 Setting Up Windows Real COM/Linux Real TTY/Unix Fixed TTY 4. The driver for Moxa Port 0 will be installed. 5. After Moxa Port 0 is installed, steps 1 to 4 will be repeated 7 or 15 times, depending on whether you are installing drivers for the 8-port or 16-port CN2510.
- Page 54 CN2510 Setting Up Windows Real COM/Linux Real TTY/Unix Fixed TTY 6. After the installation is complete, you can check Ports (COM & LPT) under Device Manager to verify that all of the ports were installed successfully. Configuring CN2510 in a Windows XP/2003 Environment After the CN2510 driver is installed, you will be given the option to proceed directly with the configuration of CN2510.
- Page 55 CN2510 Setting Up Windows Real COM/Linux Real TTY/Unix Fixed TTY 2. Click on the Configuration tab. 3. Click on Settings to configure CN2510’s Basic Configuration, Password, and Access Control. 4-18...
- Page 56 CN2510 Setting Up Windows Real COM/Linux Real TTY/Unix Fixed TTY 4. On the Basic Configuration page, modify Server Name, IP Address, Netmask, and Gateway. Check the DHCP checkbox if the network parameters will be assigned automatically by a DHCP server. 5.
- Page 57 CN2510 Setting Up Windows Real COM/Linux Real TTY/Unix Fixed TTY 6. The Access Control page allows you to set up access rights for each of the CN2510’s ports. Access right is assigned by IP address. In the example shown here, the “netmask” of 255.255.255.255 limits access to the listed IP address (192.168.6.16).
- Page 58 CN2510 Setting Up Windows Real COM/Linux Real TTY/Unix Fixed TTY 8. Click on Ports Setting to configure the data transmission mode and FIFO for each COM port. 9. Check the box(es) next to the port(s) you would like to modify, and then click on Modify Setting. 4-21...
-
Page 59: Setting Up Windows 2000 Hosts
CN2510 Setting Up Windows Real COM/Linux Real TTY/Unix Fixed TTY 10. Modify the settings that need to be changed, and then click on OK. Setting up Windows 2000 Hosts In this section, we explain how to set up a host in a Windows 2000 environment. Installing a Server 1. - Page 60 CN2510 Setting Up Windows Real COM/Linux Real TTY/Unix Fixed TTY 3. When the Welcome to the Add Hardware Wizard window opens, click on Next to continue. 4. In the Choose a Hardware Task window, select Add/Troubleshoot a device, and then click on Next to continue.
- Page 61 CN2510 Setting Up Windows Real COM/Linux Real TTY/Unix Fixed TTY 5. In the Choose a Hardware Device window, select Add a new device, and then click on Next to continue. 6. In the Find New Hardware window, select No, I want to select the hardware from a list, and then click on Next to continue.
- Page 62 CN2510 Setting Up Windows Real COM/Linux Real TTY/Unix Fixed TTY 7. In the Hardware Type window, select Multi-port serial adapters from the Hardware types list, and then click on Next to continue. 8. Click on Have Disk to install from the CD, and then click on Next to continue. 4-25...
- Page 63 CN2510 Setting Up Windows Real COM/Linux Real TTY/Unix Fixed TTY 9. After locating the win2k folder, select the driver file NPSERVER.INF, and then click on Open. 10. Select the correct CN2510 model, and then click on Next to continue. 4-26...
- Page 64 CN2510 Setting Up Windows Real COM/Linux Real TTY/Unix Fixed TTY 11. The Wizard will start installing the Server driver, and automatically search the network for copies of the CN2510 model you selected in the previous step. 12. Although the next window to open states that the software hasn’t passed Windows Logo testing, you can rest assured that this driver has already been tested and been shown that it can support this Windows OS.
- Page 65 CN2510 Setting Up Windows Real COM/Linux Real TTY/Unix Fixed TTY 13. You can select the CN2510 that was located automatically, or select Manually Enter the IP address of NPort Server / Async Server and then enter the IP address of a different server. Click on Next to finish installing CN2510 driver.
- Page 66 CN2510 Setting Up Windows Real COM/Linux Real TTY/Unix Fixed TTY 14. The next window reports that the driver was installed, and port drivers will be installed next. Click on Next to continue. Installing Ports 1. The ports will be installed automatically. Click on Finish to conclude the installation procedure. 4-29...
- Page 67 CN2510 Setting Up Windows Real COM/Linux Real TTY/Unix Fixed TTY 2. After the installation is complete, you can check Ports (COM & LPT) under Device Manager to verify that all of the ports were installed successfully. Configuring CN2510 in a Windows 2000 Environment After the CN2510 driver is installed, you will be given the option to proceed directly with the configuration of CN2510.
- Page 68 CN2510 Setting Up Windows Real COM/Linux Real TTY/Unix Fixed TTY 2. Click on the Configuration tab. 3. Click on Settings to configure CN2510’s Basic Configuration, Password, and Access Control. 4-31...
- Page 69 CN2510 Setting Up Windows Real COM/Linux Real TTY/Unix Fixed TTY 4. On the Basic Configuration page, modify Server Name, IP Address, Netmask, and Gateway. Check the DHCP checkbox if the network parameters are assigned automatically by a DHCP server. 5. On the Password page, add a password or change the existing password. Check the Remember Password checkbox to remember the password on this computer.
- Page 70 CN2510 Setting Up Windows Real COM/Linux Real TTY/Unix Fixed TTY 6. The Access Control page allows you to set up access rights for each of the CN2510’s ports. Access right is assigned by IP address. In the example shown here, the “netmask” of 255.255.255.255 limits access to the listed IP address (192.168.6.16).
- Page 71 CN2510 Setting Up Windows Real COM/Linux Real TTY/Unix Fixed TTY 8. Click on OK to return to the Configuration page. 9. Click on Ports Setting to configure the data transmission mode and FIFO for each COM port. 4-34...
-
Page 72: Setting Up Windows 95/98/Me/Nt Hosts
CN2510 Setting Up Windows Real COM/Linux Real TTY/Unix Fixed TTY 10. Check the box(es) next to the port(s) you would like to modify, and then click on Modify Setting. 11. Modify the settings that need to be changed, and then click on OK. Setting up Windows 95/98/ME/NT Hosts In this section, we explain how to set up a host in a Windows 95/98/ME/NT environment. - Page 73 CN2510 Setting Up Windows Real COM/Linux Real TTY/Unix Fixed TTY Installing a Server 1. Unzip the Windows 95/98/ME/NT driver file, located on the CN2510 CD ROM, to your hard disk. 2. Locate and run the Setup.exe file. 3. The setup program is used for both CN2500 and NPort Server Pro products, so you will see a Welcome to NPort Server Pro window.
- Page 74 CN2510 Setting Up Windows Real COM/Linux Real TTY/Unix Fixed TTY 5. Select a Destination Directory and then click on Next to continue. 6. Click on Next to finish installing NPort Pro Manager. 7. After the driver is installed, NPort Pro Manager and the Add Server Wizard will start running automatically.
- Page 75 CN2510 Setting Up Windows Real COM/Linux Real TTY/Unix Fixed TTY 8. Select one of the server’s in the list, or select No, I will define the server myself if the correct server is not listed. Click on Next to continue. 9.
- Page 76 CN2510 Setting Up Windows Real COM/Linux Real TTY/Unix Fixed TTY 10. Select the COM number for CN2510’s port 1. The rest of the ports will be mapped automatically. Click on Next to continue. 11. For added security, set a password for the CN2510. Check the Auto-Saved box to save the password on your computer.
- Page 77 CN2510 Setting Up Windows Real COM/Linux Real TTY/Unix Fixed TTY 12. Check the new server settings to make sure they are correct, and then click on Finish. 13. The server and ports will be displayed in the NPort Server Manager window. Click the Save icon in the upper left corner to save the settings before exiting the program.
- Page 78 CN2510 Setting Up Windows Real COM/Linux Real TTY/Unix Fixed TTY Configuring CN2510 in a Windows 95/98/ME/NT Environment After the CN2510 driver is installed, you can proceed directly with the configuration of CN2510, or configure CN2510 at a later time. In this section we explain how to configure Real COM Mapping. 1.
- Page 79 CN2510 Setting Up Windows Real COM/Linux Real TTY/Unix Fixed TTY 3. On the General page, you can see the server’s Serial No., and modify Server Name, Server IP, and Netmask. Select the Enable option (to the right of DHCP)if the network parameters are assigned automatically by a DHCP server.
- Page 80 CN2510 Setting Up Windows Real COM/Linux Real TTY/Unix Fixed TTY 5. The Access Control page allows you to set up access rights for each of the CN2510’s ports. Access right is assigned by IP address. 6. The Transmission page lets you to select a Transmission Mode and Tx FIFO for each port. 7.
- Page 81 CN2510 Setting Up Windows Real COM/Linux Real TTY/Unix Fixed TTY 8. The Advanced page allows you to add routes to CN2510. However, since CN2510 has a column to set the Default Gateway, you can ignore this configuration. 4-44...
-
Page 82: Setting Up Device Control
Setting Up Device Control Device Control applications use standard Linux/Unix Socket programming for Linux/Unix systems, or WinSock programming for Windows systems, to control device data transmission directly. With CN2510 configured for RAW mode, you can focus on pure data transmission, without using serial port control or serial modem control signals. -
Page 83: Accessing The Console Utility
1. Telnet over the network to the server’s IP address. 2. Type 1 to choose ansi/vt100, and then press Enter. Telnet 192.168.127.254 Async Server CN2510-8 Console terminal type (1: ansi/vt100, 2: vt52) : 1 3. CN2510’s MAIN MENU will open, as shown below. - Page 84 CN2510 Setting Up Device Control 2. From the PORT MENU, select Mode, and then press Enter. CN2510-8 CN2510-8_5631 V2.0 PORT MENU ------------------------------------------------------------------------------ [Mode] Line mOdem Welcome_MSG Quit Examine/modify the operation mode of async ports Enter: select ESC: previous menu 3. The Mode page has pop-up selection lists for Application, Mode, and Description/more setting for each serial port.
-
Page 85: Configuring Aspp Mode
Follow these steps to configure ports for ASPP mode: 1. Move the cursor to the Mode column for the port and press Enter. CN2510-8 CN2510-8_5631 V2.0 ------------------------------------------------------------------------------... - Page 86 CN2510 Setting Up Device Control 3. Move the cursor to the Description/more setting column and press Enter. CN2510-8 CN2510-8_5631 V2.0 ------------------------------------------------------------------------------ [Mode] Line mOdem Welcome_MSG Quit Examine/modify the operation mode of async ports ESC: back to menu Enter: select Port Application...
-
Page 87: Configuring Raw Mode
RAW mode is used for standard TCP/IP socket programs. RAW mode provides a transparent communication link between the network socket program and the corresponding serial port. 1. Move the cursor to the Mode column for the port and press Enter. CN2510-8 CN2510-8_5631 V2.0... -
Page 88: Configuring The Serial Ports
4. Press Esc to return to the PORT MENU. Configuring the Serial Ports Open Port Menu Line to configure serial port settings. 1. From the MAIN MENU, select Port, and then press Enter. CN2510-8 CN2510-8_5631 V2.0 MAIN MENU ------------------------------------------------------------------------------... -
Page 89: Save
DCD off will be interpreted as a disconnection. DCD off 4. Press ESC to return to the PORT MENU. Save When exiting the SERVER MENU, you will be prompted to save settings. Press Y to save. CN2510-8 CN2510-8_5631 V2.0 SERVER MENU ------------------------------------------------------------------------------ Info. -
Page 90: Aspp Library Introduction
CN2510 Setting Up Device Control 2. Select System and then press Enter to restart the system and terminate the Telnet session. CN2510-8 CN2510-8_5631 V2.0 ------------------------------------------------------------------------------ [System] Port Quit Restart the Async Server ESC: back to menu Enter: select +----------------------------------------------------------------------+ Warning !!! | Restart system will disconnect all ports and clear all status value ‘... -
Page 91: Aspp Examples For Windows
CN2510 Setting Up Device Control Settings: Target port: parity = None, data bits = 8, stop bit = 1, software (XON/XOFF) flow control, no hardware (RTS/CTS). Syntax: # ./example ConsoleServerName [port(1) [Baud(9600)]] For example: # ./example CN2510 1 19200 Program sends “1234567890” to port 1 at 19200 bps baud rate and reads back any data on it. Environment: SCO UNIX. -
Page 92: Setting Up Raw Udp
Setting Up Raw UDP UDP is a non connection-oriented data transmission method. By circumventing TCP’s handshaking process, UDP gains the advantages of fast transmission speed, and high transmission efficiency. The disadvantage is that UDP is unable to guarantee data integrity, since UDP does not re-assemble out-of-order packets, or retransmit packets when data is missing. -
Page 93: Accessing The Console Utility
1. Telnet over the network to the server’s IP address. 2. Type 1 to choose ansi/vt100, and then press Enter. Telnet 192.168.127.254 Async Server CN2510-8 Console terminal type (1: ansi/vt100, 2: vt52) : 1 3. CN2510’s MAIN MENU will open, as shown below. - Page 94 CN2510 Setting Up Raw UDP 2. From the PORT MENU, select Mode, and then press Enter. CN2510-8 CN2510-8_5631 V2.0 PORT MENU ------------------------------------------------------------------------------ [Mode] Line mOdem Welcome_MSG Quit Examine/modify the operation mode of async ports Enter: select ESC: previous menu 3. The Mode page has pop-up selection lists for Application, Mode, and Description/more setting for each serial port.
-
Page 95: Configuring Raw Udp Mode
CN2510 Setting Up Raw UDP Configuring RAW UDP Mode 1. Move the cursor to the Description/more setting column, and then press Enter. CN2510-8 CN2510-8_5631 V2.0 ------------------------------------------------------------------------------ [Mode] Line mOdem Welcome_MSG Quit Examine/modify the operation mode of async ports ESC: back to menu... -
Page 96: Configuring The Serial Ports
The serial communication buffer size is 1 KB per port. 3. Press ESC to return to PORT MENU Configuring the Serial Ports Open Port Menu Line to configure serial port settings. 1. From the MAIN MENU, select Port, and then press Enter. CN2510-8 CN2510-8_5631 V2.0 MAIN MENU ------------------------------------------------------------------------------... -
Page 97: Save
Setting Up Raw UDP 3. The Line page has pop-up selection lists for Port, Speed, Bits, Stop, Parity, FIFO, RTS/CTS, XON/XOFF, and Discon. ctrl for each serial port. Each item is described in detail below the figure. CN2510-8 CN2510-8_5631 V2.0... -
Page 98: Restart
CN2510 Setting Up Raw UDP You may also save all settings from the MAIN MENU by selecting sAve and then pressing Enter. Press Enter again to save, and any other key to cancel. CN2510-8 CN2510-8_5631 V2.0 MAIN MENU ------------------------------------------------------------------------------ Server Port seTting... -
Page 99: Setting Up Reverse Terminal
Setting Up Reverse Terminal In this chapter, we show how to use CN2510 to connect terminals to a computer over an Ethernet network. The following topics are covered in this chapter: Accessing the Console Utility Selecting the Application ... -
Page 100: Accessing The Console Utility
1. Telnet over the network to the server’s IP address. 2. Type 1 to choose ansi/vt100, and then press Enter. Telnet 192.168.127.254 Async Server CN2510-8 Console terminal type (1: ansi/vt100, 2: vt52) : 1 3. CN2510’s MAIN MENU will open, as shown below. - Page 101 CN2510 Setting Up Reverse Terminal 2. From the PORT MENU, select Mode, and then press Enter. CN2510-8 CN2510-8_5631 V2.0 PORT MENU ------------------------------------------------------------------------------ [Mode] Line mOdem Welcome_MSG Quit Examine/modify the operation mode of async ports Enter: select ESC: previous menu 3. The Mode page has pop-up selection lists for Application, Mode, and Description/more setting for each serial port.
-
Page 102: Configuring Rtelnet Mode
Reverse Telnet, or RTELNET, supports the Telnet program used by Ethernet hosts to login to serial hosts. Ethernet hosts recognize serial ports by the specified source IP address, or by the TCP port number followed by CN2510’s IP address. 1. Move the cursor to the Description/more setting column, and then press Enter. CN2510-8 CN2510-8_5631 V2.0 ------------------------------------------------------------------------------... -
Page 103: Configuring The Serial Ports
3. Press Esc to return to PORT MENU. Configuring the Serial Ports Open Port Menu Line to configure serial port settings. 1. From the MAIN MENU, select Port, and then press Enter. CN2510-8 CN2510-8_5631 V2.0 MAIN MENU ------------------------------------------------------------------------------... -
Page 104: Save
CN2510 Setting Up Reverse Terminal Save When exiting the SERVER MENU, you will be prompted to save settings. Press Y to save. CN2510-8 CN2510-8_5631 V2.0 SERVER MENU ------------------------------------------------------------------------------ Info. Lan Adv. Host_table Route_table [User_table] Quit Examine/modify async server basic configuration... -
Page 105: Setting Up Terminal
Setting Up Terminal In this chapter, we describe the steps you should follow to configure Moxa CN2510 as a Terminal Server. CN2510 provides Telnet and Rlogin protocols for terminals to establish connections with UNIX hosts. Two terminal modes are supported—ASCII terminal with up to 8 simultaneous sessions, and Binary terminal with one session for one user. -
Page 106: Accessing The Console Utility
1. Telnet over the network to the server’s IP address. 2. Type 1 to choose ansi/vt100, and then press Enter. Telnet 192.168.127.254 Async Server CN2510-8 Console terminal type (1: ansi/vt100, 2: vt52) : 1 3. CN2510’s MAIN MENU will open, as shown below. - Page 107 CN2510 Setting Up Terminal 2. From the PORT MENU, select Mode, and then press Enter. CN2510-8 CN2510-8_5631 V2.0 PORT MENU ------------------------------------------------------------------------------ [Mode] Line mOdem Welcome_MSG Quit Examine/modify the operation mode of async ports Enter: select ESC: previous menu 3. The Mode page has pop-up selection lists for Application, Mode, and Description/more setting for each serial port.
-
Page 108: Configuring Term_Asc Mode
Setting Up Terminal Configuring TERM_ASC Mode TERM_ASC supports 8 terminal sessions for each terminal. Hot keys are used to switch between different sessions. 1. Move the cursor to the Mode column for the port and press Enter. CN2510-8 CN2510-8_5631 V2.0 ------------------------------------------------------------------------------ [Mode]... - Page 109 CN2510 Setting Up Terminal 4. The pop-up selector contains input/display fields for Key Mapping, Auto-link protocol, Link by input IP, Auto-login prompt, Terminal type, Inactivity time, Authentication type, and TCP alive check time. Each item is described in detail below the figure. +--------------------------------------------------+ | Key Mapping : Max.
-
Page 110: Configuring Term_Bin Mode
XMODEM or ZMODEM. You are only allowed to open one terminal session at a time when in Terminal Binary mode. 1. Move the cursor to the Mode column for the port and press Enter. CN2510-8 CN2510-8_5631 V2.0 ------------------------------------------------------------------------------... - Page 111 CN2510 Setting Up Terminal 3. Move the cursor to the Description/more setting column and press Enter. CN2510-8 CN2510-8_5631 V2.0 ------------------------------------------------------------------------------ [Mode] Line mOdem Welcome_MSG Quit Examine/modify the operation mode of async ports ESC: back to menu Enter: select Port Application...
-
Page 112: Configuring The Serial Ports
5. Press Esc to return to the PORT MENU. Configuring the Serial Ports Open Port Menu Line to configure serial port settings. 1. From the MAIN MENU, select Port, and then press Enter. CN2510-8 CN2510-8_5631 V2.0 MAIN MENU ------------------------------------------------------------------------------... -
Page 113: Save
Setting Up Terminal 3. The Line page has pop-up selection lists for Port, Speed, Bits, Stop, Parity, FIFO, RTS/CTS, XON/XOFF, and Discon. ctrl for each serial port. Each item is described in detail below the figure. CN2510-8 CN2510-8_5631 V2.0 ------------------------------------------------------------------------------... -
Page 114: Restart
CN2510 Setting Up Terminal You may also save all settings from the MAIN MENU by selecting sAve and then pressing Enter. Press Enter again to save, and any other key to cancel. CN2510-8 CN2510-8_5631 V2.0 MAIN MENU ------------------------------------------------------------------------------ Server Port seTting... -
Page 115: Setting Up Multi-Host Tty
Setting Up Multi-host TTY The Multi-host TTY application is the ideal transmission method for communicating with multiple Unix hosts over the network via several simultaneous sessions. When the communication starts, a Unix server connected to the network must first activate Moxattyd to use the TTY port’s mapping function. -
Page 116: Accessing The Console Utility
1. Telnet over the network to the server’s IP address. 2. Type 1 to choose ansi/vt100, and then press Enter. Telnet 192.168.127.254 Async Server CN2510-8 Console terminal type (1: ansi/vt100, 2: vt52) : 1 3. CN2510’s MAIN MENU will open, as shown below. - Page 117 CN2510 Setting Up Multi-host TTY 2. From the PORT MENU, select Mode, and then press Enter. CN2510-8 CN2510-8_5631 V2.0 PORT MENU ------------------------------------------------------------------------------ [Mode] Line mOdem Welcome_MSG Quit Examine/modify the operation mode of async ports Enter: select ESC: previous menu 3. The Mode page has pop-up selection lists for Application, Mode, and Description/more setting for each serial port.
-
Page 118: Configuring Fixtty Mode
CN2510 Setting Up Multi-host TTY Configuring FIXTTY Mode 1. Move cursor to the Description/more setting column and then press Enter. CN2510-8 CN2510-8_5631 V2.0 ------------------------------------------------------------------------------ [Mode] Line mOdem Welcome_MSG Quit Examine/modify the operation mode of async ports ESC: back to menu... -
Page 119: Configuring The Serial Ports
CN2510 Setting Up Multi-host TTY Configuring the Serial Ports Open Port Menu Line to configure serial port settings. 1. From the MAIN MENU, select Port, and then press Enter. CN2510-8 CN2510-8_5631 V2.0 MAIN MENU ------------------------------------------------------------------------------ Server [Port] seTting sAve Utility Restart Exit... -
Page 120: Save
CN2510 Setting Up Multi-host TTY Save When exiting the SERVER MENU, you will be prompted to save settings. Press Y to save. CN2510-8 CN2510-8_5631 V2.0 SERVER MENU ------------------------------------------------------------------------------ Info. Lan Adv. Host_table Route_table [User_table] Quit Examine/modify async server basic configuration... -
Page 121: Setting Up Hosts
CN2510 Setting Up Multi-host TTY Setting up Hosts Installing and Compiling Moxatty Installing and Compiling 1. Create a directory for Moxatty (e.g. /user/etc/moxatty) as shown below: #mkdir /usr/etc/moxatty #cd /usr/etc/moxatty moxatty.tar 2. Extract code from the tar-formatted file as follows: #tar xvf moxatty.tar 3. -
Page 122: Moxatty For Different Applications
CN2510 Setting Up Multi-host TTY Adding Moxatty to system booting procedures moxattyd /etc/inittab To include MOXATTY in the booting system, add the daemon process to the file. moxattyd /etc/inittab The following example illustrates how to add the full path name for to the entries of for different UNIX hosts. -
Page 123: Using Moxatty
CN2510 Setting Up Multi-host TTY Transparent Printer Access /etc/inittab It’s not necessary to add additional entries to for printer access, as mentioned in the section on terminal access. Since MOXATTY is a fixed pseudo tty, you can easily connect a serial printer to a Moxa CN2510 serial port to execute printing commands. -
Page 124: Setting Up Dialin/Out
Setting Up Dialin/out In this chapter, we describe the steps required to configure Moxa CN2510 as a Dial-in/out Access Server. Dial-in Access allows remote users to access the LAN, whereas Dial-out Access allows LAN hosts to establish connections to other sites. The following topics are covered in this chapter: ... -
Page 125: Accessing The Console Utility
1. Telnet over the network to the server’s IP address. 2. Type 1 to choose ansi/vt100, and then press Enter. Telnet 192.168.127.254 Async Server CN2510-8 Console terminal type (1: ansi/vt100, 2: vt52) : 1 3. CN2510’s MAIN MENU will open, as shown below. - Page 126 CN2510 Setting Up Dialin/out 2. From the PORT MENU, select Mode, and then press Enter. CN2510-8 CN2510-8_5631 V2.0 PORT MENU ------------------------------------------------------------------------------ [Mode] Line mOdem Welcome_MSG Quit Examine/modify the operation mode of async ports Enter: select ESC: previous menu 3. The Mode page has pop-up selection lists for Application, Mode, and Description/more setting for each serial port.
-
Page 127: Configuring Pppd/Ppp Mode
PPPD (PPP on demand) is used for dial-in services, since it provides PPP services only when receiving a request from a remote PC. PPP provides standard PPP services for both dial-in and dial-out. 1. Move the cursor to the Mode column for the port and then press Enter. CN2510-8 CN2510-8_5631 V2.0... - Page 128 CN2510 Setting Up Dialin/out 4. The pop-up selector contains input/display fields for Destination IP addr, Source IP address, IP netmask, TCP/IP compression, Inactivity time, Link quality report, Outgoing PAP ID, PAP password, and Incoming PAP check. Each item is described in detail below the figure. +--------------------------------------------------+ | Destination IP addr | Source IP address...
-
Page 129: Configuring Slipd/Slip Mode
Setting Up Dialin/out Configuring SLIPD/SLIP Mode Moxa CN2510 supports SLIP (Serial Line Internet Protocol), and SLIPD (for Dial-in services only). 1. Move the cursor to the Mode column for the port and then press Enter. CN2510-8 CN2510-8_5631 V2.0 ------------------------------------------------------------------------------ [Mode]... - Page 130 CN2510 Setting Up Dialin/out 4. The pop-up selector contains input/display fields for Destination IP addr, Source IP address, IP netmask, TCP/IP compression, Inactivity time, Link quality report, Outgoing PAP ID, PAP password, and Incoming PAP check. Each item is described in detail below the figure. +--------------------------------------------------+ | Destination IP addr | Source IP address...
-
Page 131: Configuring Dynamic Mode
You can further enable/disable PPP/SLIP/Terminal services by using the Description/more setting pop-ups. 1. Move the cursor to the Mode column for the port and then press Enter. CN2510-8 CN2510-8_5631 V2.0... - Page 132 CN2510 Setting Up Dialin/out 4. The pop-up selector contains input/display fields for TERM_BIN mode, PPPD mode, and SLIPD mode. Each item is described in detail below the figure. +------------------------------------------------------+ Enable Detail setting | TERM_BIN mode [yes] [Term parameters | PPPD mode [yes] [PPP parameters | SLIPD mode...
- Page 133 CN2510 Setting Up Dialin/out Setting Value Notes Necessity None: Auto-link protocol None/Telnet/ Do not connect to the host Optional Rlogin automatically. Telnet: Connects to the host automatically by Telnet. Rlogin: Connects to the host automatically by Rlogin. Telnet TCP port By default, the Telnet TCP port number is set to Optional 23, which is the default TCP port number for...
- Page 134 CN2510 Setting Up Dialin/out 8. The pop-up selector contains input/display fields for Destination IP addr, Source IP address, IP netmask, TCP/IP compression, Inactivity time, Link quality report, Outgoing PAP ID, and, PAP password. Each item is described in detail below the figure. +--------------------------------------------------+ | Destination IP addr | Source IP address...
-
Page 135: Configuring The Serial Ports
11. Press Esc to return to the PORT MENU. Configuring the Serial Ports Open Port Menu Line to configure serial port settings. 1. From the MAIN MENU, select Port, and then press Enter. CN2510-8 CN2510-8_5631 V2.0 MAIN MENU ------------------------------------------------------------------------------... -
Page 136: Configuring Modem Initialization
4. Press ESC to return to the PORT MENU. Configuring Modem Initialization Open Port Menu Modem to configure modem dial-out initialization and dial-out phone numbers. 1. From the MAIN MENU, use the arrow keys to select Port, and then press Enter. CN2510-8 CN2510-8_5631 V2.0 MAIN MENU... -
Page 137: Optional Welcome Message
Setting Up Dialin/out Optional Welcome Message Open Port Menu Welcome_MSG to set up a welcome message to greet dial-in users. 1. From the MAIN MENU, use the arrow keys to select Port, and then press Enter. CN2510-8 CN2510-8_5631 V2.0 MAIN MENU... -
Page 138: Save
3. The User_table page has input fields for User name, Password, and Phone Number, for each serial port. Input a Phone Number to activate the automatic call back function. Note that CN2510 can store information for up to 64 users. CN2510-8 CN2510-8_5631 V2.0 ------------------------------------------------------------------------------ Info. -
Page 139: Restart
CN2510 Setting Up Dialin/out Restart 1. From the MAIN MENU, select Restart. CN2510-8 CN2510-8_5631 V2.0 MAIN MENU ------------------------------------------------------------------------------ Server Port seTting sAve Utility [Restart] Exit Restart the whole system or selected async ports Enter: select ESC: previous menu 2. Select System and then press Enter to restart the system and terminate the Telnet session. -
Page 140: Setting Up Printer
Setting Up Printer In this chapter, we describe how to set up Moxa CN2510 as a printer server. Up to 16 serial printers can be connected simultaneously to one CN2510. At the end of the chapter, the settings needed for one-port parallel printing is illustrated for both UNIX and Windows systems. -
Page 141: Accessing The Console Utility
1. Telnet over the network to the server’s IP address. 2. Type 1 to choose ansi/vt100, and then press Enter. Telnet 192.168.127.254 Async Server CN2510-8 Console terminal type (1: ansi/vt100, 2: vt52) : 1 3. CN2510’s MAIN MENU will open, as shown below. - Page 142 CN2510 Setting Up Printer 2. From the PORT MENU, select Mode, and then press Enter. CN2510-8 CN2510-8_5631 V2.0 PORT MENU ------------------------------------------------------------------------------ [Mode] Line mOdem Welcome_MSG Quit Examine/modify the operation mode of async ports Enter: select ESC: previous menu 3. The Mode page has pop-up selection lists for Application, Mode, and Description/more setting for each serial port.
-
Page 143: Configuring Raw Prn Mode
CN2510 Setting Up Printer Configuring RAW PRN Mode 1. Move the cursor to the Mode column for the port and then press Enter. CN2510-8 CN2510-8_5631 V2.0 ------------------------------------------------------------------------------ [Mode] Line mOdem Welcome_MSG Quit Examine/modify the operation mode of async ports ESC: back to menu... -
Page 144: Configuring Lpd Prn Mode
CN2510 will reset the port and terminate the connection. 5. Press Esc to return to the PORT MENU. Configuring LPD PRN Mode 1. Move the cursor to the Mode column for the port and then press Enter. CN2510-8 CN2510-8_5631 V2.0 ------------------------------------------------------------------------------ [Mode]... -
Page 145: Configuring The Serial Ports
CN2510 Setting Up Printer 3. Move the cursor to the Description/more setting column, and then press Enter. CN2510-8 CN2510-8_5631 V2.0 ------------------------------------------------------------------------------ [Mode] Line mOdem Welcome_MSG Quit Examine/modify the operation mode of async ports ESC: back to menu Enter: select Port Application... -
Page 146: Save
Setting Up Printer 3. The Line page has pop-up selection lists for Port, Speed, Bits, Stop, Parity, FIFO, RTS/CTS, XON/XOFF, and Discon. ctrl for each serial port. Each item is described in detail below the figure. CN2510-8 CN2510-8_5631 V2.0 ------------------------------------------------------------------------------... -
Page 147: Restart
CN2510 Setting Up Printer You may also save all settings from the MAIN MENU by selecting sAve and then pressing Enter. Press Enter again to save, and any other key to cancel. CN2510-8 CN2510-8_5631 V2.0 MAIN MENU ------------------------------------------------------------------------------ Server Port seTting... -
Page 148: Setting Up A Sco Unix Host
CN2510 Setting Up Printer Setting up a SCO Unix Host Steps SCO UNIX Command Description Uncompress all programs #uncompress print.tar.Z Uncompress printer.tar.Z #tar xvf printer.tar to ./printer compile/link #make -f sco_unix.mak make printer node #mknod /dev/iop1 p Create a unique pipe name for each printer group. -
Page 149: Setting Up A Solaris X86 Host
CN2510 Setting Up Printer Setting up a SOLARIS X86 Host Steps SCO UNIX Command Description Set free the occupied Floppy disk #/etc/init.d/volmgt stop Uncompress all programs #tar /dev/fd0 ./ Uncompress printer.tar.Z #tar xvf printer.tar.Z to ./printer compile/link #make -f sco_unix.mak make printer node #mknod /dev/iop1 p Create a unique pipe name for each printer... -
Page 150: Setting Up A Linux Host
CN2510 Setting Up Printer Setting up a LINUX Host Steps SCO UNIX Command Description Uncompress all programs #tar /dev/fd0 ./ Uncompress printer.tar.Z #tar xvf printer.tar.Z to ./printer compile/link #make -f sco_unix.mak make printer node #mknod /dev/iop1 p Create a unique pipe name for each printer group. -
Page 151: Setting Up Windows Hosts
CN2510 Setting Up Printer Setting up Windows Hosts Windows uses the LPD/LPR application to access printers. Moxa provides LPD PRN mode for serial printing. In this section, we explain how to install a LPD/LPR printer in a Windows NT/2000 environment to access a serial printer connected to a CN2510 Async Server. - Page 152 CN2510 Setting Up Printer 7. Click on Start Settings Printers. 8. Click on Add Printer to start the Add Printer Wizard. 9. Select My Computer, and then click on Next to continue. 10. In the window that opens next, click on Add Port. 11-13...
- Page 153 CN2510 Setting Up Printer 11. Select LPR Port. Click on New Port…. 12. Enter CN2510’s IP Address, and then enter the Print Queue’s name. Click on OK to continue. 13. Select logical printer port for the LPR port you just added. The LPF port should be the IP address of the port.
-
Page 154: Setting Up A Windows 2000 Host
CN2510 Setting Up Printer 15. Enter the printer’s name, and select yes if you wish to set this printer as the default printer. Click on Next to continue. 16. Select Shared when prompted with questions asking if the printer is to be shared or not, and then enter the name of the shared printer. - Page 155 CN2510 Setting Up Printer 3. A Welcome message will appear. Click on Next to continue. 4. Select Local printer, and click on Next to continue. 5. Select Create a new port:, and then select LPR Port from the drop down list. Click on Next to continue. 11-16...
- Page 156 CN2510 Setting Up Printer 6. Enter CN2510’s IP Address, and then enter the Print Queue’s name. Click on OK to continue. 7. Select the printer’s manufacturer and model name. Click on Next to continue. 8. Enter the printer’s name, and select yes if you wish to set this printer as the default printer. Click on Next to continue.
- Page 157 CN2510 Setting Up Printer 9. Select Shared when prompted with questions asking if the printer is to be shared or not, and then enter the name of the shared printer. Click on Next to continue. 10. You will need to reboot Windows 2000 to enable the printer you just added. When asked if you want to print a test page, select No.
- Page 158 CN2510 Setting Up Printer 11. If you want to print a test page, reboot Windows 2000, select this printer, and click on Print Test Page. 11-19...
-
Page 159: Setting Up Multiplex
Setting Up Multiplex In this chapter, we describe how to configure Moxa CN2510 as a Multiplexor and De-Multiplexor. Using the Multiplexor/De-Multiplexor application requires two Async Servers—one attached to a host with a multi-port serial board and several serial lines, and the other connected to external devices. In this way, the original host can use a TCP/IP connection to control serial devices from a remote location. -
Page 160: Accessing The Console Utility
1. Telnet over the network to the server’s IP address. 2. Type 1 to choose ansi/vt100, and then press Enter. Telnet 192.168.127.254 Async Server CN2510-8 Console terminal type (1: ansi/vt100, 2: vt52) : 1 3. CN2510’s MAIN MENU will open, as shown below. -
Page 161: Selecting The Application
Configure the “Host” CN2510’s serial ports for RTELNET mode, and configure the “Device” CN2510’s serial ports for TERM_BIN mode. Configuring the “Host” CN2510 Open Port Menu Mode to select the Multiplex application. 1. From the MAIN MENU, select Port, and then press Enter. CN2510-8 CN2510-8_5631 V2.0 MAIN MENU ------------------------------------------------------------------------------... - Page 162 3. The Mode page has pop-up selection lists for Application, Mode, and Description/more setting for each serial port. Use the arrow keys to move the cursor to the Application column for the port to be configured, and then press Enter. We first use Port 6 to illustrate. CN2510-8 CN2510-8_5631 V2.0...
- Page 163 CN2510 Setting Up Multiplex 6. Move the cursor to the Description/more setting column, and then press Enter. CN2510-8 CN2510-8_5631 V2.0 ------------------------------------------------------------------------------ [Mode] Line mOdem Welcome_MSG Quit Examine/modify the operation mode of async ports ESC: back to menu Enter: select Port Application...
-
Page 164: Configuring The "Device" Cn2510
CN2510 Setting Up Multiplex 8. Repeat the previous steps for ports 5, 7, and 8. CN2510-8 CN2510-8_5631 V2.0 ------------------------------------------------------------------------------ [Mode] Line mOdem Welcome_MSG Quit Examine/modify the operation mode of async ports ESC: back to menu Enter: select Port Application Mode... - Page 165 CN2510 Setting Up Multiplex 4. Use the up/down arrow keys to select Multiplex, and then press Enter to confirm. CN2510-8 CN2510-8_5631 V2.0 ------------------------------------------------------------------------------ [Mode] Line mOdem Welcome_MSG Quit Examine/modify the operation mode of async ports ESC: back to menu Enter: select...
- Page 166 CN2510 Setting Up Multiplex 7. Use the arrow keys to highlight TERM_BIN, and then press Enter. CN2510-8 CN2510-8_5631 V2.0 ------------------------------------------------------------------------------ [Mode] Line mOdem Welcome_MSG Quit Examine/modify the operation mode of async ports ESC: back to menu Enter: select Port Application...
- Page 167 CN2510 Setting Up Multiplex 10. The pop-up selector contains input/display fields for Quit key, Auto-link protocol, Link by input IP, Auto-login prompt, Terminal type, Inactivity time, Authentication type, and TCP alive check time. Each item is described in detail below the figure. +--------------------------------------------------+ | Quit key : [^E]...
-
Page 168: Configuring The Serial Ports
Optional the TCP connection is alive or not. If no response is received, CN2510 will reset the port and terminate the connection. 11. Repeat the previous steps for ports 5, 7, and 8. CN2510-8 CN2510-8_5631 V2.0 ------------------------------------------------------------------------------ [Mode] Line mOdem Welcome_MSG Quit... -
Page 169: Save
Setting Up Multiplex 3. The Line page has pop-up selection lists for Port, Speed, Bits, Stop, Parity, FIFO, RTS/CTS, XON/XOFF, and Discon. ctrl for each serial port. Each item is described in detail below the figure. CN2510-8 CN2510-8_5631 V2.0 ------------------------------------------------------------------------------... -
Page 170: Restart
CN2510 Setting Up Multiplex You may also save all settings from the MAIN MENU by selecting sAve and then pressing Enter. Press Enter again to save, and any other key to cancel. CN2510-8 CN2510-8_5631 V2.0 MAIN MENU ------------------------------------------------------------------------------ Server Port seTting... -
Page 171: Setting Up Routing
Setting Up Routing Routing is the main process used by Internet hosts to deliver packets. The Internet uses a hop-by-hop routing model, which means that each host or router that handles a packet examines the Destination Address in the IP header, computes the next hop that will bring the packet one step closer to its destination, and then delivers the packet to the next hop, where the process is repeated. -
Page 172: Accessing The Console Utility
1. Telnet over the network to the server’s IP address. 2. Type 1 to choose ansi/vt100, and then press Enter. Telnet 192.168.127.254 Async Server CN2510-8 Console terminal type (1: ansi/vt100, 2: vt52) : 1 3. CN2510’s MAIN MENU will open, as shown below. -
Page 173: Configuring Rip
RIP version 2 recently became the standard version of RIP, and the original RIP is no longer in use. Configuring RIP Open Server Menu Adv. to configure Dynamic routing. 1. From the MAIN MENU, select Server, and then press Enter. CN2510-8 CN2510-8_5631 V2.0 MAIN MENU ------------------------------------------------------------------------------... -
Page 174: Configuring The Static Routing Table
Although RIP-1 and RIP-2 periodically update routing tables between different routers, you still need to add routing entries in the routing table for routes only directed to you. Open Server Menu Route_table to configure the static routing table. 1. From the MAIN MENU, select Server, and then press Enter. CN2510-8 CN2510-8_5631 V2.0 MAIN MENU... -
Page 175: Static Routing Examples
203.67.6.254. In this case we should add the default gateway IP address (203.67.6.254) to the routing table, as shown in the following figure, to handle hops to any destination beyond the local network (203.67.6). CN2510-8 CN2510-8_5631 V2.0 --------------------------------------------------------------------------------- Info. -
Page 176: Configuring Routes To The Internet And Intranet
202.65.66.4 or 202.65.66.5, which are on network 202.65.66 (located outside network 203.67.6). In this case, add a route entry for the next-hop router, 203.67.6.252, that delivers requests to network 202.65.66. The metric hop in this case is 2 route hops. CN2510-8 CN2510-8_5631 V2.0 --------------------------------------------------------------------------------- Info. -
Page 177: Configuring Multiple-Point Routes
Modem 2 Modem 4 203.67.6.249 201.2.2.249 201.2.2.249 203.67.6.249 In this case, you will need to add three entries to the routing table, as shown below. CN2510-8 CN2510-8_5631 V2.0 --------------------------------------------------------------------------------- Info. Lan Adv. Host_table [Route_table] User_table Quit Examine/modify the routing table... -
Page 178: Save
CN2510 Setting Up Routing Save When exiting the SERVER MENU, you will be prompted to save settings. Press Y to save. CN2510-8 CN2510-8_5631 V2.0 SERVER MENU ------------------------------------------------------------------------------ Info. Lan Adv. Host_table Route_table [User_table] Quit Examine/modify async server basic configuration Enter: select... -
Page 179: Administrative Utilities
Administrative Utilities In this chapter, we show how to use CN2510 administrative utilities, which include Ping (to see if a LAN host is still active), and how to get information with Monitor Line, Monitor Network, Monitor Async, Monitor ... -
Page 180: Ping
CN2510 Administrative Utilities Ping Ping is used to test network hardware connectivity and whether a network host is active. 1. From the MAIN MENU, select Utility, and then press Enter. CN2510-8 CN2510-8_5631 V2.0 MAIN MENU ------------------------------------------------------------------------------ Server Port seTting sAve... -
Page 181: Line
CN2510 Administrative Utilities 3. Each item is discussed in the following subsections. CN2510-8 CN2510-8_5631 V2.0 MONITOR MENU ------------------------------------------------------------------------------ [Line] Network Async async-Setting Routing PPP-Trace Quit Monitor asynchronous port connective utilization Enter: select ESC: previous menu Line 1. From the MONITOR MENU, select Line, and then press Enter. -
Page 182: Network
CN2510 Administrative Utilities Network 1. From the MONITOR MENU, select Network, and then press Enter. CN2510-8 CN2510-8_5631 V2.0 ------------------------------------------------------------------------------ [Line] Network Async async-Setting Routing PPP-Trace Quit Monitor asynchronous port connective utilization ESC: back to menu Enter: select ETHERNET: Received Sent... -
Page 183: Async
Sent: Total sent packets, including those on current connections. ReSent: Retransmitted packets. 2. Press Esc to return to Network Async 1. From the MONITOR MENU, select Async, and then press Enter. CN2510-8 CN2510-8_5631 V2.0 MONITOR MENU ------------------------------------------------------------------------------ Line Network [Async]... -
Page 184: Routing
CN2510 Administrative Utilities Routing 1. From the MONITOR MENU, select Routing, and then press Enter. CN2510-8 CN2510-8_5631 V2.0 ------------------------------------------------------------------------------ Line Network Async async-Setting [Routing] PPP-Trace Quit Monitor current routing table ESC: back to menu Enter: select Iface Destination Gateway/HA Netmask... -
Page 185: Ppp-Trace
CN2510 Administrative Utilities PPP-Trace 1. From the MONITOR MENU, select PPP-Trace, and then press Enter. CN2510-8 CN2510-8_5631 V2.0 MONITOR MENU ------------------------------------------------------------------------------ Line Network Async async-Setting Routing [PPP-Trace] Quit Trace PPP protocol connect messages Enter: select ESC: previous menu 2. Use the arrow keys to select the port you wish to trace, and then press Enter to select. -
Page 186: Upgrade
CN2510 Administrative Utilities 1. From the UTILITY menu, select Diagnostic, and then press Enter. CN2510-8 CN2510-8_5631 V2.0 UTILITY MENU ------------------------------------------------------------------------------ Ping Monitor [Diagnostic] Upgrade Quit Loopback test and self-diagnose Enter: Select ESC: previous menu 2. If any of these tests fails, contact Moxa to request repair services. - Page 187 CN2510 Administrative Utilities 2. Select the CN2510 server by clicking the button on the toolbar. If the CN2510 server is at a remote site, use to add it to the list. 3. Specify the new firmware file used to upgrade. Click on OK to start. 4.
-
Page 188: Console Terminal Upgrade
CN2510 Administrative Utilities Console Terminal Upgrade 1. Run Start Programs PComm Terminal Emulator. (If you cannot find the software on your computer, install PComm Lite from the CN2510 CD, and then run the program.) 2. Use an RJ45-DB9 female cable to connect to the console port, and then turn on CN2510. Start the PComm Terminal program and then open a new connection. -
Page 189: Upgrading Through The Serial Console
CN2510 Administrative Utilities 4. On the Terminal page, select VT100 for Terminal Type, and then press Enter. 5. Type 1 to choose ansi/VT100 terminal type, and then press Enter to enter the MAIN MENU. 6. Use the following keystrokes to navigate CN2510’s console utility. Action [Up/Down/Left/Right] Arrow Key or [Tab] Key Move... - Page 190 CN2510 Administrative Utilities 2. From the UTILITY MENU, select Upgrade, and then press Enter. 3. Select Console port (using XMODEM) for Upgrade type, and then press Ctrl-U to start. 4. When you see Start loading file … near the bottom of the screen, click on the Port Manager menu. 14-12...
- Page 191 CN2510 Administrative Utilities 5. Select Port Manager File Transfer from the menu bar. 6. In the File Transfer window select XModem-CheckSum for Protocol and Transmit for Direction, and then click on OK, The file will be transmitted to the CN2510. 7.
-
Page 192: Remote Rcp Upgrade
CN2510 Administrative Utilities 8. The CN2510 will store the new firmware in its Flash ROM, and then restart the entire system, completing the Firmware Upgrade procedure. Remote RCP Upgrade RCP (Remote Copy Program) is the Unix utility for copying files over the Ethernet. RCP allows transparent copying of files between hosts, without the need to enter passwords. - Page 193 CN2510 Administrative Utilities 5. After entering CN2510’s MAIN MENU, select Utility Upgrade. CN2510-8 CN2510-8_5631 V2.0 UTILITY MENU ------------------------------------------------------------------------------ Ping Monitor Diagnostic [Upgrade] Quit Upgrade operational system program Enter: select ESC: previous menu 6. In the Upgrade via column, select Network host (using RCP).
-
Page 194: Export
CN2510 Administrative Utilities Export Settings can be exported to a file to backup the configuration, or to set up another CN2510 with the same configuration. There are two types of exported file settings: Console Terminal or Remote RCP. Console Terminal Export 1. - Page 195 CN2510 Administrative Utilities 5. When you see Start loading file … near the bottom of the screen, click on the Port Manager menu. 6. Select Port Manager File Transfer from the menu. 7. In the File Transfer window select XModem-CheckSum for Protocol, and Receive for Direction. Selecting OK causes the terminal to receive settings from the CN2510.
-
Page 196: Remote Rcp Export
6. Enter the UNIX/LINUX host’s IP address for Host name/IP address. 7. Enter CN2510’s firmware file name on the UNIX/LINUX host for File name. 8. Enter the user name required to login to the UNIX/LINUX host for User name. 9. Press CTRL-U to start. CN2510-8 CN2510-8_5631 V2.0 ------------------------------------------------------------------------------... -
Page 197: Import
CN2510 Administrative Utilities Import Saved settings can be imported back to the CN2510. There are two settings to choose from for importing from a file, Console Terminal or Remote RCP. Console Terminal Import 1. Run Start Programs PComm Terminal Emulator. Follow the steps given earlier to enter the MAIN MENU. - Page 198 CN2510 Administrative Utilities 5. When you see Start loading file … near the bottom of the screen, click on the Port Manager menu. 6. Select Port Manager File Transfer from the menu. 7. In the File Transfer window select XModem-CheckSum for Protocol and Transmit for Direction. This causes the file to be sent from the terminal to CN2510.
-
Page 199: Remote Rcp Import
5. Enter the UNIX/LINUX host’s IP address for Host name/IP address. 6. Enter CN2510’s firmware file name on the UNIX/LINUX host for File name. 7. Enter the user name required to login to the UNIX/LINUX host for User name. 8. Press CTRL-U to start. CN2510-8 CN2510-8_5631 V2.0 ------------------------------------------------------------------------------... -
Page 200: Default
CN2510 Administrative Utilities Default CN2510 can restore default settings if necessary. Note that the IP address will not be changed to default. 1. From the MAIN MENU select seTting, and then press Enter. CN2510-8 CN2510-8_5631 V2.0 MAIN MENU ------------------------------------------------------------------------------ Server Port... -
Page 201: Android Api Instructions
Android API Instructions The following topics are covered in this chapter: Overview How to Start MxNPortAPI MxNPortAPI Function Groups Example Program... -
Page 202: Overview
CN2510 Android API Instructions Overview If you want to remote control your serial devices on an Android platform, then the MxNPortAPI is a simple application programming tool that you can use. The MxNPortAPI helps programmers develop an Android application to access the device server by TCP/IP. The MxNPortAPI provides frequently used serial command sets like port control, input/output, etc., and the style of developed Android application is similar to MOXA Driver Manager. -
Page 203: Mxnportapi Function Groups
CN2510 Android API Instructions For more details about the installation, please refer to the Overview section. MxNPortAPI Function Groups The supported functions in this API are listed below: Port Control Input/Output Port Status Inquiry Miscellaneous open read getBaud setBreak close write getFlowCtrl setIoctlMode... - Page 204 CN2510 Android API Instructions mode.parity = MxNPort.PARITY_NONE; mode.stopBits = MxNPort.STOP_BITS_1; MxNPort mxNPort = NPortList.get(0); /* Get first NPort device */ try { byte[] buf = {'H','e','l','l','o',' ','W','o','r','l','d'}; mxNPort.open(); /*open port*/ mxNPort.setIoctlMode(mode); /*serial parameters setting*/ mxNPort.write(buf, buf.length); /*write data*/ mxNPort.close(); /*close port*/ } catch (MxException e){ /*Error handling*/ thread.start();...
-
Page 205: Troubleshooting
Troubleshooting In this appendix, we give solutions to various problems you may come across when using CN2510. The following topics are covered in this appendix: Console Terminal Problems Terminal Port Problems How to Save CN2510’s Parameters ASPP Port Problems ... -
Page 206: Console Terminal Problems
Question: How can I restore CN2510 to the factory default settings? Solution: After entering the Console window, select setting Default, and then press Enter. The CN2510 will be restored to the factory default settings. CN2510-8 CN2510-8_5631 V2.0 MAIN MENU... - Page 207 CN2510 Troubleshooting Problem: I used Telnet Console in a Windows 9x/NT environment, but I couldn’t use the arrow keys to select options. Solution: In Telnet, click on the Terminal menu, choose Preferences, and then select VT100 Arrows in the Terminal Preferences window.
-
Page 208: Terminal Port Problems
Solutions: After entering the Console screen, select seTting Export, and press Enter. Then you can use XMODEM for a Windows host, or RCP for a UNIX host, to save the parameters to a file. CN2510-8 CN2510-8_5631 V2.0 MAIN MENU... -
Page 209: Aspp Port Problems
CN2510 Troubleshooting ASPP Port Problems Problem: The application utilizing the ASPP subroutines could not connect to the CN2510. Solutions: Check to see if the target port’s mode is set to ASPP. The connection will fail if the port mode is set to something other than ASPP. - Page 210 CN2510 Troubleshooting 2. Add two similar line to the shell program “mk_radius” at read_os “1”. For example, they might appear as follows: read_os case $ans in ‘1’) clear mk_src echo “enter lib directory” cd lib echo “compiling source program ..” make cd ..
-
Page 211: Radius Server
RADIUS Server Managing dispersed serial lines and modem pools for large numbers of users can create the need for significant administrative support. Since modem pools are a link to the outside world, they require careful attention to security, authorization, and accounting. This can best be achieved by managing a single “database” of users, allowing for authentication (verifying user name and password) as well as configuring information which details the type of service to deliver to the user (for example: SLIP, PPP, Telnet, rlogin). -
Page 212: What Is Radius
CN2510 RADIUS Server What is RADIUS? Definition Remote Authentication Dial-up User Service, or RADIUS, is the standard for centralizing the authentication, authorization, and accounting of remote access users. Here is a brief description of how RADIUS works: When a user dials in to a remote access device, that device communicates with the central RADIUS server to determine if the user is authorized to connect to the LAN. -
Page 213: Setting Up Cn2510
CN2510 RADIUS Server Setting up CN2510 Setting up the RADIUS Server IP Address 1. From the MAIN MENU, select Server, and then press Enter. CN2510-8 CN2510-8_5631 V2.0 MAIN MENU ------------------------------------------------------------------------------ [Server] Port seTting sAve Utility Restart Exit Examine/modify async server node/table configuration... -
Page 214: Setting Up Port Configuration
RADIUS Server Setting up Port Configuration RADIUS is effective for dial-up services. Apart from dial-in services (PPP, SLIP, Dynamic), it also supports RADIUS settings in Terminal applications and Console Management application. Dialin/out—Dynamic Mode CN2510-8 CN2510-8_5631 V2.0 ------------------------------------------------------------------------------ [Mode] Line mOdem Welcome_MSG Quit... - Page 215 CN2510 RADIUS Server Dialin/out—TERM_BIN / TERM_ASC Mode CN2510-8 CN2510-8_5631 V2.0 ------------------------------------------------------------------------------ [Mode] Line mOdem Welcome_MSG Quit Examine/modify the operation mode of async ports ESC: back to menu Enter: select Port Application Mode Description/more setting [Terminal ] [TERM_ASC ] [ASCII Terminal mode (8...
-
Page 216: Setting Up Unix Hosts
CN2510 RADIUS Server Setting up UNIX Hosts MOXA recommends the FreeRADIUS server for UNIX users. FreeRADIUS is the premiere open source RADIUS server, and is well within the top 5 RADIUS servers in use world-wide. It is suitable for embedded systems with small amounts of memory, to systems with millions of users. - Page 217 CN2510 RADIUS Server 4. Right click on RADIUS in the left info window, and then select Properties. 5. Select Service. Check the RADIUS ports. [Authentication] 1645 [Accounting] 1646 6. Select Client, and the click on Add. Enter CN2510’s IP address in the IP address field. Enter CN2510’s password in the password field.
-
Page 218: Setting Up Windows 2000 Hosts
CN2510 RADIUS Server Setting up Windows 2000 Hosts 1. Click on Start Programs Administrative Tools Routing and Remote Access. 2. Follow the steps below to install. Right click on Server (Local) to select Configure and Enable Routing and Remote Access. - Page 219 CN2510 RADIUS Server 5. Select TCP/IP protocol, and then click on Next to continue. 6. Specify an IP address.
- Page 220 CN2510 RADIUS Server 7. Select Yes, I want to use a RADIUS server, and then click on Next to start using this function. B-10...
-
Page 221: Setting Up Windows 2003 Hosts
CN2510 RADIUS Server Setting up Windows 2003 Hosts Windows 2003 uses IAS service instead of RADIUS service. For this reason, you need to install IAS service to use RADIUS with Windows 2003 (IAS service will not be installed by default). 1. - Page 222 CN2510 RADIUS Server 4. After the installation is finished, click on Administrative Tools, and run Internet Authentication Service. The window shown below will open. 5. Select NEW RADIUS Client to add a new RADIUS client. You will then be able to start using this function. B-12...
-
Page 223: Snmp Agent With Mib Ii
SNMP Agent with MIB II Simple Network Management Protocol agent software is built into CN2510. The software supports cold/warm start trap, line up/down trap, and RFC 1213 MIB-II. The following table lists the standard MIB-II groups, as well as the variable implementations for CN2510. Supported SNMP variables System MIB Interfaces MIB... - Page 224 CN2510 SNMP Agent with MIB II UDP MIB TCP MIB SNMP MIB UdpInDatagrams tcpRtoAlgorithm snmpInPkts UdpNoPorts tcpRtoMin snmpOutPkts UdpInErrors tcpRtoMax snmpInBadVersions UdpOutDatagrams tcpMaxConn snmpInBadCommunityNames UdpLocalAddress tcpActiveOpens snmpInASNParseErrs UdpLocalPort tcpPassiveOpens snmpInTooBigs tcpAttempFails snmpInNoSuchNames Address Translation MIB tcpEstabResets snmpInBadValues AtIfIndex tcpCurrEstab snmpInReadOnlys AtPhysAddress tcpInSegs snmpInGenErrs...
-
Page 225: Pin Assignments And Cable Wiring
Pin Assignments and Cable Wiring In this appendix, common pin assignment and cable wiring diagrams are presented. The following topics are covered in this appendix: Pin Assignments 10/100BaseTX Port Pin Assignment Console Port Pin Assignment Async RS-232 Port Pin Assignment ... -
Page 226: Pin Assignments
CN2510 Pin Assignments and Cable Wiring Pin Assignments 10/100BaseTX Port Pin Assignment Signal Console Port Pin Assignment RS-232 DSR (in) RTS (out) TxD (out) RxD (in) DCD (in) CTS (in) DTR (out) Async RS-232 Port Pin Assignment RS-232 DSR (in) RTS (out) TxD (out) RxD (in) -
Page 227: Async Rs-232 Port Cable Wiring
CN2510 Pin Assignments and Cable Wiring Async RS-232 Port Cable Wiring 8-pin RJ45 to Male DB9 for CN2510 8-pin RJ45 to Female DB9 for CN2510 8-pin RJ45 to Female DB25 for CN2510... -
Page 228: Db9 And Db25 Connector Pin Assignments
CN2510 Pin Assignments and Cable Wiring 8-pin RJ45 to Male DB25 for CN2510 DB9 and DB25 Connector Pin Assignments DB9 Connector Pin Assignment Male DB9 Connector Female DB9 Connector DB25 Connector Pin Assignment Male DB25 Connector Female DB25 Connector... -
Page 229: Lcm Display
If the CN2510 is working properly, the LCM panel will display a green color. The red Ready LED will also light up, indicating that the CN2510 is receiving power. After the red Ready LED turns to green, you will see a display similar to: This is where • CN2510-8 is the CN2510’s name • is the CN2510’s serial number •... - Page 230 CN2510 LCM Display In addition, you only need to remember to: • Use the SEL button to move up one level (i.e., left to right on the tree graph) • Use the MENU button to move down one level (i.e., right to left on the tree graph) •...
- Page 231 CN2510 LCM Display ↓ Press the down cursor button once to see Odd as the second option. ↑ ↓ Press the down cursor button again to see Even as the third option. ↑ ↓ Press the down cursor button again to see Space as the fourth option. ↑...
Need help?
Do you have a question about the CN2510-8 and is the answer not in the manual?
Questions and answers