Advertisement
Quick Links
A S S E M B L Y I N S T R U C T I O N S
TABLE OF CONTENTS:
Pg. 1
Pg. 1
Pg. 7
Pg. 9
Exploded View Diagram
Fold-out Pg. 10
Cable Mapping Diagram
Fold-out Pg. 11
Back Page
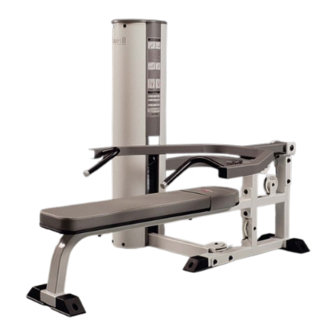
SP-401
Supine Bench Press
A m e r i c a ' s
P r e m i u m
69 1/2"
L 69 1/2" W 52 1/4" H 54 3/4"
E x e r c i s e
E q u i p m e n t
Revision Date 05-10-02
52 1/4"
SP-401 Rev0
Advertisement

Related Manuals for TuffStuff SP-401


Summary of Contents for TuffStuff SP-401
-
Page 1: Table Of Contents
L 69 1/2" W 52 1/4" H 54 3/4" A m e r i c a ’ s P r e m i u m E x e r c i s e E q u i p m e n t SP-401 Rev0... -
Page 2: Introduction
Stuff Equipment This Tuffstuff product has been built to precise quality 2. Neatly organize and identify all parts according to the standards and has been carefully packaged to ensure that Parts List and the Exploded View Diagram. - Page 3 Rubber Donuts (#15). Note: Be sure the label on the Top Plate Selector Bar (#9) facing out, as shown above, before sliding the Top Plate Se- lector Bar (#9) onto the Guide Rods (#4). SP-401 Supine Bench Press...
- Page 4 Loosely Fasten: Do not completely fasten this hardware as- sembly at this time, as it will be completely fastened later in the assembly process. Note: Refer to Fig A on fold-out page 11 for further detailed il- lustration of this assembly. SP-401 Supine Bench Press...
- Page 5 11. These black boxed letters will be the assembly process. primarily used for locating certain pulleys during the cable rout- ing process beginning with Fig. 11. SP-401 Supine Bench Press...
-
Page 6: Assembly Pg
Chrome Washers 3/8 X 1 1/2 (#44), and two Split Lock Washers 3/8” (#50). Use the two supplied Hex Keys 7/32” (#63) to fasten this assembly. Note: Refer to the Exploded View Diagram on fold-out page 10 for further illustration of this assembly. SP-401 Supine Bench Press... - Page 7 FIG. 20 Affix the Back Pad (#36) to the Bench Frame (#30), in the 1/2-20 (#60). position as shown above, using four Hex Head Cap Screws 3/8-16 X 3 (#48), and four Flat Washers SAE 3/8” (#19). SP-401 Supine Bench Press...
-
Page 8: Cable Adjustment
Guide Rod Retainer (#5) Shrouds (#2, #3), in the position as shown above, and slide them all ing four Hex Head Cap Screws 1/4-20 X 3/4 (#21), and four Flat the way down. Washers 1/4” (#20). SP-401 Supine Bench Press... - Page 9 (#6). FIG. 25 Attach the Plastic Shroud Lid (#11) to Guide Rod Retainer (#5), in the position as shown above, and secure it into place using two Flat Head Socket Cap Screws 3/8-16 X 3 (#25). SP-401 Supine Bench Press...
-
Page 10: Parts List
DECAL-SIMPLEX II (1 7/8 X 5 3/16) BNH1199 REAR BENCH FRAME UP803 DECAL-TUFFSTUFF (2 3/4 X 19 1/16) BNH1200 BOTTOM CROSS BRACE UP804 DECAL-EXERCISE SP-401 FLAT PRESS 4 1/2 X 16 BNH1186 PRESS BAR UP805 DECAL-LARGE TUFFSTUFF LOGO DIAMOND SHAPE BNH0360 TOP CROSS BRACE UP806... -
Page 11: Warranty
L I M I T E D W A R R A N T Y TuffStuff warrants to the original purchaser only that TuffStuff equipment will be free from defects in material and workmanship. The warranty and remedies set forth herein are conditioned upon proper storage, installation, use, maintenance and conformance with any recommendations of TuffStuff.
Need help?
Do you have a question about the SP-401 and is the answer not in the manual?
Questions and answers