Table of Contents
Advertisement
Quick Links
Advertisement
Table of Contents

Summary of Contents for Accriva Diagnostic AVOXimeter 4000
- Page 1 Operator’s Manual...
-
Page 2: Technical Support
Manufacturing Company Location Accriva Diagnostics, Inc. 6260 Sequence Drive, San Diego, CA USA Phone: 1-858-263-2300 Fax: 1-858-314-6700 web site: www.accriva.com Copyright and Trademarks Copyright© 2015 Accriva Diagnostics, Inc. All rights reserved. This material may not be reproduced or copied, in whole or in part, without the written permission of Accriva. Accriva and AVOXimeter are registered trademarks of Accriva Diagnostics, Inc. -
Page 3: Table Of Contents
Table of Contents INTRODUCTION ...................... 6 Intended Use of the AVOXimeter 4000 ..............6 Summary and Explanation of the Test ..............6 Glossary of Abbreviation Equivalents ……………………………………………………7 Operating Precautions and Warnings ............... 8 Limitations ........................ 9 DESCRIPTION ....................... 10 Front Panel......................10 Keypad ........................ - Page 4 OPERATION ....................... 329 Startup ........................32 Sample Collection and Preparation .................33 Sample Collection ..................33 Sample Preparation ..................33 Running a Test .......................34 Running a Test on a Patient Sample ............34 Using the Printer .....................36 Printing the Current Test Results ..............36 Specifying Automatic Printing of Results .............36 Changing the Serial Port Baud Rate and Parity ..........36 Data Management ....................37 Reviewing and/or Printing the Last Sample ..........37...
- Page 5 Important Labels and Symbols Before using the AVOXimeter 4000, it is essential that the contents of this Operator’s Manual, any labels on the instrument or its packaging, and instructions accompanying AVOXimeter 4000 cuvettes are read and understood by the operator. These materials make reference to additional...
-
Page 6: Introduction
Up to three liquid control lot numbers for each level of Liquid Quality Control (LQC) can be stored in the AVOXimeter 4000 and must be tagged to the stored or printed records. Cuvette lot numbers can also be tagged to the LQC records. The instruments can be configured so that only authorized operators can operate the system and that patient IDs can be entered for each test run. -
Page 7: Glossary Of Abbreviation Equivalents
1.39 is the amount of oxygen assumed to be carried by one gram of oxygenated hemoglobin (Hϋfner’s Number). Depending on your facility protocols, the Hϋfner’s Number stored in the AVOXimeter 4000 can be set at any value in the range of 1.30 to 1.39 (see page 30). Glossary of Abbreviation Equivalents In some cases, the display screen of the AVOXimeter 4000 does not show the most commonly used format for a specific constituent’s abbreviation. -
Page 8: Operating Precautions And Warnings
35°C, 95°F). Such exposure could affect the performance of any type of electronic instrumentation. ● DO NOT drop the AVOXimeter 4000 instrument, and do not use the results if the instrument is dropped during a test. ● Only properly qualified personnel should attempt to open and perform work on the AVOXimeter 4000 instrument as identified in this manual. -
Page 9: Limitations
Limitations Do not disturb the instrument while a test is in progress. As with all diagnostic tests, AVOXimeter 4000 test results should be scrutinized in light of a specific patient’s condition and therapy. Any results exhibiting inconsistency with the patient’s... -
Page 10: Description
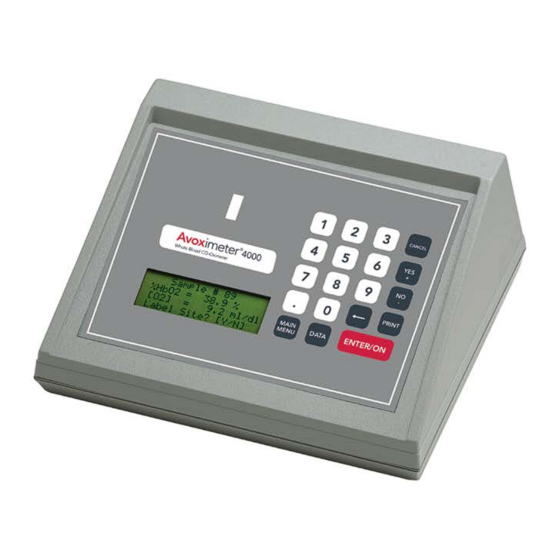
AVOXimeter 4000 Operator’s Manual 2 Description The AVOXimeter 4000 (Figure 1) is a tabletop device for use at the bedside. It contains a test chamber which performs all operations to measure the concentrations of reduced oxyhemoglobin (HHb), oxyhemoglobin saturation (%0... -
Page 11: Keypad
AVOXimeter 4000 Operator’s Manual Test Chamber Number Keys (White) Action Keys (Grey) Enter/On Key Display (Red) Panel Menu Keys (Grey) Figure 2. Front Panel Keypad The routine analysis of blood samples does not require the use of menus or the numeric keypad. -
Page 12: Menus
AVOXimeter 4000 Operator’s Manual Menus The principal menus, their commands, and the procedure to access each menu are summarized below: Note: Press the button at any time to return to the previous menu. Menu Commands Access Main Menu Press the key when a test is not running or another menu is not active. -
Page 13: Test Cuvettes
Federal, state and local laws and regulations require that hazardous waste be disposed of in a specific manner. Waste material from the AVOXimeter 4000 which may be classified as biohazardous include used cuvettes. It is important that steps be taken to dispose of these materials in accordance with the prevailing regulations in your location. -
Page 14: Connections
Figure 4. Rear Panel Components Automatic Standby and Shutdown The AVOXimeter 4000 enters a low-power standby mode after the instrument has been idle for a specified period of time (the standby delay). The instrument is factory preset for a standby delay time of 60 minutes, but a time of 10 to 180 minutes can be specified (see page 22). -
Page 15: Instrument Specifications
Nickel Cadmium (NiCad) Approximately 8 hours (constant run) or 10 complete test cycles Operating Time On Battery per charge. Tests may also be run while the AVOXimeter 4000 is plugged into the AC/DC power module. Anticipated Battery Life Approximately 500 charge / discharge cycles... -
Page 16: Interference
7.1 < pH < 7.8) Calibration The AVOXimeter 4000 is factory-calibrated and employs highly stable state-of-the-art light sources. Should recalibration be required please contact a Technical Support representative. Proper calibration also requires entry of the correct cuvette pathlength by the user (see page 30) and use of a customary value for Hüfner’s number (see page 30). -
Page 17: Getting Started
AVOXimeter 4000 Operator’s Manual 3 Getting Started Unpacking and Inspection Note: Inspect each component for damage when unpacking. If damage is observed, contact your shipping representative immediately. Remove any protective packaging that may be present around the instrument. Examine the packaging material to be sure that the AC Adapter, temperature probe, connecting cables, or other components have been removed. -
Page 18: Optional Materials
This eliminates the risk of the instrument powering down during a test. Fully charged batteries will allow the AVOXimeter 4000 to analyze blood samples continuously for up to 8 hours when the display is set at medium brightness. -
Page 19: Setting Up The Instrument
AVOXimeter 4000 Operator’s Manual Press to display the time, date, and battery menu again. Press to return to the previous menu, if desired. Setting Up the Instrument The user can specify the display brightness, specify the units that are used for reporting total hemoglobin (tHb), change the date and time, and specify the length of time that the instrument is idle before it enters the standby mode. -
Page 20: Enabling Or Disabling Display Of [So Ct], And [O Cap]
AVOXimeter 4000 Operator’s Manual Enabling or Disabling Display of SO Ct, and O Display of calculated oxygen content (O Ct), percent saturation (SO ) and oxygen carrying capacity (O Cap) of the blood sample can be enabled or disabled. Oxygen content (O... -
Page 21: Changing The Date And Time
AVOXimeter 4000 Operator’s Manual Changing the Date and Time Changing the Time: Display the “Time, Date, and Temperature” menu (a submenu of , see page 12). Press followed by to display the current time: Press followed by to change the time: Use the number keys to enter the new time, then press . -
Page 22: Setting The Standby Delay
AVOXimeter 4000 Operator’s Manual Use the number keys to enter the new date, then press . The new date is displayed. Press followed by . The “Time, Date, and Battery” menu is again displayed. Press to return to the previous menu, if desired. -
Page 23: Specifying Entry Of User Id And/Or Patient Id
AVOXimeter 4000 Operator’s Manual Specifying Entry of User ID and/or Patient ID A User ID and/or Patient ID can be entered for any test. The User ID and/or Patient ID is included in the results record for tests that are run and can be included in the printed results. Three alternatives are available for entry of User ID: ●... - Page 24 AVOXimeter 4000 Operator’s Manual Disabling the Requirement to Enter an Authorized User ID: Display the “Data Management” menu (a submenu of , see page 12). Press followed by to display the current User ID setting: Press followed by . A confirmation prompt is displayed, and the “User and Patient ID”...
- Page 25 AVOXimeter 4000 Operator’s Manual Reviewing and/or Deleting Authorized User IDs: Display the “Data Management” menu (a submenu of , see page 12). Press followed by to display the current User ID setting: Note: User ID: must be ON to proceed.
- Page 26 AVOXimeter 4000 Operator’s Manual Printing a List of Authorized User IDs: Prepare the printer (see page 36). Display the “Data Management” menu (a submenu of , see page 12). Press followed by to display the current User ID setting: Note: User ID: must be ON to proceed.
- Page 27 AVOXimeter 4000 Operator’s Manual Specifying Whether Authorized User IDs are Included on Results Printouts: Display the “Data Management” menu (a submenu of , see page 12). Press followed by to display the current User ID setting: Note: User ID: must be ON to proceed.
-
Page 28: Specifying Optional Entry Of A User Id Whenever A Test Is Run
AVOXimeter 4000 Operator’s Manual Specifying Optional Entry of a User ID Whenever a Test is Run Enabling Optional Entry of User IDs: Display the “Data Management” menu (a submenu of , see page 12). Press followed by to display the current User ID setting:... -
Page 29: Specifying Optional Entry Of A Patient Id Whenever A Test Is Run
AVOXimeter 4000 Operator’s Manual Specifying Optional Entry of a Patient ID Whenever a Test is Run Enabling Optional Entry of Patient IDs: Display the “Data Management” menu (a submenu of , see page 12). Press followed by to display the current Patient ID setting:... -
Page 30: Specifying A Different Value For Hüfner's Number
(see page 6). Although Hüfner’s number is generally assumed to be 1.39 mL/gm, facilities may use a different value and may wish to set the AVOXimeter 4000 to match other instruments in the facility. Display the “Calibration” menu (a submenu of , see page 12). -
Page 31: Calibration
Re-Calibration If the AVOXimeter 4000 results are out of range with either blood samples or controls and troubleshooting does not resolve the issue, re-calibration may be necessary. Please contact Technical Support for more information on re-calibration. -
Page 32: Operation
AVOXimeter 4000 Operator’s Manual 4 Operation Startup If Entry of an Authorized User ID is Not Required: (see page 23) Press . The instrument starts and performs a series of self-tests. “READY” and “Insert Cuvette” are displayed when a test can be run: Confirm that the Cal Code is the same as the one marked on the package of cuvettes. -
Page 33: Sample Collection And Preparation
AVOXimeter 4000 Operator’s Manual Sample Collection and Preparation Sample Collection Collect whole blood samples in a sodium or lithium heparinized syringe. Do not use samples that contain excessive volumes of anticoagulant or are diluted with saline. Note: Refer to CLSI document H18-A3, entitled “Procedures for the Handling and Processing of Blood Specimens –... -
Page 34: Running A Test
AVOXimeter 4000 Operator’s Manual Running a Test Running a Test on a Patient Sample Verify that the instrument is ready to run a test and that the “READY” - “Insert Cuvette” screen is displayed: Holding the cuvette by the finger grip on the black cap, insert the cuvette (with the syringe still attached with vent patch to the left) into the test chamber. - Page 35 AVOXimeter 4000 Operator’s Manual The screen for specifying the sample type is displayed: Press followed by If optional entry of Patient IDs is enabled (see page 28), the screen for entering a Patient ID is displayed: Note: To bypass entry of a Patient ID, press ●...
-
Page 36: Using The Printer
Changing the Serial Port Baud Rate and Parity If a computer is being connected to the AVOXimeter 4000, the baud rate and parity of the serial port on the instrument may need to be changed to optimize communication. -
Page 37: Data Management
AVOXimeter 4000 Operator’s Manual Data Management Stored results can be reviewed, printed, and purged (if desired). CAUTION: Once the instrument database contains the results of 100 tests, the results from the oldest test are automatically deleted when a test is run. Use the Data Transfer function to transfer data to an information system. -
Page 38: Locating, Reviewing, And/Or Printing Any Sample
AVOXimeter 4000 Operator’s Manual Locating, Reviewing, and/or Printing any Sample (If needed) Turn on the printer. Display the “Stored Data” menu (a submenu of , see page 12). Press followed by . A screen to specify the test record number is... -
Page 39: Quality Control
Verify that the serial number on each filter matches the serial number of the instrument when performing optical quality control. Each set of yellow and orange filters can only be used only with the AVOXimeter 4000 of the same serial number and cannot be shared between different instruments. - Page 40 AVOXimeter 4000 Operator’s Manual The screen for specifying the sample type is displayed: Press followed by . The screen for specifying QC type is displayed: Press followed by . The screen for specifying filter type is displayed: Press the number key corresponding to the filter being run, followed by...
-
Page 41: Running Liquid Controls
AVOXimeter 4000 Operator’s Manual Running Liquid Controls It is recommended to use the following Liquid Quality Controls (LQC): ● RNA Medical CO-Oximeter controls, available from RNA Medical, Devens, MA., phone 978 772-9070 or toll-free 800-533-6162. Verify that the instrument is ready to run a test and that the “READY” - “Insert Cuvette”... - Page 42 AVOXimeter 4000 Operator’s Manual Select the previously entered (see page 38) lot number and press cuvette lot number screen is displayed: ● If the previously entered cuvette lot number is to be used, press followed by . A confirmation screen is displayed.
-
Page 43: Entering Liquid Control Lot Numbers
AVOXimeter 4000 Operator’s Manual Entering Liquid Control Lot Numbers Three lot numbers for each of three levels of liquid control can be entered into the instrument for later reference. Display the “Data Management” menu (a submenu of , see page 12). -
Page 44: Entering Cuvette Lot Numbers
AVOXimeter 4000 Operator’s Manual Entering Cuvette Lot Numbers The lot number of cuvettes can be entered into the instrument for later reference. Display the “Calibration” menu (a submenu of , see page 12). Press followed by to display the cuvette lot number screen:... -
Page 45: Shutdown
AVOXimeter 4000 Operator’s Manual Shutdown Press (see page 12). Press followed by . The instrument will shut down. Simultaneously press . The instrument will shut down. -
Page 46: Troubleshooting
AVOXimeter 4000 Operator’s Manual Troubleshooting Symptom Possible Cause Action Required The instrument does 1. The battery is discharged, 1. Connect the AC Adapter to an not turn on. and the AC Adapter is not AC outlet and the AVOXimeter connected to an AC outlet 4000. - Page 47 AVOXimeter 4000 Operator’s Manual Symptom Possible Cause Action Required 4. The microprocessor is 4. See above. locked up. Measurements of 1. The optical detector may be 1. Run optical quality control. If %HbO are not contaminated by blood or needed, clean the optical accurate foreign material.
- Page 48 AVOXimeter 4000 Operator’s Manual Symptom Possible Cause Action Required The following ERROR: 1. Microprocessor error. 1. Press the keys message is displayed: simultaneously to turn the instrument off, then turn the “Uninitialized Vector instrument back on. Service Required“ 2. If the problem persists, contact...
-
Page 49: Maintenance
AVOXimeter 4000 Operator’s Manual 5 Maintenance Periodic maintenance procedures must be performed on the AVOXimeter 4000 in order to assure consistent efficient performance or to repair/replace user-serviceable components. Inspect and clean the exterior of the instrument as required. Remove residual dried blood or other foreign matter using a water-dampened cloth. -
Page 50: Cleaning The Optical Detector
1. # 0 Phillips screwdriver 2. 5 mm nutdriver 3. 1/4 inch nutdriver Disconnect the AVOXimeter 4000 from the AC Adapter. Remove the four screws from the bottom of the instrument, using the #0 Phillips screwdriver. Holding the upper and lower covers together, place the instrument in the upright position, with the keypad to your right. - Page 51 AVOXimeter 4000 Operator’s Manual Keypad Cable Display Cable Locate the flat cable that runs from the black optical unit to the main circuit board. Disconnect the cable from the J203 connector on the main circuit board. Locate the coaxial cable that runs from the black optical unit to the small circuit board.
- Page 52 AVOXimeter 4000 Operator’s Manual Using the 1/4" nutdriver, remove the four screws and four nuts that secure the two halves of the black optical unit. Take care when separating the two halves of the optical unit. Do not lose the small torsion spring or the shutter door. Set them aside in a safe place for reassembly.
- Page 53 AVOXimeter 4000 Operator’s Manual Place the optical unit back on the front panel. Using the 5mm nutdriver, secure the black optical unit to the front panel with the four nuts (and washers, if applicable). Optical Unit Position the upper cover (containing the black optical unit) in an upright position over the lower part of the instrument, with the keypad to the right.
-
Page 54: Replacing The Battery
Record the temperatures displayed on the battery status screen. Then read the thermometer and record it as well. If the AVOXimeter 4000 temperature reading is within ± 3°C of the NIST traceable thermometer, the AVOXimeter 4000 is properly calibrated. If the AVOXimeter 4000 differs from the thermometer by more than 3°C, call Technical Support (800) - Page 55 AVOXimeter 4000 Operator’s Manual Plastic Tie Blue and White Battery Cable Plastic Tie Remove the battery, being careful not to snag any components when pulling the cable out from underneath the main circuit board. If the battery well contains tape, remove the tape.
- Page 56 AVOXimeter 4000 Operator’s Manual Secure the new battery in the battery well, using the new white plastic ties. Note: When securing the battery to the battery well, be sure that the plastic ties are routed underneath the battery well. Cut the excess length from the plastic ties using the diagonal cutting pliers.
-
Page 57: Quality Control Logs
AVOXimeter 4000 Operator’s Manual 6 Quality Control Logs Quality control logs for the yellow and orange filters are shown on the following pages. - Page 58 AVOXimeter 4000 Operator’s Manual...
- Page 59 AVOXimeter 4000 Operator’s Manual...
-
Page 60: Warranty
AVOXimeter 4000 Operator’s Manual 7 Warranty Certification, Warranty and Service Warranty, and Service ACCRIVA, declares to the original purchaser that each instrument manufactured and sold by ACCRIVA, or sold by an authorized ACCRIVA dealer, shall be free from defects in material and workmanship and, under normal and proper use conditions, warrants it for a period of one year from installation and no more than 13 months from the shipping date, except as otherwise provided in writing. - Page 61 AVOXimeter 4000 Operator’s Manual THIS WARRANTY IS GIVEN EXPRESSLY AND IN LIEU OF ALL OTHER WARRANTIES, EXPRESS OR IMPLIED. PURCHASER AGREES THAT THERE IS NO WARRANTY OR MERCHANTABILITY AND THAT THERE ARE NO OTHER REMEDIES OR WARRANTIES, EXPRESS OR IMPLIED, WHICH EXTEND BEYOND THE CONTENTS OF THIS AGREEMENT.
-
Page 62: Safety Standards
AVOXimeter 4000 Operator’s Manual 8 Safety Standards The AVOXimeter 4000 instrument complies with the following safety standard requirements and directives: CAN/CSA C22.2 No. 61010-1:2012 CAN/CSA C22.2 No. 61010-2-101:2009 CAN/CSA C22.2 No. 61010-2-010:2009 UL 61010-1:2012 IEC/EN 61010-1:2010 IEC/EN 61010-2-101:2002 IEC/EN 61010-2-010:2003... -
Page 63: Guidance And Manufacturer's Declaration - Electromagnetic Emissions
Guidance and Manufacturer’s Declaration – Electromagnetic Emissions The AVOXimeter 4000 is intended for use in the electromagnetic environment specified below. The customer or the user of the AVOXimeter 4000 should assure that it is used in such an environment. Emissions Test... -
Page 64: Guidance And Manufacturer's Declaration - Electromagnetic Immunity
Guidance and Manufacturer’s Declaration – Electromagnetic Immunity The AVOXimeter 4000 is intended for use in the electromagnetic environment specified below. The customer or the user of the AVOXimeter 4000 should assure that it is used in such an environment. IEC 60601... -
Page 65: Index
AVOXimeter 4000 Operator’s Manual Index backlighting ............15 labels and symbols ..........v batteries limitations ............4 charging ............14 liquid controls ..........38 checking ............14 entering lot numbers ........40 calculations ............2 lockout ..............9 calibration ............27 menus ..............7... - Page 66 AVOXimeter 4000 Operator’s Manual This page was left intentionally blank.
- Page 67 AVOXimeter 4000 Operator’s Manual This page was left intentionally blank.
- Page 68 AVOXimeter 4000 Operator’s Manual AP4001EN 0515...
Need help?
Do you have a question about the AVOXimeter 4000 and is the answer not in the manual?
Questions and answers
I **** seeing fluctuation in the reading for the yellow filter. I have tried recalibrating the yellow filter and I **** still seeing sporadic readings
Fluctuation in the yellow filter readings on the Accriva Diagnostic AVOXimeter 4000 despite recalibration could be caused by contamination of the optical detector by blood or debris. The manual states that if quality control results are not acceptable, erroneous results occur, or error messages are displayed, contamination is the most likely cause and cannot be resolved by recalibration. It is recommended to consult the Troubleshooting section for further guidance.
This answer is automatically generated