Advertisement
Quick Links
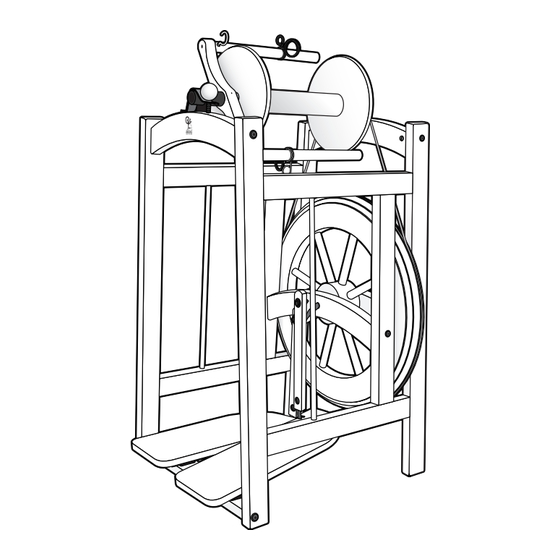
ASHFORD COUNTRY SPINNER 2
Ashford Handicrafts Limited
Factory and Showroom: 415 West Street
PO Box 474, Ashburton 7700 New Zealand
Telephone 64 3 308 9087 Facsimile 64 3 308 8664
Email: sales@ashford.co.nz Internet: www.ashford.co.nz
INSTRUCTIONS
Ashford Guarantee
Thank you for purchasing this Ashford product. In the unlikely event there is
any fault in manufacture we will replace the item. To validate our guarantee
please visit our website or write to us.
CS240717V7
Advertisement

Related Manuals for Ashford COUNTRY SPINNER 2


Summary of Contents for Ashford COUNTRY SPINNER 2
- Page 1 Ashford Guarantee Factory and Showroom: 415 West Street Thank you for purchasing this Ashford product. In the unlikely event there is PO Box 474, Ashburton 7700 New Zealand any fault in manufacture we will replace the item. To validate our guarantee Telephone 64 3 308 9087 Facsimile 64 3 308 8664 please visit our website or write to us.
-
Page 2: Tools Required
Before commencing, please read these instructions of colour and grain. For a silky smooth matt finish, completely, identify the parts and note the assem- use the Ashford Wax Finish to enhance the natural bly sequence. colours and character of this timber. - Page 3 Real Scale Hardware List...
- Page 4 Squeeze Thread the flyer hooks into the flyer arms. Squeeze and slide the stainless steel yarn guides onto the flyer arms. Assemble the bobbin by aligning the screw holes in the bobbin end, whorl and long end of the bobbin centre.
- Page 5 Insert wooden dowels into both ends of the rails. Top front rail Top back rail Wheel support rail Wheel support rail Treadle rail Locate the dowels on one end of the top front rail, the top back rail, Top back rail both wheel support rails and the treadle rails into the holes on one side of...
- Page 6 Hook the drive belt over the back flyer bearing and hang it between the 2 wheel support rails. Position the wheel between the 2 wheel support rails. CHECK: The smallest groove in the wheel is towards the front of the Spinner.
- Page 7 Insert the crank through the ball bearing in the front wheel support, through the wheel and into the ball bearing in the rear wheel support. If tight, loosen the bolts securing the wheel support rails, insert the crank and retighten. CHECK: Make sure the drive belt is still around the wheel.
- Page 8 Locate the metal cover plates into the polyurethane hinges. Then attach the hinges to the treadle rail with 16mm (5/8”) screws. Lay the Spinner on its back. Position the treadle boards against the hinges. Locate the metal cover plates into the polyurethane hinges.
- Page 9 Slide the inner shell of the conrod universal joint onto the crank until it clicks into the groove. Lay the Spinner on its back. Insert the front conrod joint into the large slot in right hand treadle board. NOTE: The front conrod will attach to the right treadle board.
- Page 10 Spinner. If you want to ply your yarn, spare bobbins are available from your local Ashford Dealer. HINT: The Spinner is bobbin lead and will require very little tension to draw the yarn onto the bobbin.
-
Page 11: Maintenance
Large Medium Small Wheel Maintenance To make spinning easier apply a drop of Ashford Spinning Wheel Oil to the flyer, bobbin and conrod bearings. Remove drive belt when not in use to avoid it stretching. - Page 12 Spinning on the Country Spinner 2. Because the Country Spinner 2 is bobbin lead, your yarn needs to be strong enough to turn the flyer. - Place the drive belt on the slow ratio. - Loosen the leather brake so there is no tension on the flyer shaft.
Need help?
Do you have a question about the COUNTRY SPINNER 2 and is the answer not in the manual?
Questions and answers