Epson TM-J7100 Developer's Manual
Hide thumbs
Also See for TM-J7100:
- User manual (104 pages) ,
- Development manual (32 pages) ,
- Manual (13 pages)

Related Manuals for Epson TM-J7100


Summary of Contents for Epson TM-J7100
- Page 1 Confidential Developer’s Guide TM-J7000/J7100 Copied Date Copied by English EPSON 403221801...
- Page 2 Confidential...
- Page 3 ❏ On the earlier of (a) termination of your relationship with Seiko Epson, or (b) Seiko Epson’s request, you must stop using the confidential information. You must then return or destroy the information, as directed by Seiko Epson.
-
Page 4: Revision Information
EPSON took the initiative by introducing ESC/POS, a proprietary POS printer command system including patented commands and enabling versatile POS system construction with high scalability. Compatible with all types of EPSON POS printers and displays, this proprietary control system also offers the flexibility to easily make future upgrades. Its popularity is worldwide. -
Page 5: Safety Precautions
Continued use may lead to fire or electric shock. Immediately unplug the equipment and contact your dealer or a Seiko Epson service center for advice. ❏ Never attempt to repair this product yourself. Improper repair work can be dangerous. -
Page 6: Safety Label
❏ Before moving the product, unplug it and unplug all cables connected to it. ❏ If ink leaks out of the printer, wipe up the ink with a cloth or similar material immediately and contact your dealer or a Seiko Epson service center for advice. Safety Label... -
Page 7: Table Of Contents
Confidential TM-J7000/TM-J7100 Developer’s Guide Developer’s Guide TM-J7000/J7100 Revision Information ..........ii About This Booklet . - Page 8 Confidential Chapter 2 Adjustments and Settings Using Different Paper Width ..........1 Paper Near-End Sensor .
-
Page 9: Chapter 1 Product Overview
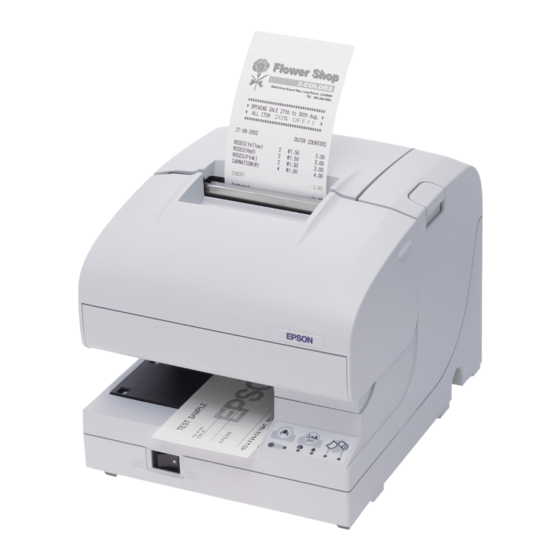
Confidential TM-J7000/TM-J7100 Developer’s Guide Chapter 1 Product Overview Product Structure Part Names roll paper cover ink cartridge cover Connectors display module connector drawer kick out power supply switch control panel interface connector connector power supply connector Control Panel TM-J7000 TM-J7100 * For detailed information for the control panel, see “Control Panel (LEDs and Buttons)”... -
Page 10: Models
UB-U02 / U02II (Downstream hub not provided) Ethernet UB-E01 Consumables ❏ Ink cartridge [TM-J7000] SJIC8 [TM-J7100] SJIC6, SJIC7 Note: Use Seiko Epson specified ink cartridges. Performance of the printer when other ink cartridges are used is not guaranteed. 1-2 Product Overview Rev. A... -
Page 11: Printer Specifications
Printing Print method Serial inkjet dot matrix ❏ TM-J7000: single-color, 64 nozzles × 1 line ❏ TM-J7100: two-color, 64 nozzles × 2 lines ❏ Density: 180 × 180 dpi Interfaces ❏ Standard: RS-232 and IEEE 1284 parallel ❏ Options: RS-485, all UB boards, except the UB-P02, 10Base-T Reliability ❏... -
Page 12: Environmental Conditions
(The printer must be kept at or below 70°C {158°F} whenever it is operating or in storage. Ambient temperature (°C) Operating Temperature and Humidity Range Electrical Characteristics ❏ Supply voltage 24 V ± 2.4 V (using optional EPSON power supply 180) ❏ Current consumption (except when the drawer kick-out is used): Operating Mean: Approximately 1A (all lines contain character font A α-N) -
Page 13: Product Handling
Confidential TM-J7000/TM-J7100 Developer’s Guide ❏ Width: 195 mm {7.68"} ❏ Depth: 237 mm {9.33"} ❏ Mass: Approximately 4.4 kg Product Handling Control Panel (LEDs and Buttons) PAPER FEED PAPER FEED CLEANING CLEANING TM-J7100 TM-J7000 ERROR POWER PAPER OUT POWER ERROR... -
Page 14: Leds
Confidential LEDs POWER Lights when the power is on and is off when the power is off; flashes during cleaning and other operations such as power-on and power-off. Power on process (when an operation is being executed): Flashing 320 ms 320 ms Power off process (after DLE DC4, fn = 2 is executed): Flashing 160 ms... -
Page 15: Buttons
Confidential TM-J7000/TM-J7100 Developer’s Guide PAPER OUT Lights when roll paper is out or nearly out. Flashes when the printer is in the self test standby state. CUT SHEET Lights when cut sheet (slip, check) is selected as print sheet. Off when roll paper is selected as print sheet. -
Page 16: Power Switch And Power Switch Cover
Confidential • When cleaning is being performed or an error has occurred with any sheet selected. • When it is disabled with the ESC c 5 command. There is the case that even if the paper source is changed, the printer may feed the previously selected paper source. -
Page 17: Power Switch Cover
Confidential TM-J7000/TM-J7100 Developer’s Guide Power Switch Cover You can use the enclosed power switch cover to make sure that the power switch is not accidentally pressed. Just press the cover into place to install it. If you need to turn the power switch on or off with the cover attached, you can insert a thin tool into one of the holes in the cover to operate the switch. - Page 18 Confidential CAUTION: Be sure to use roll paper that meets the specifications. Follow these steps to install or replace paper: 1. Make sure the printer is on. 2. Open the roll paper cover by pressing the cover open button. 3. Remove the used roll paper core if there is one. 4.
-
Page 19: Inserting Slip Paper
Confidential TM-J7000/TM-J7100 Developer’s Guide Inserting Slip Paper Note: Be sure the paper is flat, without curls, folds, or wrinkles. Do not insert any multiple sheet paper because this may cause a paper jam. Use only single sheet paper. Because the printer is an inkjet printer, pressure sensitive copy paper cannot be used. -
Page 20: Instructions
The TM-J7100 has two separate cartridges, one each for black and colored ink (either red, green, or blue). Therefore, the TM-J7100 has two INK OUT LEDs, one for the black and one for the color. Follow these steps to install an ink cartridge for the first time or to replace an empty ink cartridge. - Page 21 Confidential TM-J7000/TM-J7100 Developer’s Guide 4. Open the ink cartridge cover using the tabs on the sides of the cover. 5. Lift up the empty ink cartridge by using the tab. TM-J7100 TM-J7000 CAUTION: Do not put your fingers inside the ink cartridge compartment or you may be injured by a plastic projection.
- Page 22 6. Take a new ink cartridge out of its packing and remove the yellow tape. CAUTION: You must not remove any tape on which the EPSON logo is printed. 7. Carefully insert a new ink cartridge from the top and push it firmly but gently until it clicks into place.
-
Page 23: Disposal Of Used Cartridges
Confidential TM-J7000/TM-J7100 Developer’s Guide Disposal of Used Cartridges Dispose of used ink cartridges as industrial waste products. Obey the laws and regulations of your country and district. Ink Cartridge Life To make your ink cartridges last as long as possible, follow these simple rules: ❏... -
Page 24: Cleaning The Micr Mechanism
Confidential 2. The printer will detect the check and start drawing it in. When the printer starts drawing it in, let go of the check immediately. When the printer ejects the check and the CUT SHEET LED starts blinking again; remove the check by pulling it straight up; do not pull it at an angle. -
Page 25: Self-Test On Roll Paper
Confidential TM-J7000/TM-J7100 Developer’s Guide ❏ Printer mechanisms ❏ Print quality ❏ Control software version ❏ DIP switch settings ❏ Memory switch settings ❏ Paper width to be set Self-test on roll paper Follow the following procedure to start the self-test on roll paper. -
Page 26: Self-Test Of The Endorsement Mechanism
Confidential NOTES: Make sure to use a cut sheet with a width wider than 85 mm {3.35"} because the self-test on the cut sheet is full-column printing regardless of the paper width that is currently selected. If the width of the cut sheet is narrower than full-column print width, the ink may make the platen dirty beyond the edge of the paper. -
Page 27: Shipping Procedure
Confidential TM-J7000/TM-J7100 Developer’s Guide Hexadecimal Dump & Shipping Procedure To ship the printer, follow these steps: 1. Remove the roll paper and ink cartridge. 2. Turn off the power supply. 3. Check that the POWER LED is off. 4. Remove the power supply connector and other connectors. -
Page 28: Troubleshooting
Confidential Troubleshooting Check the following cases. See also the “Error LED Codes” item to locate the causes. ✔ The print head temperature may be high or low. Wait until the print head cools or warms and the printer resumes printing automatically. ✔... -
Page 29: Error Led Codes
Confidential TM-J7000/TM-J7100 Developer’s Guide Error LED Codes Errors that Automatically Recover ERROR LED Flashing Pattern approx. 320 ms Error Description Recovery Condition Roll paper cover Roll paper cover Recovers open error (when open is detected automatically when auto recovery is during printing on the the cover is closed. -
Page 30: Errors That Are Possible To Recover
Confidential Errors that are Possible to Recover ERROR LED Flashing Pattern approx. 320 ms Error Description Recovery Condition Paper roll cover Roll paper cover Recovers by DLE ENQ open error (when open is detected (n = 1) or DLE ENQ (n Possible recovery is during printing on the = 2) with the cover... -
Page 31: Errors That Are Impossible To Recover
Confidential TM-J7000/TM-J7100 Developer’s Guide Errors that are Impossible to Recover ERROR LED Flashing Pattern approx. 320 ms Error Description Recovery Condition CPU execution The CPU executes an Impossible to error incorrect address or recover. the interface board is not connected. -
Page 32: Data Receive Error
Confidential ❏ The ERROR LED flashes. Data Receive Error If one of the following errors occurs during serial interface communication, the printer prints “?” or ignores the data, depending on the setting memory switch 1-4. ❏ Parity error ❏ Framing error. ❏... -
Page 33: Chapter 2 Adjustments And Settings
Confidential TM-J7000/TM-J7100 Developer’s Guide Chapter 2 Adjustments and Settings Using Different Paper Width This printer accommodates 76 mm wide paper rolls with no adjustment; however you can change the roll paper width to 82.5 mm, 69.5 mm, or 57.5 mm. - Page 34 Confidential Note: The amount of paper remaining on roll paper varies depending on the outer and inner diameters of the roll paper core. 1. Set the roll paper diameter A to obtain the corresponding adjustment shown in the table below. Note: The inner diameter of the paper core should be 10 mm {0.4 in.} or more.
-
Page 35: Dip Switches
Confidential TM-J7000/TM-J7100 Developer’s Guide 3. Be sure that the sensor lever operates smoothly after setting. Note: If the roll paper becomes loose due to the paper quality, the near-end sensor may operate incorrectly. DIP Switches The DIP switches are located on the main board inside the bottom cover of the printer. -
Page 36: Memory Switches
Confidential Transmission Speed Transmission speed (bps) SW1-7 SW1-8 9600 19200 38400 115200 bps: bits per second Note: Changes in DIP switch settings are recognized only when the printer power is turned on or when the printer is reset by using the interface. If a DIP switch setting is changed after the printer power is turned on, the change does not take effect until the printer is turned on again or is reset. - Page 37 Confidential TM-J7000/TM-J7100 Developer’s Guide Memory Switch Msw 1 Function 0 (Off) 1 (On) Transmits the power ON Does not transmit Transmits information Reserved Receive buffer-full or Conditions for BUSY Receive buffer-full offline Data processing for receiving Prints "?" Ignored error...
- Page 38 Confidential Function 0 (Off) 1 (On) Slip print columns (for font A / font B) Face of the slip 48 / 64 52/ 72 Endorsement (back of the slip) 46 / 61 50 / 69 Receipt print columns (for font A / font B) Paper width 57.5 mm {2.26"}...
-
Page 39: Memory Switch Setting Mode
Confidential TM-J7000/TM-J7100 Developer’s Guide Customized value is defined as follows: Customized Value Item Value 57.5 mm {2.26"} 69.5 mm {2.74"} Paper width selection 76 mm {2.99"} 82.5 mm {3.25"} Communication conditions for the serial interface are defined as follows: Communication Conditions for the Serial Interface... -
Page 40: Starting The Memory Switch Setting Mode
Confidential • Data processing for receiving error (Msw1-4) ❏ Automatic line feed (Msw 1-5) ❏ Interface reset signal (Msw1-7, Msw1-8) Starting the memory switch setting mode Use the following procedure to start the memory switch setting mode. 1. Open the roll paper cover. 2. -
Page 41: Operating Procedure
Confidential TM-J7000/TM-J7100 Developer’s Guide Operating procedure The procedures used for this process are described below. Entering Memory Switch Setting Mode 1. Open the roll paper cover and turn the power on while pressing the paper FEED button until POWER, ERROR, and PAPER OUT LED are on. - Page 42 Confidential Selecting individual settings ❏ Autocutter Press the FEED button the number of times required to select the desired Autocutter setting. Press FEED button Setting to select 0 times: No change 1 time: Autocutter enabled (Note: “Installed” is printed in the setting guidance) 2 times: Autocutter disabled (Note: “Not installed”...
- Page 43 Confidential TM-J7000/TM-J7100 Developer’s Guide ❏ Data length, handshake, or parity Press the FEED button the number of times required to select the desired “Data length, handshake, or parity” setting used for transmission conditions. Press FEED button Setting selected Data Length...
-
Page 44: Connection Form And Cables
Confidential Press the FEED button the number of times required to select the desired auto carriage return setting. Press FEED button Setting select ed 0 times: No change 1 time: Enabled 2 times: Disabled 3 or more times: No change ❏... - Page 45 Confidential TM-J7000/TM-J7100 Developer’s Guide Connections for usable serial cross cables are as follows: The type of cable that should be used depends on the operation and the handshake method for the TM printer. You can operate the TM printer with the Windows driver, OPOS, or ESC/POS commands.
- Page 46 Confidential DM-D500: A,B — — Other DM-D: not available DTR/DSR — Type A or B Type B — Type A or B Type B Y-connection TM printer is connected to the host PC via serial port and the customer display (DM-D) is connected to TM printer via modular connector.
-
Page 47: Parallel Connection
Confidential TM-J7000/TM-J7100 Developer’s Guide Application XON/XOFF DTR/DSR RTS/CTS TM side control (except OPOS) (DOS, OPOS, Visual C) (DOS, Windows driver, Visual C, control setting Visual Basic, MSComm) XON/XOFF Not available — — DTR/DSR — Type A or B Type B —... -
Page 48: Ethernet
Confidential Ethernet TM printers are connected to a network via a hub using an Ethernet cable. Note: If the TM printer is connected to the host PC via the Ethernet interface, a DM-D cannot be connected to the TM printer. 2-16 Adjustments and Settings Rev. -
Page 49: For Ibm Pos Systems
Confidential TM-J7000/TM-J7100 Developer’s Guide For IBM POS systems When installing this printer on an IBM POS system (IBM Sure POS 700 series, or IBM 4694 models 041, 044, and 144), follow the procedure below. 1. Remove the rubber feet. 2. Install new rubber feet as shown in the following illustration. - Page 50 Confidential 2-18 Adjustments and Settings Rev. A...
-
Page 51: Chapter 3 Application Development Information
Confidential TM-J7000/TM-J7100 Developer’s Guide Chapter 3 Application Development Information This section explains key words and miscellaneous information in a question and answer format and the single-pass processing for developing a system with the TM-J7000/J7100. Rev. A Application Development Information 3-1... -
Page 52: Key Words In Q & A
Confidential Key words in Q & A Category Question Answer Any one of the types of paper the printer can What is an active sheet? process, such as roll paper, a slip sheet, or a check. To select the functions the printer can use. For Why the active sheet is example, roll paper requires certain functions selected? - Page 53 Confidential TM-J7000/TM-J7100 Developer’s Guide Category Question Answer When do you need to select Before image scanning you need to select a the active sheet with GS ( G check as the active sheet. function 80? A check is automatically The current command, FS a 0 has multiple...
-
Page 54: Miscellaneous Information In A Q & A Format
Confidential Miscellaneous Information in a Q & A Format The following Q & A will help you understand more about the printer. Question Answer The printer prints all data in the line being What happens when an ink out occurs? printed when the ink out signal is received;... -
Page 55: Single-Pass Processing
Confidential TM-J7000/TM-J7100 Developer’s Guide Single-Pass Processing EPSON recommends the following sequence of MICR reading, endorsement printing, and printing on front for single-pass processing. Step User Operation Printer Operation Transmit GS ( G <Function 80> Selects the check as the paper source. - Page 56 Confidential (*2) After processing GS ( G <Function 85>, the printer flashes the CUT SHEET LED and does not take the next action until the paper is removed. (*3) The print starting position can be set once per each printing of face of the slip. NOTE: The following shows the paper position and paper feeding directions for the single-pass processing.
- Page 57 Confidential TM-J7000/TM-J7100 Developer’s Guide CLAMP 3. The cut sheet has been clamped when 2. The cut sheet is inserted. the it was detected. 4-1. MICR reading is performed. 4-2. MICR reading is completed. Rev. A Application Development Information 3-7...
- Page 58 Confidential 6. Feeds the cut sheet to the print start 7. Prints endorsement. position of the back. 9. Feeds the cut sheet to the print start 10. Prints on the face of the cut sheet and position of the face. feeds the cut sheet.
- Page 59 Confidential TM-J7000/TM-J7100 Developer’s Guide 11. Ejects the cut sheet. Rev. A Application Development Information 3-9...
- Page 60 Confidential 3-10 Application Development Information Rev. A...
-
Page 61: Chapter 4 Specifications
Confidential TM-J7000/TM-J7100 Developer’s Guide Chapter 4 Specifications Product Specifications Item Specifications Printing method Serial ink jet dot matrix Paper width Roll paper: 82.5 ± 0.5 mm, 76 ± 0.5 mm, 69.5 ± 0.5 mm, 57.5 ± 0.5 mm Autocutter Circular-type cutting method... -
Page 62: Print Specifications
64 nozzles ✕ 1 line Head nozzle array TM-J7000 Nozzle pitch approx. 0.141 mm (1/180 inch) 64 nozzles ✕ 2 lines (one line for each color) TM-J7100 Nozzle pitch approx. 0.141 mm (1/180 inch) Printing direction Bidirectional logical seeking Paper feed... - Page 63 Confidential TM-J7000/TM-J7100 Developer’s Guide Print Speed Print mode Font Unit Paper width (mm) Slip 57.5 69.5 82.5 {2.26”} {2.74”} {2.99”} {3.25”} Normal Font A (6 lpi) Font B (8 lpi) 10.7 Graphics mm/s High-speed Font A (6 lpi) 11.6 10.5 10.1...
-
Page 64: Character Specifications
Confidential Character Specifications Character Specifications Item Specifications Character type Alphanumeric 95 characters International 37 types 128 characters ✕ 11 pages Extended graphics (including one user-defined page) Character structure See "Character Configurations and Dimensions" table below. (Default is Font A.) Character dimensions See "Character Configurations and Dimensions"... -
Page 65: Receipt Printer Section
Confidential TM-J7000/TM-J7100 Developer’s Guide Receipt Printer Section Characters per Line and Printable Area for Roll paper 57.5 69.5 82.5 Remarks Paper roll width (mm) {2.26”} {2.74”} {2.99”} {3.25”} Number of dots for printing (dots) Printable width (mm) 50.8 67.7 72.2 {2.00”}... -
Page 66: Printable Area
Confidential Printable Area ABCDE 12345 Paper feed direction 567890 Printing area Paper roll width Printable Area Dimensions a (paper roll width) b (left margin) c (printing area) d (right margin) 57.5 {2.26”} 3.4 {0.13”} 50.8 {2.00”} (360 dots) 3.3 {0.13”} 69.5 {2.74”} 4.2 {0.17”} 61.0 {2.40”} (432 dots) -
Page 67: Printing Position Versus Cutter Position
Confidential TM-J7000/TM-J7100 Developer’s Guide Printing Position Versus Cutter Position The printing position in relation to cutter position is shown in the figure below. Position to be left Last line of previous receipt uncut Emergency cutter position Approx. 34 mm Auto cutting position {1.34”}... -
Page 68: Paper Feed Specifications
Confidential Paper Feed Specifications Paper Feed Specifications Item Specifications Paper feed method Friction feed Paper feed direction Bidirectional Feeding pitch Approx. 0.1411 mm (1/180 inch) Continuous feed speed Approx. 150 mm/s (approximately 5.9 inches/s) at 35.4 lps lps: lines per second Printable Area The first printing line position... -
Page 69: Micr Reader Section (Factory-Installed Option)
Total number of checks − (number of sheets misread or not identified.) × 100 Recognition rating (%)= Total number of checks • Check paper used for test is EPSON standard check paper. • Checks must be flat, without curls, folds, or wrinkles. Rev. A Specifications 4-9... -
Page 70: Insertion Direction And Endorsement Printing
Confidential Insertion Direction and Endorsement Printing Insert the check with the surface printed with the magnetic ink facing upward, following the slip side guide. Insertion direction Area of Personal Check where MICR Character Recognition is Impossible Notes on Using the MICR Reader ❏... -
Page 71: Endorsement Mechanism Section (Factory-Installed Option)
Confidential TM-J7000/TM-J7100 Developer’s Guide ❏ Let go of the check immediately as soon as the printer starts feeding it. Otherwise, the paper is not fed straight, causing paper jams and MICR reading errors. Also, do not open any covers. Endorsement Mechanism Section (Factory-Installed Option) -
Page 72: Notes On Using The Endorsement Mechanism
Confidential Note: The values shown in this figure are calculated ones. Consider this for the user design for the print starting position in the paper feeding direction. Notes on Using the Endorsement Mechanism ❏ The endorsement mechanism enables printing of endorsements on the back of a personal check. -
Page 73: Paper Specification
Confidential TM-J7000/TM-J7100 Developer’s Guide Paper Specification Paper Roll Specification Paper type Normal quality paper (only single-ply rolls can be used) Form Roll paper Paper width Can be selected an any of the following: 82.5 ± 0.5mm 76 ± 0.5mm 69.5 ± 0.5mm 57.5 ±... -
Page 74: Endorsement Paper Specification
Confidential ❏ Since the slip TOF sensor uses a reflective photo sensor and it detects from the back of slip paper, do not use paper that has holes or dark portions with low reflection (less than 40% reflection) at the sensor position. Area where paper holes are prohibited and reflection rate for the back of paper...
Need help?
Do you have a question about the TM-J7100 and is the answer not in the manual?
Questions and answers