Epson TM-J7200 series User Manual
Hide thumbs
Also See for TM-J7200 series:
- Technical reference manual (112 pages) ,
- Development manual (25 pages)
Table of Contents
Advertisement
User's Manual
Before Use . . . . . . . . . . . . . . . . . . . . . . . . . . . . . . . . . . . . . . . . . . 2
Part Names and Functions . . . . . . . . . . . . . . . . . . . . . . . . . . . 6
Setup . . . . . . . . . . . . . . . . . . . . . . . . . . . . . . . . . . . . . . . . . . . . . . 10
Maintenance . . . . . . . . . . . . . . . . . . . . . . . . . . . . . . . . . . . . . . . 28
Transporting . . . . . . . . . . . . . . . . . . . . . . . . . . . . . . . . . . . . . . . 29
Troubleshooting. . . . . . . . . . . . . . . . . . . . . . . . . . . . . . . . . . . . 31
Specification . . . . . . . . . . . . . . . . . . . . . . . . . . . . . . . . . . . . . . . 33
Consumable Products . . . . . . . . . . . . . . . . . . . . . . . . . . . . . . 34
Appendix . . . . . . . . . . . . . . . . . . . . . . . . . . . . . . . . . . . . . . . . . . 35
M00107201EN
Advertisement
Table of Contents

Related Manuals for Epson TM-J7200 series


Summary of Contents for Epson TM-J7200 series
-
Page 1: Table Of Contents
User's Manual Before Use ......... . 2 Part Names and Functions . -
Page 2: Before Use
English Before Use Please read this manual carefully before using this product. Keep this manual at hand for immediate reference whenever necessary. For details about the functions and operation procedure of this product and software, refer to Technical Reference Guide. Safety Precautions The symbols shown below are used in this manual in order to ensure safety and proper use of this product and to prevent danger to customers and other persons, and property damage. -
Page 3: Cautions On Handling
English ❏ Do not use a damaged power cable. Doing so may cause electric shock or fire. Contact qualified service personnel for advice if the power cable is damaged. Observe the following points so as not to damage the power cable: •... - Page 4 English CAUTION: ❏ Do not allow anyone to stand or place heavy objects on top of this product. Equipment may fall or collapse, causing breakage and possible injury. ❏ Install the cables and optional products in the proper direction according to the proper procedures. Failure to install correctly may cause fire or injury.
- Page 5 English ❏ Do not allow foreign objects to fall into the cartridge installation section. Doing so may cause printing malfunction. Remove any object that might have fallen into the installation section, taking care not to damage the section. ❏ When ink is charged for the first time (right after purchase), ink is consumed for filling the print head nozzle (ink discharge holes) to get ready for printing.
-
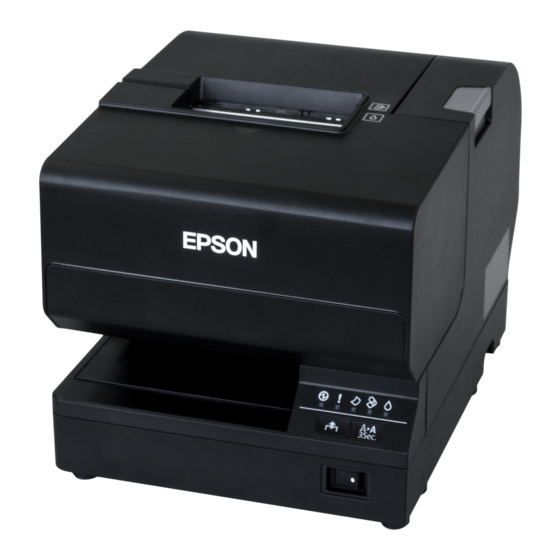
Page 6: Part Names And Functions
English Part Names and Functions Front Side TM-J7200 TM-J7700 Roll paper cover Open this cover to install/replace the roll paper. (U ") "Installing/Replacing the Roll Paper" on page 21 Front cover Open this cover to install/replace the ink cartridge. (U "Installing/Replacing the Ink Cartridge"... -
Page 7: Control Panel
English Control panel (Power) LED Lights up when the printer is turned on. Flashes during head cleaning and other operations such as when turning the printer on/off. (Error) LED Lights up when the printer is offline due to the following conditions. ... - Page 8 English (Feed) Button Press this button to feed the roll paper or cut sheet. Notes: Paper cannot be fed using this button in the following cases: • The front cover/roll paper cover is open. • Printer is in the slip paper insertion or removal state. •...
- Page 9 English Input/Output Ports DM-D connector For connecting the customer display. Drawer kick connector For connecting a modular cable for the cash drawer. Power supply connector For connecting the power cable. USB Type B port For connecting a USB cable for connecting to a computer. Ethernet connector For connecting a LAN cable.
-
Page 10: Setup
English Setup Removing the Protective Materials and Tape Protective materials and tape are applied for protection against impacts during transportation. Remove them before installation. Notes: The Protective materials and packaging box will be required for future transportation. Keep them in a safe place. -
Page 11: Installing The Printer
English TM-J7700 Installing the Printer Install this product in a location as follows: ❏ On an area larger than the bottom surface of the product. ❏ In a location free of vibration and impacts. ❏ In a location that is firm, stable, and horizontal. ❏... -
Page 12: Connecting The Ac Adapter
English Connecting the AC Adapter WARNING: Be sure to use the specified AC adapter [PS-180 (model: M159E)]. Connection to an improper power source may lead to equipment damage, fire, or electric shock. Connect the AC Adapter by following the procedure below. For the TM-J7700, you can connect an AC adapter to the underside of the printer. - Page 13 English To install the AC Adapter (only for the TM-J7700) Follow the procedure below to install the AC Adapter. Notes: Perform the following when installing the AC adapter. • Be sure to use a dedicated AC adapter [PS-180 (model: M159E)]. •...
- Page 14 English 4. Place the AC adapter into the printer with the label side facing up. 5. Align the depressions on the power source fixing plate with the hook protrusions on the main unit and gently push the plate to install. 6.
- Page 15 English 7. Connect the DC cable of the AC adapter to the power supply connector ("24V") and connect the AC cable to the AC adapter. ➀ ➁ 8. Turn the printer right side up and connect the AC cable plug to a power outlet.
-
Page 16: Connecting The Interface Cable
English Connecting the Interface Cable Connect the interface cable to be used to the connector on the rear side of the printer. "Input/Output Ports" on page 9 Connect the cable to be used to either the USB type-B connector or Ethernet connector. CAUTION: When using a USB cable, pass the cable through the wire saddle to prevent accidental disconnection. -
Page 17: Attaching The Power Switch Cover
English Attaching the Power Switch Cover Attach the power switch cover to prevent accidental operation of the power switch. Insert a sharp-pointed object into one of the holes on the power switch cover to turn the power on or off accordingly. Use a sharp- pointed object to detach the cover. - Page 18 English Changing the Roll Paper Width You can move the roll paper guide installed in the printer to adjust for use with any of the following four paper widths: 57.5/69.5/76/82.5 mm {2.26/2.74/2.99/3.25"}. The default setting is 76 mm {2.99"}. Follow the procedure below to change the paper width. CAUTION: ❏...
- Page 19 English 4. Change the location of the roll paper guide to match the paper width you want to use. Align the upper and lower grooves, and confirm that the protrusion is inserted in the hole on the bottom. 5. Use the removed screw to affix the roll paper guide.
- Page 20 English Turning On/Off Turning On Press the power switch on the side with the ( ) mark. (Power) LED lights up and the power turns on. Turning Off CAUTION: Do not turn off the printer when the (Power) LED is flashing. Press the power switch on the side with the ( ) mark.
- Page 21 English Installing/Replacing the Roll Paper CAUTION: ❏ Be sure to use roll paper that meets the specifications. ❏ Do not use thermal paper. ❏ Be careful not to insert your fingers into the paper exit. The cutter blade is installed inside the paper exit and you might be injured.
- Page 22 English 3. Remove the used roll paper core if there is one. 4. Put the roll paper inside the printer in the correct direction as shown in the illustration below. 5. Before closing the cover, pull out the leading edge of the roll paper and align the mark as shown in the illustration below.
-
Page 23: Inserting Slip Paper
English Inserting Slip Paper Notes: • Be sure the paper is flat, without curls, folds, or wrinkles. • Use only single sheet paper. Do not insert any multiple sheet paper, as this may cause a paper jam. • Pressure sensitive copy paper cannot be used because the printer is an inkjet printer. •... - Page 24 English Installing/Replacing the Ink Cartridge CAUTION: Read the handling instructions carefully before installing the ink cartridge. "Cautions on the Ink Cartridge" on page 4 "Ink cartridge SJIC33P (K)" on page 34 Install/Replace the ink cartridge by following the procedure below. 1.
- Page 25 English 5. Shake the ink cartridge package three or four times before opening it. 6. Insert a new ink cartridge from the top and push it firmly but gently until it clicks into place. 7. Push down the tab in the direction of the arrow before closing the front cover.
- Page 26 English 8. Close the front cover. (Ink) LED will now turn off. When the ink cartridge is installed for the first time, the (Power) LED flashes and initial ink charging starts. Notes: The ink cartridge included in the product package is used for initial ink charging. The printer uses ink to prepare for printing when the ink cartridge is installed for the first time.
-
Page 27: Test Printing
English Test Printing You can perform printer status printing using the self-test to check if any print errors, such as dot drop-outs, are occurring. You can use the nozzle check pattern which is printed to check whether the nozzle is clogged. Follow the procedure below to perform the self-test. -
Page 28: Maintenance
English Maintenance Cleaning the Printer Case Be sure to turn off the printer, and wipe the dirt off the printer case with a dry cloth or a damp cloth. CAUTION: Never clean the product with alcohol, benzine, thinner, or other such solvents. Doing so may damage or break the parts made of plastic and rubber. -
Page 29: Transporting
English Transporting Follow the procedure below to transport this printer. 1. Remove the roll paper. Notes: Leave the ink cartridge in the printer. Transporting the printer with the ink cartridge removed can result in dot dropout or ink adhering to the inside of the case. 2. - Page 30 English TM-J7700 6. Wrap the printer with protective cushioning material to prevent any impacts during transport. Keep the printer upright and horizontal while packing and transporting it. Notes: Reshipping it can result in dot dropout. Perform head cleaning if dot dropout occurs. ( "Cleaning the Print Head"...
-
Page 31: Troubleshooting
English Troubleshooting (Error) LED is flashing or lit ❏ Check whether a paper jam has occurred. Remove any jammed paper. ( "Removing Jammed Paper" on page 31 ❏ Check whether the front cover/roll paper cover is closed. Close the cover if open. ( "Front Side"... - Page 32 English For cut sheets: 1. Open the front cover. 2. Remove the paper causing the paper jam. 3. Close the front cover.
-
Page 33: Specification
251 × 260 × 188 mm {7.68 × 10.24 × 7.40”} {9.88 × 10.24 × 7.40”} Weight Approximately 5.1 kg {11.24 lb} Approximately 5.8 kg {12.79 lb} (including the ink cartridge) (including the ink cartridge) *: According to Epson's operating conditions... -
Page 34: Consumable Products
Ink cartridge specialized for this printer. Genuine Ink Cartridge Recommended ❏ For the best performance of the printer, it is recommended to use genuine Epson ink cartridges. Use of non-genuine Epson ink cartridges can adversely affect the printing quality and prevent the printer from realizing its maximum performance. -
Page 35: Appendix
(4) Neither is any liability assumed for damages resulting from the use of the information contained herein. (5) Neither Seiko Epson Corporation nor its affiliates shall be liable to the purchaser of this product or third parties for damages, losses, costs, or expenses incurred by purchaser or third parties as a result of: accident, misuse, or abuse of this product or unauthorized modifications, repairs, or alterations to this product, or (excluding the U.S.) failure to strictly comply with Seiko Epson Corporation’s operating and...
Need help?
Do you have a question about the TM-J7200 series and is the answer not in the manual?
Questions and answers