Table of Contents
Advertisement
Advertisement
Table of Contents

Related Manuals for Flowserve PMV D20


Summary of Contents for Flowserve PMV D20
- Page 1 PMV D20 Installation Digital Positioner Operation Maintenance...
-
Page 2: Table Of Contents
10.5 Calibration of 4 - 20 mA input signal and/or 4 - 20 mA feedback transmitter ..............29 11. Trouble shooting ................ 30 11.1 PMV D20 Error codes .............. 30 11.2 PMV D20 symptoms and solutions .......... 31 12. Spare parts ................. 32... -
Page 3: General Information
1. General information 1.1 Using In most cases FLOWSERVE valves, The following instructions are designed actuators and accessories are designed to assist in unpacking, installing and for specific applications (e.g. with regard performing maintenance as required on to medium, pressure, temperature). For FLOWSERVE products. -
Page 4: Protective Clothing
1.3 Protective clothing 1.6 Spare parts FLOWSERVE products are often used Use only FLOWSERVE original spare in problematic applications (e.g. parts. FLOWSERVE cannot accept extremely high pressures, dangerous, responsibility for any damages that occur toxic or corrosive mediums). In particular... -
Page 5: Storage
WARNING: flange faces to prevent the ingress of fo- Before products are returned to reign materials. These caps should not FLOWSERVE for repair or service be removed until the valve is actually FLOWSERVE must be provided mounted into the system. -
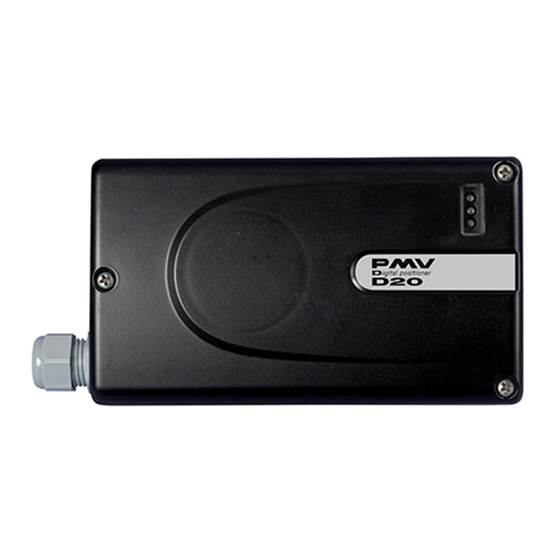
Page 6: Pmv D20 Overview
PMV D20 overview The PMV D20 is a two-wire loop pressure rating a supply regulator is powered, 4-20 mA input digital valve required to lower the pressure to the positioner. actuator’s maximum rating (not to be confused with operating range). A... -
Page 7: Specifications
4. Specifications 4.1 Technical data Input signal 4-20 mA Current supply min. 3,6 mA Current supply Max. 150 mA Load Standard 400 ohm at 20mA Load HART 470 ohm at 20mA Voltage dropStandard 8 VDC at 20mA Voltage dropHART 9.4 VDC at 20mA Angle of rotation min 0-40°... -
Page 8: Mechanical Switches
4.2 Mechanical switches Type SPDT Size Sub Sub miniature Rating 3A, 125 VAC / 2A, 30VDC Mechanical life >1 x 10 operations Namur sensors Type P+F NJ2 V3 N Inductive DIN 19234 Load current <1mA>3mA Voltage range 5-25 VDC Hysteresis 3-15% (5% typical) Temp range -25°... -
Page 9: Type Sign
Operating time 1.0 ms Transmitter Power supply 12-28 VDC Output 1-22 mA Resolution 0.1% Linearity ±0.5% Load impedance 600 ohm at (12 VDC and 20mA) Alarm Output Supply 3-28 VDC Output 20mA @ 24 VDC 4.3 Type sign... -
Page 10: D20 Model Code
4.4 D20 Model Code Model no Digital compact positioner, General purpose, LED status Approval, Certificate General purpose version Intrinsically safe version ATEX Connections Air, Electrical 1/4" NPT air, M20 x 1,5 electrical x 2 1/4" NPT air, 1/2" NPT electrical x 2 Housing/Surface treatment Aluminium/Powder epoxy, black Function... -
Page 11: Control Drawing
4.5 Control Drawing... -
Page 12: Certificates
4.6 Certificates... -
Page 16: Principle Of Operation
Control Figure 1. Valve 5. Principle of operation The PMV D20 positioner is a digital posi- amplifier. The position of the pilot valve tioner with various options. The positio- in the pneumatic amplifier is measured ner consists of three main modules: and relayed to the inner loop control circuit. -
Page 17: Mounting And Installation
Before starting installation, inspect the di- to NAMUR) is described in Figure 3. gital positioner for any transit damages. The PMV D20 positioner is installed with a For the two mounting possibilities of cast mounting kit (according to NAMUR yoke actuators (according to NAMUR, lEC specification) to the left-hand actuator sup- 534 part 6) refer to Figure 5. - Page 18 For mounting, proceed as follows: 4. Tighten all screws and nuts. Mounting the Follower Arm (Figures 3 NOTE: A slight unsymmetrical and 6) mounting increases the linearity 1. Unscrew the lock nut for the follower deviation but does not affect the arm attachment.
-
Page 19: Rotary Actuators
6.3 Rotary actuators NOTE: Stroke the actuator carefully and ensure the follower arm does not Mounting the PMV D20 positioner on interfere with valve parts, actuator or a quarter-turn actuator (closed or positioner. Do not adjust the follower pin... - Page 20 Rotary actutaors VDI/VDE 3485 (Namur) Mount bracket 1 to positioner. Secure with 4 x M6 screws 2. Fit positioner on actuator and secure with 4 x screws 3. Install tubing 4 between actuator and po- sitioner. See section 7. Linear actuator “Flow act” (Direct mounting, integrated tubing.
- Page 21 Figure 4. Basic Adjustment for a Linear Pneumatic Actuator Mounting A Mounting B Hexagon head screw Lock washer Figure 6. Follower Arm (standard) Figure 5. Yoke Actuator Mounting (according to IEC 534 part 6)
-
Page 22: Tubing Positioner To Actuator
(Figure 8). Now connect the air supply to the filter, which is Air connections: 1/4” NPT (standard air connected to the PMV D20 positioner. connection). 3. With a maximum supply pressure of 6 Auxiliary power: Pressurized air or bar (102 psi) a regulator is not required. -
Page 23: Wiring And Grounding Guidelines
Air supply NOTE: The input loop current signal to 8.1 Grounding screw the PMV D20 should be in shielded cable. Shields must be tied to a ground at only The grounding screw, located inside the one end of the cable to provide a place... -
Page 24: Electromagnetic Compability
8.2 Electromagnetic compatibility The PMV D20 digital positioner has been techniques of the control lines, and route designed to operate correctly in control lines away from electro-magnetic electromagnetic (EM) fields found in sources that may cause unwanted noise. typical industrial environments. Care... -
Page 25: Operation
Example: DCS Compliance Voltage = 19 V This system will support the PMV D20, as = 300Ω the voltage 12,5 V is greater than the required barrier 8 V. = 25Ω wire CURRENT = 20 mA Voltage = 19 V – 0,020 A(300Ω + 25Ω) = 12,5 V 9. -
Page 26: Set Of Direct Or Reverse Action
9.5 Show gain setting 9.4 Set of Direct or Reverse If the actuator position is unstable or action selfoscillating after calibration, the gain Note! For safety reason, this opera- can be adjusted. tion has to be done max 5 minutes after calibration. -
Page 27: Change Gain Setting
Button functions: Press 5 sec = Calibration Press x3 = Direct/reverse action Press x4 = Show gain setting Press x5 - x11 = Change gain setting To indicate that a command is accepted, the three LED:s light up. 9.6 Change of gain setting G (Highest) To lower the gain, press the button: 7, 6 or 5 times (5= lowest). -
Page 28: Limit Switches & 4 - 20 Ma Transmitter (Optional)
10. Limit switches & 4 - 20 mA transmitter (Optional) Caution! installation electrical equipment in hazardous areas must comply with the procedures contained in the certificates of conformity. Coun- try specific regulations may apply. Electrical safety is determined only by the power supply device. -
Page 29: Feedback Transmitter
Input signal + 4-20 mA , HART- Hart, connection Input signal – 4-20 mA , Hart Remote unit Remote unit Remote unit 9 10 11 12 4-20 mA + Feedback, 13-28 V DC – – + – 4-20 mA – Feedback, 13-28 V DC Remote unit Alarm output +, 8-28 V DC Alarm output –, 8-28 V DC... -
Page 30: Trouble Shooting
11. Trouble shooting 11.1 PMV D20 error codes An unsuccessful calibration is indicated by the LED:s. The type of error is shown by the flash sequence. Error code Probable Cause Action Deviation between set value (Alarm) and valve position. No air supply or Check air supply shaft do not move. -
Page 31: Pmv D20 Symptoms And Solutions
11.2 PMV D20 symptoms and solutions Failure Probable Cause Corrective action No LED is flashing Current source below 3,6 mA . Verify current source supplies at least 3,6 mA. Incorrect wiring polarity. Check wiring for correct polarity. Valve position reading Stem position sensor mounting Reposition sensor. -
Page 32: Spare Parts
12. Spare parts 15 19... - Page 33 PMV P/N Description Remarks Housing 31947 Lever arm set 30116 Potentiometer assy. Compl. D2-AS5D Shaft D-type Linear, incl. nut D2-AS5N Shaft VDI/VDE 3845 Rotary D2-SP50 STD Air relay assy. incl. O-rings, screws, standard temp. D2-SP50 LT Air relay assy. incl. O-rings, screws, low temp. 7-SP82 Electronics 7-SP82-I...
- Page 34 E-mail: controls@cancoppas.com Flowserve Italy Flowserve Spa Hanwei Building Asia Pacific Headquarters Via Prealpi, 30 No. 7 Guanghua Road Flowserve Pte Ltd. 20032 Cormano (Milano) Chao Yang District No. 12 Tuas Avenue 20 ITALY 100004 Beijing REPUBLIC OF SINGAPORE 638824 CHINA...
Need help?
Do you have a question about the PMV D20 and is the answer not in the manual?
Questions and answers