Table of Contents
Advertisement
Quick Links
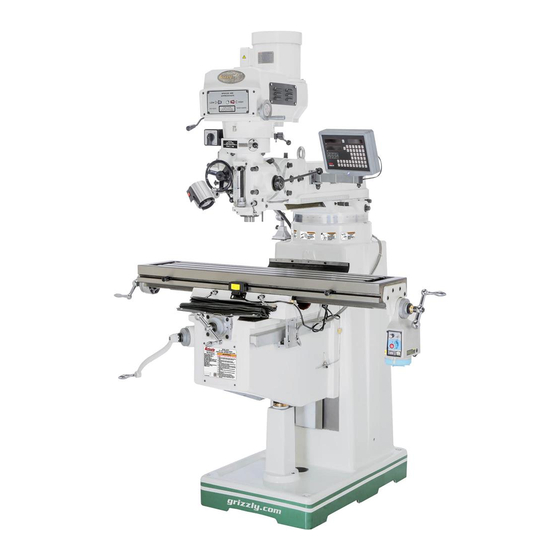
MODEL G0796/G0797
VERTICAL MILL w/POWER
FEED & DRO
OWNER'S MANUAL
(For models manufactured since 1/18)
G0796
G0797
COPYRIGHT © AUGUST, 2015 BY GRIZZLY INDUSTRIAL, INC. REVISED MAY, 2018 (MN)
WARNING: NO PORTION OF THIS MANUAL MAY BE REPRODUCED IN ANY SHAPE
OR FORM WITHOUT THE WRITTEN APPROVAL OF GRIZZLY INDUSTRIAL, INC.
#WK17430 PRINTED IN CHINA
V2.05.18
Advertisement
Table of Contents

Subscribe to Our Youtube Channel
Related Manuals for Grizzly G0796


Summary of Contents for Grizzly G0796
- Page 1 (For models manufactured since 1/18) G0796 G0797 COPYRIGHT © AUGUST, 2015 BY GRIZZLY INDUSTRIAL, INC. REVISED MAY, 2018 (MN) WARNING: NO PORTION OF THIS MANUAL MAY BE REPRODUCED IN ANY SHAPE OR FORM WITHOUT THE WRITTEN APPROVAL OF GRIZZLY INDUSTRIAL, INC.
- Page 2 This manual provides critical safety instructions on the proper setup, operation, maintenance, and service of this machine/tool. Save this document, refer to it often, and use it to instruct other operators. Failure to read, understand and follow the instructions in this manual may result in fire or serious personal injury—including amputation, electrocution, or death.
-
Page 3: Table Of Contents
SECTION 8: WIRING ........64 SECTION 3: SETUP ........18 Wiring Safety Instructions ......64 Needed for Setup ......... 18 G0796 Motor & Switch Wiring ..... 65 Unpacking ............ 18 G0797 Motor & Switch Wiring ..... 66 Inventory ............19 SECTION 9: PARTS ........ -
Page 4: Introduction
Use this machine with respect and caution to decrease the risk of operator injury. If normal safety pre- cautions are overlooked or ignored, serious Manufacture Date personal injury may occur. Serial Number Model G0796/G0797 (Mfd. Since 1/18) -
Page 5: Front View Identification
Ball Handle Power Feed Limit Switch X-Axis Power Feed Knee Crank Mounting Point (1 of 4) Y-Axis Ball Handle Knee G0797 Shown To reduce your risk of serious injury, read this entire manual BEFORE using machine. Model G0796/G0797 (Mfd. Since 1/18) -
Page 6: Model G0796 Headstock Identification
Auto-Downfeed Direction Pin Coarse Downfeed Lever Fine Downfeed Clutch Lever Quill Lock Lever Adjustable Downfeed Stop Dial Indicator Quill & Spindle To reduce your risk of serious injury, read this entire manual BEFORE using machine. Model G0796/G0797 (Mfd. Since 1/18) -
Page 7: Model G0797 Headstock Identification
Coarse Fine Downfeed Downfeed Lever Handwheel Quill Lock Fine Downfeed Lever Clutch Lever Dial Indicator Adjustable Downfeed Stop Quill & Spindle To reduce your risk of serious injury, read this entire manual BEFORE using machine. Model G0796/G0797 (Mfd. Since 1/18) -
Page 8: Controls & Components
AFTER power to spindle is turned OFF. H. Variable-Speed Indicators: Indicate spindle speed in high and low range. Variable-Speed Handwheel: Selects desired Figure 1. Model G0796 upper headstock spindle speed within high or low range. controls and components. Spindle Speed Range Selector: Engages A. - Page 9 Z-axis table movement for increased rigidity R. Fine Downfeed Handwheel: Manually con- during operations where the Z-axis should trols slow spindle downfeed for fine Z-axis not move. control. S. Auto-Downfeed Direction Pin: Starts, stops, and reverses auto-downfeed direction. Model G0796/G0797 (Mfd. Since 1/18)
- Page 10 Figure 5. X-axis power feed controls. AI. ON/OFF Button: Turns power feed ON and OFF. AJ. Circuit Breaker Reset Button: Resets inter- nal circuit breaker if unit is overloaded and shuts down. Model G0796/G0797 (Mfd. Since 1/18)
-
Page 11: G0796 Machine Data Sheet
MACHINE DATA SHEET Customer Service #: (570) 546-9663 · To Order Call: (800) 523-4777 · Fax #: (800) 438-5901 MODEL G0796 9" X 49" VERTICAL MILL WITH POWER FEED AND DRO Product Dimensions: Weight................................2249 lbs. Width (side-to-side) x Depth (front-to-back) x Height................83 x 62 x 84 in. - Page 12 The information contained herein is deemed accurate as of 5/24/2018 and represents our most recent product specifications. Model G0796 PAGE 2 OF 3 Due to our ongoing improvement efforts, this information may not accurately describe items previously purchased. -10- Model G0796/G0797 (Mfd. Since 1/18)
-
Page 13: G0797 Machine Data Sheet
The information contained herein is deemed accurate as of 5/24/2018 and represents our most recent product specifications. Model G0797 PAGE 1 OF 3 Due to our ongoing improvement efforts, this information may not accurately describe items previously purchased. -11- Model G0796/G0797 (Mfd. Since 1/18) - Page 14 The information contained herein is deemed accurate as of 5/24/2018 and represents our most recent product specifications. Model G0797 PAGE 2 OF 3 Due to our ongoing improvement efforts, this information may not accurately describe items previously purchased. -12- Model G0796/G0797 (Mfd. Since 1/18)
-
Page 15: Section 1: Safety
Everyday ery. Never operate under the influence of drugs or eyeglasses are NOT approved safety glasses. alcohol, when tired, or when distracted. -13- Model G0796/G0797 (Mfd. Since 1/18) - Page 16 EXPERIENCING DIFFICULTIES. If at any time debris. Make sure they are properly installed, you experience difficulties performing the intend- undamaged, and working correctly BEFORE ed operation, stop using the machine! Contact our operating machine. Technical Support at (570) 546-9663. -14- Model G0796/G0797 (Mfd. Since 1/18)
-
Page 17: Additional Safety For Milling Machines
OFF to avoid a possible sudden startup use. This will prevent them from being thrown by once power is restored. the spindle upon startup. -15- Model G0796/G0797 (Mfd. Since 1/18) -
Page 18: Section 2: Power Supply
This machine MUST be grounded. In the event at one time during normal operations. of certain malfunctions or breakdowns, grounding G0796 Full-Load Current Rating ..13.8 Amps reduces the risk of electric shock by providing a G0797 Full-Load Current Rating ..8.6 Amps path of least resistance for electric current. -
Page 19: Extension Cords
Grounding Prong and matching plug/receptacle. Additionally, it must meet the following size requirements: Figure 6. Typical 6-20 plug and receptacle. Minimum Gauge Size (G0796) ....12 AWG Minimum Gauge Size (G0797) .....14 AWG Maximum Length (Shorter is Better)..50 ft. -17- Model G0796/G0797 (Mfd. Since 1/18) -
Page 20: Section 3: Setup
IMPORTANT: Save all packaging materials until you are completely satisfied with the machine and have resolved any issues between Grizzly or the shipping agent. You MUST have the original pack- No list of safety guidelines can be complete. -
Page 21: Inventory
B. Fine Downfeed Handwheel ......1 C. Rear Way Cover ......... 1 D. Drawbar ............1 E. Knee Crank ..........1 Belt Housing Safety Covers (G0796) ..2 G. Revolving Handles ........3 H. Coarse Downfeed Lever ......1 Ball Handles ..........3 Closed-End Wrench 17/19mm .... -
Page 22: Cleanup
Figure 9. T23692 Orange Power Degreaser. Repeat Steps 2–3 as necessary until clean, then coat all unpainted surfaces with a quality metal protectant to prevent rust. -20- Model G0796/G0797 (Mfd. Since 1/18) -
Page 23: Site Considerations
Wall 30" Minimum Clearance for Maintenance 99" 100" 30" 67" 67" Minimum Clearance for 61" 74" Maintenance 35" 39" 24" 25" Figure 10. Minimum working clearances. -21- Model G0796/G0797 (Mfd. Since 1/18) -
Page 24: Lifting & Placing
Headstock Facing Backward — If mill lifts evenly, remove shipping pallet and lower mill onto its prepared location. Figure 11. Illustrated example of using lifting straps to move the mill. -22- Model G0796/G0797 (Mfd. Since 1/18) -
Page 25: Leveling
Figure 13. Model H2683 12" Master Machinist's Level. Lag Screw Flat Washer Machine Base Lag Shield Anchor Concrete Drilled Hole Figure 14. Popular method for anchoring machinery to a concrete floor. -23- Model G0796/G0797 (Mfd. Since 1/18) -
Page 26: Assembly
Thread revolving handles into small end of ball handles (see Figure 15) and tighten them with 14mm wrench. Screws Ball Handle Ball Figure 17. Rear way cover installed. Handle Revolving Handle Figure 15. Ball handle installed on X-axis leadscrew. -24- Model G0796/G0797 (Mfd. Since 1/18) -
Page 27: Power Connection
Note About Extension Cords: Using an incor- rectly sized extension cord may decrease the life of electrical components on your machine. Auto-Downfeed Refer to Extension Cords on Page 17 for more Direction Pin information. Figure 19. Downfeed controls installed. -25- Model G0796/G0797 (Mfd. Since 1/18) -
Page 28: Test Run
(refer to 10. Rotate spindle switch to STOP (G0796) or Downfeed Controls section on Page 37 for OFF (G0797) to stop spindle rotation. detailed instructions). - Page 29 Page 31, to understand Adjustments procedures. how power feed, table locks, and limit switch function. Loosen table locks on front of table. Plug power feed power cord into a grounded 110V power outlet. -27- Model G0796/G0797 (Mfd. Since 1/18)
-
Page 30: Spindle Break-In
RPMs: ings once they are placed under load. G0796: 660, 1715, 2720 RPM G0797: 500, 2500, 4000 RPM The spindle break-in procedure distributes lubri- cation throughout the bearings to reduce the risk Note: Make sure to turn spindle OFF and of early bearing failure if there are any "dry"... -
Page 31: Section 4: Operations
Read books/magazines or get formal training before beginning any proj- ects. Regardless of the content in this sec- tion, Grizzly Industrial will not be held liable for accidents caused by lack of training. -29- Model G0796/G0797 (Mfd. Since 1/18) -
Page 32: Positioning Table
Always keep table locked in place unless 0.001" 0.200" table movement is required for your oper- 0.001" 0.200" ation. Unexpected table and workpiece movement could cause cutter to bind 0.001" 0.100" with workpiece, which may ruin cutter or workpiece. -30- Model G0796/G0797 (Mfd. Since 1/18) - Page 33 For additional component details, refer to X-Axis Power Feed Identification on Page 8. Limit Switch Limit Stop (1 of 2) Speed Dial Feed/Jog Switch Direction Knob Rapid Traverse Button ON/OFF Button Figure 25. Location of X-axis power feed controls. -31- Model G0796/G0797 (Mfd. Since 1/18)
-
Page 34: Positioning Headstock
Figure 28. Head tilt controls. Re-tighten lock bolts. Figure 27. Head rotated to the left. The head is heavy. When tilting or rotating head, get help to support its weight as you make adjustments. -32- Model G0796/G0797 (Mfd. Since 1/18) -
Page 35: Positioning Ram
Rotating Head Left/Right DISCONNECT MACHINE FROM POWER! Loosen four lock bolts shown in Figure 29. The ram rotates 360° around the turret, and travels forward or backward 12" (G0796), or 18 ⁄ " Use one hand to apply pressure to head in (G0797). -
Page 36: Spindle Speed
Also, there are a large number of easy-to-use spindle speed calculators that can be found on the internet. These sources will help you take into account all applicable variables to determine the best spindle speed for the operation. -34- Model G0796/G0797 (Mfd. Since 1/18) - Page 37 Setting G0796 Spindle Speed Move range lever shown in Figure 34 to HIGH or LOW position. The Model G0796 has eight spindle speeds—four in low motor speed and four in high motor speed. Setting the spindle speed involves: 1) Selecting...
- Page 38 1750 2720 reverse spindle rotation. Model G0797 Spindle Speed Ranges Low Range 60–500 RPM Figure 36. Model G0796 spindle speed chart. High Range 500–4200 RPM Push adjustment lever backward with moder- Spindle Speed ate force to re-tension V-belt, then re-tighten...
-
Page 39: Spindle Downfeed
0.003 in/rev 0.006 in/rev B. Fine Downfeed Handwheel. Manually con- trols slow spindle downfeed. C. Auto-Downfeed Direction Pin. Starts, stops, and reverses the auto-downfeed direction. D. Fine Downfeed Clutch Lever. Engages the fine/auto-downfeed gears. -37- Model G0796/G0797 (Mfd. Since 1/18) - Page 40 Note: It may be necessary to turn the spindle by hand as you move the selector to enable the gears to mesh. Manual Auto-Downfeed (Disengaged) (Engaged) Downfeed Selector Figure 40. Downfeed selector in manual (disengaged) position. Manual Auto-Downfeed (Disengaged) (Engaged) Downfeed Selector -38- Model G0796/G0797 (Mfd. Since 1/18)
- Page 41 Figure 42. Downfeed selector in auto-downfeed (engaged) position. Position downfeed stop for spindle depth that is correct for your operation, then secure it in place with locking wheel (see Figure 39 on Page 37 and description on Page 37). -39- Model G0796/G0797 (Mfd. Since 1/18)
- Page 42 To avoid damage to system gearing, never use auto-downfeed system with spindle speeds over 1750 RPM. -40- Model G0796/G0797 (Mfd. Since 1/18)
-
Page 43: Spindle Brake
Loading/Unloading Tooling After turning the spindle switch OFF, move the brake lever left or right (G0796) or up or down Each mill is equipped with an R-8 spindle taper (G0797) to bring the spindle to a full stop (see and a ⁄... -
Page 44: Unloading Tooling
Overtightening makes tool removal difficult and may damage arbor and threads. Figure 49. Tapping drawbar to unseat tool taper (G0796 shown). Support tool with one hand and fully unthread drawbar from tool. -42- Model G0796/G0797 (Mfd. Since 1/18) -
Page 45: Section 5: Accessories
To reduce this risk, only install accessories recommended for this machine by Grizzly. NOTICE Refer to our website or latest catalog for additional recommended accessories. - Page 46 3/4". Sizes marked in a durable molded case. These swiveling milling vises feature perfectly aligned, precision-ground jaws, robust clamping screws, and easy-to-read 0°–360° scales. Figure 55. G9756 20-Pc. HSS End Mill Set. Figure 58. G7155 6" Premium Milling Vise. -44- Model G0796/G0797 (Mfd. Since 1/18)
- Page 47 ", ⁄ ", ⁄ ", and 1" collets, spanner wrench, and moulded plastic case. Figure 60. G9760 20-Pc. 2 & 4 Flute TiN End Mill Set. Figure 62. T26688 R-8 Quick Change Collet Set. -45- Model G0796/G0797 (Mfd. Since 1/18)
-
Page 48: Section 6: Maintenance
• Perform lubrications tasks as directed in the Lubrication section on Page 47. • Check table movement in all three axis direc- tions for loose/tight gibs. Adjust the gibs if necessary (see Page 54). -46- Model G0796/G0797 (Mfd. Since 1/18) -
Page 49: Lubrication
Follow the referenced sections on the following pages for detailed instructions. Quill Oil Cup Figure 64. Location of quill oil cup (Model G0796 The following recommended lubrication shown). schedule is based on light to medium mill usage. -
Page 50: Ram Ways
Add two pumps from a grease gun to the grease fitting shown in Figure 67. Head Tilt Rack & Pinion Gear Figure 69. Head tilt and ram pinions. Figure 67. Model G0797 headstock gearing grease fitting. -48- Model G0796/G0797 (Mfd. Since 1/18) -
Page 51: Power Feed Gears
Push ball handle in to engage detent sleeve graduated dial and retaining rings. and prevent leadscrew from rotating, then remove ball handle nut, ball handle, and com- pression spring from power unit end of X-axis leadscrew (see Figure 71). -49- Model G0796/G0797 (Mfd. Since 1/18) -
Page 52: Machine Storage
10. Manually move table with power feed ball handle to check gear movement and to dis- tribute grease on gears. If movement is not smooth, repeat Steps 2–8 until it is. -50- Model G0796/G0797 (Mfd. Since 1/18) -
Page 53: Section 7: Service
8. Machine incorrectly mounted. 8. Tighten mounting bolts; relocate/shim machine. 9. Motor bearings at fault. 9. Test by rotating shaft; rotational grinding/loose shaft requires bearing replacement. 10. Centrifugal switch is at fault (G0796). 10. Replace. -51- Model G0796/G0797 (Mfd. Since 1/18) - Page 54 1. Poorly adjusted return spring. 1. Increase return spring tension. fully retract. 2. Worn return spring. 2. Replace return spring. Spindle switch does 1. Shorted/disconnected wiring. 1. Inspect wiring connections. Replace/repair as not work. necessary. -52- Model G0796/G0797 (Mfd. Since 1/18)
- Page 55 1. Initial reading is incorrect. 1. Tare/zero/reset DRO at beginning point. incorrect. 2. Sensor has gone bad. 2. Test/replace sensor as necessary. 3. Spacing between sensor and scale is 3. Adjust spacing between sensor and scale. incorrect. -53- Model G0796/G0797 (Mfd. Since 1/18)
-
Page 56: Adjusting Gibs
Figure 77. Knee gib and adjustment screw. Use ball handles/crank to move table/knee until you feel a slight drag in the path of movement. Repeat Steps 3–4 as necessary. -54- Model G0796/G0797 (Mfd. Since 1/18) -
Page 57: Adjusting Leadscrew Backlash
Housing Figure 78. X-axis leadscrew nut cap screws and adjustment plate (viewed from underneath left side of table). Figure 80. Y-axis bearing housing. When you are satisfied with adjustment, re- tighten two cap screws. -55- Model G0796/G0797 (Mfd. Since 1/18) - Page 58 & Cap Screws leadscrew, then check amount of backlash. When you are satisfied with adjustment, re- tighten two cap screws. Re-install parts previously removed in reverse order. Figure 81. Y-axis leadscrew nut and cap screws. -56- Model G0796/G0797 (Mfd. Since 1/18)
-
Page 59: Tramming Spindle
Figure 83. Dial test indicator mounted. Dial Test Indicator (with at least 0.0005" resolution) ....1 Indicator Holder (mounted on the quill/spindle) ....1 Precision Parallel Block (at least 9" in length) ........1 -57- Model G0796/G0797 (Mfd. Since 1/18) - Page 60 Steps 6–7 until you are satisfied with the so the head does not move loosely while you spindle axis alignment along the table adjust it. Remember to tighten all the tilt lock X-axis. bolts after adjusting the head. -58- Model G0796/G0797 (Mfd. Since 1/18)
-
Page 61: Replacing Belts & Brake Shoes
Screws Cover good idea to check the brake shoes whenever you replace a belt, and replace the shoes if necessary. Figure 87. Location of G0796 bearing cover and G0796 Phillips head screws removed during belt/brake shoe replacement procedure. Tools Needed Screwdriver Phillips #2 ........ - Page 62 Motor Pulley Brake Shoes Figure 92. Removing motor pulley to gain access to brake shoes. 12. Re-assemble machine in reverse order from Figure 90. Belt housing placed upside down on Steps 2–11. workbench. -60- Model G0796/G0797 (Mfd. Since 1/18)
- Page 63 — If replacing timing belt or brake shoes, proceed to Step 5. -61- Model G0796/G0797 (Mfd. Since 1/18)
- Page 64 (2 of 3) External Upper Retaining Pulley Ring Figure 97. Location of hex bolts that secure headstock to spindle housing. Bearing Cover Assembly Figure 99. Brake bracket and pulley components removed for disassembly. -62- Model G0796/G0797 (Mfd. Since 1/18)
- Page 65 Figure 103. Using shop press to re-install shaft with bearing assembly into brake bracket and lower pulley. 15. Re-assemble head in reverse order from Steps 2–11. -63- Model G0796/G0797 (Mfd. Since 1/18)
-
Page 66: Section 8: Wiring
Technical Support at (570) 546-9663. The photos and diagrams included in this section are best viewed in color. You can view these pages in color at www.grizzly.com. -64- Model G0796/G0797 (Mfd. Since 1/18) -
Page 67: G0796 Motor & Switch Wiring
G0796 Motor & Switch Wiring 220V 1-PH Motor Ground Start Capacitor Capacitor Figure 104. G0796 motor wiring. 150 uF 40 uF Centrifugal Switch 250 VAC 450 VAC 0086-755-26063505 60A 240VAC Spindle Switch Box Figure 105. Electronic centrifugal switch. 6-20 PLUG Y.K. -
Page 68: G0797 Motor & Switch Wiring
3-Phase SINO IO N SDSS-2V 5 IN -L B /6 0 5-15 Plug 5-15 Plug 5-15 Plug (Included) (Included) (Included) W ER 110 VAC 110 VAC 110 VAC READ ELECTRICAL SAFETY -66- Model G0796/G0797 (Mfd. Since 1/18) ON PAGE 64! -
Page 69: Section 9: Parts
SECTION 9: PARTS We do our best to stock replacement parts when possible, but we cannot guarantee that all parts shown are available for purchase. Call (800) 523-4777 or visit www.grizzly.com/parts to check for availability. G0796 Main Body 127 128... - Page 70 G0796 Main Body Parts List REF PART # DESCRIPTION REF PART # DESCRIPTION P0796001 QUILL HOUSING ADJUSTMENT GEAR 46T P0796084 Z-AXIS CRANK ARM P0796002 RAM ADAPTER P0796085 CLUTCH P0796006 HEAD TILT ADJUSTING WORM P0796086 DIAL LOCK NUT P0796007 WORM THRUST WASHER 8MM P0796087 GRADUATED DIAL 0.001"/0.100"...
-
Page 71: G0796 Table Leadscrews
X-AXIS LEADSCREW NUT (LEFT) 230-9 P0796230-9 CIRCUIT BOARD ASSEMBLY P0796220 X-AXIS LEADSCREW NUT (RIGHT) P0796231 POWER CORD 18G 3W 72" 5-15P BUY PARTS ONLINE AT GRIZZLY.COM! -69- Model G0796/G0797 (Mfd. Since 1/18) Scan QR code to visit our Parts Store. -
Page 72: G0796 Headstock
G0796 Headstock 386V2 386V2-10 386V2-1 386V2-2 386V2-9 386V2-3 386V2-12 386V2-13 386V2-8 386V2-4 386V2-5 386V2-7 386V2-6 386V2-14 386V2-11 BUY PARTS ONLINE AT GRIZZLY.COM! -70- Model G0796/G0797 (Mfd. Since 1/18) Scan QR code to visit our Parts Store. - Page 73 P0796332 CAM RING PIN M8-1.25 X 24 386V2-8 P0796386V2-8 CONTACT PLATE P0796333 E-CLIP 5MM 386V2-9 P0796386V2-9 MOTOR FAN P0796334 BRAKE LEVER 386V2-10 P0796386V2-10 MOTOR LABEL (G0796) P0796335 BRAKE LOCK PIN 386V2-11 P0796386V2-11 MOTOR CORD 12G 3W 36" P0796336 SPACER 386V2-12 P0796386V2-12 CAPACITOR COVER...
-
Page 74: G0796 Downfeed
G0796 Downfeed 420 421 448 449 581 582 583 584 479 480 BUY PARTS ONLINE AT GRIZZLY.COM! -72- Model G0796/G0797 (Mfd. Since 1/18) Scan QR code to visit our Parts Store. - Page 75 P0796526 HANDWHEEL HANDLE 66L, M8-1.25 X 10 P0796463 FEED GEAR SHIFT CRANK P0796527 R-8 SPINDLE P0796464 CLUSTER GEAR SHIFT CRANK P0796528 QUILL SKIRT BUY PARTS ONLINE AT GRIZZLY.COM! -73- Model G0796/G0797 (Mfd. Since 1/18) Scan QR code to visit our Parts Store.
- Page 76 G0796 Downfeed Parts List (Cont.) REF PART # DESCRIPTION REF PART # DESCRIPTION P0796529 SPANNER NUT M30-1.5 P0796564 QUILL DEPTH STOP LEADSCREW M13-1 X 160 P0796530 EXT TOOTH WASHER 30MM P0796565 CAP SCREW M10-1 X 15 P0796531 BALL BEARING 6206ZZ...
-
Page 77: G0796 One Shot Oiler
P0796608 A-TYPE OIL DISTRIBUTOR A8 P0796604 CAP SCREW M6-1 X 12 P0796609 ELBOW OIL DISTRIBUTOR CPS5 P0796605 A-TYPE OIL DISTRIBUTOR A4 BUY PARTS ONLINE AT GRIZZLY.COM! -75- Model G0796/G0797 (Mfd. Since 1/18) Scan QR code to visit our Parts Store. -
Page 78: G0796 Accessories
709 P0796709 HEX WRENCH 4MM 719 P0796719 DRO INSTRUCTIONS 710 P0796710 CLOSED-END WRENCH 17 X 19MM 720 P0796720 POWER FEED INSTRUCTIONS BUY PARTS ONLINE AT GRIZZLY.COM! -76- Model G0796/G0797 (Mfd. Since 1/18) Scan QR code to visit our Parts Store. -
Page 79: G0796 Labels
Safety labels help reduce the risk of serious injury caused by machine hazards. If any label comes off or becomes unreadable, the owner of this machine MUST replace it in the original location before resuming operations. For replacements, contact (800) 523-4777 or www.grizzly.com. BUY PARTS ONLINE AT GRIZZLY.COM! -77- Model G0796/G0797 (Mfd. -
Page 80: G0797 Main Body
G0797 Main Body 127 128 161 162 88 81 BUY PARTS ONLINE AT GRIZZLY.COM! -78- Model G0796/G0797 (Mfd. Since 1/18) Scan QR code to visit our Parts Store. - Page 81 LIMIT SWITCH CORD 2W 18G 60" P0797082 Z-AXIS LEADSCREW P0797161 CAP SCREW M8-1.25 X 10 P0797083 CRANK HANDLE P0797162 FLAT WASHER 10MM BUY PARTS ONLINE AT GRIZZLY.COM! -79- Model G0796/G0797 (Mfd. Since 1/18) Scan QR code to visit our Parts Store.
-
Page 82: G0797 Table Leadscrews
X-AXIS LEADSCREW NUT (LEFT) 230-9 P0796230-9 CIRCUIT BOARD ASSEMBLY P0797220 X-AXIS LEADSCREW NUT (RIGHT) P0796231 POWER CORD 18G 3W 72" 5-15P BUY PARTS ONLINE AT GRIZZLY.COM! -80- Model G0796/G0797 (Mfd. Since 1/18) Scan QR code to visit our Parts Store. -
Page 83: G0797 Headstock
G0797 Headstock 308V2-1 308V2-6 308V2A 308V2-2 308V2-5 308V2 308V2-4 308V2-3 308V2-7 340A BUY PARTS ONLINE AT GRIZZLY.COM! -81- Model G0796/G0797 (Mfd. Since 1/18) Scan QR code to visit our Parts Store. - Page 84 P0797378 CAP SCREW M6-1 X 12 P0797335 HEX BOLT M6-1 X 20 P0797379 POWER CORD 14G 4W 72" P0797336 PIVOT SLEEVE BUY PARTS ONLINE AT GRIZZLY.COM! -82- Model G0796/G0797 (Mfd. Since 1/18) Scan QR code to visit our Parts Store.
-
Page 85: G0797 Headstock Gearing
G0797 Headstock Gearing 407 409 BUY PARTS ONLINE AT GRIZZLY.COM! -83- Model G0796/G0797 (Mfd. Since 1/18) Scan QR code to visit our Parts Store. - Page 86 P0797449 FIXED CLUTCH BRACKET P0797491 COTTER PIN 3 X 24 P0797450 SET SCREW 10-24 X 3/8 P0797492 CAP SCREW M5-.8 X 12 BUY PARTS ONLINE AT GRIZZLY.COM! -84- Model G0796/G0797 (Mfd. Since 1/18) Scan QR code to visit our Parts Store.
-
Page 87: G0797 Downfeed
G0797 Downfeed 520 521 548 549 681 682 683 684 579 580 BUY PARTS ONLINE AT GRIZZLY.COM! -85- Model G0796/G0797 (Mfd. Since 1/18) Scan QR code to visit our Parts Store. - Page 88 626 P0797626 HANDWHEEL HANDLE 66L, M8-1.25 X 10 563 P0797563 FEED GEAR SHIFT CRANK 627 P0797627 R-8 SPINDLE 564 P0797564 CLUSTER GEAR SHIFT CRANK 628 P0797628 QUILL SKIRT BUY PARTS ONLINE AT GRIZZLY.COM! -86- Model G0796/G0797 (Mfd. Since 1/18) Scan QR code to visit our Parts Store.
- Page 89 661 P0797661 QUILL DEPTH STOP NUT 693 P0797693 EXT RETAINING RING 30MM 662 P0797662 MICROMETER NUT 694 P0797694 FLAT WASHER 12MM 663 P0797663 QUILL STOP KNOB BUY PARTS ONLINE AT GRIZZLY.COM! -87- Model G0796/G0797 (Mfd. Since 1/18) Scan QR code to visit our Parts Store.
-
Page 90: G0797 One Shot Oiler
P0797708 A-TYPE OIL DISTRIBUTOR A8 P0797704 CAP SCREW M6-1 X 12 P0797709 ELBOW OIL DISTRIBUTOR CPS5 P0797705 A-TYPE OIL DISTRIBUTOR A4 BUY PARTS ONLINE AT GRIZZLY.COM! -88- Model G0796/G0797 (Mfd. Since 1/18) Scan QR code to visit our Parts Store. -
Page 91: G0797 Accessories
819 P0797819 DRO INSTRUCTIONS 810 P0797810 CLOSED-END WRENCH 17 X 19MM 820 P0797820 POWER FEED INSTRUCTIONS 811 P0797811 SCREWDRIVER PHILLIPS #2 BUY PARTS ONLINE AT GRIZZLY.COM! -89- Model G0796/G0797 (Mfd. Since 1/18) Scan QR code to visit our Parts Store. -
Page 92: G0797 Labels
Safety labels help reduce the risk of serious injury caused by machine hazards. If any label comes off or becomes unreadable, the owner of this machine MUST replace it in the original location before resuming operations. For replacements, contact (800) 523-4777 or www.grizzly.com. BUY PARTS ONLINE AT GRIZZLY.COM! -90- Model G0796/G0797 (Mfd. - Page 93 Would you recommend Grizzly Industrial to a friend? _____ Yes _____No Would you allow us to use your name as a reference for Grizzly customers in your area? Note: We never use names more than 3 times. _____ Yes _____No 10.
- Page 94 FOLD ALONG DOTTED LINE Place Stamp Here GRIZZLY INDUSTRIAL, INC. P.O. BOX 2069 BELLINGHAM, WA 98227-2069 FOLD ALONG DOTTED LINE Send a Grizzly Catalog to a friend: Name_______________________________ Street_______________________________ City______________State______Zip______ TAPE ALONG EDGES--PLEASE DO NOT STAPLE...
-
Page 95: Warranty & Returns
WARRANTY & RETURNS Grizzly Industrial, Inc. warrants every product it sells for a period of 1 year to the original purchaser from the date of purchase. This warranty does not apply to defects due directly or indirectly to misuse, abuse, negligence, accidents, repairs or alterations or lack of maintenance.
Need help?
Do you have a question about the G0796 and is the answer not in the manual?
Questions and answers