Table of Contents
Advertisement
Quick Links
Advertisement
Table of Contents

Related Manuals for Kyocera PF-760


Summary of Contents for Kyocera PF-760
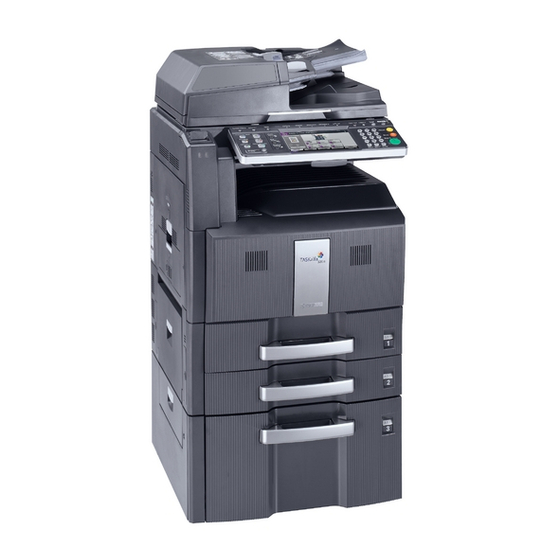
- Page 1 Option Copier PF-760 SERVICE MANUAL Code Y112030-5...
- Page 2 PUBLICATION ISSUED BY: Olivetti S.p.A. 77, Via Jervis - 10015 Ivrea (TO) Italy Copyright © 2010, Olivetti All rights reserved...
- Page 3 This page is intentionally left blank.
-
Page 4: Safety Precautions
Safety precautions This booklet provides safety warnings and precautions for our service personnel to ensure the safety of their customers, their machines as well as themselves during maintenance activities. Service personnel are advised to read this booklet carefully to familiarize themselves with the warnings and precautions described here before engaging in maintenance activities. - Page 5 Safety warnings and precautions Various symbols are used to protect our service personnel and customers from physical danger and to prevent damage to their property. These symbols are described below: DANGER: High risk of serious bodily injury or death may result from insufficient attention to or incorrect compliance with warning messages using this symbol.
- Page 6 1.Installation Precautions WARNING • Do not use a power supply with a voltage other than that specified. Avoid multiple connections to one outlet: they may cause fire or electric shock. When using an extension cable, always check that it is adequate for the rated current....................•...
-
Page 7: Specifications 1
2.Precautions for Maintenance WARNING • Always remove the power plug from the wall outlet before starting machine disassembly....• Always follow the procedures for maintenance described in the service manual and other related brochures............................• Under no circumstances attempt to bypass or disable safety features including safety mechanisms and protective circuits. - Page 8 • Do not remove the ozone filter, if any, from the copier except for routine replacement..... • Do not pull on the AC power cord or connector wires on high-voltage components when removing them; always hold the plug itself...................... •...
- Page 9 This page is intentionally left blank.
-
Page 10: Table Of Contents
CONTENTS 1-1 Specifications 1-1-1 Specifications............................1-1-1 1-1-2 Parts names............................1-1-2 1-1-3 Machine cross section ..........................1-1-3 1-2 Installation 1-2-1 Installation environment ..........................1-2-1 1-2-2 Unpacking ...............................1-2-2 1-2-3 Installing the cassette heaters (option) ....................1-2-3 1-3 Maintenance Mode 1-3-1 Maintenance mode ..........................1-3-1 (1) Executing a maintenance item ......................1-3-1 (2) Maintenance mode item list.......................1-3-2 (3) Contents of maintenance mode items....................1-3-3 1-4 Troubleshooting... - Page 11 This page is intentionally left blank.
-
Page 12: Specifications
1-1 Specifications 1-1-1 Specifications Paper supply method...... Friction feed (No. sheets: 3000, 80 g/m Paper size........A4, B5, Letter Paper weight........60 - 105 g/m Paper types........Standard, recycled, color Power source........Electrically connected to the machine Dimensions ........23 "... -
Page 13: Parts Names
1-1-2 Parts names Figure 1-1-1 Cassette 3 Cassette front cover Lifts Left cover 4 1-1-2 Service Manual Y112030-5... -
Page 14: Machine Cross Section
1-1-3 Machine cross section Paper path Figure 1-1-2 Machine cross section 1-1-3 Y112030-5 Service Manual... - Page 15 This page is intentionally left blank. 1-1-4 Service Manual Y112030-5...
-
Page 16: Installation Environment
1-2 Installation 1-2-1 Installation environment Installation location (Be based on the machine establishment place.) Avoid direct sunlight or bright lighting. Ensure that the photo-conductor will not be exposed to direct sunlight or other strong light when removing paper jams. Avoid extremes of temperature and humidity, abrupt ambient temperature changes, and hot or cold air directed onto the machine. -
Page 17: Unpacking
1-2-2 Unpacking Figure 1-2-1 Unpacking 3000-sheet paper feeder Paper size plates Outer case 10. M4 x 16 TP screws Lower front pad 11. Pins Lower rear pad 12. Longitudinal size adjusters* Supports 13. Round cross-head tapping Upper pad screws, M3 x 8* Machine cover 14. -
Page 18: Installing The Cassette Heaters (Option)
1-2-3 Installing the cassette heaters (option) Installing the cassette heater requires the following component: Cassette heater set: for 220 - 240 V specifications Supplied parts of cassette heater set: Two (2) cassette heaters (P/N AVGR02967B): for 220 - 240 V specifications Two (2) cassette heater retainers Six (6) M4 x 6 IT tap-tight (S-tight) screws One (1) relay wire... - Page 19 8. Insert the cassette heater connectors into the relay wire connectors. 9. Insert the main harness connector into the relay wire connector. 10. Tidy up the cassette heater cable and relay wire using eight wire saddles and route the cable and wire while clipping the wire sad- dles into the holes in the rear frame.
-
Page 20: Maintenance Mode
1-3 Maintenance Mode 1-3-1 Maintenance mode The machine is equipped with a maintenance function which can be used to maintain and service the machine. (1) Executing a maintenance item Start Enter 10871087 using Maintenance mode is entered. the numeric keys. Enter the maintenance item number using the cursor up/down keys The maintenance item is... -
Page 21: Maintenance Mode Item List
5H8-1 (2) Maintenance mode item list Item Initial Section Content of maintenance item setting* General U019 Displaying the ROM version Drive, paper U034 Adjusting the print start timing feed and LSUOUT TOP 0/0/0/0/0/0/0/0/0/0/0/0 paper convey- LSUOUT LEFT 0/0/0/0/0/0 ing system LSUOUT TOP B/W 0/0/0/0/0/0 Operation... -
Page 22: Contents Of Maintenance Mode Items
5H8-1 (3) Contents of maintenance mode items Maintenance Description item No. Displaying the ROM version U019 Description Displays the part number of the ROM fitted to each PWB. Purpose To check the part number or to decide, if the newest version of ROM is installed. Method 1. - Page 23 Maintenance Description item No. Adjusting the print start timing U034 Description Adjusts the leading edge registration or center line. Purpose Make the adjustment if there is a regular error between the leading edges of the copy image and original. Make the adjustment if there is a regular error between the center lines of the copy image and original. Method 1.
- Page 24 5H8-1 Maintenance Description item No. U034 When [LSUOUT TOP B/W] is selected. Display Description Setting Default Change in range setting value per step LSUOUT TOP Paper feed from MP tray -3.0 to 3.0 0.1 mm MPT (L) B/W (when large size paper is used) LSUOUT TOP Paper feed from cassette -3.0 to 3.0...
- Page 25 5H8-1 Maintenance Description item No. Adjustment: Center line adjustment U034 1. Select the item. Display Description Setting Default Change in range setting value per step LSUOUT LEFT Paper feed from MP tray -3.0 to 3.0 0.1 mm (MPT) LSUOUT LEFT Paper feed from cassette 1 -3.0 to 3.0 0.1 mm...
- Page 26 Maintenance Description item No. Setting the paper size for the paper feeder U208 Description Sets the size of paper used in 3000-sheet paper feeder. Purpose To change the setting when installing the 3000-sheet paper feeder or the size of paper used in the paper feeder is changed.
- Page 27 5H8-1 Maintenance Description item No. Checking copy counts by paper feed locations U901 Description Displays or clears copy counts by paper feed locations. Purpose To check the time to replace consumable parts. Method 1. Press the start key. The counts by paper feed locations are displayed. Display Description MP TRAY...
-
Page 28: Paper Misfeed Detection
1-4 Troubleshooting 1-4-1 Paper misfeed detection (1) Paper misfeed indication When a paper misfeed occurs, the machine immediately stops copying and displays the jam location on the operation panel. Paper misfeed detection can be reset by opening and closing the left cover 4 to turn left cover 4 switch off and on. (2) Paper misfeed detection conditions FSW3 PFPFCL1... - Page 29 Section Jam code Conditions Specified time Paper feed Sequence error is occurred between the machine and section Sequence error JAM 3000-sheet paper feeder. Feed switch 3 (FSW3) does not turn on within the speci- 670 ms No paper feed from fied time of PF paper feed clutch 1 (PFPFCL1) turning on.
-
Page 30: Paper Misfeeds
(3) Paper misfeeds Problem Causes/check procedures Corrective measures Paper is extremely curled. Change the paper. A paper jam in the Broken feed switch 3 actua- Check visually and replace switch. paper feed section is tor. indicated during copying (no paper Defective feed switch 3. - Page 31 Problem Causes/check procedures Corrective measures Paper is extremely curled. Change the paper. A paper jam in the Check if the paper side Check visually and replace. paper feed section is guides are deformed. indicated during copying (jam in 3000- Defective paper path sen- With 5 V DC present at CN6-6 on the PF main PWB, check if sheet paper feeder sor 1.
-
Page 32: Self-Diagnosis
5H8-1 1-4-2 Self-diagnosis (1) Self-diagnostic function This unit is equipped with a self-diagnostic function. When a problem is detected, copying is disabled and the problem dis- played as a code consisting of C followed by a number, indicating the nature of the problem. A message is also displayed requesting the user to call for service. - Page 33 5H8-1 Remarks Code Contents Causes Check procedures/corrective measures C1130 PF right lift position problem Poor contact in the Check the connection of connector YC27 on Level switch 2 does not turn on within 30 connector termi- the engine PWB and the connector on the s of PF lift motor 1 turning on.
-
Page 34: Electric Problems
1-4-3 Electric problems Troubleshooting to each failure must be in the order of the numbered symptoms. Problem Causes Check procedures/corrective measures 1. Poor contact in the con- Reinsert the connector. Also check for continuity within the con- The paper feeder nector terminals. -
Page 35: Mechanical Problems
1-4-4 Mechanical problems Problem Causes/check procedures Corrective measures Check if the PF separation roller 1 or 2 is Clean with isopropyl alcohol. No primary paper feed. soiled with paper powder. Check if PF paper feed roller 1 or 2 is soiled Clean with isopropyl alcohol. -
Page 36: Assembly And Disassembly
1-5 Assembly and Disassembly 1-5-1 Precautions for assembly and disassembly (1) Precautions Before starting disassembly, press the Power key on the operation panel to off. Make sure that the Power lamp is off before turning off the main power switch. And then unplug the power cable from the wall outlet. Turning off the main power switch before pressing the Power key to off may cause damage to the equipped hard disk. -
Page 37: Paper Feed Section
1-5-2 Paper feed section (1) Detaching and refitting PF separation roller 1 and 2 Clean or replace PF separation roller 1 and 2 as follows. Procedure 1. Open left cover 4. 2. Remove two stop rings (a). 3. Remove the shaft. 4. -
Page 38: Detaching And Refitting The Pf Paper Conveying Unit
(2) Detaching and refitting the PF paper conveying unit Procedure 1. Pull the cassette out. 2. Remove left cover 4. 3. Remove two screws holding the PF paper PF paper conveying unit conveying unit and then the unit. Screw Screw Figure 1-5-2 (3) Detaching and refitting PF paper feed rollers 1 and 2 Clean or replace PF paper feed roller 1 and 2 as follows. -
Page 39: Adjusting The Position Of The Center Adjuster (Center Line Alignment)
(4) Adjusting the position of the center adjuster (center line alignment) Perform the following adjustment if the center lines of the copy image and the copy paper are misaligned. Procedure 1. Connect the power plug to the wall outlet and turn the main power switch on. 2. -
Page 40: Setting The Paper Size
(5) Setting the paper size Procedure Screw Lateral size adjuster 1. Pull out the cassette of the paper feeder. Remove the lower cassette from the machine. 2. Move the sliders at front and rear inward (two at each point). Slider Slider 3. -
Page 41: Cassette
6. Remove the screw and remove the longitu- Screw Screw dinal size adjusters. 7. Depending on the paper size, align either the A4 pins or the B5 pins with the pin holes Longitudinal in the longitudinal size adjusters, fit the Longitudinal size adjuster size adjuster... -
Page 42: Mechanical Construction
2-1 Mechanical Construction 2-1-1 Mechanical construction The paper feeder consists mainly of the left and right cassettes and separation section. The left cassette paper feed section sends paper from the lift to PFseparation rollers 1 and 2. When the left cassette becomes empty, the right cassette paper feed section conveys paper onto the lift of the left cassette. -
Page 43: Left Cassette Paper Feed
(1) Left cassette paper feed As the PF paper conveying clutch (PFCCL) and PF separation clutch (PFSCL) turns on, the drive is transmitted to PF sep- aration rollers 1 and 2, starting paper feed from the left cassette. The PFseparation rollers 1 and 2 ensure that the paper is fed one sheet at a time and that it is fed into the machine cor- rectly. -
Page 44: Right Cassette Paper Feed
(2) Right cassette paper feed As the last sheet in the left cassette is fed, PF paper feed clutch 2 (PFPFCL2) and PF paper feed clutch 1 (PFPFCL1) turn on for paper feed from the right cassette. PF paper feed rollers 1 and 2 start to rotate to convey paper from the right cas- sette onto the left cassette lift. -
Page 45: Raising And Lowering The Lifts
(3) Raising and lowering the lifts The following is a description of the right cassette lift operating mechanism. The left cassette lift operates in the same manner. PF lift motor 2 (PFLM2) drives the right lift belt assembly that winches the belt up and hence raises the lift until it is stopped by level switch 2 (LSW2). -
Page 46: Detecting The Paper Level
(4) Detecting the paper level The lift rises as paper in the cassette is used. When the remaining number of sheets in either right or left cassette reduces to around 100 to 250 sheets, the projection on the lift belt assembly pushes against the sensor lever which turns the relevant paper level sensor 1 or 2 (PLS1/2) on. When both paper level sensors 1 and 2 (PLS1/2) have turned on, the message [Low on paper.] is shown on the machine message display. - Page 47 This page is intentionally left blank. 2-1-6 Service Manual Y112030-5...
-
Page 48: Electrical Parts Layout
2-2 Electrical Parts Layout 2-2-1 Electrical parts layout (1) PWBs Machine front Machine inside Machine rear Figure 2-2-1 PWBs PF main PWB (PFMPWB) ......Controls electrical components and communications with the machine. Sensor relay PWB (SENRPWB) ....Distributes the power source to the level switch1 and paper feeder open/ closed safety switch. -
Page 49: Switches And Sensors
(2) Switches and sensors Machine front Machine inside Machine rear Figure 2-2-2 Switches and sensors Paper path sensor 1 (PPS1) ......Detect paper jams and the absence of paper on the lifts. Paper path sensor 2 (PPS2) ......Detect paper jams and the absence of paper on the lifts. Paper path sensor 3 (PPS3) ...... -
Page 50: Others
(3) Others Machine front Machine inside Machine rear Figure 2-2-3 Others PF paper conveying clutch (PFCCL) ... Regulates drive transmission to PF separation rollers 1 and 2. PF paper feed clutch 1 (PFPFCL1)....Regulates drive transmission to PF paper feed roller 1. PF paper feed clutch 2 (PFPFCL2).... - Page 51 This page is intentionally left blank. 2-2-4 Service Manual Y112030-5...
-
Page 52: Pf Main Pwb
2-3 Operation of the PWBs 2-3-1 PF main PWB PFMPWB Serial Communication communication PFSCL circuit signal From the machine PFCCL Clutch drive circuit PF paper PFPF conveying PFCM motor drive (IC8) circuit PFPF PFLM1 PFLM1 drive circuit drive circuit PPS1 PFLM2 PFLM2 drive circuit... - Page 53 IC11 IC12 Figure 2-3-2 PF main PWB silk-screen diagram Connector Pin No. Signal Voltage Description FEED SW SIG 0/5 V DC FSW3 On/Off signal from the machine Connected READY 0/5 V DC Ready signal to the machine to the SDO(IN) 0/5 V DC (pulse) Serial communication signal from the machine machine...
- Page 54 Connector Pin No. Signal Voltage Description DC5V 5 V DC 5 V DC supply to PLS2 Connected SGND Signal ground to the paper RS2_3 0/5 V DC PLS2: On/Off level sensor P2_CL 0/24 V DC PFPFCL2: On/Off Connected DC24V 24 V DC 24 V DC supply to PFPFCL2 to the PF P1_CL...
- Page 55 Connector Pin No. Signal Voltage Description RS2_2 0/5 V DC PFLM2 paper gauge signal (2) Connected SGND Signal ground to the PF lift RS2_1 0/5 V DC PFLM2 paper gauge signal (1) motor 1/2 Not used DC24V 24 V DC 24 V DC supply to PFLM2 LMOT2 0/24 V DC...
-
Page 56: List Of Maintenance Parts
2-4 Appendixes List of maintenance parts Maintenance part name Alternative Fig. Ref. Part No. part No. Name used in service manual Name used in parts list PF paper feed roller 1/2 H-PICK ROLLER 906419T PF separation roller 1 PULLEY,PAPER FEED 909009P PF separation roller 2 PULLEY,SEPARATION... - Page 57 This page is intentionally left blank. 2-4-2 Service Manual Y112030-5...
-
Page 58: Wiring Diagram
Wiring diagram Machine Wire color Mark PFCH1 PFCH2 Brown PFPFCL2 Yellow Blue White 9 10 11 12 Orange Light blue PFPFCL1 Gray Black Purple 10 9 PFCCL 10 9 P2_CL DC24V P1_CL PFSCL DC24V B_CL DC24V PFCM B_CL PFSSW DC24V MOT_ON DC24V PGND... - Page 59 UPDATING STATUS DATE UPDATED PAGES PAGES CODE 04/2010 EDITION Y112030-5...
Need help?
Do you have a question about the PF-760 and is the answer not in the manual?
Questions and answers