Table of Contents
Advertisement
Quick Links
Download this manual
See also:
Owner's Manual
Advertisement
Table of Contents

Related Manuals for GREEN SERIES FITNESS CIR-TM6000AC-G


Summary of Contents for GREEN SERIES FITNESS CIR-TM6000AC-G
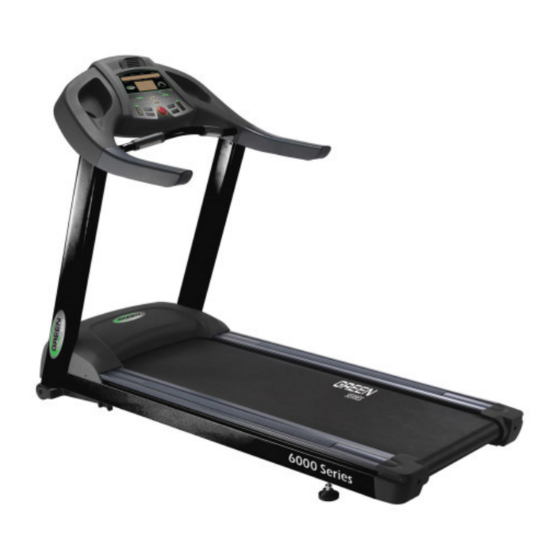
- Page 1 Owner's Manual CIR-TM6000AC-G Light Commercial Treadmill Install Date: _________________________ Serial Number: ________________________ www.GreenSeriesFitness.com © February 2014 Call Toll free at (800) 269-7130...
-
Page 2: Table Of Contents
TABLE OF CONTENTS SAFETY PRECAUTIONS ----------------------------------------------------------------- 2-7 Important voltage information, grounding instructions, how often you exercise, how hard you exercise, how long you exercise, beginner treadmill program, target heart rate zone. TECHNICAL SPECIFICATIONS -------------------------------------------------------- 8 UNPACKING & ASSEMBLY ---------------------------------------------------------- 9-16 Parts, hardware kit and assembly drawing WARM UP &... -
Page 3: Safety Precautions
MUST be approved and supplied by Green Series Fitness prior to use. Don't attempt to use this unit with an extension cord which does not meet Green Series Fitness criteria of the following; 12 gauge SO3, maximum of 25 foot length with a 20 amp rating. - Page 4 SAFETY PRECAUTIONS IMPORTANT SAFETY INSTRUCTIONS When using an electrical appliance, basic precautions should always be followed, including the following: Read all instructions before using the Treadmill. DANGER - To reduce the risk of electric shock: Always unplug this appliance from the electrical outlet immediately after using and before cleaning. WARNING - To reduce the risk of burns, fire, electric shock, or injury to persons: 1.
- Page 5 SAFETY PRECAUTIONS Grounding Instructions This treadmill must be grounded. If it should malfunction or break down, grounding provides a path of least resistance for electric current to reduce the risk of electric shock. This product is equipped with a cord having an equipment-grounding conductor and a grounding plug.
- Page 6 SAFETY PRECAUTIONS Safety key Emergency dismount: n case you must leave the equipment in an EMERGENCY SITUATION, grab the handrail and set both feet on the right and left foot platform beside the running belt. Now you pull out the safety switch, in order to slow down the equipment.
- Page 7 SAFETY PRECAUTIONS CONSULT A PHYSICIAN IMMEDIATELY Warning: before starting any exercise program consult your physician. This is especially important for individuals over the age of 35 or persons with preexisting health problems. Read all instructions before using any fitness equipment. We assume no responsibility for personal injury damage sustained by or through the use of this treadmill.
-
Page 8: Target Heart Rate Zone
SAFETY PRECAUTIONS BEGINNER TREADMILL PROGRAM EXERTION LEVEL DURATION WEEK 1 Easy 6~12 minutes WEEK 2 Easy 10~16 minutes WEEK 3 Moderate 14~20 minutes WEEK 4 Moderate 18~24 minutes WEEK 5 Moderate 22~28 minutes WEEK 6 Slightly higher or slightly lower 20 minutes WEEK 7 Add interval training... -
Page 9: Technical Specifications
TECHNICAL SPECIFICATIONS Length: 78” (199 cm) Width: 36” (86cm) Height: 57” (145cm) Running area: 20” x 60” (50cm x 152cm) Weight of product: 302 lbs (137 kg) Speed Range: 0.3 to 15 mph (0.48 to 24 km) Power elevation: 0~15 % Emergency stop: Pull the safety key Program: 40 programs, 1 target, 3 Heart Rate Control, 1 fitness test and 2 custom. -
Page 10: Unpacking & Assembly
UNPACKING & ASSEMBLY PARTS #3-2 #3-1 #3-6 #3-7 HARDWARE KIT #3-3 #3-5 #3-4 8mm x 15mm 8mm Flat washer 8mm curve washer (20 each) (16 each) (4 each) 5mm x 76mm 5mm x 114mm 6mm T-Handle #3-9 #3-8 3mm x 12mm Screw Belt Lube www.GreenSeriesFitness.com ©... - Page 11 UNPACKING & ASSEMBLY This unit has been 100% assembled, tested for all functions including vibration sensors and then disassembled. Any misalignments with stripped out threads is not coved by warranty due to installer not reinstalling correctly per the following steps #1 thru #7. Step 1: Removal of motor cover Remove the motor cover screws #1 - #4, and put the motor cover aside.
- Page 12 UNPACKING & ASSEMBLY Step 2 Pull thru lower cable to display 1). Put right console tube to right side of frame and attach wire/string to wire harness from motor controller area. Gently pull wire thru hole in frame right tube, then thru hole near bottom of right tube. 2).
- Page 13 UNPACKING & ASSEMBLY Step 3 Assemble the console mast 1). Install right tube to frame with four (4) 8mm x 15mm bolts and 8mm flat washer. Finger tight bolts at this time. Always start with inner bolt #1. Then proceed to upper right, bolt #2. Then lower right, bolt #3.
- Page 14 UNPACKING & ASSEMBLY Step 4 : Slide handlebars onto console 1).Slide handlebar onto console, Using Allen wrench with Allen Bolt 8mm x 15mm, 8mm flat washers. 2) After all four (4) bolts are finger tight and aligned to display plastic, then tighten bolts completely. 8mm x 15mm Allen Bolt (4 each) 8mm Flat Washer...
- Page 15 UNPACKING & ASSEMBLY Step 5 : Assembly console mast with console set. NOTICE: Two people are required for the following steps or damage may occur to wire harness when installing main display housing to front tubes. 1).Connect the upper console wire from console to lower console wire on the right console mast. 2).
- Page 16 UNPACKING & ASSEMBLY Step 6 : Reinstall motor hood cover 1) Take out four (4) screws in frame from the motor area/ 2) Angle hood at 45 degrees left to right to slide hood between front mass tubes, then down to position over motor housing.
-
Page 17: Unpacking & Assembly
UNPACKING & ASSEMBLY Step 7 : Assemble power cord and “sure connect”. 1) Unscrew small 3mm x 10 mm Philips head screw on right side of power connector (Next to 15amp breaker) 2) Plug in the power cord. 3) Fasten power cord and “sure connect” by Philips screw driver with new 3mm x 12mm screw. #3-8 Power Cord Power Cord Sure... -
Page 18: Warm Up & Cool Down
WARM UP & COOL DOWN A successful exercise program consists of a warm up, aerobic exercise and a cool down. Warming up is an important part of your workout, and should begin every session. It prepares your body for more strenuous exercise by heating up and stretching out your muscles. At the end of your workout, repeat these exercises to reduce sore muscle problems. -
Page 19: Panel Control & Program
PANEL CONTROL Safety Key Pad The treadmill will not function if the safety key is not present. www.GreenSeriesFitness.com © April 2014 Call Toll free at (800) 269-7130... - Page 20 PANEL CONTROL Display: Window Function Message window Display the workout program and operational instruction to begin a workout. Dot-matrix Display the program profile or setting value & figure. Incline Display the incline level during a workout. Calories Display the calories consumed during a workout. Time Display the workout time or countdown during a workout.
- Page 21 PROGRAMS Quick START : : : : 1. Press START, speed start from lowest speed, incline start from 0, all data starting to count. 2. Use any speed or incline adjust key or device to change the speed or incline what you want. Cool down program :...
- Page 22 PROGRAMS P2 Target : : : : 1. Insert the Safety Key in position. Press 『 P rogram Select 』 to select the Target program. Message Window shows T ARGET . Then press E NTER t o Target Time setting. 【...
- Page 23 PROGRAMS P3 Course : : : : 1. Insert the Safety Key in position. Press 『 P rogram Select 』 to select the COURSE program. Message Window shows C OURSE . Press E NTER to enter the program. 【 】 【...
- Page 24 PROGRAMS Course program profile www.GreenSeriesFitness.com © April 2014 Call Toll free at (800) 269-7130...
- Page 25 PROGRAMS P4 Custom : : : : 1. Press 『 P rogram Select 』 to select the Custom program. Message Window shows 【 C USTOM 】 Press E NTER to enter the program. Press E NTER t o choose program or Q uick Start 【...
- Page 26 PROGRAMS P5 Fitness test: 1. Press P rogram Select to select the Fitness test program. Message Window shows 『 』 F ITNESS TEST . Press E NTER to enter the program. 【 】 【 】 S ET WEIGHT 2. Body weight setting: Message Window shows 【...
- Page 27 PROGRAMS P6 Heart Rate Train : : : : 1.Press P rogram Select to select the Heart Rate Train program. Message Window shows 『 』 【 H EART RATE TRAIN 】 . Press 【 E NTER 】 to enter the program. 2.
- Page 28 PROGRAMS 7. Start speed setting: Message Window shows 【 S TART SPEED 】 , press 『 S peed /Incline up 』 S peed / Incline down to set the workout speed. Press E NTER to confirm the setting and go 『...
-
Page 29: Operation
OPERATION Emergency Stop Safety Key 1 Clothing of user 2 Emergency Stop Safety Clip (from front of display) The emergency stop key functions as an emergency stop. In an emergency situation, the emergency stop key disengages from the console and the treadmill will come to a stop. Before using the treadmill, clip the emergency stop key in display. -
Page 30: Operation
OPERATION Horizontal Adjustment For floor stability, you can adjust the 2 screws located under the front of base frame. 1. Lift the machine on one side and then turn the screw under the front of base frame. 2. Turn the screw clockwise to make the screw go up. 3. -
Page 31: Belt Adjustment
BELT ADJUSTMENT BELT ADJUSTMENT You may need to adjust the running belt during the first weeks of use. All running belts are properly set at the factory. It may stretch or be off-center after use. Stretching is normal during the break-in period. -
Page 32: Care & Maintenance
Turn clockwise to Increase the running belt Turn counter-clockwise to decrease the tension running belt tension CARE & MAINTENANCE CARE & MAINTENANCE Always remove the key and unplug the power cord before cleaning, lubricating, or performing any maintenance. HOW DO I CLEAN MY MACHINE? Clean with soap and water cleaners only. - Page 33 CARE & MAINTENANCE RECOMMENDED CLEANING TIPS Preventative maintenance and daily cleaning will prolong the life and look of your equipment. Use a soft, clean cotton cloth. DO NOT use paper towels to clean surfaces on the treadmill. Paper towels are abrasive and can damage surfaces. B Use a mild soap and damp cloth.
-
Page 34: Check For Damaged Parts
Ensure that any person(s) making adjustments or performing maintenance or repair of any kind is qualified to do so. Green Series Fitness will provide service and maintenance training at our corporate facility upon request or in the field if proper arrangements are made. -
Page 35: Trouble Shooting
DECK warning you running belt to erase the signal. need to lubricate. If the supply cord is damaged, it must be replaced by Green Series Fitness or its service supplier in order to avoid a hazard. www.GreenSeriesFitness.com © April 2014... -
Page 36: Limited Warranty
Limited Warranty 6000 SERIES LIGHT COMMERCIAL WARRANTY The Green Series™ 6000 light commercial warranty is intended for non-dues-paying facilities where equipment use is generally up to eight (8) hours per day. 7000 SERIES FULL COMMERCIAL WARRANTY The Green Series™ 7000 full commercial warranty is intended for facilities where equipment use is regularly in excess of eight (8) hours per day. - Page 37 The warranty and remedies set forth below are exclusive and in lieu of all others, oral or written, expressed or implied. No reseller, agent or employee is authorized to make any modification, extension or addition to this warranty. Warranty Conditions and Restrictions The above Limited Warranty is subject to the following conditions: 1.
- Page 38 12. GREEN SERIES™ and its Authorized Service Center, dealers or authorized technicians accept no responsibility for any parts of any products returned for repair to GREEN SERIES™. 13. GREEN SERIES™ makes no warranty either expressed or implied regarding third-party (non-GREEN SERIES™) installed parts, accessories or modifications.
- Page 39 also assumes full liability for losses or damages resulting from shipping as well as all responsibility to pursue remuneration for such issues with their selected carrier. After Warranty – Post Warranty Repair For post warranty repair, the procedure is the same as outlined above for service and shipping. However, customer is responsible for shipping charges both ways, labor, trip charges and the current price of part(s) needed to repair the product(s).
Need help?
Do you have a question about the CIR-TM6000AC-G and is the answer not in the manual?
Questions and answers