
Related Manuals for GREEN SERIES FITNESS CIR-TM7000-G


Summary of Contents for GREEN SERIES FITNESS CIR-TM7000-G
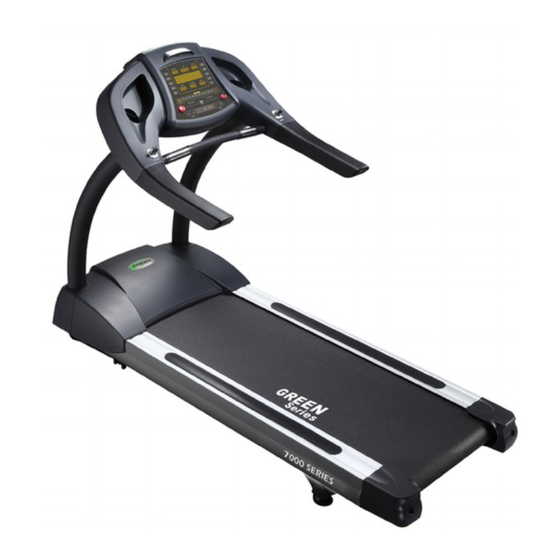
- Page 1 Owner's Manual CIR-TM7000-G Full Commercial Treadmill Install Date: _________________________ Serial Number: ________________________ www.GreenSeriesFitness.com ©September 2014 Call Toll free at (800) 269-7130...
-
Page 2: Table Of Contents
TABLE OF CONTENTS SAFETY PRECAUTIONS ----------------------------------------------------------------- 2-5 Important voltage information, grounding instructions, how often you exercise, how hard you exercise, how long you exercise, beginner treadmill program target heart rate zone. TECHNICAL SPECIFICATIONS -------------------------------------------------------- 6 UNPACKING & ASSEMBLY ----------------------------------------------------------- 7-12 Parts, hardware kit and assembly drawing WARM UP &... - Page 3 MUST be approved and supplied by Green Series Fitness prior to use. Don't attempt to use this unit with an extension cord which does not meet Green Series Fitness criteria of the following; 12 gauge SO3, maximum of 25 foot length with a 20 amp rating.
- Page 4 SAFETY PRECAUTIONS Before beginning 1).Only one person at a time should use this equipment. If dizziness, nausea, chest pains, or any other abnormal symptoms are experienced while using this treadmill, stop the workout at once. 2).MAX. user weight: 227 kg (500Ibs ) 3).Always use this treadmill on a clear and level surface.
-
Page 5: Safety Precautions
SAFETY PRECAUTIONS Safety key SAFETY KEY The safety key is to prevent falling down or any other emergencies from runner's not familiar with the speed of the treadmill. Please always wear safety key in case of any accident. CONSULT A PHYSICIAN IMMEDIATELY Warning: before starting any exercise program consult your physician. -
Page 6: Target Heart Rate Zone
SAFETY PRECAUTIONS BEGINNER TREADMILL PROGRAM EXERTION LEVEL DURATION WEEK 1 Easy 6~12 minutes WEEK 2 Easy 10~16 minutes WEEK 3 Moderate 14~20 minutes WEEK 4 Moderate 18~24 minutes WEEK 5 Moderate 22~28 minutes WEEK 6 Slightly higher or slightly lower 20 minutes WEEK 7 Add interval training... -
Page 7: Technical Specifications
TECHNICAL SPECIFICATIONS SPECIFICATIONS: Length: 212 cm Width: 92 cm Running area: 55cm x 154cm Weight of product: 185 kg ( 407 lbs) Power elevation: 0~18 motorized (front incline) Programs: 9 preset programs, 4HRC.. Manual mode: Yes Standard features: Total used time, Distance memorize, Hand pulse, Receiver, Calories, Heart rate. Quick speed/incline, Quick shift, Fan. -
Page 8: Unpacking & Assembly
UNPACKING & ASSEMBLY PARTS #2-6 #3-10 #3-6 #3-5 Main body Console Console mast set Left console Right console mast cover mast cover #3-9 #3-2 #3-1 Packing Handle bar set UNPACKING & ASSEMBLY www.GreenSeriesFitness.com ©September 2014 Call Toll free at (800) 269-7130... -
Page 9: Unpacking & Assembly
HARDWARE KIT #3-3 #3-4 #3-7 #3-8 #3-15 M8x25mm / 4pcs M8 / 4pcs M5x15mm / 4pcs M8X15mm / 10pcs M8 curve (Console mast set) Washer / 18pcs (Console / (Console / (Console mast set) Handle bar set) Handle bar set) #3-17 #3-16 End cap / 4pcs... - Page 10 Step1: Slide handlebars onto console 1).Slide handlebar onto console, Using Allen wrench with 4pcs bolt of M8*25mm, M8 washers. #3-3 #3-4 UNPACKING & ASSEMBLY Step 2: Assemble the console mast 1).Slide the right console mast down on to the console mast support tube, and secure using M8*15mm bolts and M8 curve washer (Do not completely tighten the M8*15mm bolts until Step3).
- Page 11 2).Slide the console mast cover and packing into two sides of console mast. (Do not attach the console mast cover until Step 3). #3-9 #3-6 #3-5 #3-15 M8 curve washer X10 #3-8 UNPACKING & ASSEMBLY Step 3: Attach the console to the console mast 1).Connect the right side of console cables and carefully tuck wires in mast to avoid damage.
- Page 12 5).Tighten the bolt of console mast with base frame console tube. Slide the console mast cover and packing down, and secure using the M5*15mm bolt. #3-17 #3-15 M8 curve washer X8 #3-7 #3-16 UNPACKING & ASSEMBLY Please tear the protective film away from side rein, and pastes the non-slip sticker to the appropriate position.
-
Page 13: Warm Up & Cool Down
WARM UP & COOL DOWN A successful exercise program consists of a warm up, aerobic exercise, and a cool down. Warming up is an important part of your workout, and should begin every session. It prepares your body for more strenuous exercise by heating up and stretching out your muscles. At the end of your workout, repeat these exercises to reduce sore muscle problems. - Page 14 finally, drop your head to your chest for one count . Repeat this action for several times. SHOULDER LIFTS QUADRICEPS STRETCH 1 1BU Lift your right shoulder up With one hand against a wall for toward your ear for one count. balance, reach behind you and Then lift your left shoulder up pull your right foot up.
-
Page 15: Panel Control
PANEL CONTROL Display & Keys Message window, display program profiles & message Safety Key Stop key If the safety key is not present the Press to stop the treadmill. treadmill will not function www.GreenSeriesFitness.com ©September 2014 Call Toll free at (800) 269-7130... - Page 16 PANEL CONTROL Display function Display Definition Time Displays time remaining or total time. Calories Displays calories burned. Incline Displays current incline level. Heart Rate Displays hand grip and wireless Heart Rate reading. Distance Displays total distance KM/Mi. Speed Displays the running speed. Key function Function Start...
-
Page 17: Program
PROGRAMS PROGRAMS SPEED INCLINE Target Rolling Valley Fat Burn Ramp Strength Interval Random Fitness Test H.R.C Program operation : : : : T arget 【 】 1.1. Press T arget k ey to select T arget p rogram. 『 』 【... - Page 18 PROGRAMS P reset Programs 【 】 : 2.1. Press program key to select a preset program, there are 7 preset program keys(ROLLING 、 VALLEY F AT BURN R AMP S TRENGTH I NTERVAL R ANDOM). 、 、 、 、 、 2.1.1.
- Page 19 PROGRAMS Prog. speed incline speed incline speed incline speed incline speed incline speed incline Prog. speed incline speed incline speed incline speed incline speed incline speed incline Prog. speed incline speed incline speed incline speed incline speed incline speed incline P1=ROLLING, default value 4 MPH/6KPH.
- Page 20 PROGRAMS 3. Fitness Test : : : : 3.1. Press F itness Test t o select the program. 『 』 3.2. Message window show S ET BODYWEIGHT THEN PRESS ENTER s et body weight then 『 』 , press 『 E NTER 』...
-
Page 21: Program
PROGRAMS H RC 【 】 4.1. HRC operate with chest belt only w ill be reset to idle mode if no any heart rate signal input after , 60 seconds. 4.2. Press H RC k ey to select the program m essage window show T HR , press... -
Page 22: Operation
OPERATION Quick Shift : Speed Quick Shift: press Quick Shift up to increase speed or down to decrease speed. Incline Quick Shift: press Quick Shift to incline or down to decline. Speed button Incline button FOLLOW THESE INSTRUCTIONS TO LEVEL YOUR TREADMILL: An uneven floor or improper adjustable pad level can cause the treadmill to wobble during use as well as the incline adjustment to function incorrectly. -
Page 23: Belt Adjustment
BELT ADJUSTMENT BELT ADJUSTMENT You may need to adjust the running belt during the first weeks of use. All running belts are properly set at the factory. It may stretch or be off-center after use. Stretching is normal during the break-in period. -
Page 24: Care & Maintenance
CARE & MAINTENANCE CARE & MAINTENANCE Always remove the key and unplug the power cord before cleaning, lubricating, or performing any maintenance. Other parts maintenance: Number Checking Item Daily Week Month Season 6 Months Console Screws Checking Frame Wipe Checking Running Surface Clean(dust) Checking... -
Page 25: Care & Maintenance
CARE & MAINTENANCE CLEANING Perspiration should be wiped from the console and treadmill surface after your workout. You should wipe down this treadmill after each use with a water dampened, soft cloth. Be careful do not get excessive moisture on the display panel, this might cause an electrical hazard or electronics to fail. REPLACEMENT RUNNING BELT Running belt is consumables parts. -
Page 26: Trouble Shooting
TROUBLE SHOOTING F831825-000-00 M-7002A3 10203 SYMPTOM CAUSE SOLUTION Console display do A).No power to treadmill. A).Check the on-off switch is on, switch indicator shall be light. if not light, check AC power source. not illuminate B).Console wire is not B).Check console wire every connector points connected or incompletely. -
Page 27: Limited Warranty
Limited Warranty 6000 SERIES LIGHT COMMERCIAL WARRANTY The Green Series™ 6000 light commercial warranty is intended for non-dues-paying facilities where equipment use is generally up to eight (8) hours per day. 7000 SERIES FULL COMMERCIAL WARRANTY The Green Series™ 7000 full commercial warranty is intended for facilities where equipment use is regularly in excess of eight (8) hours per day. - Page 28 Except as provided below, GREEN SERIES™ is not liable for any loss, cost, expense, inconvenience or damage that may result from use or inability to use the equipment. Under no circumstances shall GREEN SERIES™ be liable for any loss, cost, expense, inconvenience or damage exceeding the purchase price of the equipment.
- Page 29 10. Customer must retain bill of sale or other proof of purchase and register equipment within thirty (30) days of installation to receive warranty service. Registration of the equipment ensures GREEN SERIES™ the ability to provide prompt and complete service. 11.
- Page 30 2. Upon receiving the technician service report, GREEN SERIES™ will repair or replace your defective parts and will ship replacement parts to the location specified (dependent on parts availability) via UPS. 3. GREEN SERIES™ will pay for shipping to and from the customer only within the time allocated under the warranty time-line following the original product installation date.
Need help?
Do you have a question about the CIR-TM7000-G and is the answer not in the manual?
Questions and answers