Sign In
Upload
Download
Table of Contents
Contents
Add to my manuals
Delete from my manuals
Share
URL of this page:
HTML Link:
Bookmark this page
Add
Manual will be automatically added to "My Manuals"
Print this page
×
Bookmark added
×
Added to my manuals
Manuals
Brands
Nikon Manuals
Measuring Instruments
NE-101
Instruction manual
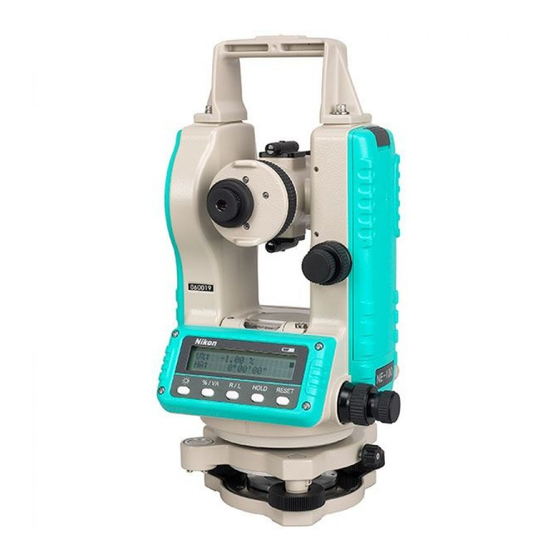
Nikon NE-101 Instruction Manual
Electronic digital theodolite
Hide thumbs
1
2
3
4
5
6
Table Of Contents
7
8
9
10
11
12
13
14
15
16
17
18
19
20
21
22
23
24
25
26
27
28
29
30
31
32
33
34
35
36
37
38
39
40
41
42
43
44
45
46
47
48
49
50
51
52
53
54
55
page
of
55
Go
/
55
Contents
Table of Contents
Bookmarks
Table of Contents
Warning and Caution Symbols in this Manual
Warning and Caution
Maintenance
Table of Contents
Nomenclature
Preparation
Unpacking and Packing the Instrument
Putting the Batteries in the Battery Pack
Setting up the Tripod
Centering
Leveling
Sighting
Initial Setting
Operation
Power Switch ON/OFF
Battery Capacity Level Display
Angle Measurement
Vertical Angle
1> Vertical 0° Angle Orientation
2> Angle Unit Selection
3> Grade Display
Horizontal Angle
1> Horizontal Angle Zero Reset
2> Reverse Horizontal Angle Scale
3> Hold
4> Repeat Horizontal Angle Measurement
5> Horizontal Angle Priority Function
Other Functions
Checking and Adjustment
Plate Level
Circular Level
Optical Plummet
Vertical Circle Zero Point Error
Warning Messages
Specifications
Optional Accessories
Advertisement
Quick Links
1
Initial Setting
2
Checking and Adjustment
3
Vertical Circle Zero Point Error
4
Specifications
Download this manual
Electronic Digital Theodolite
NE-101 / NE-100
Instruction Manual
helmut-schultz
www.
.de
H176 E
04.8.VF.2
Table of
Contents
Previous
Page
Next
Page
1
2
3
4
5
Advertisement
Table of Contents
Need help?
Do you have a question about the NE-101 and is the answer not in the manual?
Ask a question
Questions and answers
Related Manuals for Nikon NE-101
Measuring Instruments Nikon NE-100 Instruction Manual
Electronic digital theodolite (55 pages)
Measuring Instruments Nikon Nivo 2.C Instruction Manual
Hardware (32 pages)
Measuring Instruments Nikon Nivo Series Instruction Manual
Total station (197 pages)
Measuring Instruments Nikon N Series Instruction Manual
(198 pages)
Measuring Instruments Nikon NPL-302 Series Instruction Manual
Pulse laser station (234 pages)
Measuring Instruments Nikon NPL-352 Manual
Unswitched (12 pages)
Measuring Instruments Nikon NPL-322 Instruction Manual
Total station (197 pages)
Measuring Instruments Nikon NPL-632 Instruction Manual
Field station (206 pages)
Measuring Instruments Nikon NPL-332 Instruction Manual
Pulse laser station (234 pages)
Measuring Instruments Nikon NPL-362 Instruction Manual
Pulse laser station (234 pages)
Measuring Instruments Nikon NR-5500 Repair Manual
Auto refractometer (25 pages)
Nikon MONARCH 3000 STABILIZED - 6x21 Laser Rangefinder Manual
(article)
Nikon COOLSHOT PRO II STABILIZED - 6x21 Golf Laser Rangefinder Manual
(article)
Measuring Instruments Nikon DTM-502 Series Instruction Manual
(201 pages)
Measuring Instruments Nikon Total Station DTM-322 Instruction Manual
(185 pages)
Nikon Laser 550, ProStaff 550, Team REALTREE 550 Manual
(article)
This manual is also suitable for:
Ne-100
Table of Contents
Save PDF
Print
Rename the bookmark
Delete bookmark?
Delete from my manuals?
Login
Sign In
OR
Sign in with Facebook
Sign in with Google
Upload manual
Upload from disk
Upload from URL


Need help?
Do you have a question about the NE-101 and is the answer not in the manual?
Questions and answers