
Related Manuals for Microplex PP 803


Summary of Contents for Microplex PP 803
-
Page 1: User Manual
User Manual PP 80x PP 803 PP 806 PP 809 8707-330-xxxxx 8707-340-xxxxx 8707-390-xxxxx... - Page 3 It has to be observed that the second tractor cassette and the manual sheet feeder for PP 803 are options and do not belong to the standard delivery contents. Samples of Personality Modules (PM) or emulations in this manual always...
- Page 4 The contents of this manual are subject to change without notice. Copyright © by MICROPLEX Printware Corp. All rights strictly reserved. Reproduction or issue to third parties in any form is not permitted without written authorization from the publisher.
- Page 5 Safety Regulations The printer PP 803 , PP 806 , and the printer PP 809 fulfill the safety regulations according to UL 1950 and VDE (IEC 950) and CNA/CSA C22.2 / No. 950 for computer systems. The mains cable must be connected to a ground protected wall-socket. The selected voltage of the printer needs to fit to the local voltage.
- Page 6 Electromagnetic Compatibility We certify that the equipment at issue, Type: Printer PP 803, PP 806, and Printer PP 809 Corresponds to the law regulations ruling electromagnetic compatibility of ap- pliances (89/336/EWG) and, therefore, fulfills the requirements for conformity marking with the CE-sign.
- Page 7 Shielded interface cables should be used with this unit to ensure compliance with Class B limits. Changes and modifications not explicitly allowed by the equipment's manufacturer could void the user's authority to operate the equipment. Changes et modifications pas expressément approuvés par le producteur peuvent dévaluer l'autorité...
- Page 8 Power ON/OFF Lever To switch the printer on or off push the Power On/Off - Lever always down. Power - On Power - Off Lifting the On/Off - Lever to the zero position won’t switch off the printer. Push the On/Off - Lever always down for switching on or off.
-
Page 9: Table Of Contents
2.8.2 Manuelle Papierzuführung PP 806 ..................17 Test-Ausdrucke ..........................18 2.9.1 Sample Print Menu for Printer PP 803: ................. 19 2.9.2 Sample Print Menu for Printer PP 806: ................. 20 2.9.1 Sample Print Menu for Printer PP 809: ................. 21 2.9.2... - Page 10 4.2.1 Standard Configuration PP 803....................4 4.2.2 Standard Configuration PP 806....................5 4.2.3 Standard Configuration PP 809....................6 4.2.4 Explanation of the printout on the previous pages ..............7 Menu Structure ..........................1 5.1. Menu PP 803 ............................ 1 5.2.
- Page 11 Remove ASF Pick Up Roller (1) ..................... 12 8.3.8 Install ASF Pick Up Roller ......................13 8.4. Cut Sheet Tray Front (Only printers PP 803 oder PP 806) ............... 14 8.5. Manual Sheet Feeder (Printer PP 803) ................... 15 8.6.
- Page 12 9.2. PP 806 ............................. 23 9.2.1. Printer Spezification ........................23 9.1.5. Performance: ..........................25 9.1.6. Paperhandling..........................25 9.1.7. Option ............................. 27 9.3. PP 809 ............................. 30 9.3.1. Printer Spezification ........................30 9.1.8. Performance: ..........................32 9.1.9. Paperhandling..........................33 9.3.2. Optionen ............................20 9.4.
- Page 13 C.1.21. NV EPSON Italic Character Table (part 1)................19 C.1.22. NV EPSON Italic Character Table (part 2)................20 C.1.23. Code Table OCR-A ........................ 21 Code Pages for the Eastern European Countries (EE) ................... 22 C.1.24. CODEPAGE 437 Greek ......................22 C.1.25.
-
Page 14: Preface
Preface 1. Preface About this Manual This manual covers the printer in combination with an interface module (Perso- nality Module). The Personality Module (PM) is an integral part of the printer, and the type of PM used significantly influences the behavior or operation of the printer. The structure of this manual is such that the operator is led step-by-step through the various procedures. - Page 15 Preface Getting Started This chapter covers the unpacking and setting-up of the printer and the installation of the PM (Personality Module) and ribbon cassette. By the end of this chapter the printer should be fully functional and tested in its primary form.
- Page 16 Preface Technical Data All technical details or data about the printer can be found here. Appendix Interface Description This chapter gives hints about possibilities to connect the printer to the various computer systems and explains particularities depending on the version of the operating system. Additionally, cable connection is illustrated.
- Page 17 The operation of both printers is mostly alike. In most illustrations, the printer PP 806 is used. In case there are differences in the handling you will find the note PP 803 , PP 806 , or PP 809 . 3-XV...
-
Page 19: Getting Started
Getting startet 2. Getting started Unpacking Check each item against the check list detailed below. Contact your supplier immediately if any item is missing or damaged. The package contains the printer (1), a box (2), attachments in bubble wrap (3), and a box (4) with the ribbon cassette: Save all packing material and boxes for future transportation of the printer. - Page 20 Power cordl (3) In the bubble foil you will find one tractor cassette (10) in case of printer PP 803 two tractor cassettes (10) in case of printer PP 806 or PP 809 An additional package in bubble foil comes along with printer PP 806 and...
-
Page 21: Delivery Contents Printer Pp 803
Getting startet 2.1.1 Delivery Contents Printer PP 803 Printer (1) Tractor Cassette (2) Quick Reference Guide (3) Power Cord (4) Personality Module (PM) (5) (must ordered separately) CD-ROM (6) Ribbon Cassette (7) Pls. ckeck, if a part is missing inform your supplier. -
Page 22: Delivery Contents Printer Pp 806
Getting started 2.1.2 Delivery Contents Printer PP 806 Printer (1) Paper Guide (2) Manual insert (3) Two Tractor Cassettes (4) Quick Reference Guide (5) Power Cord (6) Personality Module (PM) (7) (must ordered separately) Ribbon Cassette (8) CD-ROM (9) Pls. ckeck, if a part is missing inform your supplier. -
Page 23: Lieferumfang Pp 809
Getting startet 2.1.3 Lieferumfang PP 809 Printer (1) Paper Guide (2) Two Tractor Cassettes (3) Quick Reference Guide (4) Power Cord (5) Personality Module (PM) (6) (must ordered separately) Ribbon Cassette (7) CD-ROM (8) Pls. ckeck, if a part is missing inform your supplier. -
Page 24: Requirements To The Location Of The Printer
Getting started Requirements to the location of the printer Requirements to the location of the printer Environmental Conditions Install the printer in an area away from any heat source, air conditioner, or strong airflow. Avoid installing the printer where it is exposed to moisture or heat (eg. Direct Sun light). -
Page 25: Remove Transport Lock
Getting startet 2.3 Remove transport lock Open the rear cover (2) by pressing the two locking buttons (1) and swivel the rear cover backwards Remove the transport lock (3) for the print head carriage... -
Page 26: Installing The Personality Module (Pm)
Getting started Re-packing Information To ensure maximum protection when transporting the printer, always: Remove any installed paper handling option. Remove the mains cable. Remove the ribbon cassette. Reposition the transport lock. Pack the printer in its original packing material and ship in its original package. 2.4 Installing the Personality Module (PM) The printer is only operational when an interface is installed, called a Personality Module (PM). -
Page 27: Mains Connection And Power On
Getting startet 2.5 Mains Connection and Power on Connect the printer to the mains using the power cord. First connect the cable to the power cord socket and then to the mains. Do not plug into the same wall outlet other equipment besides the printer such as coffee machines, copy machines, or air conditioners. -
Page 28: Ribbon Installation
Getting started 2.6 Ribbon Installation It is recommended to use only original ribbon cassettes supplied by Note: the printer manufacturer. Using other ribbons will void your warranty. The following procedure describes how the ribbon cassette is installed into the printer for the very first time. Section 2.7 Replacing the Ribbon Cassette is applicable if the ribbon cassette is to be changed. - Page 29 Getting startet Slide the ribbon cassette (3) into the printer Close the rear cover (2). The printer locks automatically the ribbon and cover. 2-11...
-
Page 30: Replace Ribbon Cassette
PP 803). Single sheets through the manual paper path input of the PP 806 which is an optional device for printer PP 803. Only for printer PP 806 automatic sheet feeder cassette (ASF-Cassettes) are available as an option. For further information please refer to chapter 7.2 ASF Cassettes. -
Page 31: Paper Source Selection
Getting startet 2.8.1 Paper Source Selection The basic selections for PAPER SOURCE are: TRACTOR (Default TRACTOR LOWER, indicated by *) MANUAL Select 'TRACTOR L/U' as paper source on the operator panel The following diagram shows which keys to press and what is displayed on the operator panel. -
Page 32: Fanfold Paper Feeding
Remove the manual sheet feeder (1) of printer PP 806 (option for printer PP 803, see also paragraph 7.5 Manual Sheet Feeder). Insert the lower (2) or the upper (3) tractor cassette, or both. The second Tractor Cassette is for printer PP 803 an option. Note: 2-14... - Page 33 Paper Loading Step 1: The paper width will be adjust with the right tractor. The left tractor is fix. Adjust the right tractor as shown in the picture below roughly to the paper width. Note: Don´t move the tractor with open tractor cover because it may break off! Step 2: Open the tractor covers and insert the paper preferably into the right tractor.
- Page 34 Getting Started The left tractor is fix such that the left transport holes properly feed into Note: the paper run sensor. The print area can be shifted electronically with the menu item PRINT POS. ADJ. (see also menu structure and description of the individual menu items). Step 3: Only for PP 806 and PP 809: insert the Paper Guide (1) into the right slot (2) and push it against the housing [1.].
-
Page 35: Manuelle Papierzuführung Pp 806
Paper Loading 2.8.2 Manuelle Papierzuführung PP 806 Insert and connect the Manual Sheet Feeder (1) to the paper insertion guide Select the paper source MANUAL using either the menu function or by means of the corresponding command in your application program, see chapter 2.9.1 Paper Source Selection. -
Page 36: Test-Ausdrucke
Getting Started 2.9 Test-Ausdrucke There are four test printouts available. PRINT MENU shows the current settings of all parameters and the contents of the macros. CONFIGURATION lists all available fonts and indicates the page counter value. PRINT LETTER produces a standard letter (ECMA-132) which can be used for measuring the printer’s throughput. -
Page 37: Sample Print Menu For Printer Pp 803
Paper Loading 2.9.1 Sample Print Menu for Printer PP 803: PRINT OUT FW-VERSION 20xxxxxx HW-VERSION 29xxxxxx FPGA 5.0 PAGE COUNT 213856 INTERFACE I/F TYP PARALL./ RS232 WORD LENGTH 8 BIT BAUD RATE 9600 BIT/S PARITY BIT EVEN PROTOCOL DSR/CTS MODE IGNOR. -
Page 38: Sample Print Menu For Printer Pp 806
First Steps 2.9.2 Sample Print Menu for Printer PP 806: PRINT OUT FW-VERSION 20xxxxxx HW-VERSION 29xxxxxx FPGA 5.0 PAGE COUNT 213856 INTERFACE I/F TYP PARALL./ RS232 WORD LENGTH 8 BIT BAUD RATE 9600 BIT/S PARITY BIT EVEN PROTOCOL DSR/CTS MODE IGNOR. -
Page 39: Sample Print Menu For Printer Pp 809
First Steps 2.9.1 Sample Print Menu for Printer PP 809: PRINT OUT FW-VERSION 20xxxxxx HW-VERSION 29xxxxxx FPGA 5.0 PAGE COUNT 213856 INTERFACE I/F TYP PARALL./ RS232 WORD LENGTH 8 BIT BAUD RATE 9600 BIT/S PARITY BIT EVEN PROTOCOL DTR DSR/CTS MODE IGNOR. -
Page 40: Sample Configuration
First Steps 2.9.2 Sample Configuration CONFIGURATION FW-VERSION 202xxxxx PAGE COUNT C031 ISO 8859/1 CO32 ISO 8859/15 C061 IBM SET 1 C062 IBM SET 2 C063 IBM CODE PAGE C071 EPSON EXT. GCT C100 CODE PAGE EE C101 CODE PAGE EE2 DATA ROMAN ROMAN... -
Page 41: Sample Letter (Dr. Grauert)
First Steps 2.9.3 Sample Letter (Dr. Grauert) Eilzustellung Norddeutsche Farbwerke KG Herrn Dr. Grauert Große Elbstraße 64 2000 Hamburg 4 Org. III 5/37 4 34 22.04.75 17.04.75 Volkmann Vordruckgestaltung für den allgemeinen Schrift- verkehr, für das Bestell- und Rechnungswesen E i l t Sehr geehrter Herr Dr. -
Page 42: Beispiel: Diagonal Test
First Steps 2.9.4 Beispiel: DIAGONAL TEST ABCDEFGHIJKLMNOPQRSTUVWXYZabcdefghijklmnopqrstuvwxyz0123456789!§ §ABCDEFGHIJKLMNOPQRSTUVWXYZabcdefghijklmnopqrstuvwxyz0123456789! !§ABCDEFGHIJKLMNOPQRSTUVWXYZabcdefghijklmnopqrstuvwxyz0123456789 9!§ABCDEFGHIJKLMNOPQRSTUVWXYZabcdefghijklmnopqrstuvwxyz012345678 89!§ABCDEFGHIJKLMNOPQRSTUVWXYZabcdefghijklmnopqrstuvwxyz01234567 789!§ABCDEFGHIJKLMNOPQRSTUVWXYZabcdefghijklmnopqrstuvwxyz0123456 6789!§ABCDEFGHIJKLMNOPQRSTUVWXYZabcdefghijklmnopqrstuvwxyz012345 56789!§ABCDEFGHIJKLMNOPQRSTUVWXYZabcdefghijklmnopqrstuvwxyz01234 456789!§ABCDEFGHIJKLMNOPQRSTUVWXYZabcdefghijklmnopqrstuvwxyz0123 3456789!§ABCDEFGHIJKLMNOPQRSTUVWXYZabcdefghijklmnopqrstuvwxyz012 23456789!§ABCDEFGHIJKLMNOPQRSTUVWXYZabcdefghijklmnopqrstuvwxyz01 123456789!§ABCDEFGHIJKLMNOPQRSTUVWXYZabcdefghijklmnopqrstuvwxyz0 0123456789!§ABCDEFGHIJKLMNOPQRSTUVWXYZabcdefghijklmnopqrstuvwxyz z0123456789!§ABCDEFGHIJKLMNOPQRSTUVWXYZabcdefghijklmnopqrstuvwxy yz0123456789!§ABCDEFGHIJKLMNOPQRSTUVWXYZabcdefghijklmnopqrstuvwx xyz0123456789!§ABCDEFGHIJKLMNOPQRSTUVWXYZabcdefghijklmnopqrstuvw wxyz0123456789!§ABCDEFGHIJKLMNOPQRSTUVWXYZabcdefghijklmnopqrstuv vwxyz0123456789!§ABCDEFGHIJKLMNOPQRSTUVWXYZabcdefghijklmnopqrstu uvwxyz0123456789!§ABCDEFGHIJKLMNOPQRSTUVWXYZabcdefghijklmnopqrst tuvwxyz0123456789!§ABCDEFGHIJKLMNOPQRSTUVWXYZabcdefghijklmnopqrs stuvwxyz0123456789!§ABCDEFGHIJKLMNOPQRSTUVWXYZabcdefghijklmnopqr rstuvwxyz0123456789!§ABCDEFGHIJKLMNOPQRSTUVWXYZabcdefghijklmnopq qrstuvwxyz0123456789!§ABCDEFGHIJKLMNOPQRSTUVWXYZabcdefghijklmnop pqrstuvwxyz0123456789!§ABCDEFGHIJKLMNOPQRSTUVWXYZabcdefghijklmno opqrstuvwxyz0123456789!§ABCDEFGHIJKLMNOPQRSTUVWXYZabcdefghijklmn nopqrstuvwxyz0123456789!§ABCDEFGHIJKLMNOPQRSTUVWXYZabcdefghijklm mnopqrstuvwxyz0123456789!§ABCDEFGHIJKLMNOPQRSTUVWXYZabcdefghijkl lmnopqrstuvwxyz0123456789!§ABCDEFGHIJKLMNOPQRSTUVWXYZabcdefghijk klmnopqrstuvwxyz0123456789!§ABCDEFGHIJKLMNOPQRSTUVWXYZabcdefghij jklmnopqrstuvwxyz0123456789!§ABCDEFGHIJKLMNOPQRSTUVWXYZabcdefghi ijklmnopqrstuvwxyz0123456789!§ABCDEFGHIJKLMNOPQRSTUVWXYZabcdefgh hijklmnopqrstuvwxyz0123456789!§ABCDEFGHIJKLMNOPQRSTUVWXYZabcdefg ghijklmnopqrstuvwxyz0123456789!§ABCDEFGHIJKLMNOPQRSTUVWXYZabcdef fghijklmnopqrstuvwxyz0123456789!§ABCDEFGHIJKLMNOPQRSTUVWXYZabcde efghijklmnopqrstuvwxyz0123456789!§ABCDEFGHIJKLMNOPQRSTUVWXYZabcd defghijklmnopqrstuvwxyz0123456789!§ABCDEFGHIJKLMNOPQRSTUVWXYZabc cdefghijklmnopqrstuvwxyz0123456789!§ABCDEFGHIJKLMNOPQRSTUVWXYZab... -
Page 43: Connection To The System
First Steps 2.10 Connection to the System Parallel/Serial Interface Switch the printer and the computer OFF. Connect the interface cable coming from the computer to the printer's parallel (1) or serial (2) port. The following values are default settings, see chapter 1.9.1 or 1.9.2 PRINT MENU. -
Page 44: Printer Driver
First Steps 2.11 Printer Driver Introduction This part of the documentation describes the features of the printer driver for the models PP803, PP803C, PP806 and PP809, hereinafter also referred to as PP 80X. The printer driver is available for Microsoft Windows NT2000 PP80X.DRV WIN XP Vista WIN7 SERVER 2003 and 2008. -
Page 45: Driver Installation
First Steps 2.11.1 Driver Installation Control Panel -> Hardware and Sound ->Devices and Printers Add a Printer Add a Local Printer -> next 2-27... -
Page 46: Example For A Lpr Connection
First Steps Choose a printer port - > next Or: If necessary, create a new connection (see Microsoft Manual) 2.11.2 Example for a LPR Connection: The print server of the printer is accessed via the LPR port (TCP / IP port 515). - Page 47 First Steps It may well be that " LPR Port " is not available, because the choices depend on already installed protocols. If LPR Port is not available here, this feature of Windows must be installed separately. This is done via Control Panel\All Control Panel Items\Programs and Features Turn windows features on or off ->...
- Page 48 First Steps Enter the print server name or IP address 172.20.11.46 and the required queue, in this Example PSIPP803. Confirm with OK. So that you come back to the main menu of the printer installation. Select disk (file folder where, the driver is located) Browse ->...
- Page 49 First Steps Open the *.inf file Select Printer the Version 2-31...
- Page 50 First Steps If this type of printer was already installed, you can decide whether the already installed. Driver to be used, or whether you want to overwrite the old with the new version. Next -> Enter a name for the printer that will appear later in the Windows Printers folder.
- Page 51 First Steps Specify whether the printer is to be shared with other network users. 2-33...
- Page 52 First Steps Next-> If the printer is the default printer, then set the hook. Print a test page and finish. 2-34...
- Page 53 First Steps Finish -> The driver is now installed and registered in the Windows system ! It now appears possible way an indication that the driver is not signed by Microsoft. This is to ignore and continue the installation by feature „Install this driver software anyway“...
-
Page 54: Driver Settings
First Steps Features and printer settings: By double clicking on printer icon will open the installed printer. Select -> Printer-> Porperties Driver settings 2-36... - Page 55 First Steps Device settings: The device setting describes the assignment of paper paths to the paper formats used. Print preferences: Print preferences describes the settings for the print output. 2-37...
- Page 56 First Steps Layout: Select the paper orientation portrait or landscape format Orientation: Page Order Sorting of print pages Pages per sheet Number of Compressed pages per sheet Example: 2 pages on one Paper/Quality: Paper Source = Select paper feed 2-38...
- Page 57 First Steps Advanced Document Settings and printer functions Paper / Output: Paper Size = list of available paper sizes for this driver Nonexistent or custom paper sizes must Start Menu -> Settings -> Printers and Faxes - > File - > Server Properties added.
- Page 58 First Steps Dokument Options: Advanced Printing Features = activate and deactivate the following Printer Features Pages per Sheet Layout: If using page per sheet function you can select the orientation of pages 2-40...
- Page 59 600/8 = 75 lpi Print Optimations = Windows optimization method to improve the speed and quality graphics. This should always be activated (Enabled). Printer Features: Single Sheet Output: (only PP 803 and PP 806) = Specifies where single sheet will eject. 2-41...
- Page 60 First Steps Output Bin (only PP 803 with cutter) = Specifies where the cutted sheet will eject. Print quality = quality of the printout with internal printer fonts. Job Start Macro Select = select a specific printer macro at the start print job.
- Page 61 First Steps Note: This may be necessary when printing from another system without any PSi driver. PSi Spezial Grafik Mode = If you have selected graphics print quality 180 x 180 dots per inch, the quality and thus the printing speed of the expression can be changed.
- Page 62 First Steps Print Mode = Select Bidirectional or Undirectional printing mode. LPI Linespace = using fix or Windows variable line spaces. Print Gap Control (AGC) = allows switching off the paper thickness measurement and set a fixed number of copies. 2-44...
-
Page 63: Macro Slection
First Steps 2.12 Macro Slection The following emulations are included in the PM Ser/Par: EPSON LQ / ESC/P2 in Macro 1 (Default) IBM ProPrinter XL 24 in Macro 2 IBM ProPrinter XL 24 AGM in Macro 3 EPSON LQ / ESC/P2 in Macro 4 To change from one emulation to another, follow the procedure below. -
Page 65: Printer Operation
3. Printer Operation Most of the printer functions can be executed via operator panel as well as via software commands from the host system. Some functions become only effective via Operator Panel keys, for example: locking/unlocking the printer. Operator Panel The Operator Panel ... - Page 66 Printer Operation The LCD Display (1) indicates the current status of the printer. If any error occurs (e.g. UNLOCKED - ... CHECK RIBBON) the corresponding error message will be displayed. The green LED (3) lights only if the printer is powered on and in the Ready Mode.
-
Page 67: Key Funktions
Release the key as soon as the desired function is displayed. For further information see chapter 3.1 . DISPLAY 1 ) EJECT PAPER [Form Feed] INSERT ASF (only PP 806) INSERT MANUAL (PP 806; optionally PP 803) INSERT TRACTOR INSERT TRACTOR U(pper) INSERT TRACTOR L(ower) PAPER TEAR OFF PAPER PARK FORM FEED REV. - Page 68 Printer Operation [Macro Selection] MACRO 1 MACRO 2 MACRO 3 MACRO 4 [Unlock] UNLOCK PRINTHEAD worksonly if cover oppen Info: The following keys have only one function: FUNCTION [Online / Offline] After pressing this key, the printer enters the ONLINE or OFFLINE mode. [MENU] To enter the Menu Mode at the first level.
-
Page 69: Ready-Mode
Printer Operation Ready-Mode In the READY mode the [Online/Offline] key has a function: After pressing key the printer enters the LOCAL mode STOP-Mode All keys have at least one function. If one key has multiple functions they can be displayed by keeping that key pushed: The corresponding display messages are shown on page before. - Page 70 Printer Operation Single sheet: Only form feed function. Either the form is fed into print position or is ejected. Fanfold Paper: Paper is in Park Position Paper is fed into print position. Paper is in Print Position ...
-
Page 71: Lcd Display
Printer Operation 3.3 LCD Display The LCD indicator gives information about the status of the printer. In general it can be distinguished between: ONLINE messages OFFLINE messages Messages which exceed the 16 character display, e.g. error messages, are Note: horizontally scrolled. - Page 72 Printer Operation And then, the message is scrolled: - CHECK RIBBON ..Insert the ribbon cassette and close cover, see chapter 1.6 Ribbon Installation. After the automatic locking procedure the printer switches into the ONLINE Mode. The display shows READY 1 ELQ In this state it is possible to use all keys.
-
Page 73: Menu-Mode
Printer Operation 3.4 Menu-Mode All selectable features are accessible via the operator panel and combined in the printer MENU. This feature provides: Easy configuration (language, etc.) Quick parameter changes Activation of test functions There are three entry points: ... -
Page 74: Menu Navigation
Printer Operation 3.4.1 Menu Navigation To activate the menu please follow the next steps: Press: The printer changes from the READY mode into the LOCAL mode. The display shows LOCAL 1 ELQ Note: The second term identifies the active macro and the emulation. Press: Now, the printer enters the menu mode at the first level of the menu tree. - Page 75 The default value for PAPER SOURCE is TRACTOR LOWER At the lowest level, parameters and values, the asterisk (*) to the right indicates the actual selection. To change this parameter into paper source MANUAL, (PP 806; optionally PP 803) Press: The display shows: ...
-
Page 76: Confirm A Selection
Printer Operation 3.4.2 Confirm a Selection Press ; the confirmed value is marked by an asterisk ( ) at the last position as shown in the picture before. All cursor keys have an auto repeat function. Note: The menu mode is left either by pressing or by moving to the MAIN FUNCTION level and then pressing the key. -
Page 77: How To Save Settings
Printer Operation 3.4.3 How to save settings The settings selected and confirmed are only active until the printer is switched off. In order to prevent from losing your new settings you can save them using the Main Function SAVE MENU. Display [OFFLINE] LOCAL 1 ELQ [MENU]... -
Page 78: Printer Configuration
Printer C o n f i g u r a t i o n 4. Printer Configuration 4.1. What is "Configuration" This chapter describes how to use the operator panel and menu settings to set up or configure your printer, so that the printer and your computer system can communicate correctly with each other. - Page 79 Printer C o n f i g u r a t i o n The standard parameter setting can be printed by using the function PRINT MENU. The following steps show which keys to use to start this printout. DISPLAY [STOP] LOCAL 1 ELQ...
-
Page 80: Standard Configuration
Printer C o n f i g u r a t i o n 4.2. Standard Configuration The standard Configuration (factory default values) is reflected in the following printout. 4.2.1 Standard Configuration PP 803 PRINT OUT FW-VERSION 20xxxxxx HW-VERSION 29xxxxxx FPGA 5.0... -
Page 81: Standard Configuration Pp 806
Printer C o n f i g u r a t i o n 4.2.2 Standard Configuration PP 806 PRINT OUT FW-VERSION 20xxxxxx HW-VERSION 29xxxxxx FPGA 5.0 PAGE COUNT 213856 INTERFACE I/F TYP PARALL./ RS232 WORD LENGTH 8 BIT BAUD RATE 9600 BIT/S PARITY BIT EVEN... -
Page 82: Standard Configuration Pp 809
Printer C o n f i g u r a t i o n 4.2.3 Standard Configuration PP 809 PRINT OUT FW-VERSION 20xxxxxx HW-VERSION 29xxxxxx FPGA 5.0 PAGE COUNT 213856 INTERFACE I/F TYP PARALL./ RS232 WORD LENGTH 8 BIT BAUD RATE 9600 BIT/S PARITY BIT EVEN... -
Page 83: Explanation Of The Printout On The Previous
Printer C o n f i g u r a t i o n 4.2.4 Explanation of the printout on the previous pages In the headline behind the term VERSION the revision level of the printer's firmware can be found. Then, two columns of hardware related settings follow: INTERFACE - For communication between the computer operating system and the printer it is necessary to have the same protocol settings. -
Page 85: Menu Structure
Menu Structure 5. Menu Structure 5.1. Menu PP 803 [MENU] TEST MODES PRINT MENU MACRO 1 DEFINE MACRO CONFIGURATION MACRO 2 INSTALLATION PRINT LETTER MACRO 3 SAVE MENU PRINT LINEST MACRO 4 HEX DUMP TRACTOR LOWER TRACTOR UPPER INTERFACE TRACTOR U/O... - Page 86 Printer C o n f i g u r a t i o n 5.2. Menu PP 806 PRINT MENU TEST MODES MACRO 1 CONFIGURATION DEFINE MACRO MACRO 2 [MENU] PRINT LETTER INSTALLATION MACRO 3 PRINT LINEST SAVE MENU MACRO 4 HEX DUMP TRACTOR UNTEN TRACTOR OBEN...
- Page 87 Menu Structure 5.3. Menu PP 809 [MENU] TEST MODES MACRO 1 PRINT MENU DEFINE MACRO MACRO 2 CONFIGURATION INSTALLATION MACRO 3 PRINT LETTER SAVE MENU MACRO 4 PRINT LINEST HEX DUMP TRACTOR UNTEN TRACTOR OBEN INTERFACE I/F TYPE TRACTOR U/O CUT DEVICE WORD LENGHT CUT VPOS U 3)
-
Page 88: Menu Item Description
Printer C o n f i g u r a t i o n 5.4. Menu Item Description The following tables show menu modes, submenus and parameters. Precondition is: Access to all menu items is allowed. (MENU ACCESS = ALL) Otherwise restrictions are be observed. -
Page 89: Paper Source
(range: ; 20 up to 600; steps = 20) The menu item MANUAL for Paper Source or Paper Exit can only be activ-ated Note: in conjunction with the optional Manual Sheet Feeder for the printer PP 803. The Manual Sheet Feeder is standard in printer PP 806. -
Page 90: Print Position Adjustment
BIN 3 H-POS. BIN 3 H. 0.0* Bin 3 Horizontal Position (Range: -9.0 up to 24.0; Unit: 1/10 inch) MANUAL for PP 806 and as an Option for PP 803. ASF Cassetts (BIN 1 to BIN 3) only for PP 806. -
Page 91: Page Lenght
Menu Structure 5.4.6 Page Lenght Entry Point = DEFINE MACRO -> PAGE LENGHT Selection Function default 72 Lines PAGE LENGHT (Range: 1 to 144 Lines) 5.4.7 Druckqualität Entry Point = DEFINE MACRO -> PAGE LENGHT Selection Function default LQ / NLQ DATA * (DRAFT is automatically switching tot FONT QUAL. -
Page 92: Pitch
Menu Structure 5.4.9 Pitch Entry Point = DEFINE MACRO -> PITCH Selection Function default PITCH 10 CHAR. / INCH 12 CHAR. / INCH 15 CHAR. / INCH 17 CHAR. / INCH 18 CHAR. / INCH 20 CHAR. / INCH PROPORTIONAL 5.4.10 Line Mode Entry Point = DEFINE MACRO ->... -
Page 93: Character Set
Menu Structure 5.4.12 Character Set Entry Point = DEFINE MACRO -> CHARACTER SET Selection Function default ISO 8859/1 ISO 8859/15 IBM SET 1 / IBM SET 2 1: U.S.A. 2: FRANCE 3: GERMANY 4: U.K. 5: DENMARK 6: SWEDEN 7: ITALY 8: SPAIN 9: JAPAIN 10: NORWAY... -
Page 94: Left Margin
Menu Structure Auswahl Wert / Parameter default 1: CP 437 GK CODE PAGE EE 2: CP 851 GK 3: CP 928 GK 4: CP 855 CYRI 5: CP 866 6: CP 869 7: CP 852 8: KAMENICKY 9: ISO LATIN 2 10: MAZOVIA 11: CP 437 HUN CODE PAGE EE2... -
Page 95: Right Margin
RIGHT MARGIN 136. POSITION (only PP 806/PP 809) * 165. POSITION (only PP 806/PP 809) 80. POSITION 132. POSITION (nur PP 803) * 92. POSITION (STEP 1/10 Inch) 5.4.15 Line Mode Entry Point = DEFINE MACRO -> CHARACTER SET Selection... -
Page 96: Tear Off / Cut Mode
Menu Structure 5.4.17 Tear Off / Cut Mode Entry Point = DEFINE MACRO -> TEAR OFF Selection Function default TEAR OFF / CUT TEAR OFF 10 S. TEAR OFF 1 S. CUT 10 S. CUT 1 S. CUT 1S OH. FF CUT MODE ON Is only visible when (CUTTER = YES). -
Page 97: Cutter (Option)
Menu Structure Selection Function default PROTOCOL XON / XOFF XON / XOFF + DTR DSR / CTS MODE IGNOR. DSR+CTS DSR+CTS ACTIV CTS ACTIV DSR ACTIV I/F BUFFER 64 KBYTE 32 KBYTE 8 KBYTE 1 KBYTE AUTO-STATUS PRINTER-STATUS Only indicated if the serial (RS232 or RS422) interface is selected. Switched automatically from DTR to XON/XOFF if RS422 is selected. -
Page 98: Cutter Vertical Position Adjustment
AGC Position Entry Point = INSTALLATION -> AGC POSITION Selection Function default POSITION 24 AGC POSITION (Range: 4 to 87) (PP 803) (Range: 4 to 131) (PP 806/PP 809) 5.4.22 Sprache Entry Point = INSTALLATION -> LANGUAGE Selection Function default... -
Page 99: Reacall Factory
Menu Structure 5.4.23 Reacall Factory Entry Point = INSTALLATION -> RECALL FACTORY Auswahl Funktion RECALL FACTORY All standard default settings of the firmware will be restored but not saved. 5.4.24 Program Update Entry Point = INSTALLATION -> PROGRAM UPDATE Auswahl Funktion PROGRAM UPDATE A new firmware version can be down loaded... -
Page 100: Description Of The Individual Menu Items
Description of the Individual Menu Items 5.5. Description of the Individual Menu Items Main Functions and Entry Points into the menu The following Main Functions are available: TEST MODES There are 4 test printouts and the hex dump function available. (For detail information see chapter 5.3 beginning on the next page). -
Page 101: Test Mode
Description of the Individual Menu Items 5.5.1 Test Mode PRINT MENU This test printout shows the current settings of all parameters and the contents of the macros. This printout is helpful for future reference and when macros are to be changed. For detail see chapter 4.2 Standard Configuration. -
Page 102: Define Macro
MANUAL is for single sheet or form sets only; with output to the front on top of the Manual Insertion Guide (for PP 803 optionally and for PP 806 standard). Values for BATCH CAPACITY are in the range from 0 to 600 pages to stack before a hold (offline) is performed. - Page 103 Description of the Individual Menu Items PRINT POS. ADJ. This function adjusts the print position in the current macro for the different paper paths TRACT. L.V-POS, TRACT. L.H-POS, TRACT.U.V-POS, TRACT. U.H-POS, MANUAL V-POS, MANUAL H-POS, ASF BIN x V-POS and ASF BINx H-POS (x = 1 up to 3) to exactly position the printout in relation to the top edge of the form in use.
- Page 104 Description of the Individual Menu Items PRINT QUALITY Four different font quality levels can be selected: High Speed Draft (font "Data") Draft quality (font "Data") Near letter quality (NLQ displayed beside the Font name) Letter quality (LQ displayed beside the font name). GRAPHICS QUALITY Four different graphics quality levels can be selected: ...
- Page 105 Description of the Individual Menu Items PITCH Defines the number of characters printed per inch (10, 12, 15, 17, 18, 20 or proportional). Any pitch setting can be combined with any available font. In some cases this might lead to a conflict with font designs. The pitch setting is, therefore, a matter of personal taste.
- Page 106 RIGHT MARGIN The right margin is set to print position: for all three printers only for printer PP 803 (default setting) for printer PP 806 and PP 809 for printer PP 806 and PP 809 or for printer PP 806 and PP 809 (default setting)
- Page 107 Description of the Individual Menu Items PERF. SKIP If PERF. SKIP is set to YES the printer starts to print after the specified top margin and stops printing before the bottom margin. If PERF. SKIP is set to NO the printer ignores top and bottom margin and prints from the very first to the very last line.
- Page 108 Description of the Individual Menu Items The setting TEAR - OFF 1 S causes the paper to move to the tear off position when the print job has been completed by a form feed command and no new print job has been received within one second.
-
Page 109: Installation
Description of the Individual Menu Items 5.6. Installation INTERFACE I/F TYPE (Interface Type) The following types are available: PARALLEL / RS232 PARALLEL / RS422 PARALLEL In case the PARALLEL / RS232 or PARALLEL / RS422 interface type is selected the printer switches automatically between the parallel and serial interface. - Page 110 Description of the Individual Menu Items I/F BUFFER Buffer size in Kbyte. The maximum (factory setting) size is 64 Kbyte DSR/CTS MODE (Only indicated if the serial interface is selected) Selectable are: IGNORE DSR+CTS, DSR+CTS ACTIVE, CTS ACTIVE ...
- Page 111 Description of the Individual Menu Items s = Service status: Firmware error Control unit error CU Ram error EEPROM error Carriage error Cutter error Fan Error PRINTER STATUS If Printer Status is ON, (Installation->Interface->PRINTER STATUS), this printer response a status by sent a command for several requests. ...
- Page 112 Description of the Individual Menu Items In addition all possible values of each item are listed in the lines following that item. Either a range or an enumeration of values or a combination of both is specified. Examples: PAPER SOURCE=TRACTOR LOWER #ENUMERATION 4 #TRACTOR UPPER #MANUAL...
- Page 113 Position of the first print line. Default for the horizontal AGC Position is 24, any position from 4 up to 82 (for printer PP 803) or 4 to 131 (for the printers PP 806 and PP 809) in steps of 10 cpi can be selected.
- Page 114 Description of the Individual Menu Items LANGUAGE The operator panel may display its messages in three languages. Select one out of the following: ENGLISH, DEUTSCH, or FRANCAIS. RECALL FACTORY All standard default settings of the firmware will be restored. The contents of Page Counter and the Paper-in Adjust will not be changed.
-
Page 115: Maintenence
6. Maintenence Preferred Material The following materials and cleaning lubricants are recommended when maintaining the printer: Lint-free cloth Vacuum cleaner 6.1. Vorbeugende Wartung The user should clean the printer every six months or after 50,000 prints, whatever occurs first. If you experience paper feed problems or if the print head carriage movement is hampered, cleaning should be carried out more often. - Page 116 Description of the Individual Menu Items CONFIGURATION CONFIGURATION FW-VERSION 208xxxxx PAGE COUNT 50000 C031 ISO 8859/1 CO32 ISO 8859/15 C061 IBM SET 1 C062 IBM SET 2 C063 IBM CODE PAGE C071 EPSON EXT. GCT C100 CODE PAGE EE C101 CODE PAGE EE2 DATA ROMAN ROMAN...
-
Page 117: Cleaning Procedure
Wartung und Pflege des Druckers 6.2. Cleaning Procedure Power on the printer Open the rear cover: Press the Key to enter in the LOCAL mode. Press the left and right unlocking buttons (1) simultaneously and open the rear cover (2). ... - Page 118 Description of the Individual Menu Items Open the front cover of the printer: Remove the Manual Sheet Feeder (an option for PP 803; not applicable for PP 809), Tractor Cassettes, and the Paper Guide (only for printer PP 806 and PP 809). ...
-
Page 119: Print Head Exchange
Wartung und Pflege des Druckers 6.1. Print Head exchange The life time of the print head is specified being 600 Mio. Strokes per needle. 6.2.1 Remove Printhead The print head may be very hot immediately after printing. Note: Power the printer ON: Release the rear cover (2) by pressing simultaneously the two locking Buttons and swivel the rear cover backwards. - Page 120 Description of the Individual Menu Items Disconnect the print head cable (1) carefully by pulling the black plastic holder (2) upwards. Loosen the print head cable from the plastic holder (3).
- Page 121 Wartung und Pflege des Druckers Only for printer with Paper Cutter (3) Pull the flap (2) to the front side. Move the Paper Cutter (3) to the left until the cutter jumps out of its fixation. Grasp the Paper Cutter (3) at the holder (4) of the flap, move it a little bit to the front side, and remove it to the right.
-
Page 122: Installation Of The Print Head
Description of the Individual Menu Items 6.2.2 Installation of the Print Head Put the new print head (1) into its fixation support and slide it in . For Printers with cutter installed (5) Insert the Paper Cutter (5) at the left side holder (3), shift it slightly to the right, and press the flap (2) at the right side behind the edge (4). -
Page 123: Install Print Head Cable
Wartung und Pflege des Druckers 6.2.3 Install Print Head Cable Put the plastic pin (2) into the hole (3) of the carriage for adjusting the print head cable. After finding the right position connect the print head cable by pressing the Plastic holder down (with strong pressure). - Page 124 Description of the Individual Menu Items Insert the ribbon cassette (1) and close the rear cover (2) of the printer. Be sure, that the ribbon arms (3,4) left and right are placed to the Plastic holders of the printer base. 6-10...
- Page 125 Wartung und Pflege des Druckers Power the printer ON. Note: The printer automatically locks the print head, the ribbon cassette, and the rear cover. Print out one test page to ensure that the printer works correctly after the print head replacement. DISPLAY [ONLINE] STOP...
-
Page 127: Troubleshooting And Diagnostic
7. Troubleshooting and Diagnostic How to Use This Section Find the category to which your problem belongs. The problem categories are: Power-related Problems Error Messages No Printout Operation-related Problems Print-related Problems Ribbon or Carriage-related Problems For example, if the print appears very light on the paper, look into Section "Print- related Problems". -
Page 128: Power Related Problems
Troubleshooting and Diagnostics 7.1. Power related Problems Power indicator does not light when power is switched ON: Check that the power cord and plug are securely fitted to the printer and to a mains outlet. Ask for the power connector connections (and fuse) to be verified. ... - Page 129 Troubleshooting and Diagnostics During normal operation the following error messages may occur: Note: In an error case the printer changes into the OFFLINE mode. After error correction press key to change back again into the READY mode. If an error correction is not possible call your service agent! Display That means ...
- Page 130 Troubleshooting and Diagnostics Display That means ... Cause / Action Protocol error serial Check protocol setting of printer and host FRAMING ERROR interface Repeat data transfer Printer not locked Wrong distance between print head and print bar Pins of the green ribbon Print gap incorrect, support broken green ribbon support...
- Page 131 Troubleshooting and Diagnostics Display That means ... Cause / Action Tractor cassette: Check paper path Feeding incorrect Correct paper position? No paper feeding Paper movement wrong Not enough feeding PAPER JAM TRF Too much feeding by tearing off Close front cover Insert paper After power on: See also diagram 6.8.5 Paper Jam TRF...
- Page 132 Troubleshooting and Diagnostics Display That means ... Cause / Action RIBBON UNLOCKED - Cover not closed correctly Close cover to lock ribbon COVER OPEN Print gap incorrect, green Printer not locked Wrong distance between RIBBON UNLOCKED - ribbon support not in print head and print bar Pins of the green GAP ERROR right position.
-
Page 133: No Printout
Single sheet paper does not advance (only PP 803 or PP 806) Make sure that the paper source MANUAL (an option for PP 803) or BIN x (x = 1 up to 3) is selected. Note: Bins are only for printer PP 806. -
Page 134: Operation Related Problems
Make sure that the transport lock has been removed. Single sheets are skewed (only PP 803 or PP 806) Adjust ASF cassette paper guides (only printer PP 806). You will find more information in chapter 7.2 ASF Cassette. -
Page 135: Print-Related Problems
Troubleshooting and Diagnostics 7.5. Print-related problems Print faint or of poor quality Do you use the right paper? See Chapter 9 Technical Data which contains the paper specification. Change the paper if it does not comply to this specification. Does the ribbon need to be changed? Replace it by a new one if necessary. ... - Page 136 Troubleshooting and Diagnostics If the printout or the character set is not correct the following procedure can help to clear the situation. Action Result Check Select and start PRINT No print image or PAPER SOURCE TEST 1 printout not complete selection Ribbon condition Print head condition...
-
Page 137: Ribbon Or Carriage Related Problems
Troubleshooting and Diagnostics 7.6. Ribbon or Carriage related problems Ribbon Problems Make sure that the ribbon is: Properly tight Not worn out or dry Not torn or damaged in any other way Not jammed Ribbon turned over? Carriage does not move smoothly. -
Page 138: Locking Procedure
Troubleshooting and Diagnostics 7.8.1. Locking procedure Error message: RIBBON UNLOCKED - CHECK RIBBON ... Close rear cover Check ribbon cassette and move printhead into park position LOCAL RIBBON UNLOCKED - displayed ? CARRIAGE ERROR Open the rear cover. Ribbon correctly inserted ? Is the green ribbon feed guide locked into the fixing device. -
Page 139: Ribbon Unlock
Troubleshooting and Diagnostics 7.8.2. Ribbon unlock Remove the ribbon cassette only when the print head is in park position. Note: Print Head Parkposition Rear cover Open rear cover Print head in Move print head to park position? park position Is it possible to Close rear cover remove the ribbon... -
Page 140: Ribbon Error
Troubleshooting and Diagnostics 7.8.3. Ribbon Error That means, that the printer has tried to tense the ribbon and to fix the ribbon feed guide into the fixing device. But there are still problems with the ribbon. Print Head Open rear cover Parkposition Rear cover Check:... -
Page 141: Remove Paper
Troubleshooting and Diagnostics 7.8.4. Remove Paper That means, that a sensor isn’t free from any obstructions: ‒ Paper remains are in the paper path. ‒ Front cover isn’t closed entirely. ‒ Sunlight shines directly to a sensor. ‒ Clean the sensors 1, 2 and 3 carefully. View: front cover opened Paper Sensor (3) LED (1) -
Page 142: Paperjam Trf (Tractor Feed)
Troubleshooting and Diagnostics 7.8.5. Paperjam TRF (Tractor Feed) That means, that there are obstructions in the paper path. Note: Remove the ribbon cassette only if the print head is in park position. Print Head Parkposition Rear cover Press Visible paper CHECK TOF POS jam ? displayed... -
Page 143: Paper Jam Asf Or Manual (Asf Only Pp 806)
Troubleshooting and Diagnostics 7.8.6. Paper Jam ASF or Manual (ASF only PP 806) That means, that there are obstructions in the paper path. : Remove the ribbon cassette only if the print head is in park position. Note Print Head Parkposition Remove paper Rear cover... -
Page 144: Gap Error
Troubleshooting and Diagnostics 7.8.7. Gap Error That means, that there are obstructions in the paper path. : Remove the ribbon cassette only if the print head is in park position Note Print Head Parkposition Rear cover 7-18... -
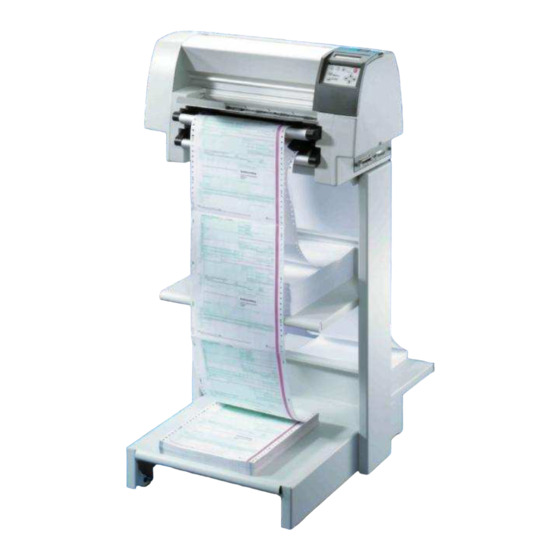
Page 145: Printer Stand Pp 803 / Pp 806 / Pp 809
Option 8. Option 8.1. Printer Stand PP 803 / PP 806 / PP 809 Put the printer onto the stand: Look at the rear of the printer and put the metal bar (1) underneath the flange-rail (2) of the stand (3... - Page 147 Option The printer is tightly locked with the stand. The stand with a shelf for lower tractor (4) and a shelf for upper tractor Note : (5) is an option.Stacker Option...
-
Page 148: Stacker Option
Option 8.2. Stacker Option The Stacker Option guides garants that the form will lay down fanfold paper in the best manner. -
Page 149: Afs-Cassetts (Only Printer Pp 806)
Option 8.3. AFS-Cassetts ( only printer PP 806 8.3.1 Check delivery content The printer can be operated with up to three ASF cassettes. The box comprises following parts: Cassette (1) Paper support (2) Forms guide (3) (already mounted) Sticker Two different types of ASF cassettes are available. -
Page 150: Prepair Asf-Cassette
Option 8.3.2 Prepair ASF-Cassette Mount the paper support (2) onto the cassette. -
Page 151: Installing Asf Cassette
Option 8.3.3 Installing ASF Cassette Push the tabs (1) of the cassette into the slots (3) of the printer or of another ASF cassette until they engage. Note: Be careful not to damage the contacts (2) of the cassette while installing. Up to three ASF cassettes can be installed at any time to enable processing of different paper types and formats simultaneously. - Page 152 Option The position of each cassette is dependent on the paper length to be processed. The cassette with the shortest paper needs to be mounted first because the distance between the pick-up rollers of the cassette and the push rollers inside the printer is the shortest at position '1'. For example, if envelopes are to be processed cassette type B must be cassette '1'.
-
Page 153: Remove Asf Cassette
Option 8.3.4 Remove ASF Cassette Remove the ASF cassette (1) from the printer by drawing back both release levers (2). To remove all AFS cassettes together release only the ASF cassette in Note: position 1. If the ASF cassettes shall be removed individually start the removal procedure with the last mounted ASF Cassette... -
Page 154: Insert Paper
Option 8.3.5 Insert Paper The ASF cassette A can be loaded with up to 180 sheets of 80g/m² (21 lb/ream) paper. Cassette B can be loaded with up to 40 envelopes. Paper that is intended for use with an ASF cassette must be unpacked and acclimatized within the printer environment for at least 24 hours prior to loading. - Page 155 Option Change the pressure off the pick-up rolls by loosen lever (2) if paper in use Note: is more or less than 80 g/m². Move tension lever (5) towards - for lighter and + or ++ for heavier paper. 8-11...
-
Page 156: Replacement Of Asf Pick Up Roller (Only Printer Pp 806)
Option 8.3.6 Replacement of ASF Pick Up Roller (only printer PP 806) Die Vereinzelungsrollen (1) haben eine voraussichtliche Lebensdauer von etwa 200.000 Seiten. 8.3.7 Remove ASF Pick Up Roller (1) Remove the ASF cassette (see 8.3.4 Remove the ASF Cassette). ... -
Page 157: Install Asf Pick Up Roller
Option 8.3.8 Install ASF Pick Up Roller Slide the new pick-up rollers (1) onto the shaft (4). Insert the free end of the shaft (4) into the mounting (6), ensuring that each roller flange (5) is positioned so that they join with the indicated slots. Carefully snap the shaft (4) into its mounting (3) and fit the small access cover (2). -
Page 158: Cut Sheet Tray Front (Only Printers Pp 803 Oder Pp 806)
Option 8.4. Cut Sheet Tray Front ( Only printers PP 803 oder PP 806 Use the cut sheet tray (1) to collect a batch of paper sheets or formsets in the output area. Insert Cut Sheet Tray Remove the manual sheet feeder (6). -
Page 159: Manual Sheet Feeder (Printer Pp 803)
Option 8.5. Manual Sheet Feeder ( Printer PP 803 The optional manual sheet feeder is a special tool to handle cut sheets or form sets. Insert the manual sheet feeder (1) into the slots (2) 8.6. Optional Tractor Cassette (... -
Page 160: Cutter (Printer Pp 803)
Optionen 8.7. Cutter (Printer PP 803) The optional paper Cutter is a tool to cut fanfold paper into single Sheet or to separate a print job. If, for some reason, it is not desired to cut exactly on the perforation it is Note: very important to cut below the perforation. -
Page 161: Technical Data
Technical Data PP 803 9. Technical Data 9.1. PP 803 The following technical data refer to the standard Personality Module PM SER/PAR 9.1.1. Printer Spezification Print Head Technoligy: SIDM Seriell Impact Dot Matrix Technologie Print Direction: Bidirectional with speed optimization. - Page 162 Technical Data PP 803 Dimention: Width: 550 mm / 21.65 inch Depth: 280 mm / 11.02 inch Height: 295 mm / 11.61 inch Weight: Approximately 16 kg / 39 lb Diagnostic: Selftest and Hex Dump, Remote Operator Panel: 16 digit LCD for menu controlled setup, status- and error messages, trilingual (German, English, French).
-
Page 163: Performance
Technical Data PP 803 Noice Level: acc. to ISO 7779 Printing: <56 dB(A) Stand-by no noise Agency Approvals: ACC. to CE / VDE / GS, UL, C-UL Electromagnetic Compatibility: ACC. to CE, FCC-Klasse B 9.1.2. Performance: Print Speed at 10 cpi:... -
Page 164: Paperhandling
Technical Data PP 803 9.1.3. Paperhandling Integrated push tractor with park position, zero tear off for continuous paper, full line position and size control by perforation scanning. Manual front insertion as an option. Paper Path Flat bed technology transportable form thickness max 2.0 mm. - Page 165 Technical Data PP 803 9.1.4. Option Printer Stand: An option to most conveniently install and operate the printer. Width: 467 mm / 18.4 inch Height: 735 mm / 28.9 inch Depth: 580 mm / 22.8 inch 790 mm / 31.1 inch (optional with V-Stacker Support) Weight: approx.
- Page 166 Technical Data PP 803 Paper Cutter: The optional paper Cutter is a tool to the fanfold paper into single sheets or to separate a print job. minimum maximum Paper length: 3 inch 14 inch Paper weight: Cut sheets 60 g/m² (16 lb/ream) 150 g/m²...
-
Page 167: Printer Spezification
Technical Data PP 803 9.2. PP 806 The following technical data refer to the standard Personality Module PM SER/PAR 9.2.1. Printer Spezification Print Head Technoligy: SIDM Seriell Impact Dot Matrix Technologie Print Direction: Bidirectional with speed optimization. Print Head: 24 needles, needle diameter 0.25 mm (0.01 inch) 600 Mio. Strokes per needle. - Page 168 Technical Data PP 803 Weight: Approximately 20 kg / 44 lb Diagnostic: Selftest and Hex Dump, Remote Operator Panel: 16 digit LCD for menu controlled setup, status- and error messages, trilingual (German, English, French). Keypad: Membrane tactile type with Ready/Stop LED.
-
Page 169: Performance
Technical Data PP 803 Agency Approvals: Acc. to CE / VDE / GS, UL, C-UL Electromagnetic Compatibility: Acc. to CE, FCC-Klasse B 9.1.5. Performance: Print Speed at 10 cpi: (High Speed Draft): 720 cps (at 12 cpi) DRAFT (Draft Quality):... - Page 170 Technical Data PP 803 Paper Path Flat bed technology transportable form thickness max 2.0 mm. Automatic Gap Control (AGC): The Automatic Gap Control (AGC) optimizes automatically the print gap according to paper thickness. Copies: 1 original + 6 copies (max. form thickness 0.7 mm [0.028 inch] ).
-
Page 171: Option
Technical Data PP 803 9.1.7. Option Printer Stand: An option to most conveniently install and operate the printer. Width: / 25 inch 635 mm Height: 840 mm / 33 inch Depth: 735 mm / 28.9 inch 790 mm / 31.1 inch (optional with V-Stacker Support) Weight: approx. - Page 172 Technische Daten PP 806 Automatic Sheet Feeder Typ A Suitable for automatic insertion of cut sheets and thin form sets (Cassette A) or for thick and inflexible sheets, not interrupted top-glued forms, and envelopes (Cassette B). Minimum Maximum Paper Width: 105 mm ( 305 mm 4.13")
- Page 173 Technische Daten PP 806 Automatic Sheet Feeder Typ A The minimum paper length for cassette B depends on the mounting position of the cassette as the feeding path of the paper is the longest in the last mounted cassette. Minimum Maximum Paper Width: 105 mm (...
-
Page 174: Pp 809
Technische Daten PP809 9.3. PP 809 The following technical data refer to the standard Personality Module PM SER/PAR 9.3.1. Printer Spezification Print Head Technoligy: SIDM Seriell Impact Dot Matrix Technologie Print Direction: Bidirectional with speed optimization. Print Head: 24 needles, needle diameter 0.25 mm (0.01 inch) 600 Mio. Strokes per needle. Print Matrix: ... - Page 175 Technical Data PP 803 Dimention: Width: 734 mm (28.6 inch) Depth: 280 mm (11 inch) Height: 295 mm (11.5 inch) Weight: Approximately 20 kg / 44 lb Diagnostic: Selftest and Hex Dump, Remote Operator Panel: 16 digit LCD for menu controlled setup, status- and error messages, trilingual (German, English, French).
-
Page 176: Performance
Technical Data PP 803 Noice Level: acc. to ISO 7779 Printing: <53 dB(A) Stand-by no noise Agency Approvals: Acc. to CE / VDE / GS, UL, C-UL Electromagnetic Compatibility: Acc. to CE, FCC-Klasse B 9.1.8. Performance: Print Speed at 10 cpi:... -
Page 177: Paperhandling
Technical Data PP 803 9.1.9. Paperhandling Integrated push tractor with park position, zero tear off for continuous paper, full line position and size control by perforation scanning. Manual front insertion as an option. Automatic Sheet Feeder (ASF) as option. Paper Path Flat bed technology transportable form thickness max 2.0 mm. -
Page 178: Optionen
9.3.2. Optionen Printer Stand: An option to most conveniently install and operate the printer. Width: / 25 inch 635 mm Height: 840 mm / 33 inch Depth: 735 mm / 28.9 inch 790 mm / 31.1 inch (optional with V-Stacker Support) Weight: approx. -
Page 179: Systemanbindung
Technical Data PP 803 9.4. Systemanbindung Personality Module (PM) SER/PAR as a sample. Interface: Parallel Centronics® (IEEE 1284 compatibility mode and nibble mode) Serial RS-232/RS-422 shared operation Emulations: EPSON® LQ 1060/2550 / ESC/P2 IBM® Proprinter XL24 (AGM) Buffer: Up to 64 kByte. - Page 180 Character Pitch: Standard character pitches are: 10, 12, 15, 17.1, 18, 20 cpi and proportional. In addition, commands are defined to select non-standard character pitches. It is also possible to print overlapped characters. Fonts will be compressed if smaller pitches are selected. Line Spacing: 2, 3, 4, 6, 8, 12 ...
-
Page 181: Appendix A System Interface Description
A.1 Appendix A System Interface Description There are two system interfaces: Serial interface with RS-232C or RS-422 support Parallel Centronics interface. The interfaces can be operated in three different modes: Parallel interface active Parallel interface active in shared mode with serial RS-232C Parallel interface active in shared mode with serial RS-422 The following chapter gives an overview about interface characteristics, control signals, protocols, and cabling. -
Page 182: Interface Characteristics
Appendix A System Interface Description A.2 Serial Interface RS-232C / RS-422 A.2.1. Interface Characteristics Signal Description RS-232C Pin No. Direction Protective Ground Transmit Data (from printer to host) OUTPUT Receive Data (from host to printer) INPUT Request to Send (printer is requesting data transfer from host) OUTPUT Clear to Send (host is ready to receive data from printer) INPUT... -
Page 183: Transmission Protocols And Connection Diagrams
Appendix A System Interface Description Transmission rate: 600, 1200, 2400, 4800, 9600, or 19200 baud Parity: even, odd, or none, Word length: 7, or 8 bits Number of stop bits: In receive mode the printer accepts 1, or 2 stop bits. The printer transmits always two bits. - Page 184 Appendix A System Interface Description Printer DTR may be connected to host DSR + CTS or only to host Note: DSR and a bridge between RTS and CTS Printer DTR may be connected to host DSR + CTS or only to host Note: DSR and a bridge between RTS and CTS.
- Page 185 Appendix A System Interface Description Additional Information After Power-ON DTR is activated and the printer is ready to receive data. DTR is deactivated when the interface buffer has only space left for 256 more characters. Further incoming data will be stored until the interface buffer is full.
-
Page 186: Xon / Xoff
Appendix A System Interface Description A.2.4. XON / XOFF This protocol requires all signal lines. 1 Protective Ground (PG) 4 Request to Send (RTS) 2 Transmit Data (TXD) 5 Clear to Send (CTS) 3 Receive Data (RXD) 6 Data Set Ready (DSR) 7 Signal Ground (SG) 20 Data Terminal Ready (DTR) Standard Connection... - Page 187 Appendix A System Interface Description Additional Information After Power-ON DTR and RTS are activated and the printer is ready to receive data. XOFF is sent, when the interface buffer has only space left for 256 more characters. XOFF is sent again, at a level of 128 characters buffer space.
- Page 188 Appendix A System Interface Description A.2.5. Serial Interface with RS-422 This interface type requires the signal lines. 1 Protective Ground (PG) 3 Receive Data (RDA) 9 Send Data (SDA) 10 Not Send Data (SDB) 18 Not Receive Data (RDB Standard Connection Protective ground (PG) connected either to host or printer Note:...
-
Page 189: Parallel Centronics ® Interface
Appendix A System Interface Description A.3 Parallel Centronics Interface ® A.3.1. Interface Characteristics - Connector Pin Assignment / Signal Definition Signal Description Pin No. Return line Direction Pin No. Control Signal from the Host. Printer reads data line (Data 1 to Input STROBE Data 8) when going low. - Page 190 Appendix A System Interface Description A.3.2. Transmission Protocol Description After Power-ON the PE (Paper Empty) signal is set to low level and the SELECT and the FAULT are set to high level. The printer is now ON-LINE and ready to receive data. Timing The host sets a print/control character to the 8 data lines.
-
Page 191: Shared Operation
Appendix A System Interface Description A.4 Shared Operation In shared operation the interface buffer capacity is reduced by 256 bytes. After Power-ON both the serial and the parallel interfaces are available for data transfer. If a byte is first recognized by the serial interface the parallel interface is imme- diately disabled by the BUSY signal. -
Page 193: Appendix B Print Samples Of Resident Fonts
Appendix B Print Sampies of Resident Fants B.1 Appendix B Print Samples of Resident Fonts The Printer with the Personality Module (PM SER/PAR) provides the following resident fonts:... - Page 194 Appendix B Print Sampies of Resident Fants...
- Page 195 Appendix B Print Sampies of Resident Fants...
-
Page 196: Character Pitches
Appendix B Print Sampies of Resident Fants Character Pitches... - Page 197 Appendix B Print Sampies of Resident Fonts...
- Page 198 Appendix B Print Sampies Resident Fants COUR IER 4xHeight 4xWidth outline COUR IER 4xHeight 4xWidth shadow COURIER 4xHeight 4xWidth shadow outline...
- Page 199 Appendix B Print Sampies of Resident Fonts...
- Page 200 Appendix C PCharacter Set Tables...
- Page 201 Appendix B Print Sampies of Resident Fonts...
-
Page 203: Appendix C Character Set Tables
Appendix C PCharacter Set Tables C.1 Appendix C Character Set Tables C.1.1. Code Table ISO 8859-1 ° À Ð à ð ¡ ± Á Ñ á ñ " ¢ ² Â Ò â ò £ ³ Ã Ó ã ó ¤... -
Page 204: Code Table Iso 8859-15
Appendix C Character Set Tables C.1.2. Code Table ISO 8859-15 A B C 0 @ P À Ð à ð ¡ ± Á Ñ á ñ ¢ ² Â Ò â ò £ ³ Ã Ó ã ó 4 D T €... -
Page 205: Code Table Iso 8859-5
Appendix C Character Set Tables C.1.3. Code Table ISO 8859-5 A B C D " 2 B R b ... -
Page 206: Code Table Iso 8859-9
Appendix C Character Set Tables C.1.4. Code Table ISO 8859-9 C D E 0 @ P ° À Ǧ à ğ 1 A Q a ¡ ± Á Ñ á ñ ¢ ² Â Ò â ò £ ³ Ã Ó ã ó... -
Page 207: Code Table Ibm All Character Set
Appendix C Character Set Tables C.1.5. Code Table IBM All Character Set C D E 0 @ P ° À Ǧ à ğ 1 A Q a ¡ ± Á Ñ á ñ ¢ ² Â Ò â ò £ ³... -
Page 208: Code Table Ibm Set 1
Appendix C Character Set Tables C.1.6. Code Table IBM Set 1 National Version = USA ░ ╨ á └ α ≡ ▒ ┴ ╤ í β ± ʺ ▓ ┬ ╥ ó Γ ≥ ├ ╙ ú │ π ≤ ┤... -
Page 209: National Version Ibm Set 1
Appendix C Character Set Tables C.1.7. National Version IBM Set 1 Character Code (Hex) 1: USA 2: FRANCE à ̊ ç § é ù è ¨ 3: GERMANY § Ä Ö Ü ä ö ü ß 4: U.K. £ 5: DENMARK Æ... -
Page 210: Code Table Ibm Set 2
Appendix C Character Set Tables C.1.8. Code Table IBM Set 2 ░ ╨ α └ ≡ Ç É á ▒ ┴ ╤ β ü æ í ± ʺ ▓ ┬ ╥ Γ ≥ é Æ ó ♥ ├ ╙ π │... -
Page 211: National Version Ibm Set 2
Appendix C Character Set Tables C.1.9. National Version IBM Set 2 Character Code (Hex) 1: USA ¢ ¥ 2: FRANCE à ̊ ç § é ù è ¨ ¢ ¥ 3: GERMANY § Ä Ö Ü ä ö ü ß ¢... -
Page 212: Code Table Ibm Code Page
Appendix C Character Set Tables C.1.10. Code Table IBM Code Page Code Page Countries 1: Code Page 437 2: Code Page 850 Germany, UK, Denmark, Sweden, Italy, Spain, Japan, Latin Am., Turkey 3: Code Page 858 Germany, UK, Denmark, Sweden, Italy, Spain, Japan, Latin Am, Turkey;... -
Page 213: Ibm Code
Appendix C Character Set Tables C.1.11. IBM Code Page 437 ∅ ░ ╨ α ▸ └ ≡ Ç É á ☺ β ▒ ┴ ╤ ◂ ü æ í ± ☻ ↕ ʺ ▓ ┬ ╥ Γ ≥ é Æ ó... -
Page 214: Ibm Code
Appendix C Character Set Tables C.1.12. IBM Code Page 850 ∅ ░ ▸ └ Ç É á ð Ó ☺ ▒ ┴ β ◂ ± ü æ í Ð ☻ ↕ ʺ ▓ ┬ é Æ ó Ê Ô ♥ ├... -
Page 215: Ibm Code
Appendix C Character Set Tables C.1.13. IBM Code Page 858 ∅ ░ ▸ Ç É á └ ð Ó ☺ ◂ ▒ ┴ Ð β ü æ í ± ☻ ↕ ʺ ▓ ┬ Ê é Æ ó Ô ♥ ├... - Page 216 Appendix C Character Set Tables C.1.14. IBM Code Page 860 ∅ ░ ╨ α ▸ └ ≡ Ç É á ☺ ▒ ┴ ╤ β ◂ ± ü À í ☻ ↕ ʺ ▓ ┬ ╥ Γ é È ó ≥...
-
Page 217: Ibm Code
Appendix C Character Set Tables C.1.15. IBM Code Page 863 ∅ ░ ╨ α ▸ └ ≡ Ç É ☺ ▒ ┴ ╤ β ◂ ü È ± ☻ ↕ ʺ Γ ▓ ┬ ╥ é Ê ó ≥ ♥ ├... -
Page 218: Ibm Code
Appendix C Character Set Tables C.1.16. IBM Code Page 865 9 A B C D E ∅ ░ ╨ α ▸ └ ≡ Ç É á ☺ ▒ ┴ ╤ β ◂ ± ü æ í ☻ ↕ ʺ ▓ ┬... - Page 219 Appendix C Character Set Tables C.1.17. IBM Code Page 857 ░ á └ Ó ▒ ┴ í ß ± ▓ ┬ " ò Ê Ô ├ ú │ Ë Ò ¾ ┤ ñ È õ ¶ ┼ Ñ Á Õ §...
-
Page 220: Epson Extended Graphics Character Table
Appendix C Character Set Tables C.1.18. EPSON Extended Graphics Character Table ░ ╨ α └ ≡ Ç É á ▒ ┴ ╤ β ü æ í ± ʺ Γ ▓ ┬ ╥ é Æ ó ≥ ├ ╙ π │ ≤... -
Page 221: Nv Epson Extended Graphics Character Table
Appendix C Character Set Tables C.1.19. NV EPSON Extended graphics Character Table Character Code (Hex) 23 24 40 5B 5C 5D 5E 60 7B 7C 7D 1: USA $ @ [ 2: FRANCE à ç § é ù è ¨ 3: GERMANY §... -
Page 222: Epson Italic Character Table
Appendix C Character Set Tables C.1.20. EPSON Italic Character Table 0 @ P 0 @ P & 6 & 6 G W g G W g ´ < ´ < > > This character table is selected by the command ESC t. C-18... -
Page 223: Nv Epson Italic Character Table (Part 1)
Appendix C Character Set Tables C.1.21. NV EPSON Italic Character Table ( part 1 Character Code (Hex) 23 24 40 5B 5C 5D 5E 60 7B 7C 1: USA 2: FRANCE à ç § é ù è ¨ 3: GERMANY §... -
Page 224: Nv Epson Italic Character Table (Part 2)
Appendix C Character Set Tables C.1.22. NV EPSON Italic Character Table ( part 2 Character Code (Hex) A4 C0 DB DC DD DE E0 FB FC FD $ @ [ 1: USA à ç § é ù è ¨ 2: FRANCE 3: GERMANY §... -
Page 225: Code Table Ocr-A
Appendix C Character Set Tables C.1.23. Code Table OCR-A ʺ & ̓ ¬ < > █ C-21... -
Page 226: Code Pages For The Eastern European Countries (Ee)
Appendix C Character Set Tables Code Pages for the Eastern European Countries (EE) C.1.24. CODEPAGE 437 Greek Α Ρ ι ω ʼ Ω ░ ╨ └ Β Σ κ ▒ ┴ ╤ ἀ ± ʺ Γ Τ λ ἐ ▓ ┬... -
Page 228: Codepage 851 Greek
Appendix C Character Set Tables C.1.25. CODEPAGE 851 Greek Ί ϊ ░ Τ ζ └ Ç Υ η ▒ ┴ ü ± ʺ ʼ Ο ὀ ▓ ┬ Φ θ υ é ὐ Χ ι ϕ ├ â ô │ Ά... -
Page 229: Codepage 928 Greek
Appendix C Character Set Tables C.1.26. CODEPAGE 928 Greek ̊ Π π ΐ ΰ Ç É Α Ρ α ρ ü æ ‛ ± ʺ Β β ς é Æ ’ ² Γ Σ γ σ â ô £ ³ ́... -
Page 230: Codepage 855 Cyri
Appendix C Character Set Tables C.1.27. CODEPAGE 855 Cyri – " " ... -
Page 231: Codepage 866
Appendix C Character Set Tables C.1.28. CODEPAGE 866 ░ ╨ 0 SP А Р а └ р Ё ▒ ┴ ╤ Б С б с ё ʺ ▓ ┬ ╥ В Т в т Є ├ ╙ Г У г │... -
Page 232: Codepage 852
Appendix C Character Set Tables C.1.29. CODEPAGE 869 ░ 0 SP Ί ϊ └ Τ ζ − ▒ ┴ Ї ΐ Υ η ± ʺ ▓ ┬ ʼ Ο ὀ Φ θ υ ├ ὐ │ Χ ι ϕ ┤ Α... - Page 233 Appendix C Character Set Tables C.1.30. CODEPAGE 852 ░ 0 SP Ç É á └ ð Ó ▒ ┴ ü Ĺ í Ð ß ̋ ʺ ▓ ┬ é Ľ ó Ď ô ̨ ├ â ô ú │ Ë Ń...
-
Page 234: Kamenicky
Appendix C Character Set Tables C.1.31. KAMENICKY ░ ╨ 0 SP Č É á └ α ≡ ▒ ┴ ╤ ü ž í β ± ʺ ▓ ┬ ╥ é Ž ó Γ ≥ ├ ╙ ď ô ú │ ∏... -
Page 235: Iso Latin 2
Appendix C Character Set Tables C.1.32. ISO LATIN 2 0 SP ̊ Ŕ Ð ŕ ð Ą ą Á Ń á ń ʺ ̆ ˛ Â Ň â ň Ł ł Ă Ó ă ó ¤ Ä Ô ä ô Ľ... -
Page 236: Mazovia
Appendix C Character Set Tables C.1.33. MAZOVIA ░ ╨ 0 SP Ç Ę Ź └ α ≡ ▒ ┴ ╤ ü ę Ż β ± ʺ ▓ ┬ ╥ é ł ó Γ ≥ ├ ╙ â ô Ó │ π... -
Page 237: Codepage 437 Hun
Appendix C Character Set Tables C.1.34. CODEPAGE 437 HUN ░ ╨ 0 SP Ç É á └ α ≡ ▒ ┴ ╤ ü æ í β ± ʺ ▓ ┬ ╥ é Æ ó Γ ≥ ├ ╙ â ő ú... -
Page 238: Codepage 852 See
Appendix C Character Set Tables C.1.35. CODEPAGE 852 SEE ░ 0 SP Ž ž Ç É á └ ð Ó ▒ ┴ ü Ľ í Ð ß ̋ ʺ ▓ ┬ é ľ ó Ď Ô ̨ ├ â ô ú... -
Page 239: Codepage 866 Lat
Appendix C Character Set Tables C.1.36. CODEPAGE 866 LAT ∅ ░ └ ▸ SP 0 @ P ‛ А а Š р Ē 1 ☺ ◂ ▒ ┴ ╤ Б б с ē ☻ ↕ ▓ ┬ č " В в... -
Page 240: Win Lat2
Appendix C Character Set Tables C.1.37. WIN LAT2 0 ∅ ▸ SP 0 @ P ̊ Ŕ Ð ŕ ð 1 ☺ ◂ ̆ ± Á Ń á ń ☻ ↕ ʺ ́ ̆ ˛ Â Ň â ň ♥ ‼ ‟... -
Page 241: Code Pages For The Eastern European Countries (Ee2)
Appendix C Character Set Tables Code Pages for the Eastern European Countries (EE2) C.1.38. CP 771 ∅ ░ └ ╨ р ▸ 0 @ P А а Ę 1 ☺ ◂ ▒ ┴ ╤ Б б с ę ☻ ↕ ▓... - Page 242 Appendix C Character Set Tables C.1.39. CP 773 ∅ ░ └ ▸ 0 @ P Ċ É Ā ̊ Ó Ę 1 ☺ ◂ ▒ ┴ ╤ ß ü æ Ī ę ☻ ↕ ▓ ┬ " é Æ Ó ̇...
- Page 243 Appendix C Character Set Tables C.1.40. CP 774 ∅ ░ └ ▸ 0 @ P Ç É á ą α ≡ 1 ☺ ◂ ▒ ┴ ü æ í č β ± ☻ ↕ ▓ ┬ ę " é Æ ó...
- Page 244 Appendix C Character Set Tables C.1.41. CP 775 ∅ ░ └ ▸ 0 @ P Ċ É Ā ą Ó 1 ☺ ◂ ▒ ┴ č ü æ Ī β ± ☻ ↕ ▓ ┬ ę “ " é Æ ó...
-
Page 245: Batic Rim
Appendix C Character Set Tables C.1.42. BATIC RIM ∅ ▸ 0 @ P ̊ Ą Š ą š 1 ☺ ◂ ˎ ± Į Ń į ń ” ☻ ↕ " ˊ ¢ ² Ā Ņ ā ņ ♥ ‼ £... - Page 246 Appendix C Character Set Tables C.1.43. CP 1251 ° А Р а р ў ± Б С б с ʺ ӯ І В Т в т Ј і Г У г у ¤ г Д Ф д ф Г µ Е...
-
Page 247: Cp 1125 / 866 Ukraine
Appendix C Character Set Tables C.1.44. CP 1125 / 866 Ukraine ░ ╨ ́ а └ р Ё ▒ ┴ ╤ б с ё ʺ ▓ ┬ ╥ в т Г ├ ╙ г │ у г ┤ ╘ д ─... - Page 248 Appendix C Character Set Tables C.1.45. CP 1250 º Ŕ Đ ŕ đ € ˇ ± Á Ń á ń ˎ ʺ ˘ ¸ Â Ň â ň ˊ Ł ł Ă Ó ă ó “ ¤ ´ Ä Ô ä...
- Page 249 Appendix C Character Set Tables C.1.46. CP 1252 º À Đ à đ € ꜟ ± Á Ñ á ñ ῾ ʺ ¢ ² Â Ò â ò ᾿ £ ³ Ă Ó ă ó “ ¤ ´ Ä Ô ä...
- Page 251 Appendix D IBM ProPrinter Quick Refernce D.1 Appendix D IBM ProPrinter Quick Reference This appendix contains basic information on the IBM ProPrinter XL 24 Emulation commands supported in the Printer: Characters used in control functions appear in monospaced type. Table 1 explains some of the conventions used.
- Page 252 Appendix D IBM ProPrinter Quick Refernce Table 2: Control Codes Column/Row Mnemonic Function Null Backspace Horizontal Tab Line Feed Vertical Tab Form Feed Carriage Return Double Width Printing By Line Condensed Printing (17.1 cpi) Select Printer Select Pica (10 cpi) Buffer Data Flow Control Cancel Double Width Printing By Line Cancel Buffer...
- Page 253 Appendix D IBM ProPrinter Quick Refernce Table 3: Vertical Form Handling Escape Sequence Mnemonic Function Set Line Space to 1 / 8 " ESC 0 Set Line Space to 7 / 72 " ESC 1 ESC 2 Start Variable Line Space ESC 4 Set Top of Form ESC 5 P1...
- Page 254 P2 = 5 Print Gap for 5-ply copies P2 = 6 Print Gap for 6-ply copies P2 = 7 Print Gap for 7-ply copies P2 = 8 Print Gap for 8-ply copies P2 = 9 Print Gap for 9-ply copies ) only for printer PP 803...
- Page 255 Appendix D IBM ProPrinter Quick Refernce Table 3 (Cont.): Vertical Form Handling Escape Sequence Mnemonic Function ESC [ ; ; P3 s Paper Exit: Native Command P3 = 0 reserved P3 = 1 or 2 Paper Exit Front (manual) P3 = 3 : Batch output (rear), default ESC [ ;...
- Page 256 Appendix D IBM ProPrinter Quick Refernce Table 4: Horizontal Form Handling and Printing Modes Escape Sequence Function ESC : Select Elite (12 cpi) ESC - P1 Cancel / Select Underline P1 = 0/0 cancel Underline Printing P1 = 0/1 set Underline Printing ESC _ P1 Cancel / Select Overline Printing P1 = 0/0 cancel...
- Page 257 Appendix D IBM ProPrinter Quick Refernce Table 4: Horizontal Form Handling and Printing Modes Escape Sequence Function ESC D P1 P2 ... P32 NUL Set Horizontal Tabs (P1...P32 = 0/1...F/F) ESC E Select Emphasized Printing (bold) ESC F Cancel Emphasized Printing (bold) ESC G Select Double Strike Printing (bold) ESC H...
- Page 258 Appendix D IBM ProPrinter Quick Refernce Table 4: Horizontal Form Handling and Printing Modes Escape Sequence Mnemonic Function ESC T Cancel Superscript/Subscript ESC U P1 Cancel / Select Unidirectional Printing P1 = 0/0 or 0 : cancel Unidirectional P1 = 0/1 or 1 : select Unidirectional ESC W P1 Cancel / Select Double Width P1 = 0/0 or 0 : cancel Double Width...
- Page 259 Appendix D IBM ProPrinter Quick Refernce Table 4: Horizontal Form Handling and Printing Modes Escape Sequence Mnemonic Function ESC [ P1 ; P2 x Select Font and Character Pitch Native Command (parameter P1 or P2 may be skipped, see following alternative command sequences) ESC [ P1 x P1 selects the font...
- Page 260 Appendix D IBM ProPrinter Quick Refernce Table 5: Character Set Selection Escape Sequence Function ESC 6 Select Character Set 2 ESC 7 Select Character Set 1 ESC \ P1 P2 Print from All Character Set Number of codes = (P1 + P2 * 256) (Pn = 0/0...F/F) ESC ^ P1 Print Single Character from...
- Page 261 Appendix D IBM ProPrinter Quick Refernce Table 6: Graphics Modes Escape Sequence Function ESC 3 P1 Set Line Space to P1/216" (P1/180") P1/216 lpi (non AGM), P1/180 lpi (AGM) (P1 = 0/1...F/F) ESC J P1 Perform P1/216" (P1/180") Line Feed P1/216 lpi (non AGM), P1/180 lpi (AGM) (P1 = 0/0...F/F) ESC K P1 P2 v1 .
- Page 262 Appendix D IBM ProPrinter Quick Refernce Table 6: Graphics Modes Escape Sequence Function ESC [ g P1 P2 P3 v1 . . . vn Select Various Graphics Modes (IBM) P1 + P2 * 256 = number of data bytes + 1 (P1,P2 = 0/0...F/F) v1 ..
- Page 263 Appendix D IBM ProPrinter Quick Refernce Table 7: Further Control Sequences, supported by IBM Emulation Mode (Native Commands) Escape Sequence Function ESC [ Control String Introducer (CSI) for 'ESC [' Control String Introducer (CSI) for 'ESC' ESC * P1 P2 P3 v1 . . . vn Select Various Graphics Modes P2 + P3 * 256 = number of columns (P2,P3 = 0/0...F/F) v1 ..
-
Page 264: Escape Sequence
Appendix D IBM ProPrinter Quick Refernce Table 7: Further Control Sequences, supported by IBM Emulation Mode (Native Commands) Escape Sequence Function ESC [ P1 ; P2 w SNVCT Set National Version and Code Table P1 = 1 - 15 national version depending on selected character set (see Appendix C Char. - Page 265 Appendix D IBM ProPrinter Quick Refernce Table 7: Further Control Sequences, supported by IBM Emulation Mode (Native Commands) Escape Sequence Mnemonic Function ESC [ ; P2 w Set Code Table P2 = 3 digit code of the code table P2 = 0 3 1 : ISO 8859/1; LATIN 1 P2 = 0 3 1 : ISO 8859/15;...
- Page 266 Appendix D IBM ProPrinter Quick Refernce Table 7: Further Control Sequences, supported by IBM Emulation Mode (Native Commands) Escape Sequence Mnemonic Function ESC [ P1 ; P2 SP r SM # Select Macro and Change Emulation P1 = 1: Macro 1 P1 = 2: Macro 2 P1 = 3: Macro 3 P1 = 4: Macro 4...
- Page 267 Appendix D IBM ProPrinter Quick Refernce Table 7: Further Control Sequences, supported by IBM Emulation Mode (Native Commands) Escape Sequence Mnemonic Function ESC [ P1 b Repeat Character P1 = number of repetitions (P1 = 1...999) ESC [ P1 d Set Vertical Position Absolute P1 = 0 or 1: Top of Form / Top Margin P1 = 2...
- Page 268 Appendix D IBM ProPrinter Quick Refernce Table 7: Further Control Sequences, supported by IBM Emulation Mode (Native Commands) Escape Sequence Mnemonic Function ESC [ ; P2 ; P3 ; P4 ; P5 ; P6 ; P7 SP z see Appendix F Barcode Header BARCODE Programming P2: Barcode typ...
- Page 269 Appendix D IBM ProPrinter Quick Refernce Hex Code Format Page Null Backspace Horizontal Tab Line Feed Vertical Tab Form Feed Carriage Return Select Double Width (one line) Select Condensed Mode (17,1 cpi) Select Printer Select Pica (10 cpi) Buffer Data Flow Control Cancel Double Width Cancel Buffer Escape...
- Page 270 Appendix D IBM ProPrinter Quick Refernce Hex Code Format Page 1B 54 Cancel Superscript/Subscript 1B 5D Reverse Line Feed 24 24 Control String Introducer for ESC [ D-12 24 24 2F Control String Introducer for ESC D-12 1B 2D 00 / 1B 2D 01 Cancel / Select / Underline Set Line Space to...
- Page 271 Appendix D IBM ProPrinter Quick Refernce Hex Code Format Page 1B 5B 3C 73 Eject Form D-14 1B 5B 3E 73 Insert Form Select Paper Source and Insert Form D-4 1B 5B 3E P 3B P 3B P 1B 5B 3F 30 68 Set Mode Barcode D-17 1B 5B 3F 30 6C...
- Page 272 Appendix D IBM ProPrinter Quick Refernce Hex - Decimal Conversion Table 16 32 48 64 80 96 112 128 144 160 176 192 208 224 240 17 33 49 65 81 97 113 129 145 161 177 193 209 225 241 18 34 50 66 82 98 114 130 146 162 178 194 210 226 242 19 35 51 67 83 99 115 131 147 163 179 195 211 227 243 20 36 52 68 84 100 116 132 148 164 180 196 212 228 244...
- Page 273 Appendix E EPSON LQ ESC/P Quick Refernce D.2 Appendix E EPSON LQ 2550, ESC/P2 Quick Reference This appendix contains basic information on the EPSON LQ 2550, ESC/P2, and EPSON Barcodes Printer Emulation: Characters used in control functions appear in monospaced type. Table 1 explains some of the conventions used.
- Page 274 Appendix E EPSON LQ ESC/P2, Quick Reference Table 2: Control Codes Escape Sequence Mnemonic Function Null Backspace Horizontal Tab Line Feed Vertical Tab Form Feed Carriage Return Double Width Printing By Line Condensed Printing Select Printer Select Pica (10 cpi) Deselct Printer Cancel Double Width Printing By Line Cancel Buffer...
- Page 275 Appendix E EPSON LQ, ESC/P2, Quick Reference Vertical Form Handling The printer is always equipped with two continuous form tractors. The last sheet of a continuous form stack can be printed on up to the end of the form. The capabillity of the printer to feed paper from different sources is optimally supplemented by the option that automatically adjust the distance between the print head and the print bar.
- Page 276 Appendix E EPSON LQ ESC/P2, Quick Reference Table 4: (Cont.) Vertical Form Handling Escape Sequence Mnemonic Function ESC b P1 NUL Clear all Tabs in Channel P1 P1 = 0/0 .. 0/7 : channel 0 - 7 ESC j P1 Perform „...
- Page 277 P2 = 3/7 : Print Gap for 7-ply copies P2 = 3/8 : Print Gap for 8-ply copies P2 = 3/9 : Print Gap for 9-ply copies ) only for printer PP 803 ESC [ ; ; P3 s Paper Exit:...
- Page 278 Appendix E EPSON LQ ESC/P2, Quick Reference Table 5: Horizontal Form Handling and Printing Modes Escape Sequence Function ESC SO Select Double Width for One Line ESC SI Select Condensed 10 cpi -> 17 cpi 12 cpi -> 20 cpi 15 cpi ->...
- Page 279 Appendix E EPSON LQ, ESC/P2, Quick Reference Escape Sequence Function ESC & NUL P1 P2 P3 P4 P5 v1 .. vn Define User Defined Characters P1 = first code table position P2 = last code table position (P1 = 0/0...P2) (P2 = P1...7/F) P3 = front space (P3 = 0/0...5/0)
- Page 280 Appendix E EPSON LQ ESC/P2, Quick Reference Table 5: (Cont.) Horizontal Form Handling and Printing Modes Escape Sequence Function ESC ( - P1 P2 P3 P4 P5 Select Line Marking P1 = 0/3 (fixed value) P2 = 0/0 (fixed value) P3 = 0/1 (fixed alue) P4 = 0/1 : underline...
- Page 281 Appendix E EPSON LQ, ESC/P2, Quick Reference Table 5: (Cont.) Horizontal Form Handling and Printing Modes Escape Sequence Function ESC D P1 P2 . . . P32 NUL Set Horizontal Tabs P1 ... P32 = tab position (Pn = 0/1..F/F) ESC E Select Emphasized Printing (bold) ESC F...
- Page 282 Appendix E EPSON LQ ESC/P2, Quick Reference Table 5: (Cont.) Horizontal Form Handling and Printing Modes Escape Sequence Function ESC g Select Pitch 15 cpi ESC k P1 Select Font P1 = 0/0 : ROMAN P1 = 0/1 : SANS SERIF P1 = 0/2 : COURIER P1 = 0/3 : PRESTIGE P1 = 0/4 : SCRIPT...
- Page 283 Appendix E EPSON LQ, ESC/P2, Quick Reference Table 5: (Cont.) Horizontal Form Handling and Printing Modes Escape Sequence Mnemonic Function ESC w P1 Cancel/Select Double Height P1 = 0/0 or 3/0 : cancel P1 = 0/1 or 3/1 : select ESC x P1 Select Character Quality P1 = 0/0 or 3/0 : select Draft...
- Page 284 Appendix E EPSON LQ ESC/P2, Quick Reference Table 5: (Cont.) Horizontal Form Handling and Printing Modes Escape Sequence Function ESC [ P1 ; P2 x Select Font and Character Pitch (any Native Command, parameter P1 or P2 may be skipped, see following alternative command sequences) ESC [ P1 x Selects font:...
- Page 285 Appendix E EPSON LQ, ESC/P2, Quick Reference Table 6: Graphic Modes Escape Sequence Function ESC ? K P1 Reassign Graphics Mode K Standard Density, 8 dpc ESC ? L P1 Reassign Graphics Mode L 1) Double Density, 8 dot per column ESC ? Y P1 Reassign Graphics Mode Y 1) Double Density &...
- Page 286 Appendix E EPSON LQ ESC/P2, Quick Reference Table 6: Graphic Modes Escape Sequence Function ESC * P1 P2 P3 v1 . . . vn Select Various Graphics Modes P2 + P3 * 256 = number of columns v1 .. vn (0/0...F/F) binary data in hex code (0/0...F/F)
- Page 287 Appendix E EPSON LQ, ESC/P2, Quick Reference Table 7: Character Set Selection Escape Sequence Function ESC 6 Enlarge Print Code Area (128-159 dec.) ESC 7 Enable Upper Control Code (128-159 dec.) ESC R P1 Select National Version P1 = 0/0 : U.S.A. P1 = 0/1 : FRANCE P1 = 0/2 : GERMANY P1 = 0/3 : U.K.
- Page 288 Appendix E EPSON LQ ESC/P2, Quick Reference Table 8: ESC / P2 Commands Escape Sequence Function ESC ( c P1 P2 P3 P4 P5 Set page format Sets top and bottom margins in the defined units. P1 = 04 00 tm = P2 + P3 x 256 tm: top margin in units tm bm = P4 + P5 x 256...
- Page 289 Appendix E EPSON LQ, ESC/P2, Quick Reference Table 8: (Cont.) ESC / P2 Commands Escape Sequence Function ESC X P1 P2 P3 Select font by pitch and point P1 = 0 : No change in pitch P1 = 1 : Selects proportional spacing P1 = 18, 24, 30, 36, 42, 48, 60 or 72 Selects fixed pitch equal to 360/m cpi pz = P2 + P3 x 256...
- Page 290 Appendix E EPSON LQ ESC/P2, Quick Reference Table 8: (Cont.) ESC / P2 Commands Escape Sequence Function ESC ( t n1 n2 Pn P1 P2 Assign character table n1 = 3, n2 = 0 Pn = Parameter of ESC t : 0, 1, 2, 3, "0", "1", "2"...
- Page 291 Appendix E EPSON LQ, ESC/P2, Quick Reference Table 8: (Cont.) ESC / P2 Commands Escape Sequence Function ESC ( ^ P1 P2 Print data as characters Prints n data bytes as characters, not control codes pd = P1 + P2 x 256 ESC ( G P1 P2 Select graphics mode P1 = 01 00...
- Page 292 Appendix E EPSON LQ ESC/P2, Quick Reference Table 9: EPSON Barcodes Commands Escape Sequence Function ESC ( B P1 P2 k m s v1 v2 c BarCodeData Specify and Print barcode P1 P2 number of data bytes to follow: 6 bytes + number of BarCodeData = P1 + P2 x 256 k specifies the barcode type: k = 0/2 Interleaved 2 of 5 k = 0/5 Code 39 k = 06 Code 128 m specifies the module width (unit 1/180 inch)
- Page 293 Appendix E EPSON LQ, ESC/P2, Quick Reference Table 10: Further Control Sequences, supported by EPSON LQ Emulation Mode (Native Commands) Escape Sequence Mnemonic Function Control String Introducer (CSI) for ESC [ control String Introducer for ESC ESC [ < s Eject Form;...
- Page 294 Appendix E EPSON LQ ESC/P2, Quick Reference Table 10: Further Control Sequences, supported by EPSON LQ Emulation Mode (Native Commands) Escape Sequence Mnemonic Function ESC [ P1 ; P2 w SNVCT Set National Version and Code Table P1 = 1 - 15 national version depending on selected character set (see Appendix C Char.
- Page 295 Appendix E EPSON LQ, ESC/P2, Quick Reference Table 10: Further Control Sequences, supported by EPSON LQ Emulation Mode (Native Commands) (Native Commands) Escape Sequence Mnemonic Function ESC [ ; P2 w Set Code Table P2 = 3 digit code of the code table P2 = 0 3 1 : ISO 8859/1;...
- Page 296 Appendix E EPSON LQ ESC/P2, Quick Reference Table 10: Further Control Sequences, supported by EPSON LQ Emulation Mode (Native Commands) (Native Commands) Escape Sequence Mnemonic Function ESC [ ; P2 ; P3 ; P4 ; P5 ; P6 ; P7 SP z see Appendix F Barcode Header BARCODE Programming...
- Page 297 Appendix E EPSON LQ 2550, ESC/P2, and Barcodes Quick Reference Hex Code Format Page Null Backspace Horizontal Tab Line Feed Vertical Tab Form Feed Cariage Return Select Printer Cancel Condensed Mode Deselect Printer Cancel Double Width Cancel Buffer Escape Space Delete 1B 0E Select Double Width for One Line...
- Page 298 Appendix E EPSON LQ ESC/P2, Quick Reference 1B 44 00 Clear Horizontal Tabs 1B 4A P Perform Line Feed 1B 4E P Set Automatic Perforation Skip 1B 51 P Set Right Margin 1B 52 P Set National Version E-15 1B 53 00 1B 53 01 Select Superscript / Subscript 1B 55 00...
- Page 299 Appendix E EPSON LQ 2550, ESC/P2, and Barcodes Quick Reference 1B 5B 3E 30 6C Reset Mode Barcode E-22 1B 5B P 20 58 Select Print Quality E-20 1B 5B P 3B P 20 72 Select Makro and Change Emulation E-20 1B 5B P 3B P...
- Page 300 Appendix E EPSON LQ ESC/P2, Quick Reference Hex - Decimal Conversion Table 16 32 48 64 80 96 112 128 144 160 176 192 208 224 240 17 33 49 65 81 97 113 129 145 161 177 193 209 225 241 18 34 50 66 82 98 114 130 146 162 178 194 210 226 242 19 35 51 67 83 99 115 131 147 163 179 195 211 227 243 20 36 52 68 84 100 116 132 148 164 180 196 212 228 244...
- Page 301 Appendix F Barcode Quick Reference F.1 Appendix F Barcode Quick Reference F.1.1 Introduction The barcode print facility is available in all three emulations. F.1.2 Programming There are three escape sequences to print barcodes The first sequence is to define the Barcode Header. The type of barcode as well as all parameters are selected by a header.
- Page 302 Appendix F Barcode Quick Reference F.1.3 Barcode Header Format Function/Parameter Hex Code Barcode Header 1B 5B 3B P 2 3B P 3 3B P 4 3B P 5 3B P 6 3B P 7 20 7A P 2 = Barcode type; P 3 = Height of barcode;...
- Page 303 Appendix F Barcode Quick Reference F.1.4 Barcode Header Parameters P2 Barcode type default = 101 (Code 39 horizontal) Type horizontal horizontal + vertical vertical + human human readable text readable text Code 39 2 of 5 industrial 2 or 5 interleaved Codabar (Monarch) EAN 8 not applicable...
- Page 304 Appendix F Barcode Quick Reference P3 Height of barcode default: " - 0.64 cm All characters in a line are automatically repeated according to the selected barcode height. This is also true for plain text! P3 * " possible values from: 0 to 40 (30 H to 34 H 30 H ) or (48 D to 52 D 48 D ) for vertical barcodes 0 to 99 (30 H to 39 H 39 H ) or (48 D to 57 D 57 D ) for horizontal barcodes...
- Page 305 Appendix F Barcode Quick Reference Width of the thin bars (default: " = 0.35 mm) Note: The width of bars and gaps should be equal. For this, the parameters P4 and P5 should not deviate more than one step. for horizontal Barcode inch 2/144 0,35...
- Page 306 Appendix F Barcode Quick Reference P 6 Ratio Width to Thin (default: 0 (2 to 1)) Code 39 EAN 8 2 of 5 industrial EAN 13 2 of 5 UPC-A interleaved UPC-E value Codabar Code 93 MSI mod 10/10 Code 128 2.0 to 1 2.5 to 1 3.0 to 1...
- Page 307 Appendix F Barcode Quick Reference F.1.5 Barcode Programming Examples All examples are coded in standard uni-directional printing - that means Note: the parameter "P 7 " is not used. In the following examples, stands for "Space". print position. The red square before and after the printed barcode indicates the actual print position.
- Page 308 Appendix F Barcode Quick Reference Barcode Example for 2 of 5 Industrial Barcode Header: ESC[;P ˽ z ESC[;202;8;1;1;1; ˽ z Start Barcode: ESC[?0h Data: : 1 2 3 4 5 6 7 8 9 0 ; Stop Barcode: ESC[?0l Barcode Example for 2 of 5 Interleaved Barcode Header: ESC[;P ˽...
- Page 309 Appendix F Barcode Quick Reference Barcode Example for Codabar (Monarch) Barcode Header: ESC[;P ˽ z ESC[;204;8;1;1;1; ˽ z Start Barcode: ESC[?0h Data: a 0 1 2 3 4 5 6 7 8 9 t Stop Barcode: ESC[?0l Barcode Example for EAN 8 Barcode Header: ESC[;P ˽...
- Page 310 Appendix F Barcode Quick Reference Barcode Example for EAN 8 Barcode Header: ESC[;P ˽ z ESC[;205;8;;;1; ˽ z Start Barcode: ESC[?0h Data: 40123455 Stop Barcode: ESC[?0l Barcode Example for EAN 8 ADD-2 Barcode Header: ESC[;P ESC[;205;8;;;1; z Start Barcode: ESC[?0h Data: 4012345512 Stop Barcode:...
- Page 311 Appendix F Barcode Quick Reference Barcode Example for EAN 8 ADD-5 Barcode Header: ESC[;P ˽ z ESC[;205;8;;;1; ˽ z Start Barcode: ESC[?0h Data: 4012345586104 Stop Barcode: ESC[?0l Barcode Example for EAN 13 Barcode Header: ESC[;P ˽ z ESC[;206;8;;;1; ˽ z Start Barcode: ESC[?0h Data:...
- Page 312 Appendix F Barcode Quick Reference Barcode Example for EAN 13 ADD-2 Barcode Header: ESC[;P ˽ z ESC[;206;8;;;1; ˽ z Start Barcode: ESC[?0h Data: 412345678901812 Stop Barcode: ESC[?0l Barcode Example for EAN 13 ADD-5 Barcode Header: ESC[;P ˽ z ESC[;206;8;;;1; ˽ z Start Barcode: ESC[?0h Data:...
- Page 313 Appendix F Barcode Quick Reference Barcode Example for Code 93 Barcode Header: ESC[;P ˽ z ESC[;207;8;1;1;; ˽ z Start Barcode: ESC[?0h Data: a C + O + D + E ˽ 9 3 W I e Stop Barcode: ESC[?0l Barcode Example for MSI Mod 10/10 Barcode Header: ESC[;P ˽...
- Page 314 Appendix F Barcode Quick Reference Barcode Example for UPC-E Barcode Header: ESC[;P ˽ z ESC[;209;8;;1;; ˽ z Start Barcode: ESC[?0h Data: 01234565 Stop Barcode: ESC [ ? 0 l Barcode Example for UPC-E ADD-2 Barcode Header: ESC[;P ˽ z ESC[;209;8;;1;; ˽ z Start Barcode: ESC[?0h Data:...
- Page 315 Appendix F Barcode Quick Reference Barcode Example for UPC-E ADD-5 Barcode Header: ESC[;P ˽ z ESC[;209;8;;1;; ˽ z Start Barcode: ESC[?0h Data: 0123456586104 Stop Barcode: ESC[?0l Barcode Example for UPC-A Barcode Header: ESC[;P ˽ z ESC[;210;8;;1;; ˽ z Start Barcode: ESC[?0h Data: 01234567890...
- Page 316 Appendix F Barcode Quick Reference Barcode Example for UPC-A ADD-2 Barcode Header: ESC[;P ˽ z ESC[;210;8;;1;; ˽ z Start Barcode: ESC[?0h 0123456789012 Data: ESC[?0l Stop Barcode: Barcode Example for UPC-A ADD-5 Barcode Header: ESC[;P ˽ z ESC[;210;8;;1;; ˽ z Start Barcode: ESC[?0h Data: 01234567890586104...
- Page 317 Appendix F Barcode Quick Reference Barcode Example for Code 128 Barcode Header: ESC[;P ˽ z ESC[;211;8;1;1;; ˽ z Start Barcode: ESC[?0h Data: C o d e ˽ 1 2 8 Stop Barcode: ESC[?0l Barcode Example for Code 128 using FNC1 = Coding ] C 1 Barcode Header: ESC[;P ˽...
- Page 318 Appendix F Barcode Quick Reference Barcode Example for POSTNET Barcode Header: ESC[;P ˽ z ESC[;112;;;;; z Start Barcode: ESC[?0h Data: 12345678901 Stop Barcode: ESC[?0l Data: CR LF LF Mark Pollan CR LF 101 Main St CR LF Anytown US 12345-6789 CR LF Mark Pollan 101 main St Anytown US 12345-6789...
- Page 319 Appendix F Barcode Quick Reference Programming two Barcodes symbols on the same line Barcode Header: ESC[;P ˽ z ESC[;201;7;0;0;1; ˽ z Start Barcode: ESC[?0h Data: * C O D E ˽ 3 9 * Stop Barcode: ESC[?0l Blank zone ˽ ˽ ˽ ˽ Start Barcode: ESC[?0h Data:...
- Page 320 Appendix F Barcode Quick Reference Programming two Barcodes symbols separated by CR and LF Barcode Header: ESC[;P ˽ z ESC[;201;7;0;0;1; ˽ z Start Barcode: ESC[?0h Data: * C O D E ˽ 3 9 * Stop Barcode: ESC[?0l Blank zone: CR LF LF LF LF LF LF LF Start Barcode: ESC[?0h...
- Page 321 Appendix F Barcode Quick Reference Programming two Barcodes symbols in landscape on the same line Barcode Header: ESC[;P ˽ z ESC[;401;7;0;0;1; ˽ z Start Barcode: ESC[?0h Data: * C O D E ˽ ˽3 9 * Stop Barcode: ESC[?0l Blank zone: ˽...
- Page 323 Appendix G Information for the System Manager Reset off Menu Access To reactivate the menu access function, perform the following steps: Switch off the printer. Press the keys simultaneously. While holding down the two keys, switch on the printer. When the message MENU ACCESS (MENUEZUGRIFF / ACCESS AU MENU) is displayed, release the keys.
Need help?
Do you have a question about the PP 803 and is the answer not in the manual?
Questions and answers