Rae ppbRAE 3000 User Manual
Hide thumbs
Also See for ppbRAE 3000:
- User manual (129 pages) ,
- User manual (115 pages) ,
- Basic operation/pocket reference (40 pages)

Related Manuals for Rae ppbRAE 3000


Summary of Contents for Rae ppbRAE 3000
- Page 1 3000 User’s Guide For Sales & Service Contact Rev. E 2650 E. 40th Ave. • Denver, CO 80205 Phone 303-320-4764 • Fax 303-322-7242 February 2016 1-800-833-7958 www.geotechenv.com P/N 059-4021-000...
- Page 2 Wireless Approval For UAE In Middle East TRA REGISTERED No: ER36153/14 or ER36153/15 DEALER No.: HONEYWELL INTERNATIONAL MIDDLE EAST – LTD – DUBAI BR Wireless Approval For QATAR In Middle East ictQATAR Type Approval Reg. No.: R-4466 or R-4635 © Copyright 2016 RAE Systems by Honeywell...
-
Page 3: Table Of Contents
3000 User’s Guide Contents Read Before Operating ..............5 Special Notes ..................6 Warnings ..................7 Standard Contents................9 General Information ................. 9 Physical Description ............... 11 Specifications ................. 11 Charging The Battery ..............15 Charging A Spare Rechargeable Battery ......... 16 Low Voltage Warning ............. - Page 4 3000 User’s Guide Alkaline Battery Adapter ............36 External Filter ................36 Optional Accessories ..............39 Standard Two-Point Calibration (Zero & Span) ......40 Entering Calibration ..............40 Zero (Fresh Air) Calibration ............ 42 Span Calibration ..............44 Exiting Two-Point Calibration In Basic User Level ....46 Three-Point Calibration ..............
- Page 5 3000 User’s Guide User Mode................74 Basic..................74 Advanced................74 Date ..................75 Time ..................75 Duty Cycle ................76 Temperature Unit ..............77 Pump Speed ................77 Language .................. 78 Radio Power ................78 Real Time Protocol ..............79 Power On Zero .................
- Page 6 3000 User’s Guide Sensor Components .............. 100 Cleaning The PID Sensor ............. 101 Cleaning The Lamp Housing Or Changing The Lamp ..101 Determining The Lamp Type ..........102 Sampling Pump ..............102 Cleaning The Instrument ............103 Ordering Replacement Parts ..........103 Special Servicing Note ............
-
Page 7: Read Before Operating
3000 User’s Guide Read Before Operating This manual must be carefully read by all individuals who have or will have the responsibility of using, maintaining, or servicing this product. The product will perform as designed only if it is used, maintained, and serviced in accordance with the manufacturer’s... -
Page 8: Special Notes
3000 User’s Guide Special Notes When the instrument is taken out of the transport case and turned on for the first time, there may be some residual organic or inorganic vapor trapped inside the detector chamber. The initial PID sensor reading may indicate a few ppm. Enter an area known to be free of any organic vapor and turn on the instrument. -
Page 9: Warnings
Read and understand instruction manual completely before operating or servicing. Use only RAE Systems battery packs, part numbers 059-3051-000, 059-3052-000, and 059-3054-000. This instrument has not been tested in an explosive gas/air atmosphere having an oxygen concentration greater than 21%. - Page 10 Ne pas melanger les anciennes et les nouvelles batteries, ou bien encore les batteries de differents fabriquants. La calibration de toute instruments de RAE Systems doivent être testé en exposant l’instrument a une concentration de gaz connue par une procédure diétalonnage avant de mettre en service l’instrument pour la première fois.
-
Page 11: Standard Contents
3000 User’s Guide Standard Contents Instrument Calibration Kit Charging Cradle AC/DC Adapter Alkaline Battery Adapter Data Cable CD-ROM With User’s Guide, Quick Start Guide, and related materials General Information The compact instrument is designed as a broadband VOC gas monitor and datalogger for work in hazardous environments. - Page 12 3000 User’s Guide The instrument consists of a PID with associated microcomputer and electronic circuit. The unit is housed in a rugged case with a backlit LCD and 3 keys to provide easy user interface. It also has a built-in...
-
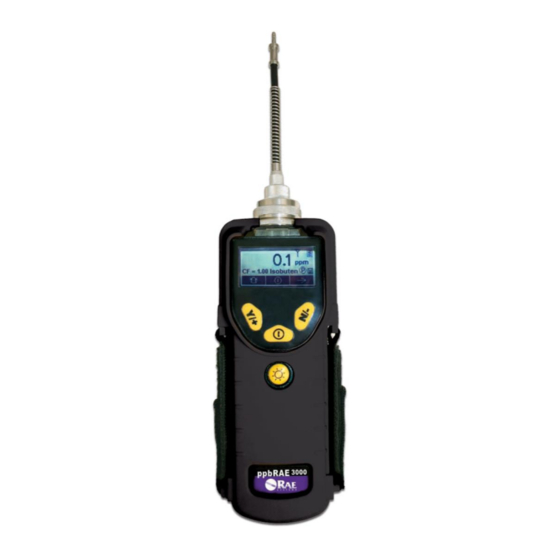
Page 13: Physical Description
3000 User’s Guide Physical Description The main components of the portable VOC monitoring instrument include: Three keys for user to interact with the instrument: 3 operation/programming keys for normal operation or programming LCD display with back light for direct readout and calculated measurements ... - Page 14 (Isobutylene): PID Detector: Easy access to lamp and sensor for cleaning and replacement Correction Factors: Over 200 VOC gases built in (based on RAE Systems Technical Note TN-106) Calibration: Two-point field calibration of zero and standard reference gases Calibration Reference:...
- Page 15 3000 User’s Guide IEC 60079-11:2006 (IIC: 059-3051-000 Li-ion bat pack or 059-3054-000 NiMH bat pack; IIB: 059-3052-000 alkaline bat pack) EM Interference: Highly resistant to EMI/RFI. Compliant with EMC R&TTE (RF Modules) Alarm Setting: Separate alarm limit settings for Low, High,...
- Page 16 3000 User’s Guide Housing (including Polycarbonate, splashproof and dustproof rubber boot): Battery can be changed without removing rubber boot.
-
Page 17: Charging The Battery
3000 User’s Guide Charging The Battery Always fully charge the battery before using the instrument. The instrument’s Li-ion battery is charged by placing the instrument in its cradle. (The battery can also be charged by placing the instrument in an AutoRAE 2 Cradle.) Contacts on the bottom of the instrument... -
Page 18: Charging A Spare Rechargeable Battery
Release the battery from the cradle by pulling it back toward the rear of the cradle and tilting it out of its slot. Note: If you need to replace the Li-ion battery pack, replacements are available from RAE Systems. The part number is 059-3051-000. -
Page 19: Low Voltage Warning
Li-ion battery or alkaline batteries are removed. This backup battery should last approximately five years, and must be replaced by an authorized RAE Systems service technician. It is not user-replaceable. Data Protection While Power Is Off When the instrument is turned off, all the current real-time data including last measured values are erased. -
Page 20: User Interface
3000 User’s Guide User Interface The instrument’s user interface consists of the display, LEDs, an alarm transducer, and four keys. The keys are: MODE Flashlight on/off The LCD display provides visual feedback that includes the reading, time, battery condition, and other functions. - Page 21 3000 User’s Guide Three panes along the bottom of the display are “mapped” to the keys. These change as menus change, but at all times the left pane corresponds to the [Y/+] key, the center pane corresponds to the [MODE] key, and the right pane corresponds to the [N/-] key.
-
Page 22: Display
3000 User’s Guide Display The display shows the following information: Gas info Tells the Correction Factor and type of calibration gas Reading Concentration of gas as measured by the instrument Calibration needed Indicates that calibration should be performed Calibration (or bump) Dark icon indicates that calibration should be needed performed;... -
Page 23: Operating The Instrument
1. With the instrument turned off, press and hold [MODE]. 2. When the display turns on, release the [MODE] key. The RAE Systems logo should appear first. (If the logo does not appear, there is likely a problem and you should contact your distributor or RAE Systems Technical Support.) The instrument is... -
Page 24: Turning The Instrument Off
3000 User’s Guide Turning The Instrument Off 1. Press and hold the Mode key for 3 seconds. A 5-second countdown to shutoff begins. 2. Once the countdown stops, the instrument is off. Release the Mode key. 3. When you see “Unit off...” release your finger from the [MODE] key. -
Page 25: Calibration Status
3000 User’s Guide During duty cycling (PID lamp cleaning), the display shows these icons in alternation: If there is a pump failure or obstruction that disrupts the pump, you will see this icon blinking on and off: If you see this blinking icon, consult the Troubleshooting section of this guide. -
Page 26: Policy Enforcement
The sensor(s) should be challenged on a periodic basis. Policy Enforcement The ppbRAE 3000 can be configured to enforce a facility/company’s requirements that calibration and/or bump testing be performed at specified intervals, and to explicitly prompt the user that calibration/bump testing is required. - Page 27 Using The Travel Charger, Desktop Charger, or AutoRAE 2 Automatic Test And Calibration System To program a ppbRAE 3000 via an AutoRAE 2, you need ProRAE Studio II Instrument Configuration and Data Management Software, the AutoRAE 2 connected to a power source, and a USB PC communications cable.
- Page 28 In this case, the instrument records that the user has bypassed the bump testing requirement in a Policy Violation report. These are the screens that are shown on a ppbRAE 3000 after startup if “Can Bypass” is selected:...
- Page 29 “No” to abort. Uploading takes a few seconds, and a progress bar is shown. You can abort the upload by clicking “Cancel.” 18. Exit ProRAE Studio II. 19. Press [Y/+] on the ppbRAE 3000 to exit Communication Mode.
-
Page 30: Operating Modes
3000 User’s Guide Operating Modes Your instrument operates in different modes, depending on the model and its factory default settings. In some cases, you can change modes using a password and using the instrument’s navigation. In other cases, you must use ProRAE Studio software. -
Page 31: Basic User Level/Hygiene Mode (Default Settings)
3000 User’s Guide Basic User Level/Hygiene Mode (Default Settings) The instrument is programmed to operate in Basic User Level/Hygiene Mode as its default. This gives you the most commonly needed features while requiring the fewest parameter adjustments. Pressing [N/-] steps you from one screen to the next, and eventually return to the main display. - Page 32 3000 User’s Guide...
-
Page 33: Alarm Signals
3000 User’s Guide After the instrument is turned on, it runs through the start-up menu. Then the message “Please apply zero gas…” is displayed. At this point, you can perform a zero air (fresh air) calibration. If the ambient air is clean, you can use that. Otherwise, use a cylinder of zero air. -
Page 34: Alarm Signal Summary
3000 User’s Guide Alarm Signal Summary Message Condition Alarm Signal Gas exceeds “High HIGH 3 beeps/flashes per second* Alarm” limit Gas exceeds 3 beeps/flashes per second* measurement range Gas exceeds electronics’ 3 beeps/flashes per second* maximum range Gas exceeds “Low 2 beeps/flashes per second* Alarm”... -
Page 35: Preset Alarm Limits & Calibration
3000 User’s Guide Preset Alarm Limits & Calibration The instrument is factory calibrated with standard calibration gas, and is programmed with default alarm limits. Cal Gas High STEL unit Span (Isobutylene) ppbRAE 3000 Testing The Alarm You can test the alarm whenever the main (Reading) display is shown. -
Page 36: Backlight
3000 User’s Guide Backlight The LCD display is equipped with an LED backlight to assist in reading the display under poor lighting conditions. Datalogging During datalogging, the instrument displays a disk icon to indicate that datalogging is enabled. The instrument stores the measured gas concentration at the end of every sample period (when data logging is enabled). -
Page 37: Auto/Manual/Snapshot Datalogging
3000 User’s Guide Auto/Manual/Snapshot Datalogging The instrument has three datalog types: Auto Default mode. Collects datalog information when the instrument is sampling. Datalogging occurs only when the instrument’s Manual datalogging is manually started (see page 69 for details). Snapshot Datalogs only during snapshot (single-event capture, initiated by pressing [MODE]) sampling. -
Page 38: Standard Kit & Accessories
3000 User’s Guide Accessories The following accessories are included with the instrument: An AC Adapter (Battery Charger) Alkaline battery adapter External Filter Organic Vapor Zeroing kit Hard-case kits also include these accessories: Calibration adapter ... - Page 39 3000 User’s Guide the display. If there is a charging error, the LED glows red continuously. A completely discharged instrument can be charged to full capacity within 8 hours. Batteries drain slowly even if an instrument is off. Therefore, if the instrument has been in storage or has not been charged for several days or longer, check the charge before using it.
- Page 40 3000 User’s Guide recharged. The internal charging circuit is designed to prevent damage to alkaline batteries and the charging circuit when alkaline batteries are installed inside the instrument. If you try to charge an alkaline batteries installed in the instrument, the instrument’s display will say, “Alkaline Battery,”...
-
Page 41: Optional Accessories
AutoRAE 2 Automatic Test & Calibration System The AutoRAE 2 Automatic Test and Calibration System for RAE Systems portable gas monitors makes compliance with monitor test and calibration requirements as easy as pressing a button. Simply cradle the monitor and the system will take care of all calibration, testing, and recharging. -
Page 42: Standard Two-Point Calibration (Zero & Span)
3000 User’s Guide Standard Two-Point Calibration (Zero & Span) The following diagram shows the instrument’s calibrations in Basic/Hygiene mode. -
Page 43: Entering Calibration
3000 User’s Guide Entering Calibration 1. Press and hold [MODE] and [N/-] until you see the Password screen. 2. In Basic User Level, you do not need a password to perform calibrations. Instead of inputting a password, enter calibration by pressing [MODE]. -
Page 44: Zero (Fresh Air) Calibration
3000 User’s Guide Zero (Fresh Air) Calibration This procedure determines the zero point of the sensor calibration curve. To perform a fresh air calibration, use the calibration adapter to connect the instrument to a “fresh” air source such as from a cylinder or Tedlar bag (optional accessory). - Page 45 3000 User’s Guide 3. Zero calibration starts a 30-second countdown and displays this message: Zeroing... During the zeroing process, the instrument performs the Zero calibration automatically and does not require any action on your part. Note: To abort the zeroing process at any time and proceed to Span calibration, press [N/-] at any time while zeroing is being performed.
-
Page 46: Span Calibration
3000 User’s Guide Span Calibration This procedure determines the second point of the sensor calibration curve for the sensor. A cylinder of standard reference gas (span gas) fitted with a 500 cc/min. flow-limiting regulator or a flow-matching regulator is the simplest way to perform this procedure. Choose the 500 cc/min. - Page 47 3000 User’s Guide 2. Press [Y/+] to initiate calibration. Note: You may press [MODE] if you decide that you do not want to initiate calibration. This will abort the span calibration and take you directly to the Calibration menu for Zero calibration.
-
Page 48: Exiting Two-Point Calibration In Basic User Level
3000 User’s Guide Exiting Two-Point Calibration In Basic User Level When you are done performing calibrations, press [MODE], which corresponds with “Back” on the display. You will see the following message: Updating settings… The instrument updates its settings and then returns to the main... -
Page 49: Three-Point Calibration
3000 User’s Guide Three-Point Calibration For enhanced accuracy, it is possible to perform a second Span calibration in addition to the Zero and Span calibrations outlined in the previous section. Your instrument first must be set to allow this third calibration. -
Page 50: Bump Test
3000 User’s Guide... -
Page 51: Span 2 Calibration
3000 User’s Guide Span 2 Calibration A cylinder of standard reference gas (span gas) fitted with a 500 cc/min. flow-limiting regulator or a flow-matching regulator is the simplest way to perform this procedure. Note: This gas should be of a higher concentration than the gas used for Span 1 calibration. - Page 52 3000 User’s Guide 5. Press [Y/+] to initiate calibration. Note: You may press [MODE] if you decide that you do not want to initiate calibration. This will take you directly to the Calibration menu for Zero calibration. 6. Span calibration starts a 30-second countdown and displays this message: Calibrating...
-
Page 53: Exiting Three-Point Calibration
The ppbRAE 3000 must be calibrated if it does not pass a bump test when a new sensor is installed, after sensor maintenance has been performed, or at least once every 180 days, depending on use and sensor exposure to poisons and contaminants. - Page 54 3000 User’s Guide 6. You can abort the calibration at any time during the countdown by pressing [N/-]. 7. If the calibration is not aborted, the display shows reading and then tells you whether the bump test passed or failed. If the bump test failed, then it automatically advances to the Calibration screen.
-
Page 55: Programming Mode
3000 User’s Guide Programming Mode Programming Mode can be entered from either Hygiene Mode or Search Mode. If the current user mode is Basic, you must provide a 4- digit password to enter. Entering Programming Mode 1. Press and hold [MODE] and [N/-] until you see the Password screen. -
Page 56: Programming Mode Menus
3000 User’s Guide Note: The password can only be changed by connecting the instrument to a PC running ProRAE Studio software. Follow the instructions in ProRAE Studio to change it.The Calibration label is shown and its icon is highlighted, but you can press [N/-] to step from one programming menu to the next, with the name of the menu shown at the top of the display and the corresponding icon highlighted. - Page 57 3000 User’s Guide Calibration Measurement Alarm Datalog Monitor Setting Setup Zero Meas. Gas High Clear Op Mode Calibration Alarm Datalog Span Meas. Unit Interval Site ID Calibration Alarm Bump Test STEL Data User ID Alarm Selection Datalog User Mode...
- Page 58 3000 User’s Guide Once you enter Programming Mode, the LCD displays the first menu, Calibration. Each subsequent menu is accessed by pressing [N/-] repeatedly until the desired menu is displayed. To enter a sub-menu of a menu, press [Y/+].
- Page 59 3000 User’s Guide The three keys perform the following functions in Programming Mode: Function in Programming Mode [MODE]: Exit menu when pressed momentarily or exit data entry mode [Y/+]: Increase alphanumerical value for data entry or confirm (yes) for a question Provides a “no”...
-
Page 60: Calibration
3000 User’s Guide Calibration Two types of calibration are available: Zero (fresh air) and Span. Select Zero or Span Calibration by pressing [N/+]. Once your choice is highlighted, press [Y/+]. Zero Calibration The procedure for performing a zero calibration is covered on page... -
Page 61: Measurement
Ten. This ensures that there is no repetition. Gas Library is a library that consists of all the gases found in RAE Systems’ Technical Note TN-106 (available online at www.raesystems.com). Custom Gases are gases with user-modified parameters. Using... -
Page 62: Meas. Unit
3000 User’s Guide 3. Once you are in one of the categories, press [N/-] to scroll through its list of options and [Y/+] to select one. (If you press [MODE], you exit to the next submenu.) 4. Press [Y/+] to save your choice or [N/-] to undo your selection. -
Page 63: Alarm Setting
3000 User’s Guide Alarm Setting During each measurement period, the gas concentration is compared with the programmed alarm limits (gas concentration alarm limit settings: Low, High, TWA and STEL). If the concentration exceeds any of the preset limits, the loud buzzer and red flashing LED are activated immediately to warn of the alarm condition. -
Page 64: High Alarm
3000 User’s Guide High Alarm You can change the High Alarm limit value. The value is typically set by the instrument to match the value for the current calibration gas. It is expressed in parts per billion (ppb). Note: The default value depends on the measurement gas. -
Page 65: Stel Alarm
3000 User’s Guide When you have completed your selections, press [MODE]. You will see two choices: Save and Undo. You have the opportunity to register the new settings or to change your mind and revert to your previous settings. -
Page 66: Twa Alarm
3000 User’s Guide TWA Alarm You can change the TWA (time-weighted average) Alarm limit value. The value is typically set by the instrument to match the value for the calibration gas. It is expressed in parts per billion (ppb). Note: The default value depends on the measurement gas. -
Page 67: Alarm Type
3000 User’s Guide Alarm Type There are two selectable alarm types: Latched When the alarm is triggered, you can manually stop the alarm. The latched setting only controls alarms for High Alarm, Low Alarm, STEL Alarm, and TWA alarm. -
Page 68: Buzzer & Light
3000 User’s Guide Buzzer & Light The buzzer and light alarms can be programmed to be on or off individually or in combination. Your choices are: Both on Light only Buzzer only Both off 1. Press [N/-] to step from one option to the next. -
Page 69: Clear Datalog
3000 User’s Guide 1. Scroll through the Datalog sub-menu using the [N/-] key until the display shows the desired parameter to be changed: Clear Datalog Interval Data Selection Datalog Type 2. Press [Y/+] to make your selection. Exit by pressing [MODE] for Back. -
Page 70: Data Selection
3000 User’s Guide Repeat this process until all numbers are entered. When you have completed your selections, press [MODE]. You will see two choices: Save and Undo. You have the opportunity to register the new settings or to change your mind and revert to your previous settings. -
Page 71: Datalog Type
3000 User’s Guide Datalog Type The instrument has three datalog types: Auto Default mode. Collects datalog information when the instrument is sampling. Datalogging occurs only when the instrument’s Manual datalogging is manually started (see below for details). Snapshot Datalogs only during single-event capture sampling. - Page 72 3000 User’s Guide...
-
Page 73: Snapshot Datalog
3000 User’s Guide Snapshot Datalog When the instrument is in Snapshot datalogging mode, it captures a single “snapshot” of the data at the moment of your choosing. Whenever the instrument is on and it is set to Snapshot, all you have to do is press [MODE] each time you want to capture a snapshot of the data at that instant. -
Page 74: Site Id
3000 User’s Guide The current mode is indicated by a dark circle within the circle in front of either Hygiene or Search. 1. Select Hygiene or Search by pressing [N/-]. The highlighting changes from one to the other each time you press [N/-]. -
Page 75: User Id
3000 User’s Guide User ID Enter an 8-digit alphanumeric User ID in the programming mode. This User ID is included in the datalog report. 1. Press [Y/+] and the display shows the current User ID. Example: “RAE00001.” Note that the left-most digit flashes to indicate it is the selected one. -
Page 76: User Mode
3000 User’s Guide User Mode The instrument has two user modes: Basic Basic users can only see and use a basic set of functions. Advanced Advanced users can see all screens and perform all available functions. Note: The default value for User Mode is Basic. -
Page 77: Date
3000 User’s Guide Date The Date is expressed as Month/Day/Year, with two digits for each. 1. Press [Y/+] and the display shows the current date. Note that the left-most digit flashes to indicate it is selected. 2. Press [Y/+] to step through all 10 numerals (0 to 9). -
Page 78: Duty Cycle
3000 User’s Guide Duty Cycle The pump’s duty cycle is the ratio of its on time to off time. The duty cycle ranges from 50% to 100% (always on), and the period is 10 seconds. Therefore, a duty cycle of 60% means that the pump is on for 6 seconds and off for four seconds. -
Page 79: Temperature Unit
3000 User’s Guide Temperature Unit The temperature display can be switched between Fahrenheit and Celsius units. 1. Press [N/-] to step from one option to the next. 2. Press [Y/+] to make your selection (the dark circle in the “radio button”... -
Page 80: Language
3000 User’s Guide Language English is the default language, but other languages can be selected for the instrument. 1. Press [N/-] to step from one option to the next. 2. Press [Y/+] to make your selection (the dark circle in the “radio button”... -
Page 81: Real Time Protocol
3000 User’s Guide Real Time Protocol Real Time Protocol is the setting for data transmission. The choices are: P2M (cable) Point to multipoint. Data is transferred from the instrument to multiple locations using a wired connection. Default data rate: 19200 bps. -
Page 82: Unit Id
3000 User’s Guide Unit ID This three-digit number keeps data separated by instrument when more than one instrument is used in a network. If multiple sensing units are attempting to communicate with the same Host, then the units must all have a different Unit ID. -
Page 83: Lamp Id
3000 User’s Guide Lamp ID The ppbRAE 3000 does not automatically identify the type of lamp, so you must select a lamp type manually. 1. Scroll through the menu by pressing [N/-]. 2. Press [Y/+] to make a selection. -
Page 84: Hygiene Mode
3000 User’s Guide minutes (240 seconds). The transmission frequency is user-adjustable, but a rate of at least once every 30 seconds is recommended. Note: Shorter intervals reduce battery life. 1. Press [N/-] to step from one option to the next. -
Page 85: Basic User Level & Hygiene Mode
3000 User’s Guide Basic User Level & Hygiene Mode The default setting is navigated in the following way:... - Page 86 3000 User’s Guide Pressing [N/-] steps you from screen to screen. Options include clearing the Peak value and turning on the instrument’s PC Communications for data transfer to a PC.
- Page 87 3000 User’s Guide Entering Search Mode From Hygiene Mode In order to change the instrument’s operational mode from Hygiene Mode to Search Mode, you must enter the password-protected Programming Mode: 1. Hold [MODE] and [N/-] until you see the password screen.
-
Page 88: Advanced User Level & Hygiene Mode
3000 User’s Guide 3. Press [MODE] when you want to register your selection to place the instrument in the selected mode. 4. Press [Y/+] to commit the change and exit to the Monitor Setup screen, or press [N/-] to Undo (exit to the Monitor Setup screen without changing the Mode). - Page 89 3000 User’s Guide...
-
Page 90: Basic User Level & Search Mode
3000 User’s Guide Basic User Level & Search Mode With the instrument in Operation Mode: Search Mode, enter User Mode and select Basic User Level (refer to the section called User Mode for instructions). When the instrument is in Search Mode, it only samples when you activate sampling. - Page 91 3000 User’s Guide...
-
Page 92: Advanced User Level & Search Mode
3000 User’s Guide Advanced User Level & Search Mode With the instrument in Operation Mode: Search Mode, enter User Mode and select Advanced User Level (refer to the section called Monitor Mode for instructions). Operation is similar to Basic User Level &... - Page 93 3000 User’s Guide...
-
Page 94: Diagnostic Mode
3000 User’s Guide Diagnostic Mode IMPORTANT! Diagnostic Mode is designed for servicing and manufacturing, and therefore is not intended for everyday use, even by advanced users. It provides raw data from sensors and about settings, but only allows adjustment of pump stall parameters, which should only be changed by qualified personnel. -
Page 95: Adjusting The Pump Stall Threshold
3000 User’s Guide Adjusting The Pump Stall Threshold If the gas inlet is blocked but the pump does not shut down, or the pump shuts down too easily with a slight blockage, the pump stall threshold value may be set too high or too low. - Page 96 3000 User’s Guide number by 2. Use the [Y/+] or [N/-] key to increase or decrease the stall value to equal that number. Press the [MODE] key to exit this display. Exiting Diagnostic Mode You can exit Diagnostic Mode and go directly to Programming Mode or Monitor Mode as outlined above, or you can exit Diagnostic Mode completely.
-
Page 97: Transferring Data To & From A Computer
3000 User’s Guide Transferring Data To & From A Computer Once you have connected your instrument cradle to the PC, you can can transfer data, including a download of the datalog to the computer and updates of firmware to the instrument (should this ever be necessary). -
Page 98: Uploading Firmware To The Instrument From A Pc
3000 User’s Guide Uploading Firmware To The instrument From A PC Uploading new firmware to your instrument requires connecting the instrument and PC. Follow these steps to make the connection: 1. Connect the data cable to the PC and the cradle. -
Page 99: Maintenance
3000 User’s Guide Maintenance The major maintenance items of the instrument are: Battery pack Sensor module PID lamp Sampling pump Inlet connectors and filters Note: Maintenance should be performed by qualified personnel only. NOTE: The printed circuit board of the instrument is connected to the battery pack even if the power is turned off. -
Page 100: Replacing The Li-Ion Battery
3000 User’s Guide Replacing The Li-ion Battery 1. Turn off the instrument. 2. Located on the rear of the instrument is a battery tab. Slide it down to unlock the battery. 3. Remove the battery pack from the battery compartment by tilting it out. - Page 101 3000 User’s Guide To install the adapter in the instrument: 1. Remove the Li-ion battery pack from the battery compartment by sliding the tab and tilting out the battery. 2. Replace it with the alkaline battery adapter 3. Slide the tab back into place to secure the battery adapter.
-
Page 102: Pid Sensor & Lamp Cleaning/Replacement
3000 User’s Guide PID Sensor & Lamp Cleaning/Replacement The sensor module is made of several components and is attached to the lamp-housing unit as shown below. Inlet Probe Assembly PN 023-3012-000 Sensor Cover Assembly O-ring, 35mm x 2mm Filter Fixer Porous Metal Filter Lamp 1/2"... -
Page 103: Cleaning The Pid Sensor
3000 User’s Guide Cleaning The PID Sensor Place the entire PID sensor module into GC grade methanol. It is highly recommended that an ultrasound bath to be used to clean the sensor for at least 15 minutes. Then dry the sensor thoroughly. Never touch the electrodes of the sensor by hand. -
Page 104: Determining The Lamp Type
3000 User’s Guide Determining The Lamp Type The monitor can accommodate two lamp values: 10.6eV (standard) and 9.8eV. There are two ways to determine the lamp type. 1. Turn off the instrument and remove the lamp. Now look at the serial number. -
Page 105: Sampling Pump
Never use solvents or cleaners. Ordering Replacement Parts If you need replacement parts, contact your local RAE Systems distributor. A list is available online: http://www.raesystems.com In the U.S., you can order sensors, replacement batteries, and other accessories online at: http://istore.raesystems.com/... -
Page 106: Special Servicing Note
3000 User’s Guide Special Servicing Note If the instrument needs to be serviced, contact either: 1. The RAE Systems distributor from whom the instrument was purchased; they will return the instrument on your behalf. 2. The RAE Systems Technical Service Department. Before... -
Page 107: Troubleshooting
3000 User’s Guide Troubleshooting Problem Possible Reasons & Solutions Cannot turn on power Reasons: Discharged battery. after charging the Defective battery. battery Solutions: Charge or replace battery. Lost password Solutions: Call Technical Support at +1 408-752-0723 or toll-free at... -
Page 108: Technical Support
Weak or defective PID lamp, defective. Solutions: Turn the unit off and back Replace UV lamp Technical Support To contact RAE Systems Technical Support Team: Monday through Friday, 7:00AM to 5:00PM Pacific (US) Time Phone (toll-free): +1 888-723-4800 Phone: +1 408-952-8461 Email: tech@raesystems.com... -
Page 109: Rae Systems Contacts
3000 User’s Guide RAE Systems Contacts RAE Systems by Honeywell World Headquarters 3775 N. First St. San Jose, CA 95134-1708 USA Phone: +1 888-723-4800 E-mail: RAE-tech@honeywell.com Web Site: www.raesystems.com RAE Systems Technical Support Monday through Friday, 7:00AM to 5:00PM Pacific (US) Time... -
Page 110: Controlled Part Of Manual
3000 User’s Guide Controlled Part Of Manual Intrinsic Safety: US and Canada: Class I, Division 1, Groups A,B,C,D T4 Europe: ATEX (0575 Ex II 2G Ex ia IIC/IIB T4 Gb) KEMA 07 ATEX 0127 Complies with EN60079-0:2009, EN60079-11:2007 IECEx CSA 10.0005 Ex ia IIC/IIB T4 Gb... - Page 111 3000 User’s Guide Note: You must hold your finger on the key for the entire shutoff process. If you remove your finger from the key during the countdown, the shutoff operation is canceled and the instrument continues normal operation.
- Page 112 3000 User’s Guide Alarm Signals During each measurement period, the gas concentration is compared with the programmed alarm limits (gas concentration alarm limit settings). If the concentration exceeds any of the preset limits, the loud buzzer and red flashing LED are activated immediately to warn you of the alarm condition.
- Page 113 3000 User’s Guide Battery Low battery 1 flash, 1 beep per minute icon plus battery icon flashes on flashes display Calibration failed, or 1 beep/flash per second needs calibration Gas reading measures 1 beep/flash per second less than number stored in calibration Preset Alarm Limits &...
- Page 114 3000 User’s Guide Charging The Battery Always fully charge the battery before using the instrument. The instrument’s Li-ion/NiMH battery is charged by placing the instrument in its cradle. Contacts on the bottom of the instrument meet the cradle’s contacts, transferring power without other connections.
- Page 115 This long-life battery keeps settings in memory from being lost whenever the Li-ion, NiMH, or alkaline batteries are removed. This backup battery should last approximately five years, and must be replaced by an authorized RAE Systems service technician. It is not user-replaceable.
- Page 116 3000 User’s Guide WARNING To reduce the risk of ignition of hazardous atmospheres, recharge battery only in area known to be non-hazardous. Remove and replace battery only in an area known to be non-hazardous. Replacing Rechargeable Li-Ion or NiMH...
- Page 117 3000 User’s Guide Troubleshooting Problem Possible Reasons & Solutions Cannot turn on power Reasons: Discharged battery. after charging the Defective battery. battery Solutions: Charge or replace battery. Lost password Solutions: Call Technical Support at +1 408-752-0723 or toll- free at...
- Page 118 3000 User’s Guide Inlet flow too low Reasons: Pump diaphragm damaged or has debris. Flow path leaks. Solutions: Check flow path for leaks; sensor module O-ring, tube connectors, Teflon tube compression fitting. Call Technical Support at +1 408-752-0723 or toll-free at +1 888-723-4800 “Lamp”...
- Page 120 RAE Systems by Honeywell World Headquarters 3775 N. First St. San Jose, CA 95134-1708 USA Phone: 408.952.8200 Toll-Free: 888.723.4800 Fax: 408.952.8480 E-mail (technical support): RAE-tech@honeywell.com Web Site: www.raesystems.com WORLDWIDE SALES OFFICES USA/Canada 1.877.723.2878 Europe +800.333.222.44/+41.44.943.4380 Middle East +971.4.450.5852 China +86.10.5885.8788-3000 Asia Pacific +852.2669.0828...
Need help?
Do you have a question about the ppbRAE 3000 and is the answer not in the manual?
Questions and answers