
Related Manuals for AvMap EKPV


Summary of Contents for AvMap EKPV
-
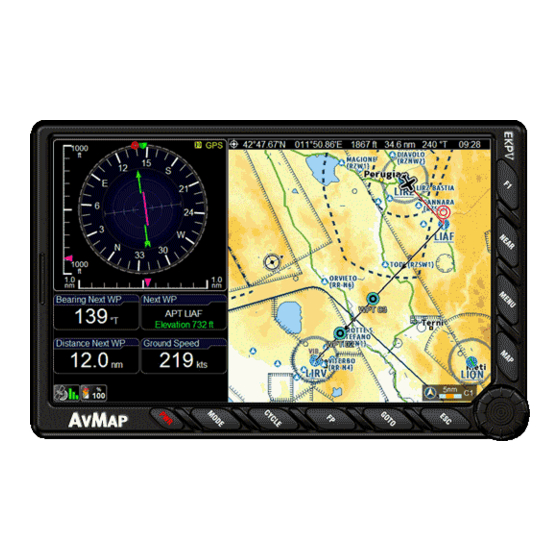
Page 1: User Manual
Aeronautical Navigator USER MANUAL Update Software version v1.11.95R Your Journey, Our Technology... -
Page 3: Table Of Contents
INDEX Aeronautical Navigator AvMap EKPV LEARN BEFORE USE Safe temperature range Battery and power source recommendations III. Warning Unit setup Powering Up the unit Initial Settings General controls to operate the unit Button, Joystick and Wheel controls EKP V Views... -
Page 4: Learn Before Use
Aeronautical Navigator AvMap EKPV 1. LEARN BEFORE USE power and charge the battery. The PWR button light is flickering when the unit is in charging mode. Charge the battery a couple of minutes and push PWR to power up the Safe temperature range unit. -
Page 5: Unit Setup
To power up the unit press once the PWR button. When powering up the EKP V from AvMap disclaims any liability deriving from external power while the battery is inserted an improper use of the device, in a way that... -
Page 6: Initial Settings
Aeronautical Navigator AvMap EKPV by the Warning page. To move to the map press the joystick (ENTER). The EKP V has 2. Initial Settings been conceived to be always ready to use through a STANDBY functionality which can be set by the user. -
Page 7: General Controls To Operate The Unit
Aeronautical Navigator AvMap EKPV • North Reference: True • Local Time Difference: +01:00 • Date Format: DD/MM/YY • Objects overlap: OFF • European Selective Display • European POI View In order to use the device in Europe, you need to choose Other. When the unit is used in North America you need to choose American. -
Page 8: Ekp V Views
Aeronautical Navigator AvMap EKPV controls one, move the joystick down; to move to an area above, move the joystick left or press – Provides quick access to several ESC. function at user choice NEAR – Lists nearest objects To focus on the desired option use the wheel. -
Page 9: Main Menu
United States of America Government, who aeronautical objects and personal data is solely responsible for keeping it working. - Tools, to operate on specific function as AvMap is not responsible for any possible weather, checklist, etc - Profiles, to create and manage different user settings... -
Page 10: Map Setup
Aeronautical Navigator AvMap EKPV display is switched off after 10 seconds • The list of the possible functions that can since last user action or software command. be associated with this button appears on Display shall switch on automatically when the screen. - Page 11 Aeronautical Navigator AvMap EKPV you touch the CYCLE button the map more easily and readily interpreted. To visualization will be modified according to enable TAWS function, Land Elevation the pre-defined customized cycles. needs to be enabled in “objects” . TAWS...
- Page 12 Aeronautical Navigator AvMap EKPV EKP V. fix position and destination (Target) visible on the map. Auto position Mode scrolled zoomed automatically to keep the best view possible. Auto Home When this mode is active the cursor is The Auto Home mode is used to keep the fix hidden.
-
Page 13: Explore The Map
Aeronautical Navigator AvMap EKPV of each data field and its position. Moreover, permits you to explore the map and the it is possible to select and display data fields shown objects. The cursor is represented by both in the vertical and in the horizontal bar. -
Page 14: Mode Menu On Map
During navigation it is possible to change display mode to EFB mode (Electronic Flight Bag), PFD mode (Primary Flight Display) if the AvMap A2 ADAHRS module is connected to the EKP V, or Navigation mode to display the moving map. -
Page 15: Airport Search
Aeronautical Navigator AvMap EKPV names and addresses on the EKP V menu’s and appears on the display every time you need to enter or modify a name, address or search for an Airport. In the round circle you can select the different characters by scrolling the wheel selector. -
Page 16: Other Objects
Aeronautical Navigator AvMap EKPV search the airport on ID, Name or City of the airport by pushing the joystick: 1. Scroll down the list with the joystick or the wheel selector. 1. Select the characters by scrolling the 2. Push the joystick to select and confirm the wheel selector (the selected character is desired item. -
Page 17: Tracks
Aeronautical Navigator AvMap EKPV recording phase (identified by a green dot), visible on the map (eye-shaped icon) and hidden on the map (eye-shaped with a red cross icon). You can finish the recording, pushing the joystick on the option “Stop recording”. -
Page 18: Flight Plan
Aeronautical Navigator AvMap EKPV • VP Area (not selectable), containing the info of the Vertical Profile along the FP. 11. Flight Plan To move from FP Tab Area to WP List Area move DOWN the Joystick, vice versa move FP page LEFT the Joystick or press ESC. -
Page 19: How To Assign A Name To A Fp
Aeronautical Navigator AvMap EKPV To reverse a FP, select it in the FP Tab Area, VI. How to change the WP INFO press ENTER and choose the option Reverse. visualized in the WP List Area In the WP List Area there are three II. -
Page 20: How To Select An Approach
Aeronautical Navigator AvMap EKPV How to select an approach Select a FP with an airport as final destination as your active FP. Press the FP button and access to the FP menu. In the FP tab Area, press ENTER and choose the option select approach. - Page 21 Aeronautical Navigator AvMap EKPV selector up and down in the items list. Plates, it is possible to: 6. Select the desired item and push the joystick to visualize it. • Change ZOOM level of the image scrolling the wheel selector clockwise From the Map: (two ZOOM IN levels).
-
Page 22: Ekp V Simulator
Aeronautical Navigator AvMap EKPV Push ESC to return to the Approach Plates Navigation Setup menu or MAP to move list in the Airport database page. directly to the map. 13. EKP V Simulator 14. Tools In the Tools menu the connection setup of... - Page 23 Cockpit Docking Station Installation Guide aviation are compatible with EKP V. For a included in the EKP V Docking Station box compatible list of third-party autopilots visit and available at www.avmap.it. www.avmap.it. Select NMEA Messages Select the NMEA message to communicate...
- Page 24 Aeronautical Navigator AvMap EKPV DATA RECEPTION and confirming the connection interface to USB. Make sure the Weather is enabled in Presentation setup in the MAP SETUP menu. If Weather is not enabled in the presentation setup, the unit may still receive the XM signal, but it will not be displayed on the map.
- Page 25 Cockpit Docking Station see the EKP V Cockpit Docking Station Installation Guide included in the EKP V Docking Station box (also available at www.avmap.it) and the serial connection specification of the ZAON XRX traffic receiver (ZOAN XRX Manual). The Range option allows you to select the horizontal detection range.
- Page 26 Primary Flight Display mode (PFD Mode) is selected. For more details on the Checklists EFIS user interface see AvMap A2 ADAHRS The checklist is the traditional list of actions User manual included in the A2 ADAHRS to be performed before, during and after box and available at www.avmap.it.
-
Page 27: Profiles
Aeronautical Navigator AvMap EKPV How to create a Checklist Select Add Checklist in the top bar in the 1. Select Add Profile by pushing the joystick Checklist page. 2. Choose if you want to create the new Enter a name for the checklist using the profile from the default settings or from virtual keyboard and confirm clicking OK. - Page 28 Aeronautical Navigator AvMap EKPV Note: 3. Select the Activate option When you power on the device for the first time, you will find a default user profile in WARNING: all the modifications made to the user profiles menu, which contains the the settings are recorded in the active user factory settings (PROFILE01).
-
Page 29: Appendix A: Nmea Data Transfer
Aeronautical Navigator AvMap EKPV Appendix A: NMEA Data Transfer The bi-directional data port outputs and inputs NMEA Data. NMEA messages sent/received, are defined as follows: Autopilot Sentence “A” contains navigation receiver warning flag status, cross- trackerror, Waypoint arrival status and initial bearing from origin Waypoint to the destination Waypoint for the active navigation leg of the journey. - Page 30 MQEK5AM0AE090 www.avmap.us ÑMQEK5AM0AE090TÓ...
Need help?
Do you have a question about the EKPV and is the answer not in the manual?
Questions and answers