Table of Contents
Advertisement
Quick Links
Advertisement
Table of Contents

Subscribe to Our Youtube Channel
Related Manuals for AvMap Geosat 5


Summary of Contents for AvMap Geosat 5
- Page 1 USER MANUAL Ver. 0.2...
-
Page 3: Table Of Contents
Index Warning Maintenance and Battery disposal 1. Introduction 1.1 Box contents 1.2 Available accessories 1.3 Hardware features 1.4 The keyboard 2. Installation 2.1 Inserting the Secure Digital (SD) CARD 2.2 Fixing the bracket 2.3 Power connection 2.4 Battery Functioning 2.5 Fitting the optional external GPS antenna 2.6 Starting 3. The Main Menu 4. Setting the destination 4.1 Setting the first destination 4.2 View on Map 4.3 Routing preferences 5. Planning a route 5.1 Planning a route from A to B 5.2 Clearing a Route 5.3 Reversing a Route 5.4 Via points... - Page 4 6.1.2 Data box 6.2 Exploring the map 6.3 2D and 3D view 6.4 Night vision 6.5 Turn List 6.6 Points of interest (POI) 7. Managing Contacts 7.1 Saving a contact on your GPS position 7.2 Saving a new contact directly on the map 7.3 Save a contact with a specific address 7.4 Address Book 7.5 Modify a contact 7.6 Set the HOME address 7.7 Contact alarm 7.8 File Manager 8. Advanced search options 8.1 Address advanced search 8.1.1 Recently found addresses 8.1.2 City Centre Search 8.1.3 Searching for intersections 8.1.4 Post code search 8.2 Advanced POI search (points of interests): 8.2.1 Recently found POI...
- Page 5 10.1.4 Display Options 10.1.5 Power 10.1.6 Simulation settings 10.1.7 Alarm 10.1.8 Reset 10.2 Map settings 10.3 Map Icons 10.4 Time zone 10.5 Traffic settings 10.6 Set data boxes 11. Updating the Software and the Map 11.1 Updating the Software 11.2 Updating the Map 12. Troubleshooting 12.1 MASTER RESET 12.2 Emergency Shut down 13. Warranty and Support 13.1 Warranty conditions 13.2 Repair and replacement under warranty 13.3 Tele Atlas End User Agreement Appendix A Appendix B...
-
Page 6: Warning
Warning The manufacturer and the distribution chain disclaim any liability deriving from an improper use of the device in a way that may cause accidents or damages to things or persons. Using this navigator implies that the user accepts and follows all these warnings and all the instructions contained in this manual. -
Page 7: Maintenance And Battery Disposal
• The Secure Digital memory card should not be formatted nor the content modified. • Only AvMap branded Secure Digital memory cards are compatible with Geosat. • Avoid knocking against the display. -
Page 8: Available Accessories
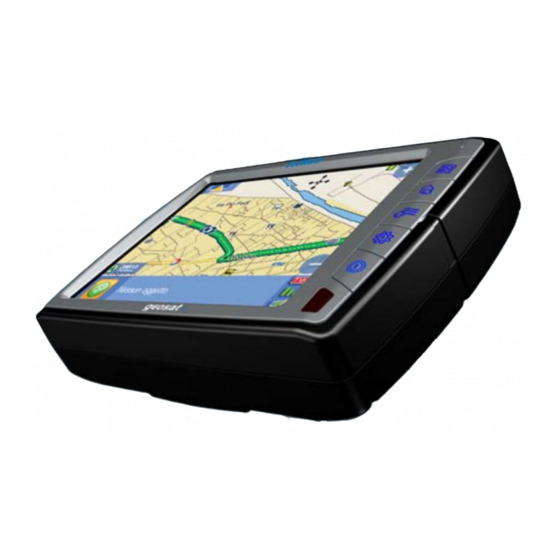
1. Introduction Box contents 1. Geosat 5 Navigator (5” LCD TFT display) 2. Secure Digital memory card preloaded with Tele Atlas cartography 3. Car charger 4. Flexible bracket with suction cup 5. USB cable 6. Audio video cable 7. Quick start guide Available accessories 1. -
Page 9: The Keyboard
The keyboard AvMap Geosat 5’s keyboard consists of 5 keys: side view MENU DRIVE ME HOME WHERE TO GO ROUTE FUNCTIONS / VOLUME POWER / BRIGHTNESS... -
Page 10: Inserting The Secure Digital (Sd) Card
2. Installation AvMap Geosat 5 is ready to be used. All you need to do is install the unit into the vehicle. Carry out these operations in order: 1. Make sure the secure digital card is in its slot 2. Fix the bracket on the windscreen 3. -
Page 11: Fitting The Optional External Gps Antenna
The battery will require 4 hours charging to be fully charged. Geosat 5 can be fed with voltage between 10 and 35 V. The car charger cable provided in the box should be used to power Geosat via the car cigarette/12 V power socket. -
Page 12: Starting
Starting 1. Switch on the navigator by pressing the POWER button 2. Some important warnings are displayed 3. If the warnings are not in the language required, it is possible to immediately set the text language by touching the Language Setting button in the lower left corner. Select the desired language for the text, then touch the upper right arrow button to select the voice language (for vocal instructions) 4. -
Page 13: The Main Menu
3. The Main Menu The MENU key It opens the Main Menu, which consists of four pages with three big buttons each. Change page by touching the arrow button. By touching the Settings button in the lower right corner, you can access the system settings, while touching the Map button on the lower left corner you can go back to the map view. - Page 14 screen displays whatever is connected to the Audio Video input. Tracks button It opens the Tracks page from which you can record tracks. Demo button It starts the Demo...
-
Page 15: Setting The First Destination
4. Setting the destination Setting the first destination In order to insert your first destination: 1. Press the WHERE TO GO Key on the side keyboard to open the Where to go page. 2. Touch the Address button to open the Address page 3. Touch on the New Address button in the upper right part of the screen 4. -
Page 16: Routing Preferences
and start the navigation from the current GPS position to the selected destination. View on Map From the Start Navigation page you can touch the View on Map to display the location of the selected address on the Map. Once you have checked the position on the map press on the Back arrow button to go back to the Start Navigation page, then touch the Go button to calculate the... -
Page 17: Planning A Route From A To B
5. Planning a route Planning a route from A to B When you are in your car and Geosat receives a valid GPS fix, the starting point of a route corresponds to your current GPSA position. It is also possible to plan a route without a Valid GPS fix, before leaving, setting both the destination and the starting point. -
Page 18: Avoiding A Street And Detour
4. Touch Add point to open the Add point page. 5. Select the desired address as for inserting a new address (par. 4) or with the advanced procedure (par. 8) then in the Start Navigation Page, touch Set as Via Point and go back to the Edit Trip page. -
Page 19: Simulation
10.1. Simulation After planning a route, it is also possible to simulate navigation. 1. Press the MENU key on the side keyboard 2. Touch the Settings button in the right lower corner 3. Touch the User preferences button 4. Touch the Simulation button 5. -
Page 20: Navigation Info
6. Map views Navigation info Inactive Navigation Back button Scale Info button Info bar Active Navigation Show / Hide info boxes bar Info box Next manoeuvre Distance to go to the next manoeuvre If the navigation is active, the position of the vehicle on the map is shown with an Icon (e.g. a blue car). -
Page 21: Unit Status
In the lower part of the screen the information bar is displayed. The information bar displays the name of the street you are travelling along, and above that, the name of the street you will have to turn into. The left corner of the information bar shows the distance to the next manoeuvre and the icon of the manoeuvre you will have to perform. -
Page 22: Exploring The Map
displayed. The data boxes show: Time to destination, time to the next manoeuvre and distance to destination. These boxes can be hidden by touching the icon on the upper left side. The data boxes can be customised. 1. Press the MENU key on the side keyboard. 2. -
Page 23: Night Vision
The database of the points of interests is very useful when you are in an unfamiliar place. This information is preloaded in the Geosat 5 memory card, together with the cartographic data. The POI list includes hotels, restaurants, hospitals, police stations, cinemas etc and are grouped in these categories: •... - Page 24 5. Touch the OK button to go back to the Settings page 6. Touch the Map button to go back to the Map You can import extra points of interest, such as Speed cameras, into the Geosat 5. These databases are published on the internet (e.g. www.poigps.com). The format compatible with Geosat 5 is.ov2.
-
Page 25: Managing Contacts
7. Managing Contacts With Geosat 5 you can save up to 1000 personal contacts’ addresses. For example you can save your customers addresses, but also friends, relatives or restaurants and shops you would like to remember. Saving a contact on your GPS position 1. -
Page 26: Save A Contact With A Specific Address
contact address. Save a contact with a specific address 1. Insert the desired address following the procedure described in par. 4 2. In the Start Navigation page select Add to contacts 3. Select the folder in which you want to save the contact 4. -
Page 27: Contact Alarm
Contact alarm Geosat 5 can alert you with a message and a beep when you are in proximity of one or more contacts associated to the proximity alert icon. For the alerts activation read par. 10.1 File Manager Using Secure Digital memory cards with different versions of the navigation software or updating the map data may cause the loss of your contacts. -
Page 28: Advanced Search Options
8. Advanced search options Beside the simple new address research described par.4, there are some advanced search options: you can search for an address through the post code, or you can search for an intersection between 2 streets, or for the centre of a city; or you can look for Points of interests and contacts. -
Page 29: Searching For Intersections
1. Press the WHERE TO GO Key 2. Touch the Address button. 3. Touch the City Centre button to open the virtual keyboard. 4. Type the name of the desired city and touch the green arrow button. 4. Choose from the list of possible results to open the Start Navigation page. 6. -
Page 30: Searching For Nearest Poi
1. Press the WHERE TO GO Key 2. Touch the POI button. In the list on the left the list of the recently found addresses is displayed, including contacts. 3. Select one of the points of interest from the list to open the Start Navigation page 4. - Page 31 7. Touch the Go button to calculate the route and start the navigation. At step n. 4 we can introduce a filter in the research by touching the ‘name’ button. Type the name of the point of interest and then go back to the choice of the main category of subcategory.
-
Page 32: Special Functions
9. Special functions Video Geosat 5 is equipped with a PAL NTSC audio-video input. Connect Geosat 5 to a DVD player, a laptop, a video camera, digital camera or to game console in order to utilise its 5 screen as an external display. -
Page 33: Setting The Preferences
10. Setting the preferences You can set a variety of preferences, allowing you to customize your Geosat 5 according to your needs. To access to the system set up: 1. Press the MENU key 2. Press the Settings button to open the settings menu which consists of 6 groups of settings: • User preferences... -
Page 34: Display Options
• U turns • Highways • Walkways • Ferry routes • Built up areas • Unpaved roads • Heavy Traffic Route preferences It specifies the preferred criteria for the route calculation: • Fastest: streets that are fastest (higher speed limit) are preferred. This calculation takes into consideration also the ‘turn cost’... -
Page 35: Simulation Settings
Power Status The icon shows the status of the battery 10.1.6 Simulation set tings Simulation: On / Off It enables or disables the simulation Speed: you can use the dimmer to set the average speed for the simulation. 10.1.7 Alarm Safety Camera Alarm: On / Off It activates the proximity alarm when approaching a speed camera (for further info read par. -
Page 36: Map Icons
• Speed: the zoom level is varied according speed. • Turn/speed: zoom automatically according to speed and distance to next turn. Scale: On / Off It enables or disables the scale icon on the map. 10.3 Map Icons You can here choose which categories of points of interest you want to display on the map Special POI In this page it is possible to enable or disable... -
Page 37: Set Data Boxes
10.6 Set data boxes Here it is possible to customize the info shown in the data boxes at the left side of the map while navigating. Set data boxes 1: it sets the info to be displayed in the first box Set data boxes 2: it sets the info to be displayed in the second box Set data boxes 3: it sets the info to be displayed in the third box... -
Page 38: Updating The Software And The Map
Each Software update is an executable file with an intuitive user interface that makes the updating operation easier. To check whether your Geosat 5 needs to be updated, you need to establish which software version is pre-loaded on your device and then visit the www.avmap.it website to check if it is the latest available version. -
Page 39: Updating The Map
This contains all the info related to software and cartography. The cartography version is detailed in the bottom: Map Name and Version (V.x) e.g. Italy V.4 The next step is to verify whether there is a newer version available on www.avmap.it . Check in the Cartography section or in the Shop on line. -
Page 40: Troubleshooting
Attention: this operation deletes all the contacts if they have not been saved in the File Manager. 1. Connect the power supply of your AvMap Geosat. The unit has to be turned off at that time. 2. Power on the navigator with the POWER key pressing at the same time another key button. Hold both keys until the ‘System Test’... -
Page 41: Warranty And Support
13. Warranty and Support 13.1 Warranty conditions Product: The Geosat 5 car navigator, contained in the packaging Conformity: Conformity to the technical, aesthetic and functional features described for the product Purchaser: Private person purchasing the product from the vendor Producer: AvMap S.r.l. -
Page 42: Repair And Replacement Under Warranty
Centre for national territory by one of the following methods: Web procedure The Purchaser should visit the www.avmap.it website and click on “Technical Support.” The Purchaser will be required to complete an on-line assistance request form. Once the form has been processed, the Support Centre will send the Purchaser an authorisation number by email. - Page 43 • Creation of a derivative product that competes with the Licensed Products ADDITIONAL PROVISIONS TO BE INCLUDED BY LICENSEE: 1. TA is a third party beneficiary of AvMap rights under the EULA, but is not a party thereto and shall have no obligations hereunder.
- Page 44 or use of the Licensed products. In the event that such exemption is challenged under any such laws, this EULA shall be considered breached and any and all right to retain any copies or to use of the Licensed Products shall be terminated and considered immediately null and void. Any copies of the Licensed Products held by Licensee shall immediately be destroyed.
- Page 45 LIST OF COPYRIGHTS Europe Austria Denmark France Great Britain Italy Northern Ireland Norway Switzerland Netherlands Products for North America (US and Canada) “© 2006 Tele Atlas North America, Inc. / Geographic Data Technology, Inc. All rights reserved. This material is proprietary and the subject of copyright protection and other intellectual property rights owned by or licensed to Tele Atlas North America, Inc.
- Page 46 Manual or automatic brightness control Built-in Sirf III GPS receiver 20 channels Built-in rechargeable Li-Ion battery Secure Digital memory card: 512 MB SD memory card for Geosat 5 2 GB SD memory card for Geosat 5e Processor Arm9 300 MHz RAM 32 MB...
- Page 47 Appendix B POI index Car services Car repair Car dealer Gas station Parking Garage Rent-a-car facility Rent-a-car parking Bovag garage Vehicle equipment provider Authorized car repair Transport Airline access Airport Bovag garage Bridge and tunnel Entry point Highway exit Ferry terminal Lighthouse Main railway station Main railway station CLF (car loading facility)
- Page 48 AvMap s.r.l. Via Caboto, 9 - 54036 Marina di Carrara (MS) - Italia info@avmap.it...
Need help?
Do you have a question about the Geosat 5 and is the answer not in the manual?
Questions and answers