
Related Manuals for Triad In-Ceiling R15


Summary of Contents for Triad In-Ceiling R15
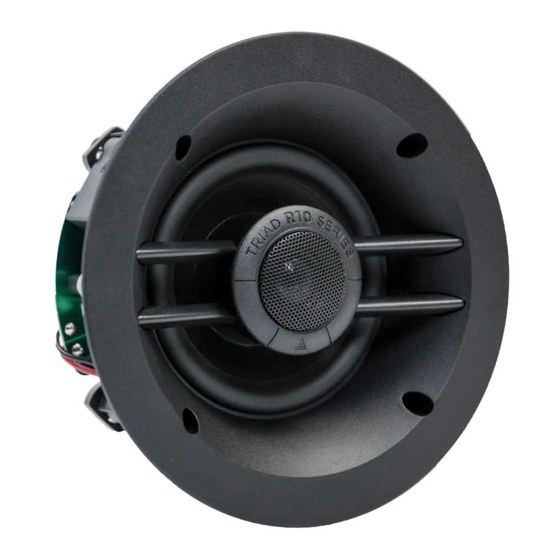
- Page 1 In-Ceiling R10 SERIES ROUND Product Family In-Ceiling R15 In-Ceiling R16 In-Ceiling R18 In-Ceiling R18DT Round Grill Square Grill (included) (available separately) TRIAD SPEAKERS INC. | PORTLAND, OR www.triadspeakers.com...
-
Page 2: Custom Painting
Triad Speakers, Inc. FINISH MAINTENANCE AND CARE The paint finish on all Triad speakers is designed to last a lifetime with minimal care. If cleaning the surface becomes necessary, gently wipe the speaker grill with a soft cloth lightly dampened with a mild soap-and-water solution. -
Page 3: New Construction Installation
NCB location (keep free from electrical wires, HVAC, and plumbing). Position the bracket beneath the two joists so the flange protrudes down for drywallers to sheetrock around. Triad In-Ceiling R10 Series Quick Start Guide - pg. 3... - Page 4 Use a stud finder to locate the two joists flanking the location in which you wish to install the speaker. Using the enclosed hole cutout template as a guide, mark the outline on the ceiling with a pencil. Triad In-Ceiling R10 Series Quick Start Guide - pg. 4...
- Page 5 The R18DT has has two terminals for its dual-voice-coil woofer and two tweeters. Connect the two left channel wires to one Left channel terminal and the two right channel wires to the other terminal. Right channel Triad In-Ceiling R10 Series Quick Start Guide - pg. 5...
- Page 6 Tighten the four Phillips screws located on the speaker’s front baffle (see drawing below) to rotate and tighten the dog legs to the sheetrock. Dog legs will move outward and tighten to secure speaker to sheetrock. Triad In-Ceiling R10 Series Quick Start Guide - pg. 6...
- Page 7 If the hardware proves to be defective in material or workmanship during the warranty period, Triad Speakers will, at its sole option, repair or replace the product with a like product. The warranty extends only to products purchased directly from Control4 Corporation or an Authorized Control4 Dealer.
-
Page 8: Specifications
SPECIFICATIONS In-Ceiling R15 In-Ceiling R16 Cabinet dimensions Cabinet dimensions Inside ring diameter: 6-7/16" (16.3 cm) Inside ring diameter: 7-3/4" (19.7 cm) Mounting depth: 3-3/4" (9.5 cm) Mounting depth: 3-11/16" (9.3 cm) Hole cutout: 6-1/2" (16.5 cm) / NCB: R5 Hole cutout: 7-7/8" (20 cm) / NCB: R6 Grill: 8-5/16"...
Need help?
Do you have a question about the In-Ceiling R15 and is the answer not in the manual?
Questions and answers