Durabook S15 User Manual
Semi-rugged notebook pc
Hide thumbs
Also See for S15:
- Quick start manual (2 pages) ,
- User manual (6 pages) ,
- Quick start manual (2 pages)
Table of Contents
Advertisement
Quick Links
Advertisement
Table of Contents

Related Manuals for Durabook S15


Summary of Contents for Durabook S15
- Page 1 © 2023 Twinhead International Corp and/or its affiliates. All rights reserved.
-
Page 2: Table Of Contents
Table of Contents ..................5 EFORE TART ..................5 ACKAGE ONTENTS ..................6 RODUCT VERVIEW Front View ....................... 6 Back View ........................ 7 Right View ....................... 8 Left View ........................9 Rear View ........................ 9 Optional Expansions ....................10 ..................11 TATUS NDICATORS GETTING STARTED .............. - Page 3 Configuring the Programmable Button (P1) ............... 32 Configuring the Programmable Button (P2) ............... 33 Assigning an Application to the P1/P2 Button ............. 33 Accessing the Mobility Center ................... 34 Configuring External Antenna Switching Mode ............34 ..................35 SING THE AMERA Opening Camera App ....................
- Page 4 ..................72 ISPLAY ROBLEMS (SSD) P ............. 72 OLID TATE RIVE ROBLEMS ..................75 THER ROBLEMS APPENDIX ................76 ....................76 OPYRIGHT ..................76 PECIFICATIONS ................79 EGULATORY TATEMENT Federal Communications Commission Statement ............79 IC Regulations ......................79 Declaration of Conformity ..................80 RF exposure warning ....................
-
Page 5: Before You Start
Before You Start Before You Start Congratulations on your purchase of this laptop. This semi-rugged laptop is portable and provides users with maximum mobile computing experience in a wide range of working environments. Before you begin using your laptop, read this chapter to familiarize yourself with the main components installed in the system. -
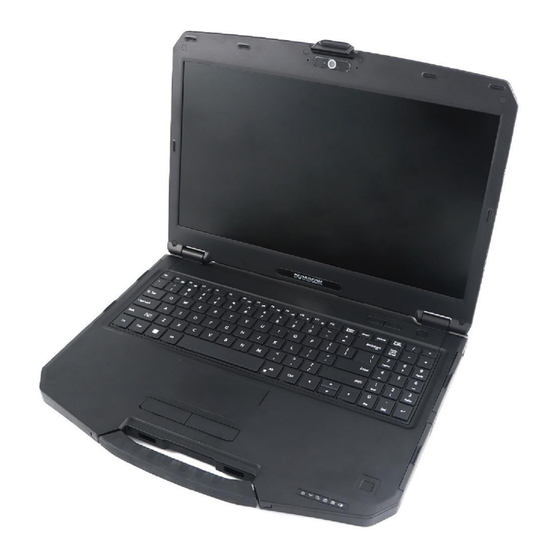
Page 6: Product Overview
Before You Start Product Overview Front View No. Item Description Microphones Record the surrounding sound. Web camera Use for video conference. (optional IR Camera) Display screen Provide visual output. Programmable P1: Press to activate the assigned function. buttons - Stealth mode button. - Night Vision mode button (optional). -
Page 7: Back View
Before You Start No. Item Description Power button Press to turn your laptop on or off. Keyboard Press the keys to input information. Touch pad Use to point, select, drag, or scroll objects on the screen. LF/HF-RFID reader Reads tags for data collections from other devices. (optional) Touch pad button Press to select objects or display a shortcut menu. -
Page 8: Right View
Before You Start Item Description Battery latch Slide to the unlock position to release the battery. Battery compartment Install the battery. Speakers Emit sound. Storage and memory Remove the door to access storage and system compartment door memory. Swap battery button Activate to swap battery. -
Page 9: Left View
Before You Start USB 3.2 (type A) Connect USB 3.2 (Gen.2) peripheral devices. with PowerShare PowerShare is supported in AC mode only. SIM card slot Use to insert a nano SIM card for WWAN module connection. DC-in jack Connect the power adapter. Left View Item Description... -
Page 10: Optional Expansions
Before You Start port Thunderbolt 4 Connect Thunderbolt 4 peripheral devices. HDMI output port Connect an HDMI device such as an external HDMI LCD TV. VGA port Connect to a display device such as an external monitor or a projector. RS-232 port Connect a serial peripheral device. -
Page 11: Status Indicators
Before You Start Status Indicators The status indicators light up when a particular function of the laptop is active. Each indicator is marked with a symbol. Icon Item Description The LED always lights on (blue) when the system is running. When the system is in standby mode, the LED Power blinks. -
Page 12: Getting Started
Getting Started Getting Started This chapter will help you get started using the device. CAUTION! Before any internal installation procedures are carried out on the system, make sure the system is turned off and cooled down for 5 minutes. Failing to turn off the system before opening it can cause permanent damage to the system and serious or fatal injury to the user. -
Page 13: Charging The Battery
Getting Started 2. Push completely until the battery locks into place. 3. Slide the latches to the lock position ( ) to secure the battery. Charging the Battery The Lithium-ion battery is not fully-charged upon purchase. To charge the battery, follow the steps below: 1. -
Page 14: Checking The Battery Level
Getting Started ATTENTION! • NE PAS charger la batterie si la température est inférieure à 0° C ou supérieures à 50º C. • Utilisez uniquement l'adaptateur secteur fourni. L'utilisation d'autres adaptateurs secteur peut endommager la batterie ou de votre tablette PC. Checking the Battery Level It is important that you monitor the battery status regularly to ensure you do not run out of power at a critical moment. -
Page 15: Removing The Battery
Getting Started Removing the Battery To remove the battery, follow the steps below: 1. Slide the battery latches to the unlock position ( 2. Remove the battery out of the battery compartment. EN-15... -
Page 16: How To Use Swappable Battery (For Selected Model)
Getting Started How to use Swappable Battery (for selected model) NOTE • The instructions in this section apply only to the laptop PCs that support the battery swapping function. To swap the battery, follow the steps below: 1. While the system is in active mode, flip to the bottom side and press the swap battery button for 2 seconds. -
Page 17: Using The Optical Disc Drive (Odd)
Getting Started Using the Optical Disc Drive (ODD) You can use the optical disk drive (ODD) to play or record DVD or CD disc. Placing a Disk To place a disk, follow the steps below: 1. Open the ODD cover. 2. -
Page 18: Manual Ejection
Getting Started Manual Ejection If the Eject button fails to work properly, insert a paper clip into the Pin Hole Eject to open the tray. NOTE • Be sure that the laptop is turned off before performing the manual ejection. •... - Page 19 Getting Started 2. Remove the storage and memory compartment door from the system. 3. Remove the screw securing the SSD #1 module to the mainboard. 4. Disconnect the SSD #1 module from the mainboard connector. EN-19...
- Page 20 Getting Started 5. Connect the new SSD #1 module to the mainboard connector. 6. Attach the screw to secure the SSD #1 module to the mainboard. 7. Replace the storage and memory compartment door to the system. EN-20...
-
Page 21: Replacing The Ssd #2
Getting Started 8. Attach the eight (8) screws to secure the storage and memory compartment door to the device. Replacing the SSD #2 To replace the SSD #2, follow the steps below: 1. Remove the eight (8) screws securing the storage and memory compartment door to the device. - Page 22 Getting Started 2. Remove the storage and memory compartment door from the system. 3. Remove the screw securing the SSD #2 module to the mainboard. 4. Disconnect the SSD #2 module from the mainboard connector. EN-22...
- Page 23 Getting Started 5. Connect the new SSD #2 module to the mainboard connector. 6. Attach the screw to secure the SSD #2 module to the mainboard. 7. Replace the storage and memory compartment door to the system. EN-23...
- Page 24 Getting Started 8. Attach the eight (8) screws to secure the storage and memory compartment door to the device. • SSD #2 is an optional feature. EN-24...
-
Page 25: Connecting To Power
Getting Started Connecting to Power Your laptop can be powered up using the AC adapter or the lithium-ion battery. Connecting the AC Adapter The AC adapter powers up your laptop and charges the battery. 1. Connect the AC adapter to the DC-in jack on your laptop. 2. -
Page 26: Configuring The Power Settings
Getting Started Configuring the Power Settings 1. Search for “Edit power plan”. Then click Open. 2. Change the desired sleep and display settings. Then click Save changes. EN-26... -
Page 27: Starting Your Laptop
Getting Started Starting Your Laptop Turning On Your Device 1. To open the display panel, lift the cover lid up to upright position. 2. Press the button until the Power LED lights up. Turning Off Your Device It is important to properly shut down your laptop to avoid the loss of unsaved data. To shut down your laptop, do the following: Click >... -
Page 28: Using The Keyboard
Getting Started Using the Keyboard No. Keys Description These function keys are used to perform designated Function keys tasks. The tasks for each key may vary from one application to another. Press the [Fn] key in combination with other keys to [Fn] execute a command. -
Page 29: Using The Touch Pad
Getting Started No. Keys Description Press to display the Start menu. This action is the Windows key same as clicking the Start icon. Press the Num Lock key to activate the numeric keypad. Press the keys on the numeric keypad to Numeric keypad enter numbers or operands as you would on a calculator. -
Page 30: Operating Your Laptop
Operating Your Laptop Operating Your Laptop This chapter will guide you through how to use your laptop. Using the Quick Menu To enter the Quick menu, tap the arrow in the system tray to display hidden icons. Then tap the Quick Menu icon ( Quick Menu Overview NOTE •... -
Page 31: Viewing The Version Information
• Optimized Battery Charging (OBC): Battery charging will stop at 80% to reduce battery aging. • Temperature Control Mode (TCM): To extend the lifetime of the battery, charging is enhanced based on DURABOOK intelligent algorithm and battery temperature. • DURA... -
Page 32: Configuring The Programmable Button (P1)
Operating Your Laptop Configuring the Programmable Button (P1) On the P1 Button Setting section, you can assign the function for the P1 button. There are three available options: • Stealth Mode: Turn off the LCD backlight, LEDs, speakers, camera flash, and RF devices. -
Page 33: Configuring The Programmable Button (P2)
Operating Your Laptop Configuring the Programmable Button (P2) On the P2 Button Setting section, you can assign the function for the P2 button. There are three available options: • Launch Application: Shortcut key for launching a specific application. To assign the application, refer to the “Assigning an Application to the P1/P2 Button”... -
Page 34: Accessing The Mobility Center
Operating Your Laptop Accessing the Mobility Center Tap the Mobility Center tab to adjust or configure the brightness, volume level, battery status, external display, sync, and presentation settings. Configuring External Antenna Switching Mode Select the respective external antenna tab to configure the setting. •... -
Page 35: Using The Camera
Operating Your Laptop Using the Camera Using the camera application, you can use this laptop to take photos or videos. Opening Camera App To access the camera application, search for “Camera” and then click Open. EN-35... -
Page 36: Taking Photos
Operating Your Laptop Taking Photos Click to capture a photo. Recording Videos Click to switch to Video mode. NOTE • You can also toggle to switch to Video mode. EN-36... - Page 37 Operating Your Laptop Click to start recording a video, as shown on the previous page. The recording time appears on the bottom of the screen. During the video recording, you can do the following: • Click to pause the recording. Then click to resume.
-
Page 38: Adjusting Brightness
Operating Your Laptop Adjusting Brightness Click to display the brightness control slider. Do the following: • Click and drag upwards to brighten your photo or video. • Click and drag downwards to darken your photo or video. Setting Photo Timer Click to toggle the desired time delay. -
Page 39: Configuring Camera Settings
Operating Your Laptop Configuring Camera Settings Click to enter the Settings menu. Select the desired menu option and setting. Menu Option Description Camera settings Show advanced Enable or disable to show advanced controls for controls for photos photos and videos. and videos Framing grid Show or hide the framing grid lines. -
Page 40: Viewing Photos/Videos
Operating Your Laptop Menu Option Description Photo settings Photo quality Select the aspect ratio of the photos. Time lapse Enable or disable taking photos continuously until the camera button is pressed again. Videos settings Video quality Set the video resolution. Flicker reduction Select the flicker reduction setting when recording video under fluorescent light. -
Page 41: Making Connections
Making Connections Making Connections This chapter will guide you through installing peripheral devices to maximize the use of your laptop. Installing the Memory Card Your laptop supports memory card to provide faster data transfer. Supported types: MicroSDXC. To insert a MicroSD memory card: 1. -
Page 42: Using The Sim Card
Making Connections Using the SIM Card You can use nano SIM card for wireless internet access. NOTE • Check the availability of service and data plan rates with your network service provider. To insert a nano SIM card: 1. Open the I/O port cover. 2. -
Page 43: Using The Smart Card Reader
Making Connections Using the Smart Card Reader Your laptop is equipped with an optional built-in smart card reader that allows you to make secure purchases, store security information, and provide identification and information using a smart card. 1. Open the I/O port cover. 2. -
Page 44: Connecting Usb Devices
Making Connections Connecting USB Devices You can connect your laptop to other USB devices, such as a mouse, keyboard, digital camera, printer, or an external storage drive. 1. Open the I/O port cover. 2. Connect one end of the USB cable to the USB port of your device or connect the device directly to the USB port. -
Page 45: Connecting To External Displays
Making Connections Connecting to External Displays You can connect an additional display to your laptop by using the HDMI or VGA cable. 1. Open the I/O port cover. 2. Connect one end of the HDMI, VGA, or USB type-C cable to the HDMI, VGA, or USB type-C port of your device. -
Page 46: Connecting To A Local Area Network (Lan)
Making Connections Connecting to a Local Area Network (LAN) You can connect your laptop to a local area network (LAN) using the ethernet cable. 1. Open the I/O port cover. 2. Connect one end of the ethernet cable to the RJ-45 port on your laptop. 3. -
Page 47: Connecting To Wireless Connections
Making Connections Connecting to Wireless Connections You can connect your laptop to a Bluetooth device, wireless local area network (WLAN), or WWAN. Connecting to a Bluetooth Device Your laptop can connect and communicate with other Bluetooth-enabled devices. By default, the Bluetooth function is enabled. To add a device, follow the steps below: 1. - Page 48 Making Connections 5. Select the desired device to pair and then click Connect to confirm the pairing code (PIN). Confirm the pairing code also in the other Bluetooth device to establish the connection. 6. After pairing is complete, click Done. NOTE •...
- Page 49 Making Connections no longer require entering the PIN. • To disconnect from the Bluetooth-enabled device, select the device in the Bluetooth menu and click Remove device. Connecting to a Wireless Local Area Network Your laptop comes with a WLAN module. A wireless network can be added either when the network is detected or by manually entering the settings information.
- Page 50 Making Connections system tray. NOTE • Wi-Fi access requires service from a wireless service provider. Contact your service provider for more information. • Actual wireless connectivity will depend on system configuration. Please contact your dealer for more information. • To disconnect from the wireless network, select the network in the wireless network list and click Disconnect.
-
Page 51: Using The Bios Setup Utility
Delete button on the keyboard to enter the setup utility. Selecting the Boot Device Restart your laptop and press the F12 button on the keyboard when the DURABOOK logo appears. Then select the boot device. EN-51... - Page 52 Using the BIOS Setup Utility Navigating and Entering Information in BIOS Use the following keys to move between fields and to enter information: Keyboard Description Select screen → Select item Enter Select + / - Change Opt. General Help Previous Values Optimized Defaults Save &...
-
Page 53: Main Menu
Using the BIOS Setup Utility Main Menu The Main Menu displays the device’s system overview information, including the system date and time. Item Description BIOS Information Display the BIOS version detected during boot up. Display the CPU type, total memory, mainboard version, System Information UEFI Firmware version, processor type, ME FW version, ME Firmware SKU, serial number, and UUID. -
Page 54: Advanced Menu
Using the BIOS Setup Utility Advanced Menu The Advanced Menu allows you to configure specific system settings. Item Description Configure the CPU parameters. For details, refer to CPU Configurations CPU Configurations. Programmable Set the function of the P1 button. For details, refer to Buttons Programmable Buttons. - Page 55 Using the BIOS Setup Utility Item Description Configure Trusted Computing settings. For details, refer to TPM Configurations TPM Configurations on page 56/ 57. Battery Calibration Perform the battery calibration. UART port 1 Mode Set the UART port mode between RS232, RS422, or selection RS485.
- Page 56 Using the BIOS Setup Utility Programmable Buttons Select this option to assign a default function to the P1 button. Item State Description Disabled Turn off the function. Set the Stealth Mode as the default function of P1 Button Stealth Mode the P1 button.
- Page 57 Using the BIOS Setup Utility Item State Description Enabled Turn on the function. Smart Card Reader Disabled Turn off the function. Enabled Turn on the function. LF/HF-RFID Reader Disabled Turn off the function. Enabled Turn on the function. Front Camera Disabled Turn off the function.
- Page 58 OBC: Battery charging will stop at 80% to Optimized reduce battery aging. Battery • TCM: To extend the lifetime of the battery, Battery- Charging charging is enhanced based on DURABOOK Protection (OBC)/ intelligent algorithm and battery Function Temperature temperature. Control Mode •...
- Page 59 Using the BIOS Setup Utility TPM Configurations Select this option to configure TPM settings. Item State Description Enable BIOS support for security device. The Enable Security Device default value is [Enabled]. Support Disable Turn off the function. Enable the SHA256 PCR bank. The default value Enabled SHA256 PCR is [Enabled].
- Page 60 Using the BIOS Setup Utility Item State Description Turn off the function. The default value is Disabled [Disabled]. EN-60...
-
Page 61: Boot Menu
Using the BIOS Setup Utility Boot Menu The Boot Menu allows you to configure the boot settings and boot sequence. Item Description Bootup NumLock Select the keyboard NumLock state. State Launch Network PXE Select the LAN PXE boot mode. OpRom Configure VMD settings. - Page 62 Using the BIOS Setup Utility VMD Setup Menu Select this option to configure VMD settings. Item State Description Turn on the function. The default value is Enabled Enable VMD [Enabled]. Controller Turn off the function. Disabled Turn on the function. The default value is Enabled [Enabled].
-
Page 63: Security Menu
Using the BIOS Setup Utility Security Menu The Security Menu allows you to set the Administrator password and configure the Secure Boot settings. Item Description Administrator Set the administrator password. Password Secure Boot Customize the Secure Boot settings. EN-63... -
Page 64: Save & Exit Menu
Using the BIOS Setup Utility Save & Exit Menu The Save & Exit Menu allows you to save/discard the changes and restore the default values for all setup options before leaving the BIOS Setup Menu. Item Description Save Changes and Reset the system after saving any changes. -
Page 65: Maintaining And Caring For Your Laptop
Maintaining and Caring for Your Laptop Maintaining and Caring for Your Laptop Taking care of your laptop will reduce the risk of damage to your device and ensure that it operates properly. To help you maintain the quality and function of your laptop, this chapter provides guidelines on how to protect, store, clean, and travel with your device. - Page 66 Maintaining and Caring for Your Laptop do not place the laptop on a bed, sofa, rug, or other similar surface. Overheating may occur, which could result in damage to your laptop. • Keep your laptop away from that are vulnerable to damage from heat, as the device can become very hot during operation.
- Page 67 Maintaining and Caring for Your Laptop Battery Pack Guidelines • Do not expose the battery to temperatures below 0°C (32°F) or above 45°C (113°F). This may adversely affect the battery pack. • While the battery may not provide 100% capacity at temperature extremes, its capacity is restored when the battery temperature return to a normal range, around 20°C (68°F).
-
Page 68: Cleaning Your Laptop
Maintaining and Caring for Your Laptop Battery Charging Recommendations The battery is a consumable item that will eventually wear out and need replacement. NOTE • If the battery pack has deteriorated, ensure it is replaced with a new one. The lifespan of the battery depends upon its usage. To prolong battery life, follow the recommendations below: •... -
Page 69: Traveling With Your Laptop
Maintaining and Caring for Your Laptop Cleaning the External Power Connector The external power connector may sometimes be exposed to moisture and/or contamination causing an unreliable connection to the external power source. Clean the connector with a cotton swab dipped in electronics grade isopropyl alcohol. -
Page 70: Troubleshooting
Troubleshooting Troubleshooting This chapter advises you on what actions to take when solving common computer problems that may be caused by issues with hardware or software. Preliminary Checklist Here are the initial steps you should follow before taking further action when encountering any problem: 1. - Page 71 Troubleshooting to the device. • The Battery Power LED lights when the battery starts charging. • If the battery still fails to start charging after an hour, remove the battery, wait several seconds, and then install it again. • If the battery does not begin charging within several minutes, return the unit for service.
-
Page 72: Display Problems
Troubleshooting Bluetooth Wireless Transmission Problems I cannot connect to another device with BT wireless technology. • Ensure that you have activated BT feature on both devices. • Make sure that the distance between the two devices is within the acceptable limit and that there are no walls or other obstructions between the devices. - Page 73 Troubleshooting Storage recovery process in Windows 11 1. Select Start > Setting > System > Recovery. 2. Select any of the three recovery methods that suits the best to solve the problem with your laptop. EN-73...
- Page 74 Troubleshooting • Fix problems without resetting your PC: Select this option to run a troubleshooter. Make sure your laptop is connected to the network. • Reset this PC: Select this option to reinstall the Windows 11 operating system. To reset your tablet PC, tap Reset PC. You are then prompted to keep or remove your personal files.
-
Page 75: Other Problems
Troubleshooting Other Problems The device won’t turn on. • Make sure a fully charged battery is properly installed. • Connect external power to charge the battery if it is not charged. • If you are using the AC adapter, check the electrical outlet you are using to make sure it is working properly. -
Page 76: Appendix
Appendix Appendix Copyright Copyright © 2023. All rights reserved. No part of this user manual may be transmitted, stored in a retrieval system, or translated into any language or computer language, in any form or by any means, without the prior written permission of the manufacturer. Information is subject to change without prior notice. - Page 77 Appendix − Integrated microphone − Intel ® High Definition Audio Compliant AUDIO − Integrated speaker x 2 − Keyboard volume and mute controls − Optional integrated 2.0 MP web-cam CAMERA − Optional 5MP IR camera for Windows Hello − 2 user-definable keys (P1/P2) KEYBOARD −...
- Page 78 Appendix Optional DVD super multi MEDIA BAY Optional 3 (One Option Only) Optional ExpressCard 54 Optional discrete VGA EXPANSION BOX Optional 2nd RJ45 x 1 + 2nd RS232 x 1 AC adapter: 100-240V, 50Hz-60Hz, 90W − Main battery Li-Ion, 7.4V, 7600mAh, 12 hours −...
-
Page 79: Regulatory Statement
Appendix Regulatory Statement Federal Communications Commission Statement This equipment has been tested and found to comply with the limits for a Class B digital device, pursuant to part 15 of the FCC Rules. These limits are designed to provide reasonable protection against harmful interference in a residential installation. -
Page 80: Declaration Of Conformity
Appendix Declaration of Conformity This device complies with part 15 of the FCC rules. Operation is subject to the following conditions: ▪ This device may not cause harmful interference ▪ This device must accept any interference received, including interference that may cause undesired operation. RF exposure warning Any changes or modifications not expressly approved by the party responsible for compliance could void the authority to operate equipment. -
Page 81: Class 1 Laser Product
Appendix CLASS 1 LASER PRODUCT LASERSCHUTZKLASSE 1 PRODUKT TO EN60825 CAUTION THIS APPLIANCE CONTAINS A LASER SYSTEM AND IS CLASSIFIED AS A "CLASS 1 LASER PRODUCT.” TO USE THIS MODEL PROPERLY, READ THE INSTRUCTION MANUAL CAREFULLY AND KEEP THIS MANUAL FOR FUTURE REFERENCE. - Page 82 Appendix CAUTION FOR ADAPTER THIS LAPTOP IS FOR USE WITH DEDICATED AC ADAPTER. − Ensure you connect the power cord to a socket-outlet with earthing connection. − The NB must be powered by using CSA/UL 62368-1 or CSA/UL 60950-1 certified/approved adapter, rated 19Vdc, 3.42A minimum. −...
- Page 83 Appendix – Le remplacement de la batterie avec un type incorrect qui peut contourner un dispositif de protection (dans le cas de certains types de batteries au lithium, par exemple; – L’élimination de la pile dans un feu, un four chaud ou un broyeur mécanique qui peut provoquer une explosion;...
-
Page 84: Safety Instructions
Appendix Safety Instructions Always observe these safety instructions to ensure safe operation when handling the device. • Do not place this device on an unstable table or surface. The device may fall, causing serious damage to its housing and components. •... - Page 85 Appendix safeguard. ✓ Disposal of a battery into fire or a hot oven, or mechanically crushing or cutting of a battery, that can result in an explosion. ✓ Leaving a battery in an extremely high temperature surrounding environment that can result in an explosion or the leakage of flammable liquid or gas.
-
Page 86: Shopfloor Date Code Format Description
Appendix ShopFloor Date Code Format Description Year Year Serial Format Type Week Origin (unit digit) (tens digit) number Example 12345 Date Code Total code numbers Definition of the Date Code First Date Code: Type SY … System (complete machine) Second Date Code: Year (unit digit) Last digit of the calendar year.
Need help?
Do you have a question about the S15 and is the answer not in the manual?
Questions and answers