dymax BlueWave 200 User Manual
Uv light-curing spot lamp system with patented intensity control adjustment
Hide thumbs
Also See for BlueWave 200:
- User manual (40 pages) ,
- Operation manual (24 pages) ,
- Quick start instructions (2 pages)

Subscribe to Our Youtube Channel
Related Manuals for dymax BlueWave 200


Summary of Contents for dymax BlueWave 200
- Page 1 Dymax BlueWave 200 Version 1.1 ® User Guide UV Light-Curing Spot Lamp System with Patented Intensity Control Adjustment Instructions for Safe Use Setup and Operation Maintenance Ordering Spare Parts and Accessories ...
- Page 2 System designs enable stand-alone configuration or integration into your existing assembly line. Please note that most dispensing and curing system applications are unique. Dymax does not warrant the fitness of the product for the intended application. Any warranty applicable to the product, its application and use is strictly limited to that contained in the Dymax standard Conditions of Sale.
- Page 3 Description of the BlueWave 200 ............................ 8 Assembly and Setup ............................9 Unpacking and Inspecting Your Shipment ........................9 Parts Included in the BlueWave 200 Spot Lamp System ....................9 Installation & System Interconnect ..........................9 Settings and Adjustments ..........................11 Intensity Adjustment ..............................
-
Page 4: Introduction
Introduction to the User Guide The enclosed BlueWave 200 Spot-Curing System was developed and manufactured by the Dymax team, driven by a desire to best serve your needs. Before shipping, your BlueWave 200 was thoroughly checked and tested for trouble-free performance. -
Page 5: Safety
Long-sleeved shirts or a lab coat are recommended to protect arms and the use of UV-opaque gloves will protect the hands. NOTE: With the internal filter installed, the BlueWave 200 emits UVA and visible light. Never look directly at the light source while the unit is on. Sécurité... -
Page 6: Dymax Uv Light-Curing System Safety Considerations
empfehlen wir UV-geblockte Handschuhe. BITTE BEACHTEN SIE: Durch den installierten inneren Filter strahlt die BlueWave 200 UVA und sichtbares Licht aus. Schauen Sie deshalb niemals direkt in die Lichtquelle, wenn das Gerät angeschaltet ist. Dymax UV Light-Curing System Safety Considerations Dymax UV light-curing technology has been used successfully for over 30 years. - Page 7 Ozone Standard Dymax bulbs (UVA type) generate an insignificant amount of UVC and therefore essentially no ozone. Some UV light-curing systems, like those used to cure UV inks, emit primarily “shortwave” (UVB and UVC) energy. Upon exposure to UVC light (specifically <240 nm), oxygen molecules (O...
-
Page 8: Product Overview
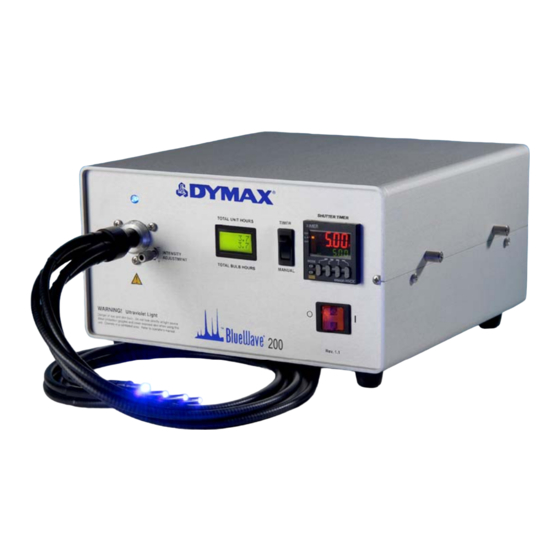
Product Overview Description of the BlueWave 200 The BlueWave 200 is a high-intensity, UV light-curing spot lamp used for curing adhesives, coatings, and potting materials. It emits UV light from a lightguide (sold separately). The lightguide can be hand-held for complete mobility, clamped into position for repetitive operations, or integrated into automated equipment. -
Page 9: Assembly And Setup
Assembly and Setup Unpacking and Inspecting Your Shipment When your BlueWave 200 arrives, inspect the boxes for damage and notify the shipper of box damage immediately. Open each box and check for equipment damage. If parts are damaged, notify the shipper and submit a claim for the damaged parts. - Page 10 4. Remove the protective end caps from the Lightguide. Visually inspect the two ends of the Lightguide to verify that no foreign material is present. The ends of a Dymax liquid-filled Lightguide can be cleaned with isopropyl alcohol as required to remove foreign material and deposition from outgassing.
-
Page 11: Settings And Adjustments
6. If desired, the Lightguide may be fastened into place by lightly tightening the securing Setscrew installed in the Lightguide Mount. A hex wrench is provided with the BlueWave 200 for this purpose. The Setscrew should be tightened gently to prevent damaging the Lightguide. -
Page 12: Intensity Validation
Setting the Cycle Duration The Shutter Timer located on the front panel of the BlueWave 200 is factory set to the most common operating mode and recommended operation of the Shutter Timer with the BlueWave 200. Some modes available on this Shutter Timer may not operate correctly with the BlueWave 200 unit and have been disabled. - Page 13 The timer digits are formatted MM:SS for a maximum Shutter time of 99 minutes and 0.99 seconds. Consult Dymax for information on changing the format of this Timer. To set the Shutter’s open duration, press the appropriate up/down button until the corresponding digit increments in the Set Value.
-
Page 14: Lamp Dual-Hour Meter
WARNING! Operating a BlueWave 200 Lamp beyond 2,000 hours will result in a non-passive failure of the lamp! Do not reset the Lamp Dual-Hour Meter without replacing the bulb. System Operation The BlueWave 200 will arrive almost fully assembled. -
Page 15: Pin Connector I/O Signals
Pin 1 – Shutter Activate This signal line may be used to remotely open the BlueWave 200 Shutter. When it is being used, the local Shutter Enable Jack on the rear of the BlueWave is still capable of opening the Shutter. Similar to the local Shutter Enable, if the Timer/Manual Switch is in timer mode, the Shutter will stay open for the time set on the Timer. - Page 16 Dymax BlueWave® 200 Rev. 1.1 User Guide Signal. The Shutter is opened when Pin 1 of the DSUB9 Connector is connected to Pin 2. When the connection between DSUB9 Connector Pins 1 & 2 is broken, the Shutter is closed.
- Page 17 Pin 5 of the DSUB9 Connector is not used at this time. Figure 14 shows the suggested relationship for both inputs and outputs between the BlueWave 200 and a PLC system. The component values shown are appropriate for a 24 VDC PLC Power Supply to limit current flow to safe levels for the opto-coupler devices within the BlueWave 200.
-
Page 18: Cleaning And Maintenance
The unit has two fuses that are installed in the power receptacle. To remove the fuses, unplug the unit and remove the fuse holder with a small screwdriver. Remove the fuses from the fuse holder and install new fuses. Replace the fuse holder into the power receptacle. The correct fuses are Dymax PN 37869, 4.0 Amp fast-acting type. -
Page 19: Bulb Replacement
1. Ensure that the Power Cord is unplugged from the rear of the unit. 2. Remove the top cover from the BlueWave 200 by loosening the four cover fasteners. 3. Unplug the Bulb and Lift the Bulb Mounting Bracket from it. Remove the Bulb from the Bulb Mount (Figure 22). - Page 20 Dymax BlueWave® 200 Rev. 1.1 User Guide Make sure that the center Electrode is positioned as shown in Error! Reference source not found.. Figure 27. Bulb Electrode Mounting Bracket Thumbscrews This metal Electrode connecting the Bulb to the wire from the Reflector should be parallel to the bottom of the unit.
-
Page 21: Troubleshooting
Dymax BlueWave® 200 Rev. 1.1 User Guide Troubleshooting WARNING: Only qualified maintenance personnel should attempt the following procedures. AVERTISSEMENT: Seulement personnel d’entretien diplomé devrais essayer les procedures suivant. Table 1. Troubleshooting Chart for BlueWave 200 Problem Possible Cause Testing Corrective Action Visually inspect all input/output Improper connections (i.e. - Page 22 Q: I installed a new bulb, and it still will not ignite. A. The BlueWave 200 has a safety shutdown feature at 2,000 hours. If the equipment has reached the safety shutdown point, the lower display on the hour meter will alternate between "Change Bulb"...
-
Page 23: Spare Parts And Accessories
D. The shutter and the bulb mount assembly are aligned incorrectly. Q: Why does my BlueWave 200 seem to run very hot? A. Replace the fan filter media on the exhaust fan and vent located in the back of the equipment. This is your first line of defense against airborne dust and debris. -
Page 24: Spare/Replacement Parts
Clip, Reflector Upper (Teflon) 38548 Filter, Band-Pass 35986 Harness to Hour Meter 40731 5121800 and Higher) Hour Meter for BlueWave 200 Rev 1.1 (Unit Serial Numbers 40730 Igniter 38776 Filter, Dual Fuse IEC Inlet 37178 Power Supply, 200W PFC 38774... -
Page 25: Specifications
Dymax BlueWave® 200 Rev. 1.1 User Guide Specifications Property Specification 38905 North American Version (standard 115V plug) Part Numbers 38605 Asian Version (Type G plug) without lightguide 38903** Unit with no power cord Total (280-450 nm) 40+ W/cm Visible (400-450 nm) -
Page 26: Definition Of Terms
- The invisible region of the spectrum just beyond the violet end of the visible region. Wavelength ranges in general from 1.0 to 400 nm. Dymax bulbs (burners) do not radiate energy in deep ultraviolet; there are very minute amounts below 220 nm and practically nothing can be sensed below 200 nm. -
Page 27: Warranty
Replacement Bulb Warranty If the bulb fails to ignite during the warranty period of 2,000 hours, return the bulb and the Bulb History Card to Dymax. The bulb will be replaced under warranty. No other warranties are implied or expressed. Index... - Page 28 © 2006-2012 Dymax Corporation. All rights reserved. All trademarks in this guide, except where noted, are the property of, or used under license by Dymax Corporation, U.S.A. Please note that most dispensing and curing system applications are unique. Dymax does not warrant the fitness of the product for the intended application. Any warranty applicable to the product, its application and use is strictly limited to that contained in Dymax’s standard Conditions of Sale.
Need help?
Do you have a question about the BlueWave 200 and is the answer not in the manual?
Questions and answers