dymax BlueWave 200 User Manual
Version 3.0
Hide thumbs
Also See for BlueWave 200:
- User manual (29 pages) ,
- Operation manual (24 pages) ,
- Quick start instructions (2 pages)

Subscribe to Our Youtube Channel
Related Manuals for dymax BlueWave 200


Summary of Contents for dymax BlueWave 200
- Page 1 BlueWave 200 Version 3.0 User Guide ® UV Light-Curing Spot Lamp System ■ Instructions for Safe Use ■ Setup and Operation Maintenance ■ ■ Ordering Spare Parts and Accessories...
- Page 2 System designs enable stand-alone configuration or integration into your existing assembly line. Please note that most dispensing and curing system applications are unique. Dymax does not warrant the fitness of the product for the intended application. Any warranty applicable to the product, its application, and use is strictly limited to that contained in the Dymax standard Conditions of Sale.
-
Page 3: Table Of Contents
Description of the BlueWave 200 ............................ 8 Unpacking the BlueWave 200 ......................... 9 Unpacking and Inspecting Your Shipment ........................9 Parts Included with the BlueWave 200 Spot Lamp ......................9 Setting Up the BlueWave 200 ........................10 Becoming Familiar with the Controls ......................11 Turning the BlueWave 200 On ........................ - Page 4 Dymax BlueWave® 200 Version 3.0 User Guide Solving Problems ............................31 Troubleshooting ................................31 Frequently Asked Questions ............................32 Diagnostic Display ................................. 33 Spare Parts and Accessories .......................... 34 Spare/Replacement Parts .............................. 34 Options/Accessories ..............................34 Specifications ..............................35 System Specifications ..............................35 Bulb Spectral Output ..............................
-
Page 5: Introduction
The BlueWave 200 is designed to maximize operator safety and minimize exposure to UV light. To use the BlueWave 200 safely, it must be set up and operated in accordance with the instructions in this user guide. Please also read and understand the safety considerations unique to UV light-curing systems. -
Page 6: Dymax Uv Light-Curing System Safety Considerations
Each is described below. UV Exposure Standard Dymax UV light-curing systems and bulbs have been designed to primarily emit UVA light (Figure 1). UVA light is generally considered the safest of the three UV ranges: UVA, UVB, and UVC. Although OSHA does not currently regulate ultraviolet light exposure in the workplace, the American Conference of Governmental Industrial Hygienists (ACGIH) does recommend Threshold Limit Values (TLVs) for ultraviolet light. - Page 7 Ozone Standard Dymax bulbs (UVA type) generate an insignificant amount of UVC and therefore essentially no ozone. Some UV light-curing systems, like those used to cure UV inks, emit primarily “shortwave” (UVB and UVC) energy. Upon exposure to UVC light (specifically <240 nm), oxygen molecules (O...
-
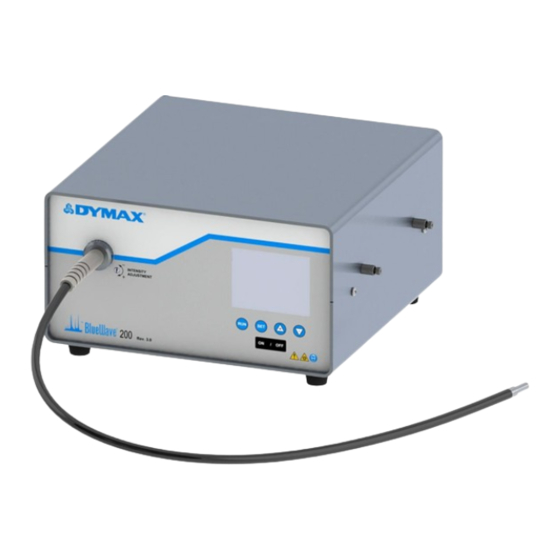
Page 8: Product Overview
LCD display. When the BlueWave 200 is operating in PLC Mode, the LCD display shows the state of the signals which control the BlueWave 200 to help set up and verify correct operation of the system. -
Page 9: Unpacking The Bluewave 200
Unpacking the BlueWave 200 Unpacking and Inspecting Your Shipment When your BlueWave 200 arrives, inspect the boxes for damage and notify the shipper of box damage immediately. Open each box and check for equipment damage. If parts are damaged, notify the shipper and submit a claim for the damaged parts. -
Page 10: Setting Up The Bluewave 200
If you will be using a Foot Pedal, connect the Foot Pedal to the Foot Pedal Connection (Figure 3) on the rear of the BlueWave 200. A ground stud is also provided on the back of the BlueWave 200 if additional grounding is desired. -
Page 11: Becoming Familiar With The Controls
■ – Pressing this button turns the bulb on (except in PLC Mode). Bulb Off Button — Pressing this button turns the bulb off. In PLC Mode, a press stops the BlueWave 200 ■ and puts it in safe state. -
Page 12: Turning The Bluewave 200 On
2. The LCD Display will turn on and show the product configuration screen (Figure 9). NOTE: If you have already set the BlueWave 200 up for PLC operation according to the instructions in “Operating in PLC Mode” (Page 20), the bulb will be controlled by the PLC and the starting screens will be slightly different. -
Page 13: Setting An Operating Mode
An external PLC (Programmable Logic Controller) controls the unit. The PLC provides Input Signals to the BlueWave 200 to control the bulb and shutter. The PLC monitors the status of the unit by reading Output Signals provided by the BlueWave 200. The PLC is typically programmed to start other machinery when the BlueWave 200 becomes ready, or perhaps start the BlueWave 200 when other machinery is ready. - Page 14 3. Press and release the Button. 4. The BlueWave 200 will show the Adjust Timer Menu with the last used timer value (Figure 11). If the value on the timer is correct, then simply press the Button. If the value needs to be changed, press the Arrows to correct the Timer’s value.
- Page 15 Dymax BlueWave® 200 Version 3.0 User Guide To Change from Manual Mode to PLC Mode: CAUTION! Always wear protective goggles or a face shield when working near UV light. Never look directly at the light exiting the lightguide. The PLC is capable of opening the shutter at any time, including when the bulb becomes ready in PLC mode or when a user selects PLC Mode from the front panel controls.
- Page 16 Dymax BlueWave® 200 Version 3.0 User Guide Figure 18. Timer Mode Figure 19. Switching To Figure 20. Manual Mode Menu Manual Mode Screen Flashing To Change from Timer Mode to PLC Mode: CAUTION! Always wear UV-blocking protective goggles or a face shield when working near UV light.
-
Page 17: Operating In Manual Mode
5. Turn the BlueWave 200 on using the On/Off Switch on the back panel. 6. Press the On Button on the unit’s front panel. 7. After the Bulb warm-up sequence is complete, the BlueWave 200 will return to Timer Mode or Manual Mode, depending on how it was used before entering PLC Mode. -
Page 18: Operating In Timer Mode
When the timer counts down to zero, the shutter closes. Once the exposure cycle is completed, the timer is automatically reset to the value that you set. The BlueWave 200 is immediately ready to accept another foot pedal or run button press to open the shutter. - Page 19 Dymax BlueWave® 200 Version 3.0 User Guide 5. Press and release the Button. 6. Press the Arrows to adjust the Timer value to the correct value. (Figure 28) NOTE: Holding either key down changes the value quickly. Single presses of either key adjust the timer in 0.1 second steps.
-
Page 20: Operating In Plc Mode
PLC (Programmable Logic Controller) controls the system. The PLC provides Input Signals to the BlueWave 200 to control the bulb and shutter. The PLC monitors the status of the unit by reading Output Signals provided by the BlueWave 200. The PLC is typically programmed to start other machinery when the BlueWave 200 becomes ready, or perhaps start the BlueWave 200 when other machinery is ready. -
Page 21: Using The Plc Switch
Dymax BlueWave® 200 Version 3.0 User Guide Using the PLC Switch The PLC Switch must be used to enter and exit PLC Mode so that accidental key presses on the front panel will not interfere with automated operations controlled by a PLC. To access the PLC Switch, the Outer Cover must be removed. - Page 22 Dymax BlueWave® 200 Version 3.0 User Guide Figure 32. PLC Dip Switch Location Adjust the PLC Switch (see below), and replace the Inner and Outer Covers. Adjusting the PLC Switch When Switch 2 is moved towards the back panel, PLC Mode is enabled. PLC Mode can be activated from front panel key presses.
-
Page 23: Wiring The Plc Interface
Definition and Notes Number +24 VDC Input This is a power input to the BlueWave 200 and acts as a supply for input signals. The supply should be regulated to 24 VDC +/- 10% and free of noise. +24 VDC Return This is the return to the power supply, and also the return for all output signals. - Page 24 1,950 Hour Warning When asserted the bulb has been operating for 1,950 hours or more, and a replacement will be needed soon. The BlueWave 200 can operate normally in this condition but will shut itself off when the bulb has 2,000 hours of operation.
- Page 25 Dymax BlueWave® 200 Version 3.0 User Guide Sample Wiring Diagram Figure 34. Sample Wiring Diagram +24VDC USE ONLY THE 2000 Ω SIGNALS REQUIRED BY THE PLC PROGRAM FROM PLC 24VDC POWER SUPPLY 10000 Ω TO PLC +24VDC RETURN Connector Pin Out The PLC Connector pin numbers are shown in Figure 35 below.
-
Page 26: Plc Front Panel Emergency Stop
Shutter and turn off the Bulb to immediately override any commands issued by the PLC. The switch on the back panel must be turned off and on before the BlueWave 200 can re-enter PLC Mode. Troubleshooting the PLC Interface Monitoring Input Signals The LCD Screen gives the status of all of the input signals when the unit is in PLC Mode. -
Page 27: Setting The Intensity
(Figure 37). The Intensity Adjustment Feature is useful for both validation and control. 1. Set the BlueWave 200 to operate in Manual Mode. Refer to “Choosing an Operating Mode” (Page 13). 2. Use the Foot Pedal to open the Shutter. -
Page 28: Maintaining Process Control
Dymax BlueWave® 200 Version 3.0 User Guide Maintaining Process Control BlueWave 200 Bulbs will typically vary less than 1% over eight hours of normal use, and daily or weekly adjustments are adequate to maintain a tightly controlled process. For your convenience, the BlueWave 200 reports the number of hours the Bulb has been operating on the LCD Display. - Page 29 6. Install the new Bulb, plug the Bulb in and tighten the two Mounting Bracket Thumbscrews (Figure 41). Re- install the BlueWave 200's cover. Make sure that the center Electrode connecting the Bulb to the wire from the Reflector is parallel to the bottom of the system.
-
Page 30: Lightguide
Figure 43. Intake Fan with Fan Filter Removed Fuse Replacement The BlueWave 200 has two Fuses that are installed in the Power Receptacle. To remove the Fuses, unplug the BlueWave 200 and remove the Fuse Holder with a small screwdriver. Remove the Fuses from the Fuse Holder and install new Fuses. -
Page 31: System Cleaning
Do not use an abrasive cleaner as it will damage the unit surfaces. Solving Problems Troubleshooting WARNING! Only qualified maintenance personnel should attempt the following procedures: Table 3. Troubleshooting Chart for BlueWave 200 Problem Possible Cause Testing Corrective Action... -
Page 32: Frequently Asked Questions
Q. Why do I have low intensity, even with a new Bulb? The standard BlueWave 200 has a Filter Lens installed, which filters the light before it reaches the Light Guide. The light intensity will be decreased as the light that passes through the filter is restricted by dust and debris. -
Page 33: Diagnostic Display
Equipment may already be full of dust and debris. Diagnostic Display The LCD Screen will display any faults detected by the BlueWave 200 (Figure 47). Contact Dymax for assistance, since most faults can be resolved over the phone. Figure 47. Diagnostic LCD Screen... -
Page 34: Spare Parts And Accessories
Dymax BlueWave® 200 Version 3.0 User Guide Spare Parts and Accessories Spare/Replacement Parts Item Part Number Bulb/Reflector Bulb/Reflector Assembly 38465 Clip, Reflector Upper (Teflon) 38548 Clip, Spring, Lower 39609 Fan 24 VDC 41028 Fan Filter Holder and Media 38587 Misc. System Components... -
Page 35: Specifications
Dymax BlueWave® 200 Version 3.0 User Guide Specifications System Specifications Property Specification 41015 North American Version (with 115V standard plug) Part Numbers 41014 Asian Version (with type G plug) 41013 BlueWave 200 with no power cord* Intensities Total (280-450) 40+ W/cm... -
Page 36: Bulb Spectral Output
Dymax BlueWave® 200 Version 3.0 User Guide Bulb Spectral Output Figure 48. 200W Bulb Spectral Chart UV Spectral Output Dual Filter No Filter Black Light Standard Filter Wavelength... -
Page 37: Definition Of Terms
(4000 to 3200) - predominately produced by Dymax Flood Lamps. 2. Ultraviolet B (UV-B) - UV of medium wavelength from within approximately 320 to 280 nm - Dymax Flood Lamps produce some amount of their energy within this bandwidth. -
Page 38: Warranty
Unauthorized repair, modification, or improper use of equipment may void your warranty benefits. The use of aftermarket replacement parts not supplied or approved by Dymax Corporation, will void any effective warranties and may result in damage to the equipment. -
Page 39: Index
Dymax BlueWave® 200 Version 3.0 User Guide Index Bulb Replacemen Procedure, 28 Front Panel Emergency Stop, 26 Wiring the PLC Interface, 23 Bulb Replacement Warning, 28 Product Overview, 8 Contact Information, 5 Safety, 5 Controls, 11 Safety of UV Light... - Page 40 Please note that most dispensing and curing system applications are unique. Dymax does not warrant the fitness of the product for the intended application.
Need help?
Do you have a question about the BlueWave 200 and is the answer not in the manual?
Questions and answers